Free CCNA | Configuring Interfaces | Day 9 Lab | CCNA 200-301 Complete Course
Summary
TLDRThis comprehensive video tutorial covers the step-by-step configuration of interfaces on a router and two switches within a single LAN network. The instructor meticulously guides viewers through configuring hostnames, IP addresses, speed and duplex settings, interface descriptions, disabling unused interfaces, and saving configurations across all devices. The hands-on approach, supplemented by clear explanations and visual demonstrations using Packet Tracer software, provides a practical learning experience ideal for CCNA candidates or those seeking to solidify their networking skills.
Takeaways
- 🎥 This is a free video tutorial on configuring interfaces on a router and two switches for the CCNA 200-301 exam.
- 🔧 The main steps covered are configuring hostnames, IP addresses, speed and duplex, interface descriptions, disabling unused interfaces, and saving configurations.
- 🌐 The network setup is a single LAN with IP range 172.16.0.0/16 connected to the router's G0/0 interface.
- 📝 The configuration steps are demonstrated one device at a time, but can be done in any order.
- 🔑 Key commands used include 'enable', 'configure terminal', 'hostname', 'interface', 'ip address', 'speed', 'duplex', 'description', 'no shutdown', 'shutdown', and various show commands.
- 💾 Different methods for saving the configuration are shown, including 'copy running-config startup-config', 'write memory', and 'write'.
- ⚠️ Packet Tracer, the simulator used, may not always behave exactly like real Cisco devices, as noted in the video.
- 🖥️ The script also covers configuring IP addresses on the PCs within the network.
- 👍 The video encourages viewers to subscribe, like, comment, and share the video to support the free tutorial series.
- 💰 The option to leave tips for the creator is mentioned, including Brave Attention Tokens (BAT).
Q & A
What is the purpose of this lab?
-The purpose of this lab is to configure interfaces on a router (R1) and two switches (SW1 and SW2) to establish a single LAN network with IP subnet 172.16.0.0/16.
What are the main steps involved in configuring the devices?
-The main steps are: 1) Configure hostnames, 2) Configure IP addresses, 3) Configure speed and duplex, 4) Configure interface descriptions, 5) Disable unused interfaces, and 6) Save the configurations.
How is the IP address configured on R1's G0/0 interface?
-The IP address 172.16.255.254/16 is configured on R1's G0/0 interface, which acts as the gateway for the LAN network.
Why is the speed and duplex manually configured on R1's G0/0 interface?
-The speed and duplex are manually configured on R1's G0/0 interface because it is connected to another networking device (SW1), and manual configuration is recommended for optimal performance.
How are the PCs configured in this lab?
-The PCs (PC1, PC2, PC3, and PC4) are configured with IP addresses 172.16.0.1, 172.16.0.2, 172.16.0.3, and 172.16.0.4 respectively, all within the 172.16.0.0/16 subnet. Their gateway is set to R1's address (172.16.255.254).
What is the purpose of configuring interface descriptions?
-Interface descriptions are configured to provide a brief explanation of the connection or purpose of each interface, making it easier to understand and manage the network configuration.
Why are unused interfaces disabled on the switches?
-Unused interfaces on the switches are disabled (shut down) for security reasons and to prevent unauthorized access or potential issues from those unused ports.
What methods are used to save the configurations on the devices?
-Three different methods are used to save the configurations: 1) On R1, the 'copy running-config startup-config' command is used, 2) On SW1, the 'write memory' command is used, and 3) On SW2, the 'write' command is used.
What is the purpose of using the 'do' command in the lab?
-The 'do' command is used to temporarily execute a privileged EXEC mode command from a lower mode, such as when executing the 'show ip interface brief' command from the interface configuration mode.
What is the issue mentioned regarding the speed and duplex settings on Packet Tracer?
-The issue mentioned is that on Packet Tracer, when speed and duplex are manually configured, the interface status shows 'a-1000' and 'a-full' (indicating auto-negotiated settings), which is incorrect and does not match the behavior of a real Cisco device, where it should display the manually configured settings without the 'a-' prefix.
Outlines

This section is available to paid users only. Please upgrade to access this part.
Upgrade NowMindmap

This section is available to paid users only. Please upgrade to access this part.
Upgrade NowKeywords

This section is available to paid users only. Please upgrade to access this part.
Upgrade NowHighlights

This section is available to paid users only. Please upgrade to access this part.
Upgrade NowTranscripts

This section is available to paid users only. Please upgrade to access this part.
Upgrade NowBrowse More Related Video
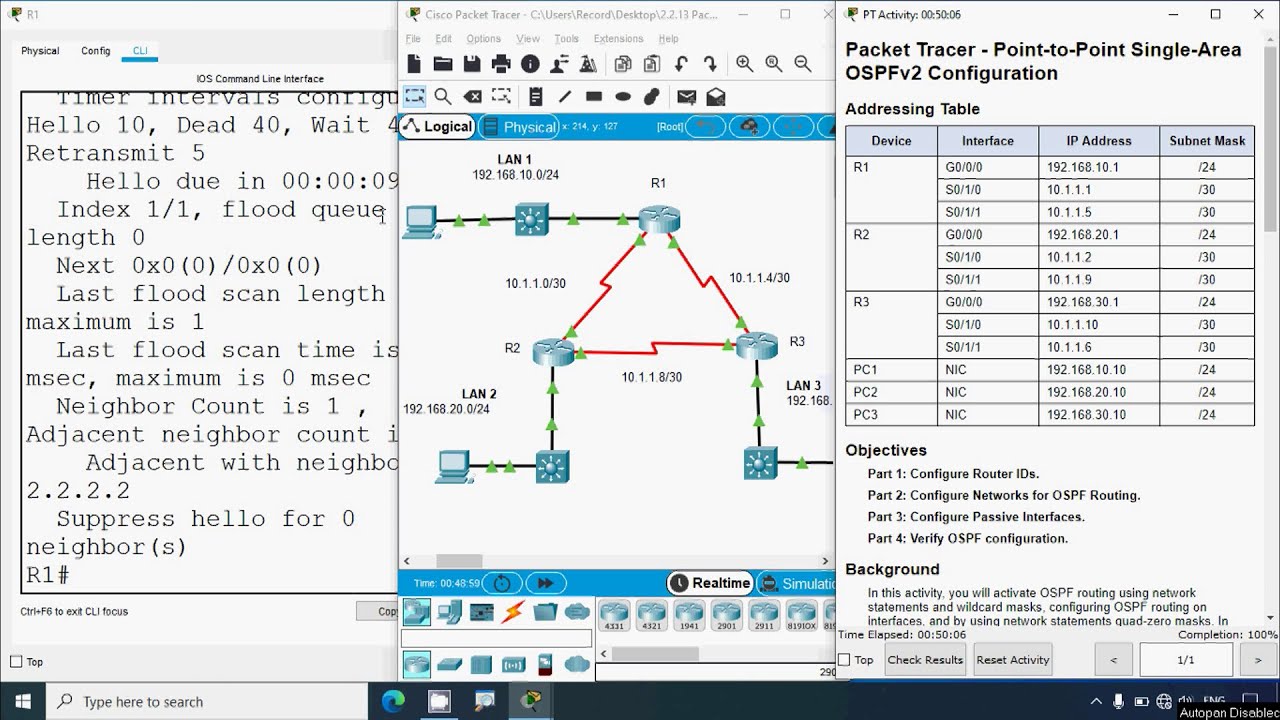
2.2.13 Packet Tracer - Point to Point Single Area OSPFv2 Configuration
Konfigurasi VLAN di Cisco Packet Tracer

KDJK MODUL 6 - Virtual LAN

Cara Konfigurasi VoIP Pada Cisco Packet Tracer Terbaru || Command Line Interface CLI

Konfigurasi Dasar Mikrotik Sebagai Router Menghubungkan Jaringan Internet dan Jaringan Lokal Terbaru
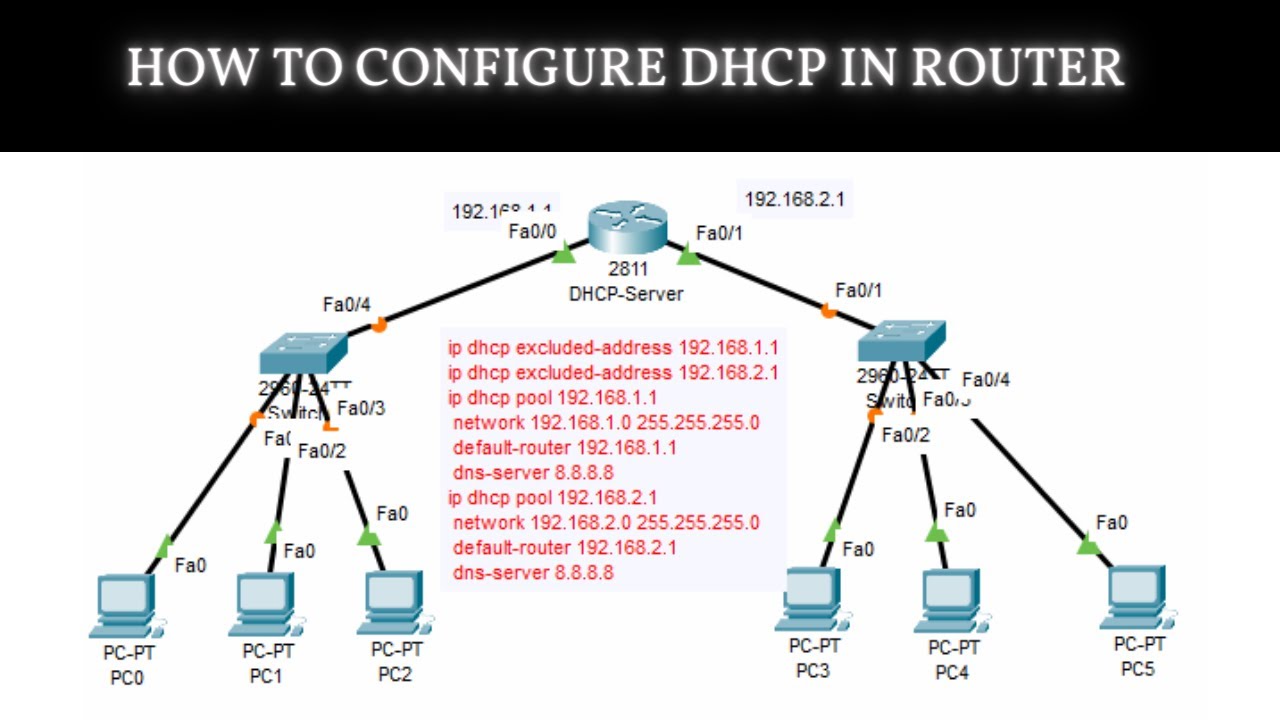
How to Configure DHCP in CISCO router in Packet Tracer | DHCP Server in CCNA | DHCP Configuration
5.0 / 5 (0 votes)