Konfigurasi VLAN di Cisco Packet Tracer
Summary
TLDRThis tutorial guides viewers through the process of configuring VLANs on Cisco routers and switches. It covers network setup, creating VLANs, and assigning them to interfaces. The tutorial also includes step-by-step instructions for configuring trunk and access ports on the switch, as well as setting up sub-interfaces on the router for inter-VLAN routing. Troubleshooting steps are provided for testing connectivity between devices, with attention to potential configuration errors. The video ends with a summary of successful configuration and a reminder to test network connectivity.
Takeaways
- 😀 Create and configure VLANs on Cisco switches and routers for network segmentation.
- 😀 VLAN 10 is used for PC1 and PC2, while VLAN 20 is assigned to PC3.
- 😀 Assign the correct IP addresses to each PC, with PC1 and PC2 on a Class A subnet and PC3 on a Class C subnet.
- 😀 On the switch, use the 'switchport access vlan' command to assign specific ports to the correct VLAN.
- 😀 Enable trunk mode on the switch port that connects to the router to allow communication between VLANs.
- 😀 Use 'encapsulation dot1Q' to configure sub-interfaces on the router for VLAN routing.
- 😀 Configure IP addresses for each sub-interface on the router to route traffic between VLANs.
- 😀 Test connectivity within the same VLAN and between different VLANs to verify the configuration.
- 😀 Ensure the switch ports are correctly assigned to the respective VLANs and that the router sub-interfaces are properly configured.
- 😀 Troubleshoot any issues by checking the VLAN assignments on the switch and verifying router configuration, especially the sub-interfaces.
- 😀 Always save the configuration with the 'write memory' command to prevent loss of settings.
Q & A
What is the primary purpose of the tutorial?
-The tutorial aims to guide users through configuring VLANs on Cisco devices, including routers and switches, and setting up network communication between different PCs.
What are the two VLANs being configured in the tutorial?
-The two VLANs being configured are VLAN 10 and VLAN 20.
What type of IP addresses are used for the VLANs in this setup?
-VLAN 10 uses Class A IP addresses (10.10.10.x), and VLAN 20 uses Class C IP addresses (192.168.10.x).
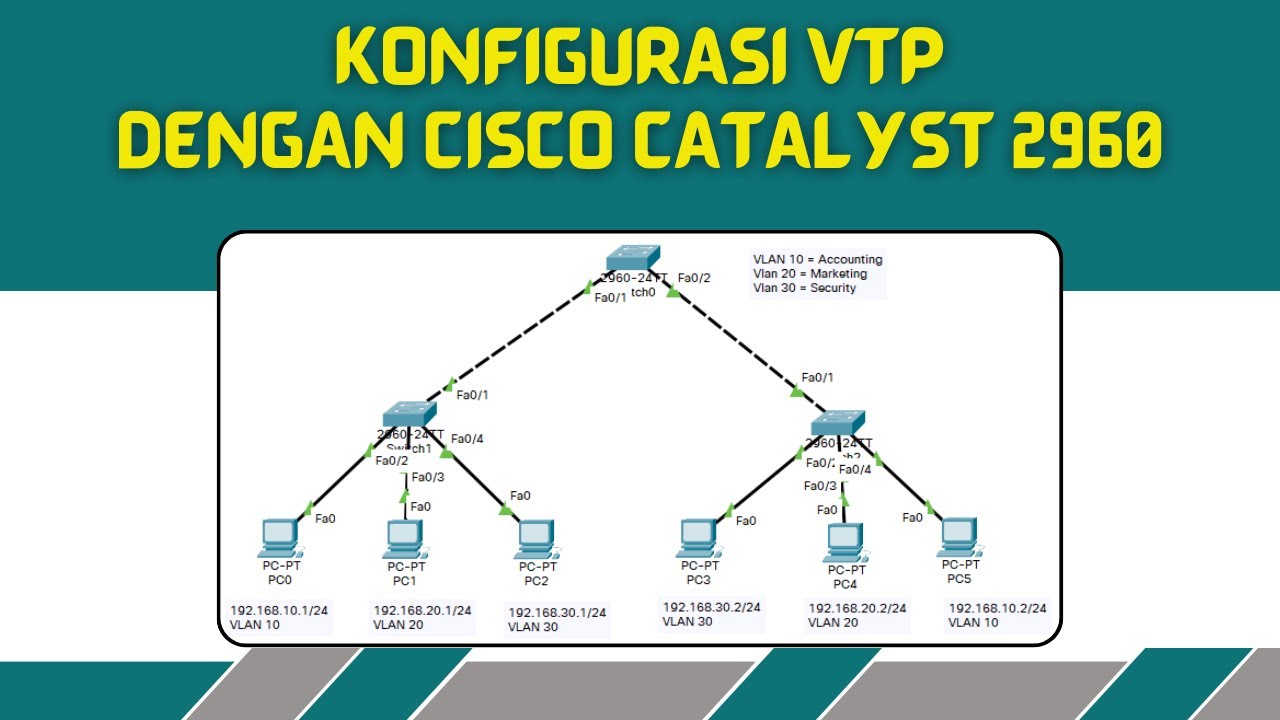
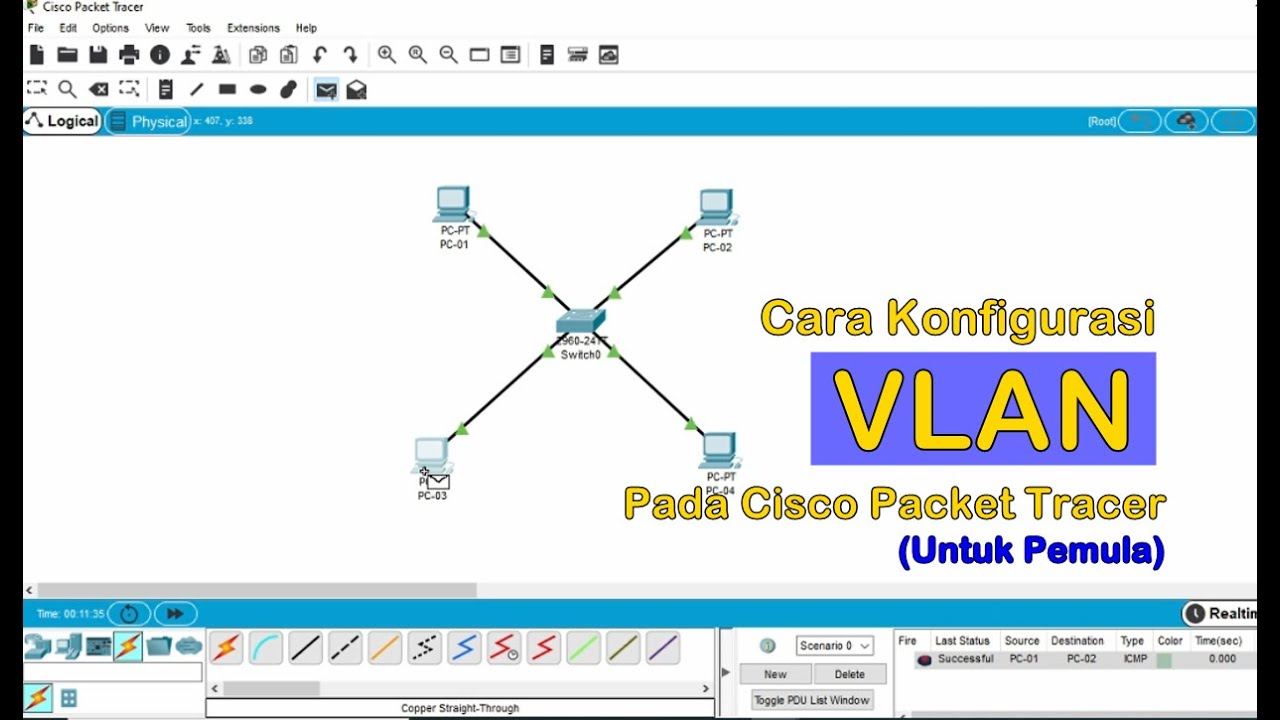
How is the network topology structured in the tutorial?
-The network consists of a router (Router1), a switch (Switch6), and multiple PCs. VLAN 10 is connected to one side of the router, while VLAN 20 is connected to the other side, with corresponding IP address assignments for each VLAN.
What is the role of the router in this configuration?
-The router is responsible for routing traffic between the two VLANs, acting as the gateway for both VLAN 10 and VLAN 20.
How do you configure the VLANs on the Cisco switch?
-To configure VLANs on the switch, the user enters the VLAN configuration mode using the 'vlan database' command, followed by assigning VLAN IDs and names, such as VLAN 10 and VLAN 20.
What is the significance of the 'switchport mode trunk' command?
-The 'switchport mode trunk' command configures a switch port to carry traffic for multiple VLANs, allowing the router to communicate with the switch for both VLANs.
Why is the IP address 10.10.10.1 assigned to the router's subinterface for VLAN 10?
-The IP address 10.10.10.1 is assigned as the gateway IP address for devices in VLAN 10, ensuring they can communicate with devices outside their subnet.
What command is used to verify VLAN configuration on the switch?
-The 'show vlan' command is used to display the list of configured VLANs on the switch.
Why does the tutorial mention that DNS configuration is optional?
-DNS configuration is considered optional because, while it can be useful for name resolution, it does not affect basic network functionality such as IP addressing and VLAN communication.
Outlines

This section is available to paid users only. Please upgrade to access this part.
Upgrade NowMindmap

This section is available to paid users only. Please upgrade to access this part.
Upgrade NowKeywords

This section is available to paid users only. Please upgrade to access this part.
Upgrade NowHighlights

This section is available to paid users only. Please upgrade to access this part.
Upgrade NowTranscripts

This section is available to paid users only. Please upgrade to access this part.
Upgrade NowBrowse More Related Video
KONFIGURASI VLAN TRUNKING PROTOKOL DENGAN CISCO CATALYST 2960
NAC313 - VLAN
Configure VLANs and Trunking.
VLAN dan Trunk - Penjelasan dan Latihan - 3.6.1 Implement VLANs & Trunking

Configuracion Basica de Router y Switch en Cisco Packet Tracer 2020
Tutorial - Cara Konfigurasi VLAN pada Cisco Packet Tracer (Untuk Pemula)
5.0 / 5 (0 votes)