Create Public Report using Actions Menu (Report, Chart, Group By and Pivot) Views - Part 14

Tech Mining
30 Oct 202207:41

Summary

TLDRTech mining's tutorial video guides users on creating and customizing interactive reports from a customer perspective. It covers saving reports as named reports, public or private, and manipulating data with control breaks, charts, and group by functions. The video also demonstrates pivot tables, sorting, and computing new columns, concluding with tips on downloading and resetting reports to default settings for further customization.

Takeaways

  • πŸ“‘ Users can save, rename, or delete a public report they created.
  • πŸ” The report in this video is created from the perspective of customers, contrasting with previous videos focusing on orders.
  • πŸ› οΈ To create a report, start by viewing a public report, then select 'Save Report' from the actions menu and choose 'As Named Report'.
  • πŸ”‘ Multiple variations of a report can be saved as named reports for public or private viewing.
  • πŸ“ For a new report, enter a name like 'Customer Review', check 'Public', and click 'Apply' to display it on the screen.
  • πŸ“Š Use 'Control Break' on the customer name column to organize the report by customer.
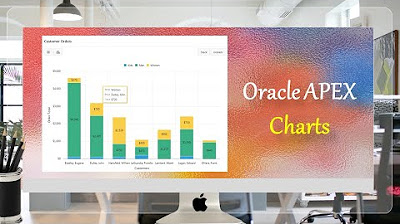
  • πŸ“ˆ The chart in the report uses the average function, unlike the sum function used in the previous video.
  • πŸ”’ An example calculation is provided, dividing the total orders by the number of orders to find the average order value per customer.
  • πŸ”„ The 'View Report' icon is used to switch between different report views.
  • πŸ“‹ The 'Group By' feature allows for summarizing data by categories, with options to display grand totals.
  • πŸ”„ The 'Pivot' option creates a crosstab view, which is demonstrated with specific parameters in the video.
  • πŸ› οΈ Additional customization options are available in the 'Actions' menu, such as 'Filter', 'Data', 'Sort', 'Compute', 'Rows per Page', and 'Reset'.
  • πŸ“ The 'Download' option allows users to save the report in various formats, depending on the installation and report definition.
  • ℹ️ 'Help' provides descriptions on how to further customize interactive reports.

Q & A

  • What is the purpose of the Tech mining report discussed in the video?

    -The Tech mining report is used to analyze and display data from a customer perspective, allowing users to create, save, and customize interactive reports for public or private viewing.

  • How can a user create a named report from a public report?

    -A user can create a named report by selecting 'Save Report' from the Actions menu under 'Report', then choosing 'As Named Report' from the Save dropdown list, and following the prompts to name and set the report visibility.

  • What is the significance of setting a report as 'public'?

    -Setting a report as 'public' allows it to be accessible to all users, ensuring that the report can be viewed by multiple end users without the need for individual access permissions.

  • How does the control break feature work in the report?

    -The control break feature organizes the report by breaking it down into sections based on a specific column, such as 'Customer', which helps in grouping related data for easier analysis.

  • What is the difference between using the 'average' function and the 'sum' function in a chart?

    -The 'average' function calculates the mean value of a set of data, while the 'sum' function totals the values. In the script, the 'average' function is used to find the average order amount per customer.

  • How can a user switch between different views of a report?

    -A user can switch between different views of a report by using the 'View Report' icon and selecting the desired view from the toolbar.

  • What does the 'Group by' feature do in a report?

    -The 'Group by' feature groups data based on specified parameters, allowing users to aggregate and summarize data for better analysis and presentation.

  • What is the role of the 'pivot' option in creating a crosstab view?

    -The 'pivot' option rearranges and summarizes data to create a crosstab view, which is useful for comparing data across different dimensions and categories.

  • How can users modify the properties of a page in the report?

    -Users can modify the properties of a page in the report by using the 'Properties' option in the Actions menu, which allows them to change settings such as the number of rows per page and sorting options.

  • What are some additional customization options available in the Actions menu?

    -The Actions menu contains options like 'Filter', 'Sort', 'Compute', 'Rows per Page', 'Reset', and 'Download', which allow users to further customize the report according to their specific needs.

  • How can users save their customized report settings?

    -Users can save their customized report settings by selecting 'As Named Report' from the 'Save' list in the Actions menu and applying the changes.

Outlines

00:00

πŸ“Š Customizing Public Reports in Tech Mining

This paragraph outlines the process of creating and customizing a public report named 'Customer Review' in Tech Mining. It begins with accessing the default primary report and saving it as a named report. The report is then formatted with a control break on the customer name and a chart is added using the average function to display customer order values. The instructions also guide on how to switch views, apply group by functions to display order totals and item counts, and save the customized report for public access.

05:00

πŸ“Š Advanced Report Customization Features

The second paragraph delves into additional features for report customization in Tech Mining. It covers the pivot option, which creates a crosstab view, and the use of the actions menu to further tailor the report. The menu options discussed include filter, which modifies the query's where clause, data, which contains sorting options, compute for adding computed columns, rows per page for setting the row display count, reset to revert to default settings, and download for exporting the report in various formats. The paragraph also mentions the help option for further guidance on customizing interactive reports and concludes with a note on modifying the properties of the 'Order Details' page.

Mindmap

Keywords

πŸ’‘Tech mining

Tech mining refers to the process of extracting valuable insights from data, particularly in the context of technology. In the video, it likely represents the subject matter or the name of the software being discussed, which is used to analyze and report on data. The script mentions 'Tech mining' at the beginning, indicating it's the title or theme of the tutorial.

πŸ’‘Public report

A public report in this context is a type of report that can be accessed by multiple users within a system. The script explains that a public report can be created, renamed, or deleted by the end user who made it, and it can be viewed by others, which is a key feature for collaborative environments.

πŸ’‘Named report

A named report is a saved instance of a report with a specific name for easy identification and retrieval. The script describes the process of saving a report as a 'named report', which allows users to create multiple variations of a report and save them under different names for either public or private viewing.

πŸ’‘Control break

In reporting tools, a control break is used to group data based on a certain field. The script mentions setting a control break on the 'customer' column, which organizes the report data by different customer names, allowing for segmented analysis within the report.

πŸ’‘Chart

A chart in the context of the script refers to a graphical representation of data that can be created within the reporting tool. The script provides steps to create a chart using parameters and functions, such as the 'average' function, to visualize the data in a more digestible format.

πŸ’‘Average function

The average function is a statistical tool used to calculate the mean of a set of numbers. In the script, it is used to determine the average order amount per customer, as shown when dividing the total orders of a customer by the number of orders they placed.

πŸ’‘Group by

Group by is a feature in reporting that allows data to be aggregated based on specific criteria. The script describes using the 'Group by' feature to organize the report by certain parameters, such as 'customer', and to display grand totals for a comprehensive view of the data.

πŸ’‘Pivot

Pivot refers to a feature in data analysis that allows for the reorganization of data into a cross-tabulated format. The script mentions using the 'pivot' option to create a crosstab view, which is useful for comparing data across different categories or dimensions.

πŸ’‘Sum switch

The sum switch is a setting in reporting tools that, when turned on, calculates the total of a particular field across the dataset. The script mentions enabling the 'sum switch' to produce grand totals on the page, which is essential for getting an overall summary of the data.

πŸ’‘Actions menu

The actions menu is a part of the reporting tool's interface that contains various options for manipulating and customizing the report. The script describes using the actions menu to perform various tasks, such as saving the report, applying filters, sorting data, and computing new columns.

πŸ’‘Download

The download option allows users to export or save a report in a specific format for offline use. The script mentions the 'download' feature, indicating that users can download the report in formats that are supported by their system and report definition.

πŸ’‘Help

The help feature provides assistance or guidance on how to use the reporting tool effectively. The script briefly mentions 'help' as a part of the actions menu that offers descriptions on customizing interactive reports, which is useful for users who need additional support.

Highlights

A public report can be saved, renamed, or deleted by end users who created it.

The report focuses on customers, unlike the previous one that focused on orders.

Users can create and save multiple variations of a report as named reports for public or private viewing.

To create a named report, select 'Save Report As' from the Actions menu under Report.

A new public report will be added to the Reports list in the toolbar with the specified report name.

Use the 'Control Break' feature to group data by customer name.

The chart in the report uses the average function, unlike the sum function used in the previous video.

Calculating the average order amount for a customer by dividing the total order amount by the number of orders.

Use the 'Group By' feature to display grand totals for each customer.

Apply some and count functions to columns like Order Total and Order Items to display total orders and items per customer.

The 'Pivot' option in the Actions menu creates a crosstab view based on the data in the report.

Turning on the sum switch in the pivot view produces grand totals on the page.

The Actions menu contains options to customize interactive reports, such as filter, data, sort, compute, rows per page, reset, and download.

The 'Filter' option focuses the report by adding or modifying the where clause on the query.

The 'Sort' submenu changes the columns to sort on and determines the sorting order, ascending or descending.

The 'Compute' feature enables users to add computed columns to a report.

The 'Rows per Page' option determines how many rows are displayed in the current report.

The 'Reset' option reorganizes the report back to the default settings.

The 'Download' feature allows users to download the report in available formats depending on the installation and report definition.

The 'Help' option provides descriptions on how to customize interactive reports.

The video also covers modifying the properties of the Order Details page.

Transcripts

play00:00

a very warm welcome to Tech mining

play00:02

a public report can be saved renamed or

play00:06

deleted by end users who created it

play00:08

alternative report created in previous

play00:11

videos focuses on orders while this one

play00:13

is Created from the perspective of

play00:15

customers

play00:17

the following steps to create first view

play00:19

named report view of a public report

play00:22

from the reports drop down list in the

play00:24

toolbar select the default primary

play00:26

report option

play00:28

from the actions menu under report

play00:30

select save report

play00:33

from the Save drop down list select as

play00:35

named report

play00:36

users can create multiple variations of

play00:39

a report and save them as named reports

play00:41

for either public or private viewing

play00:44

for report name

play00:46

enter customer review

play00:48

put a check on public

play00:51

click the apply button

play00:53

when you click the apply button the

play00:55

report is automatically displayed on

play00:57

your screen a new report public will be

play01:00

added to the reports list in the toolbar

play01:02

carrying a new report named customer

play01:04

review

play01:06

with the customer review report being

play01:08

displayed on your screen click actions

play01:12

format

play01:13

control break

play01:17

in the first row under column select

play01:19

customer

play01:20

set status to enabled

play01:22

click apply

play01:24

see the control break on customer name

play01:26

column

play01:29

[Music]

play01:41

click actions

play01:43

chart

play01:44

parameters for the chart as performed

play01:47

[Music]

play02:23

thank you

play02:25

click the apply button to see the output

play02:28

the chart uses the average function as

play02:30

compared to the sum function used in the

play02:32

previous video

play02:34

William Hartsfield has placed two orders

play02:36

amounting to 2

play02:38

370 dollars

play02:40

divide this value by 2. the average for

play02:43

this customer comes to

play02:45

1185 and this is what you see when you

play02:49

move your mouse Over the Bar

play02:50

representing this customer

play02:52

[Music]

play02:58

click the view report icon to switch

play03:00

back

play03:01

[Music]

play03:10

click actions

play03:12

Group by

play03:14

set parameters for this view as shown in

play03:16

the video steps

play03:19

[Music]

play03:41

turn on the sum switch to display Grand

play03:44

totals

play03:46

[Music]

play03:52

thank you

play03:54

[Music]

play04:24

thank you

play04:26

[Music]

play04:30

click apply

play04:32

from the report list in the toolbar make

play04:35

sure customer review is selected

play04:37

and also the View group by icon

play04:40

in this view you applied some and count

play04:42

functions to two columns order total and

play04:45

Order items

play04:46

this view displays total amount of

play04:49

orders placed by each customer with

play04:51

number of orders and the total number of

play04:53

items ordered

play04:55

using the actions menu save your work

play04:58

from the Save list select as named

play05:00

report

play05:01

the name box should be displaying

play05:03

customer review

play05:04

click apply

play05:06

[Music]

play05:08

the pivot option in the actions menu is

play05:11

used to create a crosstab view based on

play05:13

the data in the report

play05:15

let's see an instance of this option as

play05:17

well

play05:18

click the view report icon to switch

play05:20

back

play05:21

[Music]

play05:25

click actions

play05:27

pivot set following parameters

play05:31

[Music]

play05:45

don't forget to turn on the sum switch

play05:48

to produce Grand totals on the page

play05:51

click apply

play05:53

[Music]

play06:09

using the actions menu save your work

play06:17

in the previous few videos we've used

play06:20

some options from the actions menu to

play06:22

customize the interactive report

play06:25

however the menu contains a few more

play06:32

filter focuses the report by adding or

play06:36

modifying the where clause on the query

play06:39

data contains submenu

play06:43

sort changes the columns to sort on and

play06:46

determines whether to sort an ascending

play06:48

or descending order

play06:50

compute enables users to add computed

play06:52

columns to a report

play06:58

rows per page determines how many rows

play07:01

display in the current report

play07:02

[Music]

play07:10

reset is used to reorganize the report

play07:13

back to the default report settings

play07:16

download enables users to download a

play07:19

report

play07:20

available download formats depend upon

play07:23

your installation and Report definition

play07:25

help provides descriptions of how to

play07:28

customize interactive reports in the

play07:31

next part we'll modify the properties of

play07:33

page 29 order Details page

play07:37

thanks for watching

Rate This
β˜…
β˜…
β˜…
β˜…
β˜…

5.0 / 5 (0 votes)

Related Tags
Tech MiningReport CustomizationData AnalysisCustomer ReviewOrder ManagementPublic ReportsPrivate ViewingControl BreakPivot TablesChart AnalysisInteractive Reports