Cara Limitasi Bandwidth Menggunakan Simple Queue di Router Mikrotik - Mode IP Statik
Summary
TLDRThis video provides a detailed tutorial on how to limit bandwidth using MikroTik RouterOS with a static IP setup. The tutorial walks viewers through the steps of configuring MikroTik router interfaces, setting up IP addresses, testing internet connectivity, and implementing bandwidth limits using Simple Queue (Simple Q). It demonstrates how to allocate download and upload speeds to each client connected to the network, ensuring a fair distribution based on the number of active users. The tutorial also includes practical examples of bandwidth usage and how Simple Q adjusts the limits depending on the number of clients online.
Takeaways
- 😀 The video demonstrates how to limit bandwidth using MikroTik routers with static IP mode.
- 😀 The network setup consists of an internet connection, a MikroTik router, a switch, and connected client PCs.
- 😀 The first step is configuring the MikroTik router to connect to the internet via static IP settings provided by the ISP.
- 😀 After configuring the router's network interfaces and IP addresses, internet connectivity is tested using a ping to Google.
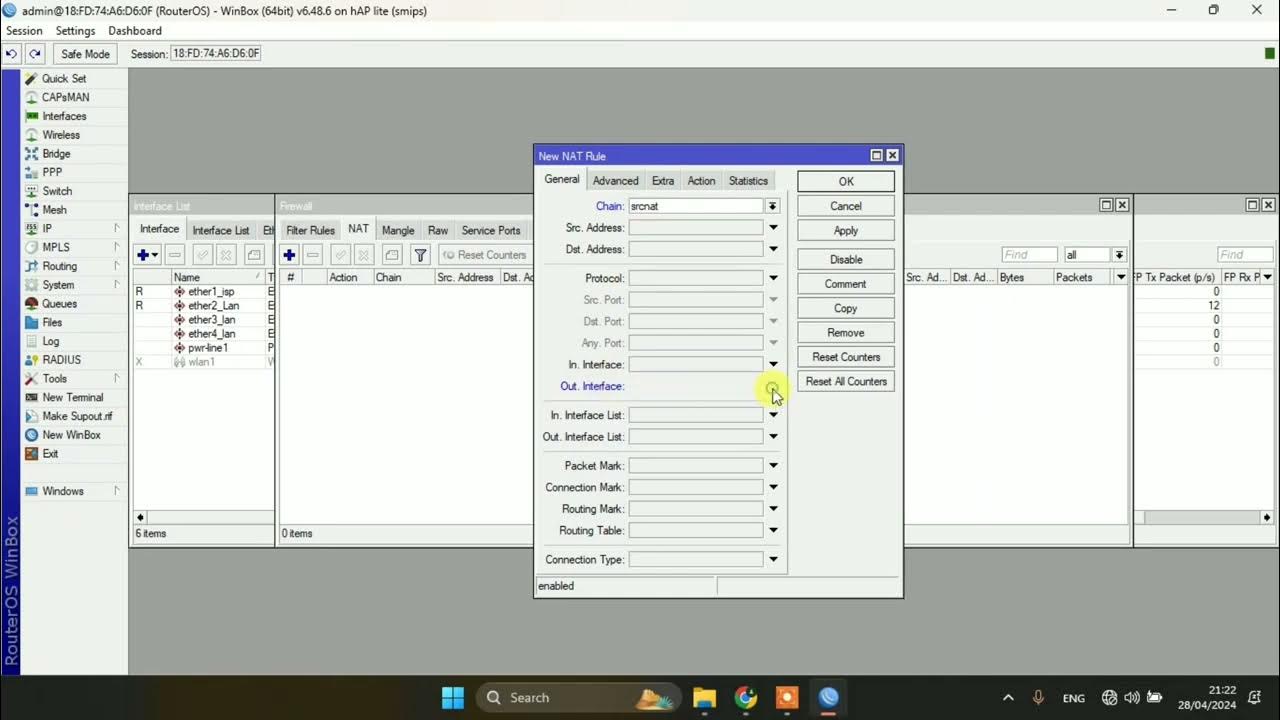
- 😀 The router's firewall is configured to allow internet access by enabling NAT (Network Address Translation).
- 😀 Static IP addresses are set on client devices (PCs) instead of using DHCP for network configuration.
- 😀 The tutorial focuses on bandwidth management using Simple Queue (Simple Q) for dividing available bandwidth among clients.
- 😀 A total bandwidth of 3 Mbps for download and 1 Mbps for upload is allocated and divided evenly among three clients.
- 😀 Simple Q is used to create bandwidth limits for each client, ensuring each receives a portion of the total bandwidth.
- 😀 The video includes a demonstration of bandwidth allocation when clients use the internet simultaneously or individually.
- 😀 Testing is done using the Torch tool to verify the bandwidth distribution for each client, showing real-time download/upload speeds.
Q & A
What is the purpose of the video tutorial?
-The video tutorial aims to demonstrate how to limit bandwidth using Mikrotik RouterOS with Static IP mode, specifically applying bandwidth limitations for client PCs in a network.
How is the network set up in this tutorial?
-The network setup includes a router (Mikrotik), an internet connection, a switch, and multiple client PCs. The router's interfaces are configured, and the internet connection is shared to the local network through IP static addressing.
What is the first step in the Mikrotik router configuration?
-The first step is to configure the router's interfaces, naming them as ether1 for the internet connection and ether2 for the local network, followed by assigning IP addresses to each interface.
What method is used to assign IP addresses to the Mikrotik router interfaces?
-Static IP addressing is used to configure the Mikrotik router interfaces, with the IP address for ether1 provided by the ISP and ether2 assigned a local IP address as per the network design.
How does the tutorial ensure that the Mikrotik router connects to the internet?
-The tutorial configures the gateway and DNS settings on the Mikrotik router, followed by testing the connection using the 'ping' command to ensure successful internet connectivity.
What is the role of the 'NAT' (Network Address Translation) in this configuration?
-NAT is enabled to allow the devices on the local network (ether2) to share the single public IP address from ether1 (the internet interface). This is done by setting up masquerading in the firewall rules.
Why does the tutorial use static IP addresses for the client PCs instead of DHCP?
-Static IP addresses are used for the client PCs in this setup to simplify the configuration and ensure each client has a fixed address, which is essential for applying bandwidth limits accurately.
How is bandwidth limitation configured using Simple Queue in Mikrotik?
-Bandwidth is limited using Simple Queue by defining maximum upload and download speeds for each client and allocating bandwidth to each client based on the total available bandwidth, ensuring equal distribution among clients.
What bandwidth allocation strategy is used in the tutorial?
-The total bandwidth of 3 Mbps download and 1 Mbps upload is allocated equally across the three clients, ensuring each client gets 1 Mbps download and 341 KBps upload when all clients are online.
How does the Simple Queue handle bandwidth when fewer clients are using the internet?
-Simple Queue dynamically adjusts the bandwidth allocation based on the number of active clients. For example, if only one client is online, that client will receive the full allocated bandwidth of 3 Mbps download and 1 Mbps upload. With two clients, the bandwidth is split evenly, and with three clients, it is divided into smaller portions.
Outlines

This section is available to paid users only. Please upgrade to access this part.
Upgrade NowMindmap

This section is available to paid users only. Please upgrade to access this part.
Upgrade NowKeywords

This section is available to paid users only. Please upgrade to access this part.
Upgrade NowHighlights

This section is available to paid users only. Please upgrade to access this part.
Upgrade NowTranscripts

This section is available to paid users only. Please upgrade to access this part.
Upgrade NowBrowse More Related Video


5.0 / 5 (0 votes)