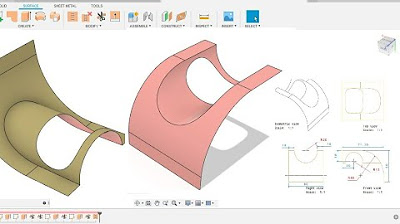
3D Baskı kalıp ile cam elyafı epoksi kompozit parça üretimi 2
Summary
TLDRThis video tutorial guides viewers through the process of applying a surface treatment product to mold surfaces, aiming to create smooth, flawless results. The focus is on the importance of using the right materials, such as cotton cloth or fabric, to avoid damaging the mold. The script covers steps like ensuring even application, polishing, and removing excess product, all while emphasizing careful preparation and timing between layers. The final goal is to achieve a shiny, mirror-like finish on the mold surface, making it ready for production.
Takeaways
- 😀 The video demonstrates the process of applying a mold release agent, similar to car wax or polishing paste, to ensure smooth separation of objects from molds.
- 😀 The product used is intended to smooth the surface of the mold, filling small imperfections and ensuring easy separation without residue or sticking.
- 😀 A key goal of using this mold release is to create a non-stick surface that allows parts to come out easily without damage to the mold or product.
- 😀 When applying the release agent, it is recommended to use a soft cotton cloth or cotton fabric, ensuring no damage to the mold surface.
- 😀 The application should be done in layers (3 to 5 layers recommended) to ensure effective results and prevent sticking.
- 😀 For molds with more complex shapes and fine details, liquid-based mold release agents might be more suitable.
- 😀 It’s important to allow some time (around 30-35 minutes) for the product to set between layers for optimal results.
- 😀 The agent should be applied using circular motions, pressing gently to ensure it covers the entire surface evenly.
- 😀 After applying, excess product should be removed using a clean cloth to avoid any residue and ensure a smooth, shiny finish.
- 😀 The final result should leave a shiny, almost mirror-like surface that facilitates easy part removal without complications.
- 😀 The process emphasizes that patience is key: allowing sufficient time between applications and ensuring each layer is fully dried improves the mold’s effectiveness and final quality.
Q & A
What is the purpose of applying the surface treatment in this video?
-The purpose of applying the surface treatment is to smooth out the surface of the mold, filling in small imperfections or bumps, and ensuring that the mold parts do not stick together when separated.
Why is the product used in this video compared to car polish or wax?
-The product is compared to car polish or wax because it serves a similar function in smoothing and polishing, with the goal of improving the surface finish of the mold, much like how wax or polish enhances a car's surface.
Can this surface treatment be used on any mold?
-While the treatment can be used on most molds, it is particularly effective for molds with smooth surfaces. For more complex or detailed molds, a liquid release agent may be more suitable.
How many layers of the surface treatment should be applied?
-It is recommended to apply 3 to 5 layers of the surface treatment to ensure the mold is fully prepared. However, for simple production molds, two layers may be sufficient.
What is the role of cotton in the application process?
-Cotton is used for applying the surface treatment as it provides a soft, gentle application that does not damage the mold surface. It is important that the cotton does not leave any residue or roughness on the mold.
What should be done after applying the surface treatment?
-After applying the surface treatment, any excess product should be wiped off with a clean cotton cloth in a circular motion to ensure a smooth and even finish. The product should not be left to dry completely before this step.
How should excess product be removed from the mold?
-Excess product should be removed by gently wiping with a clean cotton cloth using circular motions. This prevents the product from drying too thickly and ensures a smoother surface.
What happens if the excess product is not removed correctly?
-If the excess product is not removed, it may create an uneven or sticky surface, which could affect the final quality of the mold and make it difficult to separate from the mold or clean afterward.
What is the significance of waiting between layers of the surface treatment?
-Waiting between layers allows the previous layer to cure properly before applying the next. This ensures that each layer is effective and helps achieve a smooth, durable finish.
How long should you wait between layers of the surface treatment?
-It is recommended to wait between 15 to 30 minutes between layers to allow the product to dry and set properly before applying the next coat.
Outlines

This section is available to paid users only. Please upgrade to access this part.
Upgrade NowMindmap

This section is available to paid users only. Please upgrade to access this part.
Upgrade NowKeywords

This section is available to paid users only. Please upgrade to access this part.
Upgrade NowHighlights

This section is available to paid users only. Please upgrade to access this part.
Upgrade NowTranscripts

This section is available to paid users only. Please upgrade to access this part.
Upgrade NowBrowse More Related Video

How to Remove Acne - Photoshop Tutorial For Beginners 2024
Fusion 360 beginner's Exercise #9 - Fusion 360 tutorial

Latihan 1 MasterCam X5 | Materi Belajar CNC | Membuat Blok Cekung

NECT Physical Sciences - Gr 10 Acceleration
Surface Preparation: Sizing & Gesso

How To Create Realistic Product Mockups in Photoshop (Full Tutorial)
5.0 / 5 (0 votes)