Create Public Report using Actions Menu (Report, Chart, Group By and Pivot) Views - Part 14
Summary
TLDRTech mining's tutorial video guides users on creating and customizing interactive reports from a customer perspective. It covers saving reports as named reports, public or private, and manipulating data with control breaks, charts, and group by functions. The video also demonstrates pivot tables, sorting, and computing new columns, concluding with tips on downloading and resetting reports to default settings for further customization.
Takeaways
- 📑 Users can save, rename, or delete a public report they created.
- 🔍 The report in this video is created from the perspective of customers, contrasting with previous videos focusing on orders.
- 🛠️ To create a report, start by viewing a public report, then select 'Save Report' from the actions menu and choose 'As Named Report'.
- 🔑 Multiple variations of a report can be saved as named reports for public or private viewing.
- 📝 For a new report, enter a name like 'Customer Review', check 'Public', and click 'Apply' to display it on the screen.
- 📊 Use 'Control Break' on the customer name column to organize the report by customer.
- 📈 The chart in the report uses the average function, unlike the sum function used in the previous video.
- 🔢 An example calculation is provided, dividing the total orders by the number of orders to find the average order value per customer.
- 🔄 The 'View Report' icon is used to switch between different report views.
- 📋 The 'Group By' feature allows for summarizing data by categories, with options to display grand totals.
- 🔄 The 'Pivot' option creates a crosstab view, which is demonstrated with specific parameters in the video.
- 🛠️ Additional customization options are available in the 'Actions' menu, such as 'Filter', 'Data', 'Sort', 'Compute', 'Rows per Page', and 'Reset'.
- 📁 The 'Download' option allows users to save the report in various formats, depending on the installation and report definition.
- ℹ️ 'Help' provides descriptions on how to further customize interactive reports.
Q & A
What is the purpose of the Tech mining report discussed in the video?
-The Tech mining report is used to analyze and display data from a customer perspective, allowing users to create, save, and customize interactive reports for public or private viewing.
How can a user create a named report from a public report?
-A user can create a named report by selecting 'Save Report' from the Actions menu under 'Report', then choosing 'As Named Report' from the Save dropdown list, and following the prompts to name and set the report visibility.
What is the significance of setting a report as 'public'?
-Setting a report as 'public' allows it to be accessible to all users, ensuring that the report can be viewed by multiple end users without the need for individual access permissions.
How does the control break feature work in the report?
-The control break feature organizes the report by breaking it down into sections based on a specific column, such as 'Customer', which helps in grouping related data for easier analysis.
What is the difference between using the 'average' function and the 'sum' function in a chart?
-The 'average' function calculates the mean value of a set of data, while the 'sum' function totals the values. In the script, the 'average' function is used to find the average order amount per customer.
How can a user switch between different views of a report?
-A user can switch between different views of a report by using the 'View Report' icon and selecting the desired view from the toolbar.
What does the 'Group by' feature do in a report?
-The 'Group by' feature groups data based on specified parameters, allowing users to aggregate and summarize data for better analysis and presentation.
What is the role of the 'pivot' option in creating a crosstab view?
-The 'pivot' option rearranges and summarizes data to create a crosstab view, which is useful for comparing data across different dimensions and categories.
How can users modify the properties of a page in the report?
-Users can modify the properties of a page in the report by using the 'Properties' option in the Actions menu, which allows them to change settings such as the number of rows per page and sorting options.
What are some additional customization options available in the Actions menu?
-The Actions menu contains options like 'Filter', 'Sort', 'Compute', 'Rows per Page', 'Reset', and 'Download', which allow users to further customize the report according to their specific needs.
How can users save their customized report settings?
-Users can save their customized report settings by selecting 'As Named Report' from the 'Save' list in the Actions menu and applying the changes.
Outlines

Этот раздел доступен только подписчикам платных тарифов. Пожалуйста, перейдите на платный тариф для доступа.
Перейти на платный тарифMindmap

Этот раздел доступен только подписчикам платных тарифов. Пожалуйста, перейдите на платный тариф для доступа.
Перейти на платный тарифKeywords

Этот раздел доступен только подписчикам платных тарифов. Пожалуйста, перейдите на платный тариф для доступа.
Перейти на платный тарифHighlights

Этот раздел доступен только подписчикам платных тарифов. Пожалуйста, перейдите на платный тариф для доступа.
Перейти на платный тарифTranscripts

Этот раздел доступен только подписчикам платных тарифов. Пожалуйста, перейдите на платный тариф для доступа.
Перейти на платный тарифПосмотреть больше похожих видео
Customize Interactive Report With Actions Menu - Part 11
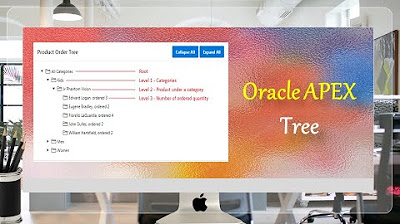
Create Oracle APEX Tree | Hierarchy - Part 29

Customize Interactive Report using Actions Menu (Sort, Control Break, Highlight) - Part 12

Interactive Grid Native PDF Printing Oracle APEX - Part 23
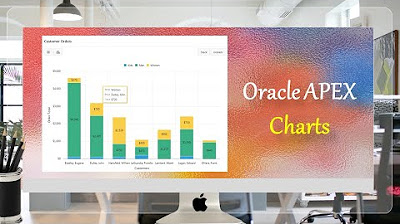
Oracle APEX Chart | Stack Unstack | Horizontal Vertical Orientation - Part 25
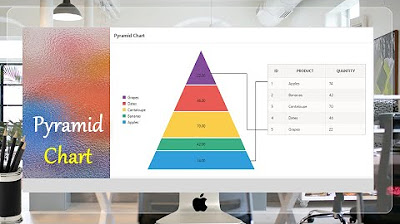
Pyramid Chart | Oracle APEX - Part 32
5.0 / 5 (0 votes)
