TUTORIAL MASTERCAM X5 MEMBUAT PION || CNC Turning (Lathe) || Simpel & Mudah dipahami !!
Summary
TLDRThis video tutorial provides a step-by-step guide on creating a pion program using Mastercam X5. It begins with sketching the design, covering key elements like lines, circles, trimming, and filleting. The tutorial then walks through CNC machine setup, including stock parameters, clamping, and toolpath creation for facing, roughing, finishing, and cutting operations. The final steps focus on simulating the program to verify accuracy and ensure proper machining. The video is a helpful resource for beginners and those looking to improve their CNC skills with Mastercam X5, with clear instructions on both design and machining processes.
Takeaways
- 😀 Begin by creating a sketch for the part, starting with a line of 4 units and a circle with a radius of 4.
- 😀 Use trim tools to remove unnecessary lines and to extend others for the proper shape.
- 😀 Horizontal lines of varying lengths (8, 12, 30, 35, etc.) are drawn for the part's profile.
- 😀 Apply specific dimensions like a 6-unit diameter split in half for precise placement of lines.
- 😀 Fillet operations are applied to round off sharp corners, with specific radii like R2 and R4 used.
- 😀 Ensure dimensions like 16 and 20 units are divided in half to position elements accurately.
- 😀 Set up the stock material in the CNC machine with a diameter of 22 and a length of 100 mm for proper setup.
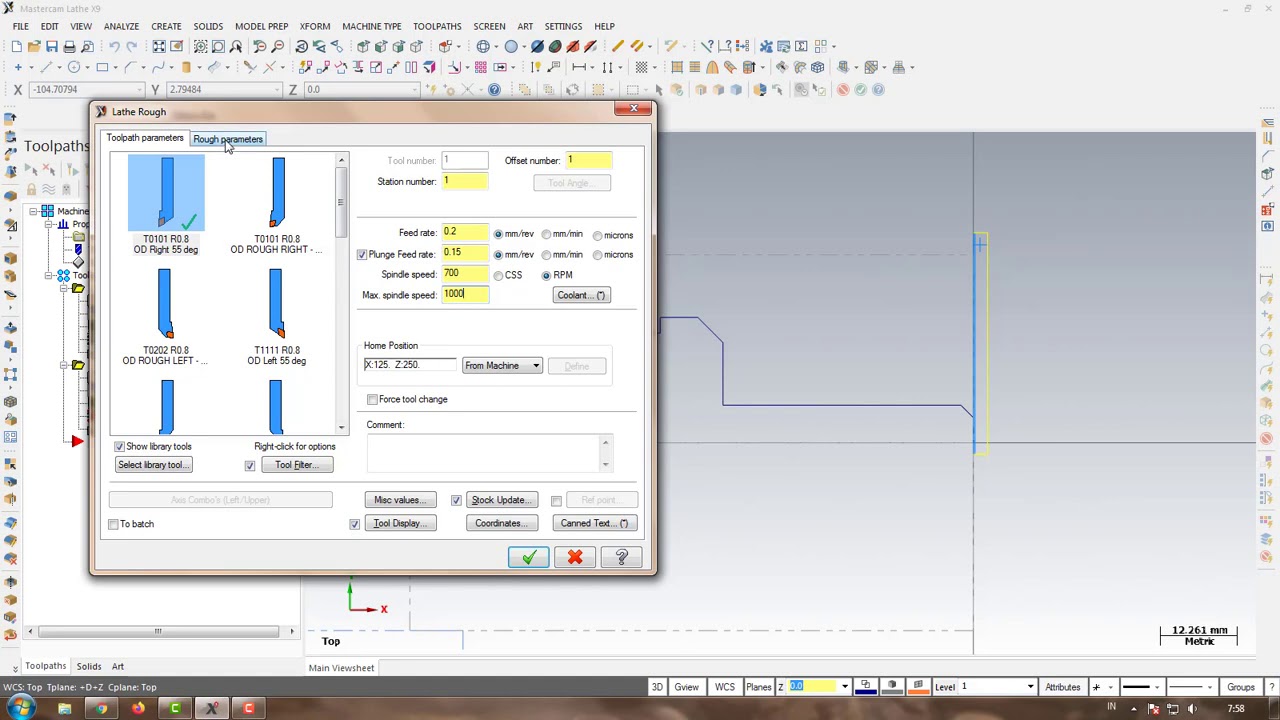
- 😀 Use toolpaths like facing and roughing (OD right) for shaping the part with specified parameters (feed rate, spindle speed, etc.).
- 😀 Finishing toolpaths are used to finalize the part’s surface with a smaller feed rate for smooth results.
- 😀 A cutoff operation is performed to separate the finished part from the stock material, using a specific cutting tool.
- 😀 Test the setup by simulating the process and checking if the output matches the job sheet before proceeding with actual machining.
Q & A
What is the first step in creating the part in Mastercam X5?
-The first step is to create a sketch, starting with a reference line of length 4 for the R4.
How do you trim unwanted lines during the sketching process?
-You can use the 'Trim' tool, selecting 'Trim to Closest' and clicking on the lines you don't need.
What is the significance of the 6mm diameter line being divided by 2?
-The 6mm diameter is divided by 2 to determine the radius, which is used to position lines and shapes correctly in the sketch.
What is the function of the 'Fillet' tool in this process?
-The 'Fillet' tool is used to create rounded edges (with a radius of R2 in this case) to smooth out the sharp corners in the design.
How is the stock material set up for machining?
-The stock material is set by inputting the diameter of the material (22mm) and the length (100mm) in the stock setup window.
What is the purpose of the 'Facing' toolpath?
-The 'Facing' toolpath is used to remove material from the top of the stock, using a tool with a specified feed rate and spindle speed.
How does the 'Roughing' toolpath differ from the 'Finishing' toolpath?
-The 'Roughing' toolpath is used to remove large amounts of material quickly, while the 'Finishing' toolpath refines the part's surface and shape to achieve the final dimensions.
What tool is used for the roughing operation?
-For the roughing operation, an 'OD Roughing Right' tool is used, with specific feed rates and spindle speeds set for optimal cutting.
What does the 'Cut-off' toolpath do in the final step?
-The 'Cut-off' toolpath is used to separate the part from the stock material, ensuring the final piece is completely cut off.
How is the toolpath 'Pack Drill' utilized in the cut-off operation?
-The 'Pack Drill' toolpath is used for a retracting cutting motion, allowing the tool to move in a back-and-forth pattern during the cut-off process.
Outlines

Этот раздел доступен только подписчикам платных тарифов. Пожалуйста, перейдите на платный тариф для доступа.
Перейти на платный тарифMindmap

Этот раздел доступен только подписчикам платных тарифов. Пожалуйста, перейдите на платный тариф для доступа.
Перейти на платный тарифKeywords

Этот раздел доступен только подписчикам платных тарифов. Пожалуйста, перейдите на платный тариф для доступа.
Перейти на платный тарифHighlights

Этот раздел доступен только подписчикам платных тарифов. Пожалуйста, перейдите на платный тариф для доступа.
Перейти на платный тарифTranscripts

Этот раздел доступен только подписчикам платных тарифов. Пожалуйста, перейдите на платный тариф для доступа.
Перейти на платный тарифПосмотреть больше похожих видео


5.0 / 5 (0 votes)
