Modul 1 Menyisipkan background
Summary
TLDRIn this tutorial video, the host, Suci Permata Dewi, introduces viewers to creating educational videos using the CapCut app on a desktop platform. She guides the audience through preparing essential assets like videos, images, audio, and animations. The main focus is on how to change the background of a video using CapCut's 'remove background' feature, which includes steps like importing files, dragging them to the timeline, and utilizing the auto-removal process. The video concludes with a practical exercise for viewers to apply these techniques in editing their educational content, ensuring a seamless and engaging learning experience.
Takeaways
- 🌐 The video is about creating educational videos using the CapCut app on a desktop or PC.
- 📚 It emphasizes the importance of preparing assets such as videos, images, audio, and animations before making educational videos.
- 🗣️ The speaker invites participants to share their thoughts on what assets are needed in the chat column.
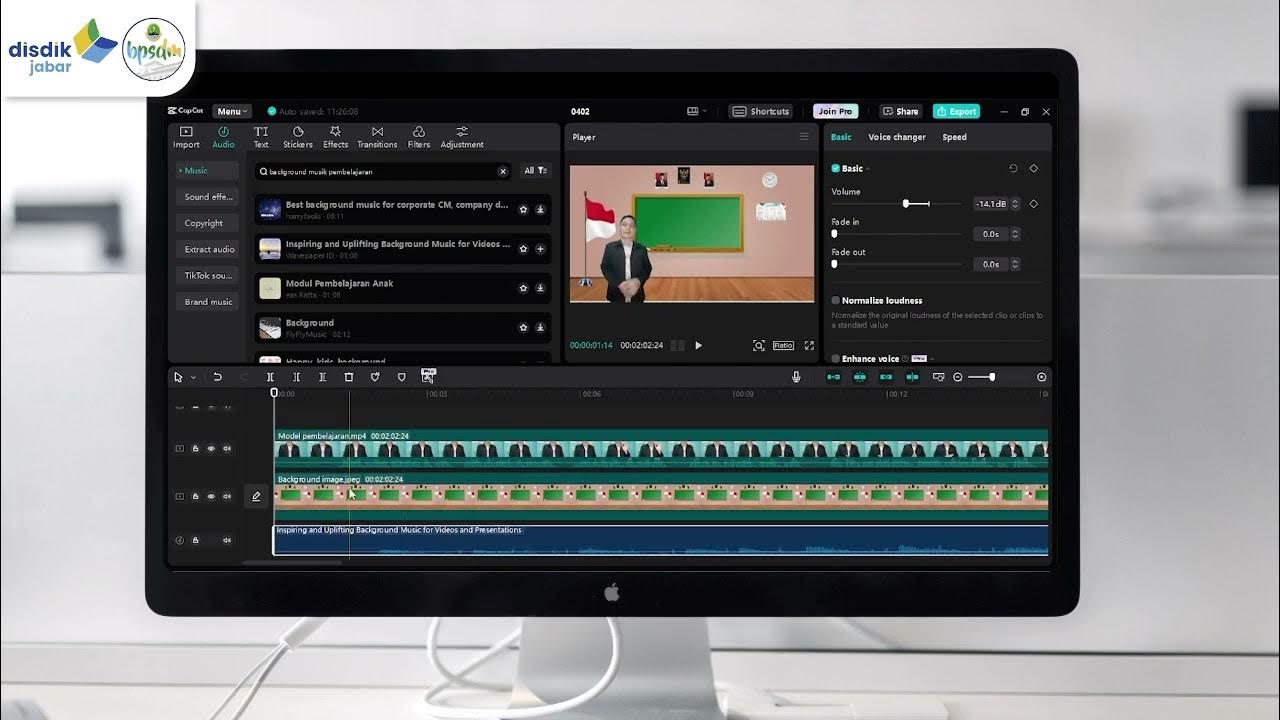
- 🎥 The script provides a step-by-step guide on how to remove the background of a video in CapCut.
- 💻 It instructs viewers to ensure that the CapCut application is activated and ready to use.
- 📷 The process involves importing images and educational videos into the CapCut app and placing them on the timeline.
- 🖼️ The 'remove background' feature in CapCut is used to change the background of the video to match the desired image.
- 🔍 After processing, the background is automatically changed, and viewers are encouraged to adjust the size and position of the video as needed.
- ⏱️ The script reminds viewers to adjust the duration of the images and videos to fit the educational material.
- 📝 The speaker concludes by encouraging viewers to apply the practice in editing educational videos according to the material they will present.
- 👋 The video ends with a warm greeting and an invitation to see the audience in the next material.
Q & A
What is the purpose of the video discussed in the script?
-The purpose of the video is to teach how to create educational videos using the CapCut application on a PC or desktop platform, specifically focusing on changing the background of the video.
Who is the host of the video tutorial?
-The host of the video tutorial is Suci Permata, Dewi from SMAN 1 Cikakak, Sukabumi.
What are the types of assets mentioned in the script that one needs to prepare for making an educational video?
-The types of assets mentioned are video, images, audio, and animations.
How does the script encourage interaction from the audience?
-The script encourages interaction by asking the audience to share their thoughts in the chat column about the assets needed for video production.
What is the first step in creating a project in CapCut according to the script?
-The first step is to click on 'Create Project', which then changes the display to the project creation interface.
How does one import images and videos into the CapCut application as described in the script?
-To import images and videos, one should click 'Import' and then 'Open File', selecting the location where the data is saved, and then click on the image or video to import it.
What feature in CapCut is used to remove the background of a video?
-The 'Remove Background' feature is used, which is accessed by clicking on the video, then selecting 'Remove Background', followed by 'Auto Removal'.
What should one do after the background removal process reaches 100% in the video?
-After the background removal process is complete, one should check that the background has changed as desired and then adjust the size and position of the video as needed.
How can the duration of images and videos be adjusted in the script?
-The duration can be adjusted to fit the needs of the project by using the timeline to extend or shorten the length of the media.
What is the closing statement of the script and what does it convey?
-The closing statement is a greeting in Arabic, 'Asalamualaikum warahmatullahi wabarakatuh', which conveys peace and blessings, and an invitation to meet again in the next material.
What does the script suggest at the end for the audience to do?
-The script suggests that the audience should try the practice they just learned to edit their educational videos according to the teaching material.
Outlines

Cette section est réservée aux utilisateurs payants. Améliorez votre compte pour accéder à cette section.
Améliorer maintenantMindmap

Cette section est réservée aux utilisateurs payants. Améliorez votre compte pour accéder à cette section.
Améliorer maintenantKeywords

Cette section est réservée aux utilisateurs payants. Améliorez votre compte pour accéder à cette section.
Améliorer maintenantHighlights

Cette section est réservée aux utilisateurs payants. Améliorez votre compte pour accéder à cette section.
Améliorer maintenantTranscripts

Cette section est réservée aux utilisateurs payants. Améliorez votre compte pour accéder à cette section.
Améliorer maintenant


5.0 / 5 (0 votes)
