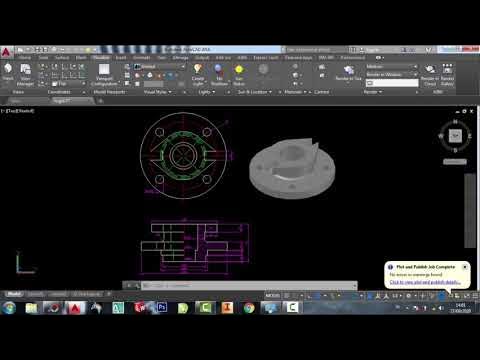
Cara Print Gambar dari AutoCAD Supaya Hasilnya Sesuai Skala
Summary
TLDRThis AutoCAD tutorial teaches users how to print 2D drawings accurately, maintaining the correct scale. It covers essential steps like setting up the layout, adjusting the viewport scale, and selecting the right paper size (A3, A4). The tutorial also provides solutions for common printing issues, such as when printers can't print to the edges (full bleed) and offers tips for printing to PDF. It’s perfect for anyone looking to print their AutoCAD drawings with precision, whether for technical drawings or professional use. Downloadable practice files and more detailed steps are available on the website.
Takeaways
- 😀 Proper scaling is essential when printing 2D AutoCAD drawings to ensure dimensions match the actual measurements.
- 😀 Always ensure the printer supports the required paper size (e.g., A3 or A4) before printing AutoCAD drawings.
- 😀 If the AutoCAD layout is empty, you can either create a custom title block or import a pre-made template.
- 😀 To insert a drawing into a layout, create a viewport and adjust its position using the Zoom Extend command.
- 😀 Adjusting the scale in the viewport is crucial for ensuring that the printed drawing matches the desired size (e.g., 1:1 or 1:2).
- 😀 If the drawing doesn’t appear correctly in the viewport, use the Zoom Extend function to automatically center the drawing.
- 😀 When printing, use the correct paper size setting (matching the layout) and ensure the scale is set to 1:1 for accurate results.
- 😀 If your printer does not support borderless printing, adjust the title block or reduce the drawing size slightly to avoid cutting off content.
- 😀 For PDF printing, use PDF creators like Adobe PDF or AutoCAD PDF, and ensure the scale and paper size match the layout settings.
- 😀 Troubleshooting tips for non-full-bleed printers include shifting or resizing the title block and adjusting the drawing placement to avoid cutting off edges.
Q & A
What is the main focus of the tutorial in the video?
-The main focus of the tutorial is to teach how to print 2D drawings from AutoCAD while maintaining the correct scale, whether printing to physical paper or a PDF.
What does a scale of 1:1 mean in AutoCAD printing?
-A scale of 1:1 means that the dimensions in the drawing will be printed at their actual size. For example, if the drawing shows a dimension of 40mm, the printed object will also measure 40mm.
What happens when you print a drawing at a scale of 1:2?
-At a scale of 1:2, the printed dimensions will be half the size of the dimensions shown in the drawing. For example, a dimension of 160mm in the drawing will print as 80mm.
How do you set up the layout in AutoCAD for printing?
-To set up the layout, you can either use a pre-made template or create a new layout manually by drawing a rectangle, inserting a title block, and then creating a viewport for your drawing. After that, you can adjust the scale and finalize the layout.
What should you do if your drawing does not appear in the viewport after setting it up?
-If the drawing doesn’t appear in the viewport, it likely means the coordinates of the model and the viewport do not align. You can activate the viewport and use the Zoom Extend command to fit the drawing inside the viewport.
How can you adjust the scale of a drawing in AutoCAD?
-To adjust the scale in AutoCAD, select the viewport and choose the desired scale from the scale options. You can also manually adjust the scale by right-clicking the viewport’s edge, selecting 'Properties', and entering the scale in the custom scale section.
What is the purpose of the 'Plot' or 'Print' function in AutoCAD?
-The 'Plot' or 'Print' function in AutoCAD is used to send the drawing to a printer or save it as a PDF file. This process involves selecting the printer, paper size, and ensuring the correct scale and plot area are set for accurate printing.
What should you do to ensure the drawing prints at the correct scale?
-To ensure the drawing prints at the correct scale, make sure the 'Fit to Paper' option is unchecked, set the plot scale to 1:1, and verify that the paper size in the printer settings matches the layout size.
How do you handle printing issues with a printer that does not support full bleed?
-If your printer does not support full bleed (printing to the edge of the paper), you can adjust the layout by reducing the margins or modifying the title block. Additionally, you can move the drawing slightly to ensure it fits within the printable area.
What is the significance of the 'Window' option in the plot settings?
-The 'Window' option in the plot settings allows you to select a specific area of the drawing to print, ensuring that only the part of the drawing you want to print is included, and it’s scaled correctly.
Outlines

Cette section est réservée aux utilisateurs payants. Améliorez votre compte pour accéder à cette section.
Améliorer maintenantMindmap

Cette section est réservée aux utilisateurs payants. Améliorez votre compte pour accéder à cette section.
Améliorer maintenantKeywords

Cette section est réservée aux utilisateurs payants. Améliorez votre compte pour accéder à cette section.
Améliorer maintenantHighlights

Cette section est réservée aux utilisateurs payants. Améliorez votre compte pour accéder à cette section.
Améliorer maintenantTranscripts

Cette section est réservée aux utilisateurs payants. Améliorez votre compte pour accéder à cette section.
Améliorer maintenantVoir Plus de Vidéos Connexes
5.0 / 5 (0 votes)


