autocad tutorials for beginners
Summary
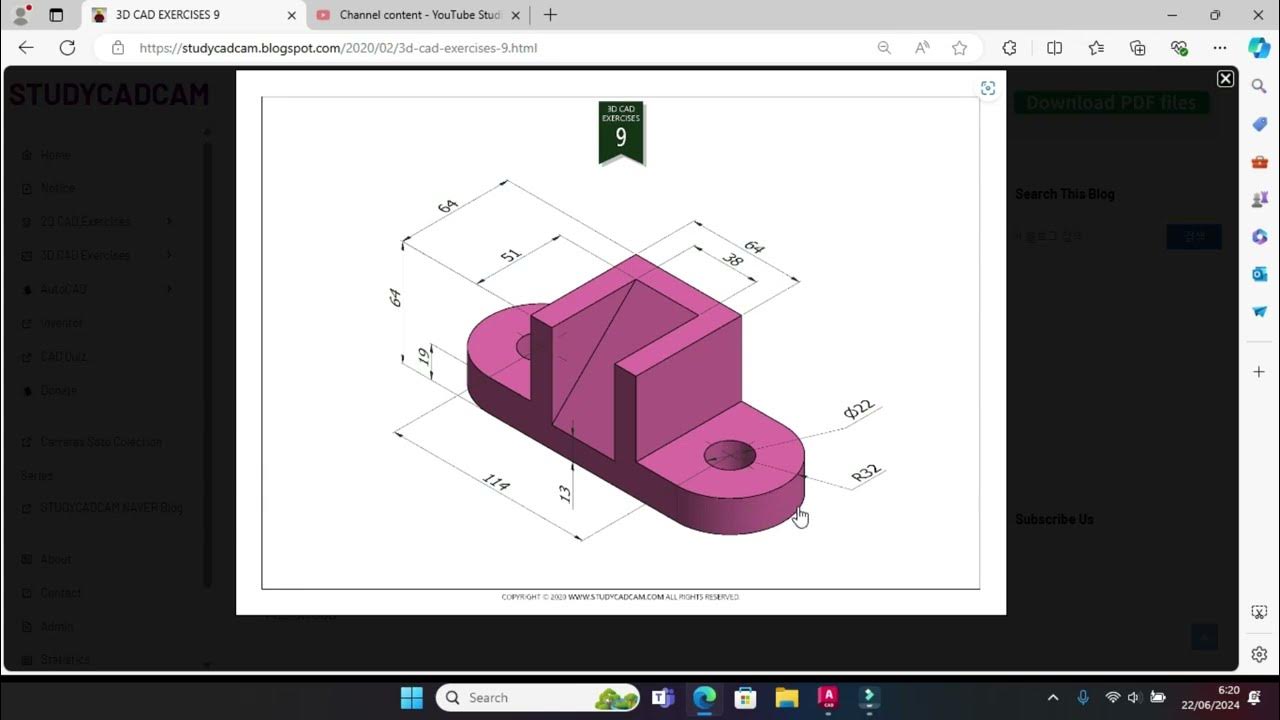
TLDRThis AutoCAD tutorial for beginners covers basic drawing techniques and introduces users to essential AutoCAD features. The video demonstrates creating simple shapes, measuring radii and diameters, and converting 2D objects into 3D models. Viewers learn to work with planes, align and move objects accurately, and use the 'Region' and 'Solid' functions to combine shapes into a unified 3D model. The tutorial also explains how to handle solid and non-solid objects in AutoCAD, helping users build a strong foundation in the software's basic drawing and editing tools.
Takeaways
- 😀 Start by drawing a square with dimensions of 10x10 units in AutoCAD.
- 😀 Add a circle with a radius (R2) at the center of the square and ensure accurate positioning.
- 😀 Measure and position the circle 2 units away from the edges of the square for correct placement.
- 😀 Use the correct diameter and radius measurements to ensure objects are accurately scaled.
- 😀 For AutoCAD 2010 and below, convert 2D drawings into 3D by 'regioning' them before proceeding.
- 😀 In AutoCAD 2017 and above, directly convert objects to 3D without using the 'region' function.
- 😀 Adjust the thickness of the 3D object by specifying the correct value, such as 3 units.
- 😀 Use the 'Move' and 'Align' tools to adjust the position of objects in your 3D model.
- 😀 Solid objects are typically represented with filled lines in AutoCAD, while holes are shown with appropriate diameters.
- 😀 Always ensure that circles and other shapes are correctly aligned with the grid and other objects for a consistent design.
- 😀 The tutorial emphasizes practicing and refining your AutoCAD skills, even if mistakes are made along the way.
Q & A
What is the focus of this AutoCAD tutorial for beginners?
-The tutorial focuses on helping beginners learn how to create drawings and practice using AutoCAD, specifically through creating and modifying basic shapes and understanding measurements, such as radius and diameter.
How does the script describe setting up a basic drawing in AutoCAD?
-The script explains that the user should start by creating a 10x10 drawing and then use basic measurements like radius and diameter to adjust the size and position of different elements within the drawing.
What is the significance of the radius (R) in the tutorial?
-The radius (R) is used to define the size of circular objects in AutoCAD. The tutorial specifically mentions using the radius to position and adjust shapes accurately on the drawing.
How does the tutorial explain the use of diameters in the drawing?
-The tutorial explains that when working with circular shapes, the diameter should be reduced to the radius value. The user is asked to use the diameter of 2 units and adjust the position accordingly.
What step is mentioned for converting the 2D drawing into a 3D model?
-To convert the drawing into 3D, the tutorial advises using AutoCAD's region function to unite objects, which is necessary for converting to three-dimensional shapes in AutoCAD 2010 and earlier. However, in AutoCAD 2017 and later, this step is not required.
What measurement does the tutorial suggest for the thickness of the 3D object?
-The tutorial suggests setting the thickness to a value of 6 units when creating the 3D object.
How does the tutorial guide users to move objects in AutoCAD?
-The tutorial describes using the 'move' function to reposition objects, explaining how to align the objects based on their central point and adjusting them for comfort and alignment with the design.
What is the role of the 'auxiliary line' mentioned in the tutorial?
-The auxiliary line is used to guide the positioning of elements in the drawing. The tutorial highlights the importance of creating accurate guidelines and fixing any misalignments in the design process.
What is the significance of solid objects and filled lines in AutoCAD, according to the tutorial?
-The tutorial emphasizes that solid objects or filled objects in AutoCAD are represented by solid lines, whereas objects with holes or gaps are indicated by lines and measurements such as diameter, showing the difference between filled and empty spaces in the drawing.
What does the tutor say about errors in the tutorial?
-The tutor acknowledges that there may be some errors in the tutorial, as they are still learning themselves, but encourages viewers to continue practicing and learning from the process.
Outlines

This section is available to paid users only. Please upgrade to access this part.
Upgrade NowMindmap

This section is available to paid users only. Please upgrade to access this part.
Upgrade NowKeywords

This section is available to paid users only. Please upgrade to access this part.
Upgrade NowHighlights

This section is available to paid users only. Please upgrade to access this part.
Upgrade NowTranscripts

This section is available to paid users only. Please upgrade to access this part.
Upgrade NowBrowse More Related Video

Autocad For Beginer [ Part 1 ] Belajar Autocad Dasar

AutoCAD Basic Tutorial for Beginners - Part 1 of 3

Tutorial Autocad 3D II Studycadcam Exercise 9

AUTOCAD 2026 CURSO - AULA 4 - COMANDO COPY - DESENHANDO

22 Perintah Dasar yang Sering Digunakan di Autocad 2D

Fungsi ORTHO, OSNAP, AUTOSNAP, TEMPORARY OSNAP, POLAR TRACKING, GRID | Belajar AutoCAD dari Nol #5
5.0 / 5 (0 votes)