SketchUp Tutorial for Beginners - Part 1 - Basic Functions

TheSketchUpEssentials
5 Jul 201715:44

Summary

TLDRIn this SketchUp Essentials tutorial, Justin introduces the basics of modeling with SketchUp 2017, suitable for new users. He covers the workspace components, including the menu bar, toolbars, tray, status bar, and workspace. The tutorial explains the concept of face modeling, using tools like line, rectangle, and push-pull for 3D extrusion. It also highlights the importance of the orbit tool for navigating the model and mentions limitations with curved surfaces, teasing the next video on building a house in SketchUp.

Takeaways

  • πŸ˜€ The video is a SketchUp Essentials tutorial aimed at beginners and covers the basics of modeling with SketchUp 2017.
  • πŸ›  It assumes the user has already downloaded and installed SketchUp, and the tutorial is applicable for both free and Pro versions.
  • πŸ“ The video introduces the SketchUp workspace, including the menu bar, toolbars, tray, status bar, and the workspace area for drawing models.
  • πŸ”§ The menu bar contains essential functions like file operations, view adjustments, drawing tools, extensions, and preferences.
  • πŸ“ Toolbars provide access to various drawing tools, and users can customize them by right-clicking and selecting options like 'large tool set'.
  • πŸ“Š The tray includes sections for adjusting model appearance, such as styles and scenes, and provides entity information for selected objects.
  • πŸ“ The status bar provides instructions for the active tool and displays measurements, helping users understand their current actions in SketchUp.
  • 🏠 SketchUp starts with a default model, which can be deleted, and includes a person model for scale reference in 3D modeling.
  • πŸ“ SketchUp is a face modeler, creating faces between three co-planar lines, with two main components in a model: faces and lines.
  • πŸ”² The line tool allows drawing lines with start and endpoint selection, and precise lengths can be entered for accuracy.
  • πŸ“ The rectangle tool is used to draw rectangles by selecting two corners, with dimensions inputted as two values separated by a comma.
  • πŸ”‘ Keyboard arrow keys can be used to lock tools to different axes, aligning drawings with the red, green, or blue planes.
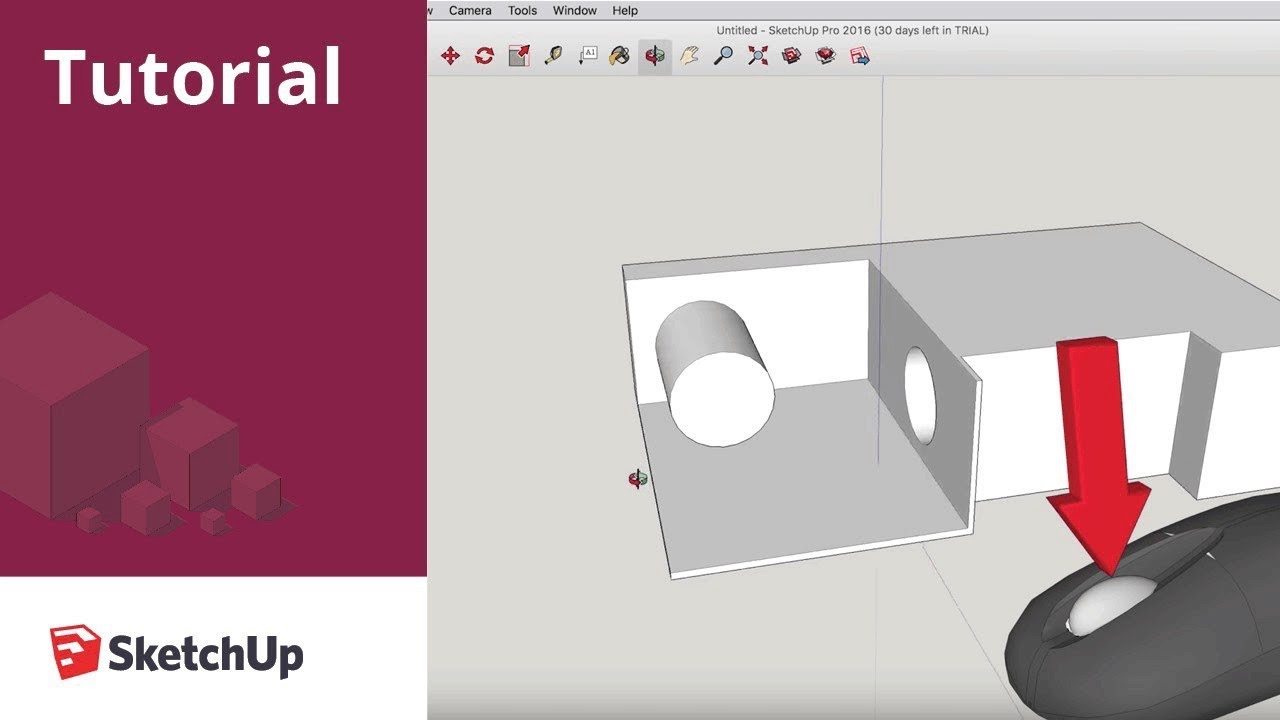
  • πŸ“ˆ The push-pull tool extrudes 2D shapes into 3D by moving faces, and can also be used to create holes or remove material from objects.
  • 🚫 SketchUp's base version does not allow for the extrusion of curved surfaces without using an extension, due to the complexity of the underlying geometry.

Q & A

  • What is the purpose of the video?

    -The purpose of the video is to provide a tutorial on the basics of modeling with SketchUp 2017, suitable for new users, and to introduce the workspace and various tools available in SketchUp.

  • Is the tutorial suitable for both SketchUp Pro and SketchUp Make users?

    -Yes, the tutorial is designed to work for both SketchUp Pro and SketchUp Make users, including those using the free version of SketchUp, which is SketchUp Make.

  • What are the main components of the SketchUp workspace?

    -The main components of the SketchUp workspace include the menu bar, toolbars, tray, status bar, and the workspace area where the model is drawn.

  • How can users access different toolbars in SketchUp?

    -Users can access different toolbars in SketchUp by right-clicking on the existing toolbars and selecting from the options that appear, or by going to 'View' and then 'Toolbars' to enable or disable specific toolbars.

  • What is the tray in SketchUp and what does it contain?

    -The tray in SketchUp contains different sections for adjusting the appearance of the model, including Styles, scenes, and tools for editing and obtaining information on the objects in the model, such as the entity info for selected objects.

  • What does the status bar in SketchUp show?

    -The status bar in SketchUp shows instructions for the currently active tool and the measurements box, which contains dimensions and information related to the active object or tool.

  • How does SketchUp handle the creation of 3D shapes from 2D forms?

    -SketchUp is a face modeler, meaning it draws faces between any three co-planar lines. To create 3D shapes, users can use the push-pull tool to extrude 2D shapes into 3D objects while maintaining the geometry of the faces.

  • What is the push-pull tool used for in SketchUp?

    -The push-pull tool in SketchUp is used to extrude flat faces into 3D, creating solid objects, or to cut holes and remove material from existing 3D objects.

  • Can SketchUp's basic version handle the extrusion of curved surfaces?

    -No, the basic version of SketchUp does not allow for the extrusion of curved surfaces without the use of an extension. The software only allows for the extrusion of flat faces.

  • What is the orbit tool used for in SketchUp?

    -The orbit tool in SketchUp is used to navigate around the model, allowing users to fly around or change their viewpoint for better visualization and interaction with the model.

  • How can users measure distances in SketchUp?

    -Users can measure distances in SketchUp using the tape measure tool, which allows them to click between two points to measure the distance, or by using the entity info in the tray to see the length of selected objects.

Outlines

00:00

πŸ“š Introduction to SketchUp Basics

This paragraph introduces the video tutorial by Justin from SketchUp Essentials, aimed at new users of SketchUp, with a brief mention that advanced users might find it basic. It assumes the viewer has SketchUp installed and will cover both the free version (SketchUp Make) and the Pro version. The tutorial begins with an overview of the SketchUp workspace, including the menu bar, toolbars, tray, status bar, and the workspace area. The menu bar is highlighted for its role in adjusting model settings, selections, and camera views. Toolbars are explained as containing drawing tools, with customization options available through right-clicking. The tray is described as a section for adjusting model appearance, including styles and scenes, and for accessing entity information. The status bar is noted for providing instructions and measurements related to the active tool, and the workspace is where the actual modeling takes place, starting with a default model that can be deleted or used for scale reference.

05:01

πŸ“ Understanding SketchUp's Modeling Principles

The second paragraph delves into the fundamental concept of SketchUp as a face modeler, where faces are automatically created between any three co-planar lines. It explains the basic elements in a SketchUp model: faces and lines, and how they can be selected and measured. The line tool is introduced, detailing its activation, usage, and how to draw lines with specific lengths using direct mouse clicking or entering values. The paragraph also covers the use of the tape measure tool for distance measurement. Moving on to more complex shapes, the rectangle tool is explained, including how to input dimensions and lock the tool to different axes using arrow keys. The importance of understanding the orientation of shapes to the axes (blue for up and down, red and green for horizontal planes) is emphasized, allowing for precise modeling aligned with the desired plane.

10:02

πŸ”‘ Exploring Extrusion and 3D Manipulation

This section introduces the push-pull tool in SketchUp, which is essential for converting 2D shapes into 3D objects by extruding them into space while maintaining their geometric integrity. The paragraph explains how to use the push-pull tool to both add volume to shapes and create holes by extruding in the opposite direction. The orbit tool is also highlighted as a means to navigate around the model, with a special note for PC users to utilize a three-button mouse for more intuitive control. The paragraph further explains how to use the push-pull tool for subtracting material by creating arcs and then removing the defined area, leaving a curved surface. It concludes by noting the limitation that SketchUp's base functionality does not allow for the extrusion of curved surfaces without additional extensions, and the importance of understanding the underlying geometry of curves made up of flat faces.

15:03

🏠 Upcoming Tutorial on House Modeling

The final paragraph wraps up the video with an invitation for viewers to share their thoughts, especially those new to SketchUp, and to ask questions if they found any part of the tutorial confusing. The host expresses a desire to engage in conversation with the audience about SketchUp. A call to action is made for viewers to like the video, subscribe for more content, and support the channel through the website's support page or Patreon. The host thanks the viewers for their time and sets the expectation for the next video, which will focus on the basics of creating a house in SketchUp.

Mindmap

Keywords

πŸ’‘SketchUp

SketchUp is a 3D modeling computer program for a wide range of drawing applications such as architectural, interior design, landscape architecture, civil and mechanical engineering, film, and video game design. In the video, it is the main software being discussed, with the tutorial focusing on its basic modeling tools and functions for beginners and advanced users.

πŸ’‘Workspace

In the context of SketchUp, the workspace refers to the digital environment where users create and manipulate their 3D models. The script introduces the various components of the SketchUp workspace, including the menu bar, toolbars, tray, status bar, and the area where the actual modeling takes place, which is essential for understanding the layout and navigation within the software.

πŸ’‘Menu Bar

The menu bar in SketchUp is located at the top of the application window and contains essential commands for file management, editing, viewing, and other preferences. It is a critical component of the SketchUp interface, as it provides access to a wide range of functionalities that affect how models are created and edited, as mentioned in the script.

πŸ’‘Toolbars

Toolbars in SketchUp are panels that contain icons for various drawing tools, making it easy for users to access and use them. The script explains how toolbars can be customized and how extensions can add additional toolbars, highlighting their importance in the modeling process for quick access to tools.

πŸ’‘Tray

The tray in SketchUp is a section of the interface that contains settings and tools for adjusting the appearance of the model, editing objects, and accessing information. The script describes how the tray can be used to change styles, scenes, and get entity information, which is vital for users to understand how to manipulate the visual aspects and details of their models.

πŸ’‘Status Bar

The status bar in SketchUp provides real-time information about the active tool, including instructions and measurements. It is an important part of the interface as it guides the user on how to use the currently selected tool and displays the dimensions of the active object, as illustrated in the script when discussing the line tool and its use.

πŸ’‘Face Modeler

As a face modeler, SketchUp allows users to create 3D objects by drawing lines and automatically inferring faces between co-planar lines. The concept is central to the video's theme of basic modeling, as it explains how SketchUp generates 3D geometry from 2D sketches, which is a fundamental aspect of the software's modeling capabilities.

πŸ’‘Push Pull Tool

The push pull tool in SketchUp is used to extrude 2D shapes into 3D objects or to create holes by subtracting material. The script demonstrates how this tool can transform flat shapes into solid forms and how it can be used to add or remove material from existing 3D objects, which is a key concept in 3D modeling with SketchUp.

πŸ’‘Extruding

Extruding in SketchUp refers to the process of converting a 2D shape into a 3D object by 'pulling' it into the third dimension. The script uses the example of turning a rectangle into a 3D box using the push pull tool, which is a basic yet crucial technique for creating 3D geometry in the software.

πŸ’‘Inferencing

Inferencing in SketchUp is a feature that provides visual cues to help users align and position their models accurately. The script mentions how inferencing appears as dotted lines when using the push pull tool, indicating where the extrusion or hole will be made, which is an important aspect of precision modeling.

πŸ’‘Curved Surfaces

The script discusses the limitations of SketchUp's base functionality when it comes to curved surfaces, noting that they are composed of flat faces and cannot be directly extruded without using an extension. This is an important point for users to understand the software's capabilities and limitations regarding organic and curved forms in 3D modeling.

Highlights

Introduction to SketchUp 2017 basics for new users and a quick overview for advanced users.

Assumption that viewers have already downloaded and installed SketchUp, applicable for both Pro and Make versions.

Explanation of SketchUp as a free version alternative with SketchUp Make.

Introduction to the SketchUp workspace components including the menu bar, toolbars, tray, status bar, and workspace.

Description of the menu bar functionalities such as file operations, view adjustments, and tool access.

Customization of toolbars through right-click options and the large tool set feature.

Use of the tray for model appearance adjustments, including styles and scenes.

Importance of the status bar for active tool instructions and measurement information.

Understanding SketchUp as a face modeler that creates faces between co-planar lines.

Basic usage of the line tool, including drawing lines and entering precise lengths.

Demonstration of the rectangle tool with axis locking for orientation and dimension input.

Extrusion of 2D shapes into 3D objects using the push pull tool.

Use of the orbit tool for navigating around the model with a three-button mouse or keyboard shortcuts.

Capability of the push pull tool to both add and subtract material from objects.

Limitation of SketchUp in extruding curved surfaces without extensions.

Upcoming tutorial on creating a house in SketchUp in the next video.

Invitation for feedback and questions from new SketchUp users.

Encouragement to like, subscribe, and support the channel for more SketchUp content.

Transcripts

play00:00

what's up guys Justin here with the

play00:02

SketchUp essentials.com back with

play00:04

another SketchUp Essentials tutorial for

play00:06

you so in this video we're going to go

play00:08

through some of the basics of modeling

play00:09

with SketchUp

play00:11

2017 so uh if you're if you're a new

play00:14

user to SketchUp this video will

play00:15

introduce you to some of the basics if

play00:17

you're a more advanced user you may want

play00:19

to go ahead and just move on to another

play00:20

tutorial but let's go ahead and just

play00:22

jump into it so this video starts off

play00:24

with the assumption that you've

play00:25

downloaded and installed SketchUp on

play00:27

your computer this video will work for

play00:29

both Pro and make users um I make I may

play00:33

make a video in the future just talking

play00:34

about the differences between SketchUp

play00:36

Pro and SketchUp make but generally

play00:38

speaking um you can do all of this with

play00:40

the free version of SketchUp which is

play00:42

SketchUp make so we're going to start

play00:45

off and we're going to do a quick

play00:46

introduction to the workspace there's

play00:48

several different parts of a SketchUp

play00:49

workspace uh the first is the menu bar

play00:53

so that's at the top of the page up here

play00:54

it's got your file edit view you can

play00:57

basically adjust just about anything in

play00:59

here it's got things from where you

play01:01

would open and save your model to things

play01:04

where you would work with your different

play01:06

selections and cutting and copying and

play01:08

that kind of thing you can adjust all

play01:10

your different camera stuff in here um

play01:13

you have links to most of your drawing

play01:14

Tools in here as well as some other

play01:17

things like extensions and all of your

play01:20

preferences and so if you want to change

play01:22

something that really affects the way

play01:24

SketchUp works it's probably up here and

play01:27

the next thing I want to talk about is

play01:29

the tool toolbars so the toolbars

play01:31

contain your different drawing tools so

play01:33

it's got links to all your different

play01:34

drawing tools a lot of extensions that

play01:37

you download we'll have toolbar links as

play01:40

well and you can adjust these and turn

play01:42

on and off different toolbars by right

play01:44

clicking if you're right click up here

play01:47

depending on what you have installed

play01:48

you're going to see different things I

play01:50

have I have some different extensions

play01:53

installed and so I probably have more

play01:55

options than someone with a brand new

play01:57

installation the one thing I would

play01:59

suggest is going ahead and right

play02:00

clicking in here and selecting large

play02:03

tool set so if you select large tool set

play02:06

it's going to pop up this set of tools

play02:07

on the left hand side of your screen

play02:09

that's just going to have more of

play02:10

sketchup's basic Tools in here you can

play02:13

also adjust the toolbars that you have

play02:15

by going to view toolbars and then

play02:18

selecting this in here so if you want a

play02:21

different toolbar in here you can just

play02:22

check the box and click close the other

play02:24

thing you can do is you can check this

play02:26

box for large icons to make your icons

play02:29

smaller or larger so you can adjust that

play02:32

in your toolbar section so in addition

play02:34

to your toolbar section you also have

play02:35

your tray and you may not be able to see

play02:38

your tray depending on how um how your

play02:40

SketchUp is set up um to see your tray

play02:43

go to window default tray and make sure

play02:46

show tray is checked then there's a

play02:48

whole bunch of boxes in here for

play02:49

different things that you can adjust but

play02:51

basically this is going to contain

play02:53

different sections for adjusting the way

play02:55

that your model looks so you can adjust

play02:57

things like your Styles or your

play02:59

different scenes as well as things for

play03:02

editing and getting more information on

play03:04

the objects in your model for example

play03:06

one of the things you'll probably use a

play03:08

lot of is the entity info that'll give

play03:10

you information about the things that

play03:12

you have selected in your model so

play03:14

things like layers or if you have lines

play03:16

in

play03:18

here and you select a line the length of

play03:21

the line will show up in here so a lot

play03:23

of different information is going to

play03:24

show up in your

play03:26

tray there's also the status bar the

play03:28

status bar contain instructions for your

play03:31

currently active tool as well as your

play03:33

measurements box so this is going to

play03:35

contain things like if you have the line

play03:37

tool active it's going to have

play03:39

instructions for how to use your active

play03:42

tool as well as the different dimensions

play03:45

that you have in here so it'll show you

play03:46

the length of the active object that you

play03:48

have in here or some things have there's

play03:52

there's a lot of different things

play03:53

that'll show up in here but this is

play03:54

where you'll look for information on

play03:56

whatever tool that you have active if

play03:58

you don't know what to do next there's

play04:00

also a couple other options in here for

play04:02

geolocation and information about things

play04:05

you've downloaded from the 3D Warehouse

play04:06

that we'll talk about in a future video

play04:09

and then finally this is your workspace

play04:10

where you're actually going to draw your

play04:12

model so we're going to start off every

play04:14

model starts with this default model in

play04:16

here you can go ahead and click on that

play04:18

and delete that you don't really need

play04:20

that for anything the one nice thing

play04:22

about that is it gives you a sense of

play04:23

scale so like for example this person is

play04:27

about actual person height in 3D and so

play04:32

you can use that as kind of an idea of

play04:35

how big other things are as well so if

play04:37

you were to draw a house and you had

play04:39

this person in here for scale and you

play04:41

were to make the house this tall then

play04:44

you'd know that this is probably a

play04:45

little big to be a

play04:47

one-story house so you can use this

play04:49

person for scale if you want or you can

play04:51

just delete that out I'm going to go

play04:52

ahead and delete that out so the first

play04:54

thing we're going to talk about is the

play04:55

way SketchUp Works SketchUp is a face

play04:58

modeler which basically means that

play05:00

SketchUp draws faces between any three

play05:03

co- planer lines so that means any three

play05:06

lines that are on the same plane

play05:08

SketchUp will draw a line between them

play05:10

so for example if I was to activate the

play05:12

line tool and I was to draw three lines

play05:17

just like this if I was to draw three

play05:20

lines you can see how

play05:22

SketchUp drew a face in between those

play05:25

lines so there's basically two different

play05:27

kinds of things in a SketchUp model

play05:29

there's faces and there's lines so you

play05:32

can see how when I click on these lines

play05:33

they turn blue that's me selecting these

play05:36

lines and if I click on this face it

play05:38

kind of Shades in and you can see how

play05:40

things like areas show up in your entity

play05:42

info in your tray so you can get

play05:44

information about those different tools

play05:46

so all of your different Tools in

play05:48

SketchUp have different inputs and we're

play05:50

going to start off very basic with the

play05:52

line tool so if you come over here and

play05:54

you click on the line tool then this is

play05:57

going to allow you to draw a line in

play05:59

SketchUp

play06:01

and you can see if you look down here

play06:05

when I activated that line tool by

play06:07

clicking on it there's an instruction

play06:08

for select your start point so that's

play06:11

telling you what to do with your current

play06:13

object so that says select your start

play06:16

point and then once I click you can see

play06:18

how now it says select endpoint or enter

play06:21

value so what that's telling you is now

play06:23

tell SketchUp how long you want your

play06:26

line to be so you can see how as I move

play06:28

my mouse

play06:30

this line kind of fills in with it so

play06:32

you can see where your line would go

play06:35

when you set your second point so you

play06:37

can click to set your second point to

play06:40

draw your

play06:41

line and then one other thing to note is

play06:44

you can see how when I do

play06:47

this if you look in the corner there's a

play06:51

length option so instead of clicking

play06:55

again if I want to be more precise like

play06:57

let's say I wanted to draw a 10- foot

play06:59

line

play07:01

what I would do is I would move my mouse

play07:03

in the direction that I want to draw

play07:04

this line I would type in 10 and then a

play07:07

foot sign and hit the inner key and what

play07:10

that would do is that would draw a 10t

play07:11

line from this point to this point and

play07:13

we can tell that that's 10t long because

play07:15

we can click on it and then look in the

play07:17

entity info and see that the length is

play07:19

10

play07:22

ft so the other way you could check that

play07:24

is you could activate this tape measure

play07:26

tool that's good for measuring distances

play07:28

and then you could click cck between

play07:30

these two

play07:31

points and you can see how down in the

play07:33

corner it tells you this is 10 ft

play07:37

long so some tools in SketchUp have

play07:40

multiple inputs so for example if I

play07:43

activate the rectangle

play07:47

tool you can see how it tells me to

play07:49

select my first Corner well what this is

play07:51

going to

play07:52

do is this is actually going to draw a

play07:55

rectangle between the two points that I

play07:57

select and you can see how in the Cor

play07:59

corner where the line tool had one

play08:01

dimmension this one has two so you can

play08:04

see how this says 6'1 comma

play08:07

6'1 so any object that's going to have

play08:10

more than one dimension in it you just

play08:13

separate the two Dimensions with a comma

play08:16

so if I wanted this to be a 4tx 4T

play08:18

rectangle I would just type in 4ot comma

play08:22

4T and hit the inner

play08:25

key and what that does is that draws a

play08:28

rectangle with 4ot long side so if I

play08:30

click on any of these sides my entity

play08:33

info in my tray is going to say that the

play08:34

length is 4T

play08:37

long in addition SketchUp automatically

play08:40

draws the face in between all these

play08:42

lines because these are co- planer

play08:45

lines and one thing I want to talk about

play08:48

really quick is if I activate the

play08:50

rectangle tool you can see how my

play08:52

rectangle right now is blue that means

play08:54

that's oriented to the blue plane so if

play08:57

you look at the intersection of these

play08:59

three lines SketchUp basically it gives

play09:02

you these guidelines along the different

play09:04

axes so the the green axis basically

play09:07

runs this way the red axis runs this way

play09:10

and the blue axis runs up and down so

play09:13

the blue indicates up and down well you

play09:16

can see how right now the little box

play09:18

that's coming off of my cursor is blue

play09:21

that's indicating that I'm going to draw

play09:22

a face

play09:24

along basically the blue Axis or the

play09:27

blue plane well what SketchUp will allow

play09:30

you to do is it'll allow you to tap the

play09:32

arrow

play09:33

keys to lock this to the different axes

play09:36

so for example if I tap my right arrow

play09:39

key you can see how this turns red

play09:41

that's going to

play09:43

draw a box along the red

play09:48

plane same thing if I tap the left Arrow

play09:51

key that's going to lock my tool to the

play09:53

green plane and it's going to draw a box

play09:55

along the green plane so you can use you

play09:59

can use your keyboard to adjust the way

play10:01

that different tools work in sketch up

play10:03

and that'll work with the lines as well

play10:05

so if I type my left Arrow key you can

play10:08

see how that locked my line to the green

play10:13

Axis or if I tap the right arrow key

play10:15

it'll lock me to the blue one or if I

play10:17

tap my up Arrow key it's going to sorry

play10:18

if I tap my right it'll lock me to the

play10:20

red axis if I tap the up key you can see

play10:23

how it locks this tool to the blue axis

play10:26

we'll get into that a little more later

play10:28

so now that we've talked about a couple

play10:29

couple of the drawing tools we're going

play10:31

to talk about extruding an object into

play10:33

3D and so what that means is let's say I

play10:36

have a rectangle like this and I want it

play10:38

to be a 3D rectangle what we're going to

play10:40

do is we're going to use a tool called

play10:41

the push pull tool which is basically

play10:44

this little icon with a little box and a

play10:46

red arrow sticking out of it so if I

play10:49

click on that then I click on a flat

play10:51

face what that's going to do is that's

play10:53

going to take an object and extrude it

play10:55

or move it into 3D um so that it has

play10:59

so that it maintains all of these

play11:01

different faces in these different sides

play11:04

so if I was to move this using the move

play11:06

tool you can see how all it does is

play11:07

moves this face around but if I use the

play11:10

push pull tool it extrudes it so

play11:13

basically it takes this face it moves it

play11:16

up and it creates all this corresponding

play11:17

geometry so this stays as kind of a

play11:19

solid object one tool that's going to be

play11:21

really important for you is going to be

play11:23

the orbit tool so the orbit tool is just

play11:25

going to allow you to fly around your

play11:27

model or your object and one thing

play11:29

that's kind of important for PC users is

play11:32

to use a three button Mouse so you want

play11:34

to use a mouse with a scroll wheel

play11:36

because what you can do is you can just

play11:38

click and hold that Center Mouse button

play11:40

and orbit around your model you can also

play11:42

go up to

play11:44

camera and select orbit and then click

play11:47

and drag with your left Mouse button or

play11:50

you can click on that little icon over

play11:52

here as well and then click and drag or

play11:55

you can tap the o key to activate the

play11:57

orbit tool and click and drag but the

play11:59

fastest thing is going to be to hold

play12:01

down your Center Mouse button and drag

play12:03

your mouse to orbit around your model so

play12:06

and you can see how I use the push pull

play12:08

tool to extrude this object into 3D well

play12:11

not only can you extrude objects into 3D

play12:14

you can also use this to cut holes in

play12:16

different faces so if I come in here and

play12:19

I draw a circle then I activate the push

play12:21

pull tool and I click and I move my

play12:24

mouse you can see if I move my mouse out

play12:26

it'll extrude this circle out into three

play12:29

but it'll also you can see how as I move

play12:32

my

play12:34

mouse backwards along this

play12:37

face it'll extrude a hole into my shape

play12:41

so if I click anywhere on this back face

play12:44

you can see how this is drawing a little

play12:45

dotted line out here that's called

play12:47

inferencing that's basically telling you

play12:50

once you've activated the push pull tool

play12:51

that you can move this

play12:54

out and you can see how you can do it

play12:57

without having your mouse over your

play12:59

object so all I have to do is move this

play13:02

to the back face and then no matter

play13:04

where I click on this face it's going to

play13:05

EXT you're basically telling it the

play13:07

length to extrude that hole so if I

play13:09

click on that face now and I finish that

play13:12

Extrusion and then I rotate around you

play13:14

can see how that actually you can see

play13:16

how that actually cut a hole along this

play13:18

face so you can use the push pull tool

play13:20

to add and

play13:22

subtract material not only can you use

play13:25

that to create a hole in an object you

play13:27

can also use that to remove material

play13:29

material so if I come to this corner and

play13:32

I draw an arc across it and then I use

play13:34

the push pull tool you can see how

play13:36

that's removing material from my object

play13:39

and if I click on this back face it'll

play13:41

remove that material completely and just

play13:43

leave this as a curved face along this

play13:46

Edge and the last thing I'm going to

play13:48

talk about in this video is you cannot

play13:50

extrude or push pull curve surfaces um

play13:54

in SketchUp without using an extension

play13:57

so the base SketchUp won't allow you to

play13:59

push pull a curved surface and here's

play14:01

why if you go up to view and you click

play14:04

this box for hidden geometry you can

play14:06

basically see the geometry that makes up

play14:08

this face and you see how as I move my

play14:10

mouse over these different

play14:12

faces it kind of Shades them in that's

play14:15

because Curves in SketchUp I'll zoom in

play14:18

a little bit so you can see aren't

play14:19

actually made up of real curving faces

play14:23

what they're made up of is a whole bunch

play14:24

of different segments and flat faces so

play14:27

you can see how when you look at this

play14:28

these are all actually flat faces so if

play14:30

I was to click on one of those you can

play14:32

extrude that out with the hidden

play14:34

geometry turned on but it won't allow

play14:36

you to push pull this whole curve face

play14:38

because then you'd be trying to extrude

play14:40

multiple faces at once and there are

play14:42

some extensions that can do that but a

play14:44

basic SketchUp model won't let you do

play14:47

that so and then you can go back to view

play14:49

and check this box for hidden geometry

play14:51

you can check that box for hidden

play14:53

geometry to turn to turn all that hidden

play14:55

geometry back off in the next video

play14:57

we're going to talk about the B basics

play14:59

of creating a house so we'll go through

play15:01

and create our actual first model in

play15:03

SketchUp so that's where we're going to

play15:04

wrap up part one of this video leave a

play15:06

comment below let me know what you

play15:07

thought are you new to SketchUp um is

play15:09

there something you'd like to do that

play15:10

you don't know how to do was any of this

play15:12

confusing for you I just love having

play15:13

that SketchUp conversation with you guys

play15:16

if you like this video please remember

play15:17

to click that like button down below if

play15:19

you're new around here remember to click

play15:21

that subscribe button for new SketchUp

play15:22

content every week if you like what I'm

play15:24

doing on this channel please consider

play15:26

visiting my support me page on my

play15:28

website that's the SketchUp

play15:30

essentials.com support that has

play15:32

everything from extensions you can

play15:34

purchase to support the show to links to

play15:36

my patreon page but in any case thank

play15:38

you so much for taking the time to watch

play15:40

this I really appreciate it and I will

play15:42

catch you in the next video thanks guys

Rate This
β˜…
β˜…
β˜…
β˜…
β˜…

5.0 / 5 (0 votes)

Related Tags
SketchUp Tutorial3D ModelingBeginner GuideAdvanced TipsSoftware BasicsDesign SoftwareArchitecture ToolModeling TechniquesSketchUp MakePush Pull Tool