Fusion 360 beginner's Exercise #5 - Fusion 360 tutorial

SPARK PLUG
12 Oct 201910:24

Summary

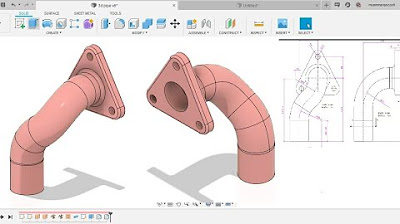
TLDRIn this tutorial video, the creator guides viewers through the process of designing a complex 3D model in Fusion 360, starting from basic sketches to intricate extrusions and chamfers. The video offers valuable insights and tricks for beginners, showcasing the creation of a detailed model with specific dimensions and features. Viewers are also provided with a high-resolution PDF for reference. The tutorial concludes with a demonstration of the loft command, a key technique for advanced 3D modeling in Fusion 360.

Takeaways

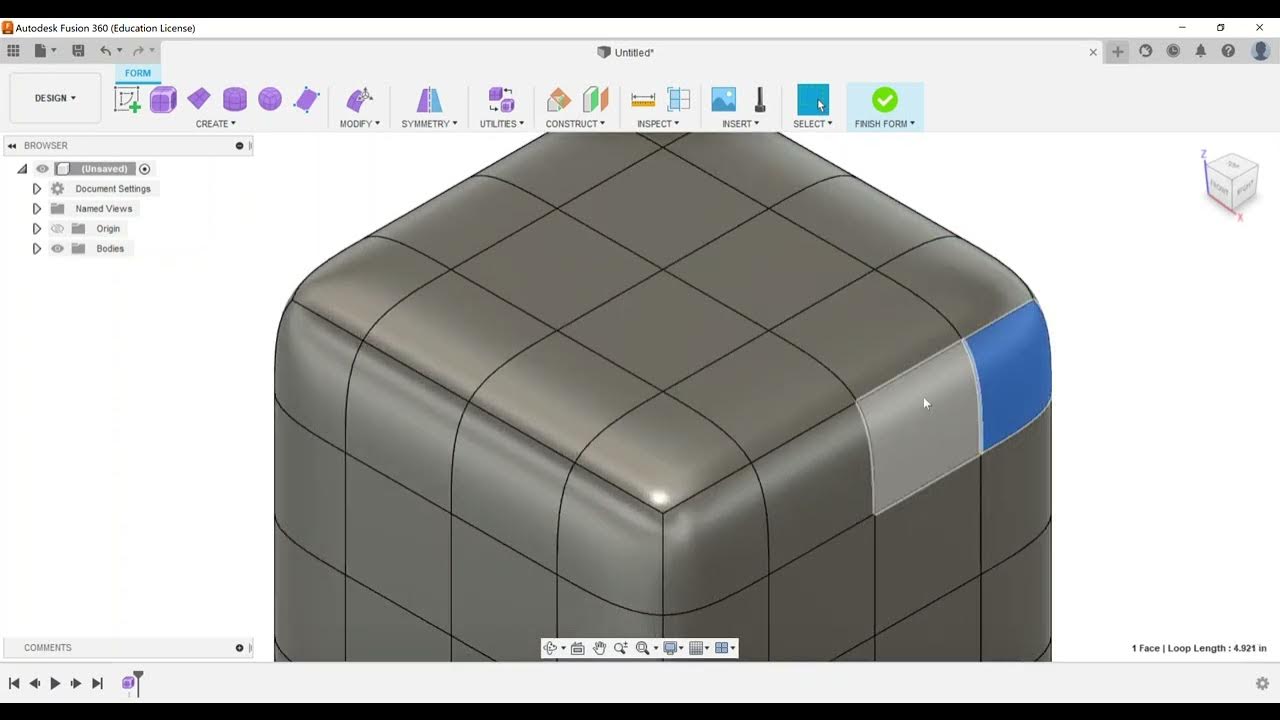
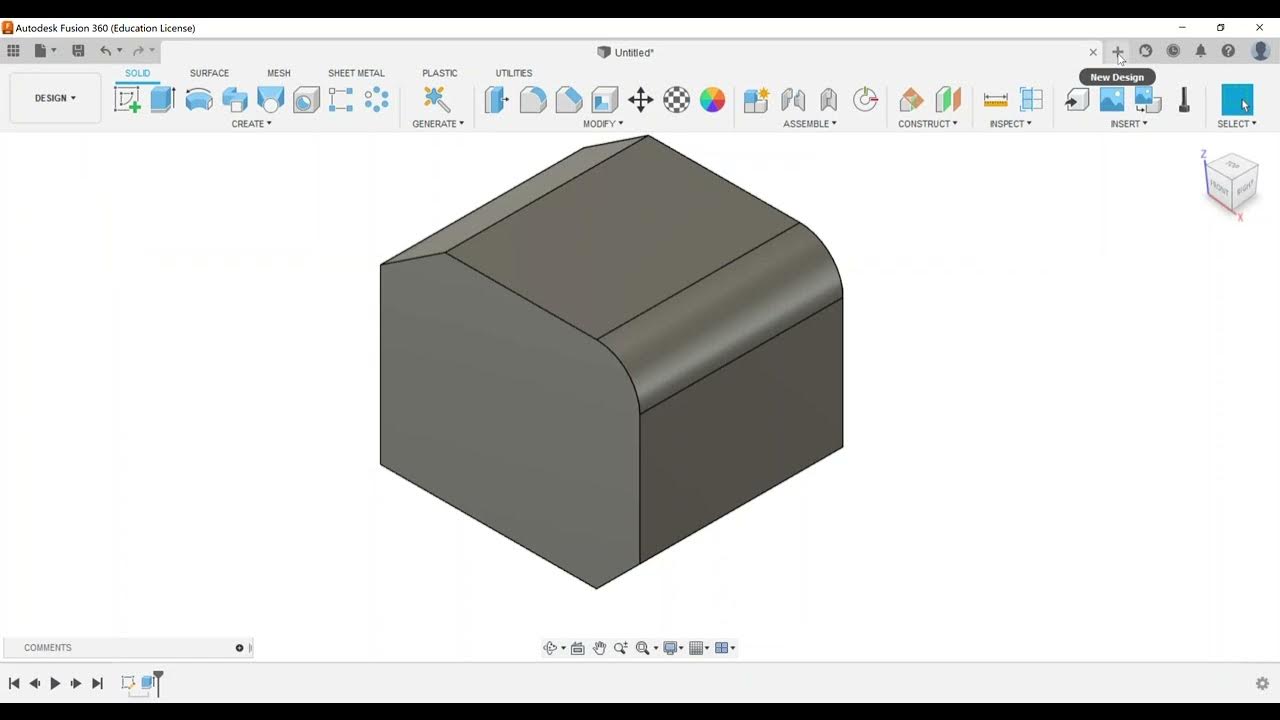
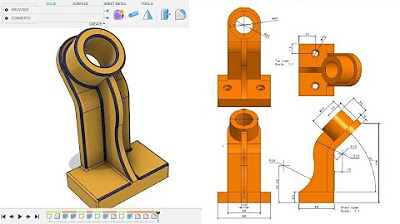
  • 😀 The video is a tutorial on creating a 3D model in Fusion 360, starting with a basic block and adding features like engraving and chamfers.
  • 🔍 The initial dimensions of the model are 70 mm in length, 40 mm in width, and 40 mm in height.
  • 📏 The first step involves creating a sketch with specific dimensions and extruding it to form the base of the model.
  • 🛠️ The tutorial demonstrates how to add chamfers to the model, which cannot be achieved with basic commands alone.
  • 📐 The process includes creating detailed sketches for the curves and cuts, such as a 40 mm wide rectangle with a depth of cut starting from the 20 mm mark on the 70 mm side.
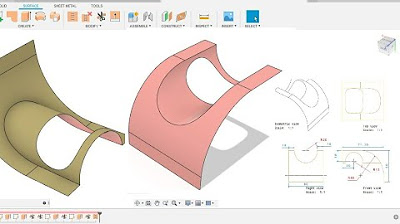
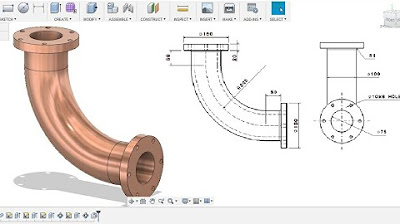
  • 🔨 The video explains the use of the 'Loft' command in Fusion 360 to create complex shapes that cannot be made with standard extrude or profile commands.
  • 🎨 The presenter makes a mistake during the tutorial, which is corrected, showing that the learning process involves trial and error.
  • 📚 A high-resolution PDF of the tutorial is available in the video description for those who want to follow along.
  • 🔍 The tutorial emphasizes the importance of understanding the model's dimensions and how they relate to the design process.
  • 🛑 The video mentions that certain features, like the chamfer, need to be manually created because they cannot be achieved with the 'Chain' command.
  • 🔄 The process involves multiple steps of sketching, extruding, and cutting to achieve the final model, highlighting the iterative nature of 3D modeling in Fusion 360.

Q & A

  • What is the main topic of the video?

    -The main topic of the video is to demonstrate how to create a 3D model using extruded fusion 360, with a focus on a specific design that involves complex modeling techniques.

  • What is the initial appearance of the model being created in the video?

    -The initial appearance of the model seems easy and simple, but it has intricate faces that cannot be modeled using basic commands like extrude and chain.

  • Who is the target audience for this video?

    -The target audience for this video is likely those who are new to Fusion 360 and want to learn advanced modeling techniques.

  • What are the dimensions of the engraved model in the video?

    -The dimensions of the engraved model are 70 mm in length, 40 mm in width, and 40 mm in height.

  • What is the first step in creating the model according to the video?

    -The first step is to switch to a new design, sketch a rectangle with specific dimensions (17 mm by 40 mm), and then extrude it to a distance of 40 mm.

  • What is the significance of the chamfer in the model?

    -The chamfer, which is at a 45-degree angle and has a depth of 20 mm, is a detail that adds complexity to the model and cannot be achieved with basic Fusion 360 commands.

  • How is the curve of the model detailed in the video?

    -The curve is detailed from the top view, showing a 40 mm width and a depth of cut that starts from 20 mm on the 70 mm side and extends to 30 mm.

  • What is the process for creating the chamfer on the model?

    -The chamfer is created manually by sketching a line at the midpoint of the relevant edges and then extruding it to the specified distance of 20 mm.

  • Why is the loft command used in the video?

    -The loft command is used because it allows for the creation of complex shapes that cannot be achieved with other commands like extrude or chamfer.

  • What is the final step in completing the model shown in the video?

    -The final step is to create a 3D sketch and use the loft command to form the complex face of the model, which is then cut using the join cut operation.

  • How can viewers access a high-resolution PDF of the model?

    -Viewers can find a high-resolution PDF of the model in the description below the video.

Outlines

00:00

🎥 Introduction to the Video and Overview

The video begins with a welcome message, indicating it will demonstrate how to create an extruded love design using Fusion 360. The presenter notes that while some parts of the design may appear simple, certain faces cannot be modeled using basic commands alone. The video aims to teach some tricks for beginners in Fusion 360, with a high-resolution PDF of the design available in the description. Initial steps include sketching the dimensions and extruding the basic shape.

05:01

📐 Detailed Sketching and Extrusion Steps

The next segment delves into the specific dimensions and steps needed to create the initial block of the design, including sketching dimensions of 70 mm by 40 mm and extruding it to a height of 40 mm. The presenter explains how to cut specific portions of the block based on given dimensions, making use of various commands such as sketching, dimensioning, and extruding specific sections. Emphasis is placed on accuracy in sketching and the importance of following the provided dimensions carefully.

10:04

🔧 Cutting and Chamfering Techniques

This section covers creating curves and chamfers on the design. The presenter highlights the complexity of achieving precise angles and dimensions, suggesting techniques for projecting lines and creating cuts. The explanation includes using constraints, making accurate sketches, and performing extrusions and cuts to achieve the desired shapes. The use of chamfer commands and manual adjustments to achieve specific angles and depths is discussed in detail.

🛠 Final Adjustments and Using the Loft Command

In the final part of the tutorial, the presenter focuses on the final adjustments needed to complete the design. This includes using the loft command to connect different profiles and create smooth transitions between faces. The challenges of using standard commands for certain shapes are addressed, and the presenter demonstrates how to create a 3D sketch and use the loft command to achieve the desired result. The video concludes with encouragement to viewers to try the techniques and share feedback.

Mindmap

Keywords

💡Fusion 360

Fusion 360 is a 3D CAD, CAM, and CAE software platform developed by Autodesk. It is widely used for creating and designing complex 3D models and is central to the video's theme of demonstrating how to model a specific object. In the script, the presenter uses Fusion 360 to model a 'love' object, showcasing its capabilities and the process involved in 3D modeling.

💡Extrude

Extrude is a common command in 3D modeling software that extends a 2D sketch or shape into a 3D object by pushing it along a path or distance. In the video, the presenter uses the extrude command to create the initial 3D block from which the 'love' object will be modeled.

💡Chamfer

A chamfer is a 45-degree beveled edge that is created to connect two surfaces at an angle, often used to reduce sharp edges and improve the aesthetics or functionality of a design. The script mentions creating a chamfer with a specific dimension, demonstrating one of the techniques used to refine the 'love' object's design.

💡Sketch

In 3D modeling, a sketch is a 2D drawing used to define the shape and size of a part of the model before it is extruded or manipulated into 3D. The video script describes creating various sketches for different parts of the 'love' object, such as the initial block and the chamfered edges.

💡Dimension

Dimension refers to the specific measurements used to define the size and proportions of a model in 3D design. The script provides various dimensions such as 70 mm in length, 40 mm in width, and 40 mm in height, which are critical in creating accurate models in Fusion 360.

💡Loft

Loft is a 3D modeling command that creates a smooth surface or shape between two or more profiles. The video script describes using the loft command to create a complex face of the 'love' object, which cannot be achieved with basic extrude or chamfer commands.

💡3D Sketch

A 3D sketch is a free-form sketch that exists in the three-dimensional space of the model, allowing for the creation of complex curves and shapes that are not confined to a single plane. The script mentions creating a 3D sketch to define the path for the loft operation, which is essential for the final shape of the 'love' object.

💡Join Cut

Join Cut is a type of operation in 3D modeling that combines cutting and joining processes to create a single, unified shape. In the context of the video, the presenter uses the join cut operation to form the final 'love' object by combining different parts of the model.

💡Profile

In 3D modeling, a profile is the cross-sectional shape used to define the outline of an object or part of an object. The script refers to selecting a profile for the loft command, which is the shape that will be swept along a path to create the final 3D form.

💡Resolution

Resolution in the context of the video refers to the clarity and detail of the PDF document provided for the viewers, which contains the step-by-step instructions for the modeling process. High resolution ensures that the details in the PDF are clear and easy to follow.

Highlights

Introduction to a tutorial on creating a 3D model in Fusion 360 with advanced techniques.

The model appears complex with intricate details that cannot be achieved using basic Fusion 360 commands.

The video offers a chance for beginners to learn advanced modeling tricks.

A high-resolution PDF of the model is available for download in the video description.

Initial dimensions of the model are provided: 70 mm in length, 40 mm in width, and 40 mm in height.

Instructions on creating a sketch and setting dimensions using Fusion 360's interface.

Demonstration of extruding the sketch to form the base of the model.

Explanation of creating chamfers and extruding complex shapes that require manual adjustments.

Guidance on making a 3D sketch for a specific cutout portion of the model.

Details on creating a rectangle for the cutout and using constraints for accuracy.

Use of the 'Extrude' command to create the cutout's shape with specific depth and dimensions.

The importance of sketching accurately to avoid errors in the 3D model.

Creating a chamfer manually due to limitations of Fusion 360's automatic chamfer tool.

Instructions on using the 'Loft' command for complex face creation not possible with other tools.

A step-by-step guide on creating a 3D sketch for the 'Loft' operation.

Completion of the model with a discussion on the practical applications of the techniques shown.

Encouragement for viewers to comment, share, and subscribe for more content.

Transcripts

play00:00

[Music]

play00:06

[Music]

play00:08

hey guys and welcome back to another

play00:10

video of the spark look so in this video

play00:12

I'm going to show you how to make this

play00:14

love from extruded fusion 360 at first

play00:19

it might look and easy burned but to

play00:21

some of its faces like this one and this

play00:24

one cannot be modelled just by making

play00:28

use of basic commands like extrude and

play00:31

chain 4 so if you are new to fusion 360

play00:34

this might have a chance we learn you

play00:39

some tricks so let's get started and

play00:41

also you can find the high resolution

play00:43

PDF of this to detroit in the

play00:46

description below so let's get started

play00:48

so at first you can see that it's

play00:53

actually engraved on it and girl vlog

play00:55

whose dimension we can see in the top

play00:58

view to top view it's 70 mm in length

play01:01

and 40 mm in width and also the height

play01:04

is 40 mm as you can see in the left view

play01:07

or the side view so what we are going to

play01:09

do we are going to make a flop of 50 by

play01:11

75 41st and then we will do the cutting

play01:15

according to the throne provided so let

play01:19

me start it what you have to do is

play01:21

switch to new design and we have to

play01:24

sketch and click on taste or the angle

play01:29

press in for dimension this dimension

play01:32

will be 17 and 40 mm and press finish

play01:40

the sketch now we have to exclude it up

play01:43

to a distance of 4 40 mm the selected

play01:48

apps root of 2 T so a new component

play01:54

now the next step is basically you guys

play01:58

can see if basically it's a chamfer of

play02:00

40 or 45 degree and it's an extrude Kurt

play02:04

and he also said it's cool to be a flute

play02:07

made at least of manually as the chamber

play02:09

is not possible as and we have to make

play02:12

this place also so what we are going to

play02:14

do we are going to first still but this

play02:16

portion out of the block then this one

play02:18

so to cut this portion you guys can see

play02:21

from the top view the detail of this

play02:24

curve so basically it's a 40 mm width

play02:27

and depth of cut is

play02:29

Pirtle starts from the 20 mm from the 70

play02:34

mm side and as you can see and it's 30

play02:38

mm here so basically it's 30 and 70

play02:40

minus 30 is 40 so here we are going to

play02:44

make a rectangle of foot-high to 20 mm

play02:48

and the base would be 40 mm so for that

play02:51

just click on create a sketch for the

play02:54

top click alpha line draw a line from

play03:00

here to here then press T what I

play03:05

mentioned click on this one and this one

play03:08

and right platform so press escape total

play03:13

incidence constraint click on this point

play03:17

and this line with equal strength if on

play03:20

this line and this line looking for stir

play03:22

the ste for dimension and keep the

play03:24

tension from this point through this has

play03:27

20 mm and from this point to this point

play03:32

has 30 you don't have to make the entire

play03:36

sketch as fusion can detect that it's a

play03:40

closed body what you have to do it if

play03:44

one x killed upon this one and this

play03:47

skewed ok so we have just made our this

play03:51

step okay if I just use to talk you guys

play03:55

can see it's just like this but now we

play03:58

have to do what you have to do that will

play04:00

make this curve and it's absolutely

play04:02

similar like the one we of

play04:04

with top things only thing that changes

play04:07

is the face now we have to make this

play04:10

simple simpler similar extra skirt on

play04:13

the front view of the profile

play04:16

so again she's to isometric create a

play04:20

sketch switch top select the front plane

play04:22

and again click L now we know that this

play04:27

point is the 30mm from dit click on this

play04:31

and as you can see the height is 40mm so

play04:33

we have to choose the midpoint of this

play04:38

line so for that you guys can just

play04:41

select the midpoint like this it will

play04:43

automatically detect the midpoint or do

play04:47

just the other ways you make it manually

play04:51

like coincident and first in four

play04:54

dimension difficult and engine off 20

play04:58

min from bottom now this time this face

play05:01

is not up to the last sketch so fusion

play05:04

will not detect error if it's off your

play05:06

sketch or talk what we have to do is we

play05:10

have to make the sketch ship half the

play05:13

flow so simply press import project

play05:17

select this line and this this line and

play05:21

okay that's a flow sketch mister stitch

play05:26

go to Ustream and just

play05:32

you can just write desk it for now

play05:39

okay okay I've done something wrong

play05:42

just like Wanda stupid one yeah gif I

play05:50

didn't guess wrong so that's good like

play05:54

this

play05:56

yes so what we have to end here we have

play06:11

created of this skirt on the side now

play06:15

the only thing left is this chain for

play06:17

the chamfer dimension is given specific

play06:19

degree and or chamfer of 20 mm so let me

play06:22

just show you one thing if I just keep

play06:24

on chamber and what we have the list if

play06:28

chamber extends to this these two things

play06:30

is also while if we just look at the

play06:34

point beneath chamber on these key

play06:36

places only so what we have to do is the

play06:40

chamfer using the chain of command is

play06:42

not possible to make manual chamber

play06:44

before that just switch back to this

play06:48

back view and just click on a sketch now

play06:52

we have to make them language chamber of

play06:54

20 M L so this L 4 9 and this if you

play06:59

just put your cursor on middle of this

play07:04

line you guys can see them people snap

play07:07

the midpoint so this at at me it's 20 40

play07:12

by 40 mm block so the midpoint will

play07:15

automatically be at 20 mm similarly if

play07:18

we test from here now you don't have to

play07:21

use the scale address on the face click

play07:24

on this click on extrude and what we

play07:27

have to do is we have don't have to make

play07:29

the entire extrusion the extra length

play07:32

this time would be given in the front

play07:34

view it's 30 mm the length from here to

play07:36

here so just extrude it to a distance of

play07:39

30 mm so this is how it will look like

play07:43

so the only thing left is to make this

play07:47

face so this is the tricky one because

play07:49

no other command not the chamber not too

play07:52

soft any other profile or they stood

play07:56

command pull that if I try to extreme

play07:58

cut it it will look like this if I try

play08:01

to make use of faithful then it will

play08:04

look like this so what we have to do is

play08:06

we are going to make use of loft command

play08:09

so basically it's a simple one it will

play08:12

ask you to profile the tooth profile in

play08:15

which you want the loft to be created so

play08:17

just click on this face and the beauty

play08:20

of 15 360 deck you don't have to select

play08:23

an entire profile on it

play08:24

sketch to knock that complicated you can

play08:27

simply just select this point at me this

play08:31

press on just let me just

play08:37

it is not snapping the point now what we

play08:41

have to do is just sit on the back click

play08:44

on create a sketch on any face like

play08:47

suppose that so what we have to do is

play08:50

make sure your 3d sketches on press L

play08:54

and from this point I am know that I'm

play08:57

not making the sketch from this point

play08:59

but we are going to make a 3d sketch so

play09:01

just from this point to this point make

play09:06

a 3d line and place that stitch you guys

play09:09

can also project projected it using the

play09:12

project command or just taking off like

play09:16

that P and 3 million 360 so just click

play09:20

on create click on loft select on this

play09:23

space and select on this point it will

play09:26

automatically create a loft and it will

play09:29

the operation is join cut so the choose

play09:31

the operation cut and press ok so this

play09:34

is how we will make the space and this

play09:37

and that's completes our today's

play09:40

exercise on conversion improving typing

play09:42

in 3d view so hope you guys will enjoy

play09:46

the video please comment anywhere in the

play09:49

suggestions don't want if you share and

play09:51

subscribe my channel

play09:54

[Music]

play10:03

[Music]

play10:14

you

play10:18

[Music]

Rate This

5.0 / 5 (0 votes)

Related Tags
Fusion 3603D ModelingDesign TutorialCAD SoftwareExtrusion TechniquesChamfer CommandsLoft CommandSketch Creation3D DesignEngineering TutorialVideo Guide