CARA INSTALL DAN KONFIGURASI DHCP SERVER PADA LINUX UBUNTU SERVER 23.10 (ISC DHCP SERVER)
Summary
TLDRThis video tutorial guides viewers on configuring a DHCP server on Ubuntu Server 23.10 using the ISC DHCP server application. The presenter covers the installation process, network settings in VirtualBox, and command-line interface steps for updating, installing the DHCP server, and configuring it to assign IP addresses within a specified range. It also includes setting up DNS and gateway configurations, ensuring the server is connected to the internet, and verifying client connectivity by assigning IP addresses automatically.
Takeaways
- 🌐 The video is a tutorial on configuring a DHCP server on Ubuntu Server 23.10.
- 💻 The server is installed on VirtualBox, and network settings are adjusted for communication between the virtual machine and the host.
- 🔌 The video ensures that the server is connected to the network and can access the internet, which is crucial for the DHCP server installation.
- 🛠️ The user interface for Ubuntu Server 23.10 has changed, and all commands are executed via the command line interface (CLI).
- 🔑 The video demonstrates logging in as the 'itbi' user and entering the password, which does not display characters as they are typed for security.
- 📡 The script checks the IP address of the Ubuntu Server 23.10, which is 192.168.1.2, with the interface being ens3.
- 🌐 The video includes a step to ping google.com to confirm the server's internet connectivity.
- 🔄 The tutorial updates the server with 'sudo apt update' before proceeding with the installation of the DHCP server software.
- 📦 The ISC DHCP server is chosen and installed using 'sudo apt install isc-dhcp-server'.
- ✏️ Configuration of the DHCP server involves editing files in '/etc/default/' and '/etc/dhcp/dhcpd.conf' to set the network interface, IP range, and other necessary parameters.
- 🔄 The video shows how to define the IP range for DHCP clients, set the DNS server to Google's public DNS (8.8.8.8 and 8.8.4.4), and configure the subnet mask and default gateway.
- 🔄 After configuration, the DHCP server is started with 'sudo systemctl start isc-dhcp-server', and its status is checked to ensure it's running properly.
- 🖥️ The tutorial concludes with a demonstration of a client computer requesting an IP address from the DHCP server and receiving an IP within the defined range.
Q & A
What is the purpose of the video?
-The purpose of the video is to discuss and demonstrate how to configure a DHCP server on Ubuntu Server 23.10.
Which version of Ubuntu Server is used in the video?
-The video uses Ubuntu Server 23.10.
What is the virtualization software used in the video?
-The virtualization software used is VirtualBox.
How is the network adapter configured in VirtualBox for the virtual machine?
-The network adapter is configured as a host-only adapter to allow communication between the virtual machine and the host machine.
What is the IP address of the Ubuntu Server 23.10 in the video?
-The IP address of the Ubuntu Server 23.10 is 192.168.1.2.
What command is used to check the IP address of the server?
-The command used to check the IP address is 'ifconfig'.
What does the acronym 'DHCP' stand for?
-DHCP stands for Dynamic Host Configuration Protocol.
Which application is installed for the DHCP server?
-The application installed for the DHCP server is ISC DHCP server.
How is the ISC DHCP server application installed?
-The ISC DHCP server is installed using the command 'sudo apt install isc-dhcp-server'.
What is the configuration file for the ISC DHCP server?
-The configuration file for the ISC DHCP server is located at '/etc/dhcp/dhcpd.conf'.
What is the range of IP addresses that the DHCP server will assign to clients?
-The DHCP server will assign IP addresses in the range of 192.168.1.100 to 192.168.1.130.
What is the default gateway defined in the DHCP server configuration?
-The default gateway defined in the DHCP server configuration is 192.168.1.1.
How can the status of the DHCP server be checked?
-The status of the DHCP server can be checked using the command 'systemctl status isc-dhcp-server'.
How is the DHCP server started after configuration?
-The DHCP server is started using the command 'sudo systemctl start isc-dhcp-server'.
Outlines

This section is available to paid users only. Please upgrade to access this part.
Upgrade NowMindmap

This section is available to paid users only. Please upgrade to access this part.
Upgrade NowKeywords

This section is available to paid users only. Please upgrade to access this part.
Upgrade NowHighlights

This section is available to paid users only. Please upgrade to access this part.
Upgrade NowTranscripts

This section is available to paid users only. Please upgrade to access this part.
Upgrade NowBrowse More Related Video

How to configure DHCP server | DHCP server configuration step by step

How to setup RADIUS in MikroTik (HapLite) and Windows Server

Instalasi dan Konfigurasi DHCP Server Pada Debian 10 Buster
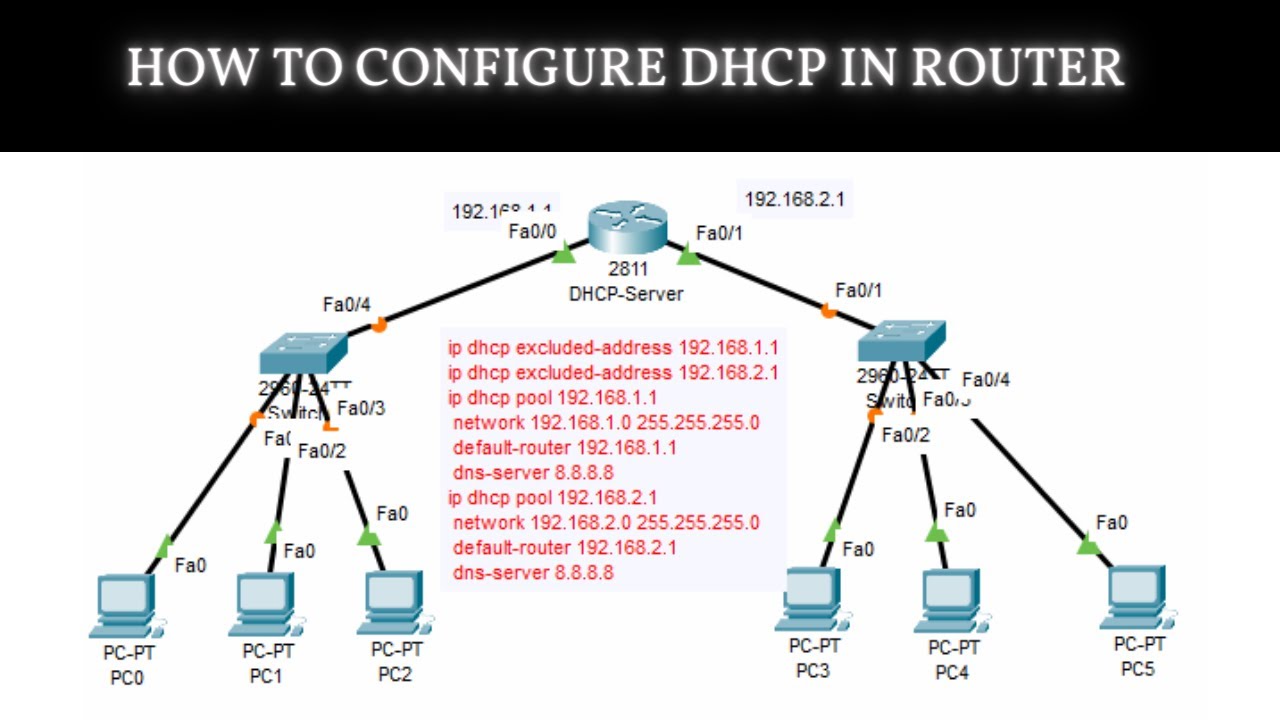
How to Configure DHCP in CISCO router in Packet Tracer | DHCP Server in CCNA | DHCP Configuration

Windows Server 2012 r2 Tutorial Tagalog!
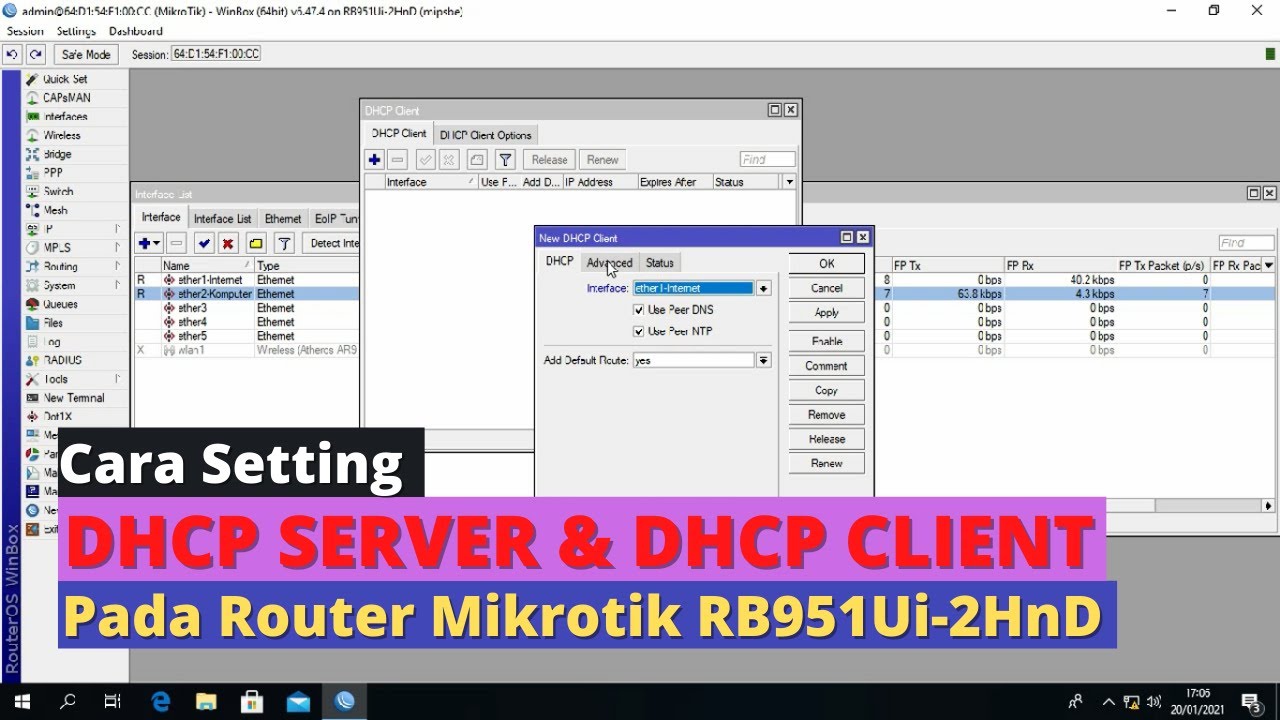
Konfigurasi DHCP Server dan DHCP Client pada Router Mikrotik RB 951Ui-2HnD
5.0 / 5 (0 votes)