PROJECT ARDUINO PENYIRAM TANAMAN OTOMATIS /SMARTGARDEN BERBASIS ARDUINO NANO DAN SENSOR SOILMOISTURE
Summary
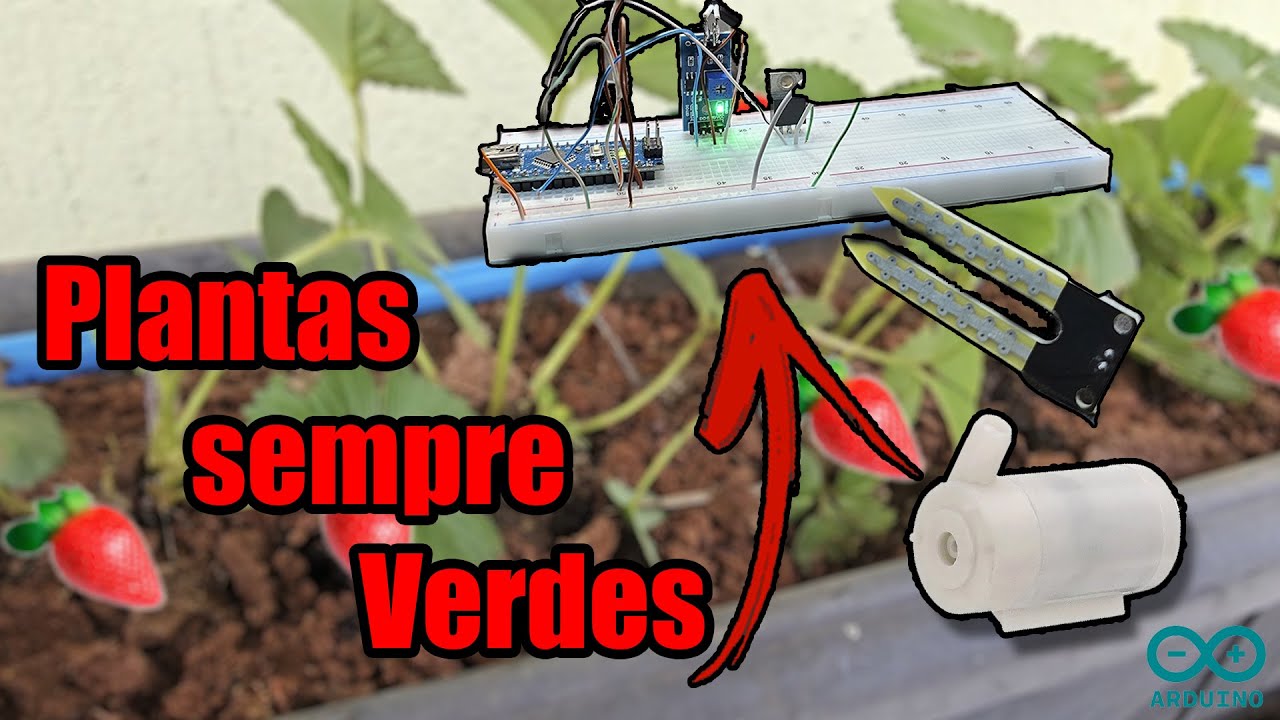
TLDRIn this video, the creator demonstrates how to build an automated plant watering system using Arduino. The system incorporates an LCD display (2x16 character) to show soil moisture levels, helping users monitor the condition of the plants. The hardware setup includes an Arduino Nano, relay, soil moisture sensor, an i2c LCD, and a modified waterproof AC pump. The system automatically waters the plants when the soil is dry and stops when the soil reaches the desired moisture level. The creator walks through the setup, testing the system, and highlights how the LCD adds valuable real-time information for better control.
Takeaways
- 😀 The project focuses on creating an automatic plant watering system with an LCD display showing soil moisture status.
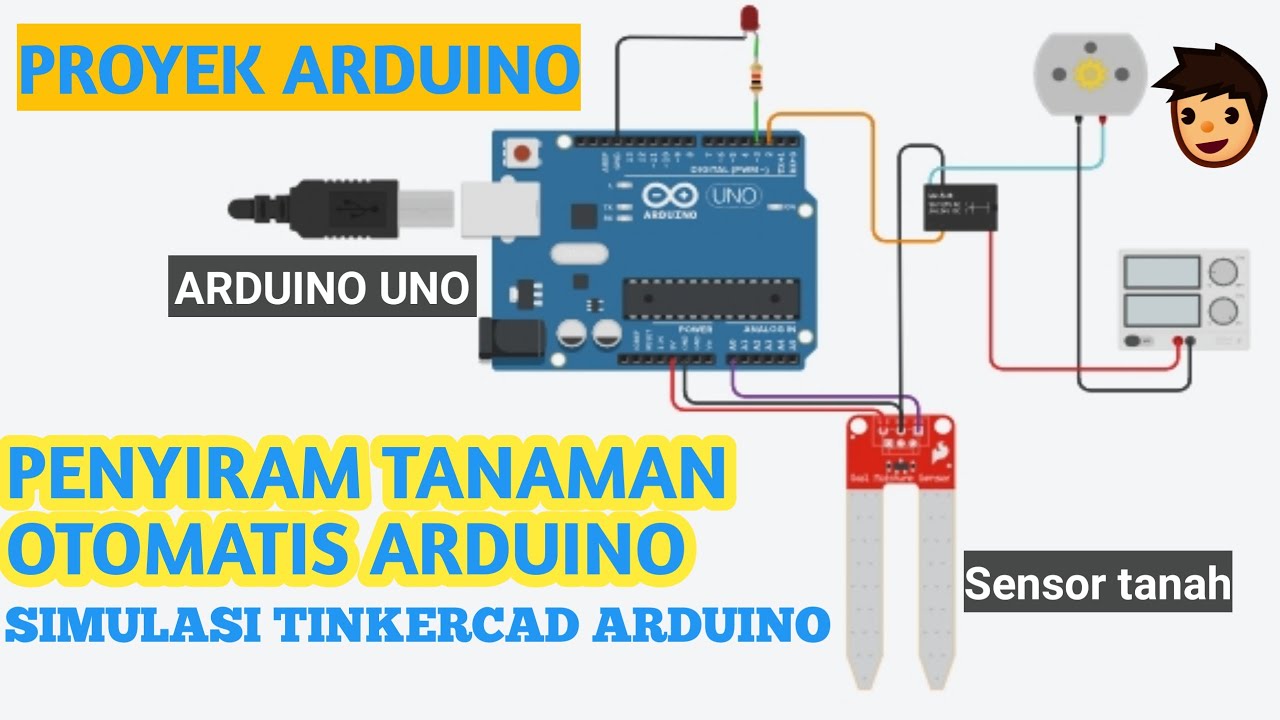
- 😀 The Arduino Nano is used as the central controller for this project, along with a relay, soil moisture sensor, and an LCD with I2C communication.
- 😀 The system is designed to water plants automatically based on soil moisture readings, providing real-time feedback on soil conditions.
- 😀 The LCD display will show whether the soil is dry or wet, making the project more informative and easier to monitor.
- 😀 Hardware components include an Arduino Nano, relay for controlling the pump, a soil moisture sensor, and an AC water pump.
- 😀 An AC submersible pump is used for watering the plants, capable of being submerged in water.
- 😀 Power for the system is supplied via a 12V 2A adapter to ensure enough current for the pump and other components.
- 😀 The relay is controlled by a digital pin (D2) on the Arduino, while the soil moisture sensor connects to an analog pin (A0).
- 😀 The LCD is connected using I2C communication, allowing it to display the status of the soil moisture sensor and the pump.
- 😀 The system automatically activates the pump when the soil is dry and turns it off once the soil moisture reaches a sufficient level, ensuring efficient plant watering.
Q & A
What is the purpose of the Arduino project described in the video?
-The project aims to create an automatic plant watering system with an LCD display that shows the soil condition (wet or dry) to provide more informative feedback about the sensor and pump status.
Which hardware components are used in the project?
-The project uses an Arduino Nano, a relay, a soil moisture sensor, an LCD display with I2C, a waterproof AC pump, and a 12V 2A power supply adapter.
How does the LCD display function in this project?
-The LCD display is used to show the soil moisture condition, indicating whether the soil is wet or dry. It helps monitor the sensor and pump status, making the system more informative.
What role does the relay play in the automatic watering system?
-The relay acts as an actuator that controls the on/off operation of the AC pump. It switches the pump on when the soil is dry and off when the soil is wet.
Why is the soil moisture sensor important in this project?
-The soil moisture sensor detects the dryness or wetness of the soil. This information is used to control the pump, turning it on when the soil is dry and off when it is wet.
How is the connection between the hardware components set up?
-The relay is connected to digital pin D2 on the Arduino, while the soil moisture sensor is connected to analog pin A0. The I2C LCD uses the SDA and SCL pins for communication, and the pump is controlled through the relay.
What is the significance of using an AC waterproof pump in this project?
-The AC waterproof pump is chosen because it can be submerged in water, making it suitable for watering plants in an outdoor or garden setting.
What happens when the soil moisture sensor detects dry soil?
-When the sensor detects dry soil, the system activates the pump through the relay, which then waters the plants until the sensor detects that the soil is wet.
Can this automatic watering system be used outdoors?
-Yes, the system is designed to be used outdoors as it uses a waterproof pump, and the moisture sensor can be placed in the soil to monitor its condition.
How does the system stop watering once the soil is sufficiently moist?
-Once the soil moisture sensor detects that the soil is wet, the system turns off the pump by deactivating the relay, stopping the watering process.
Outlines

このセクションは有料ユーザー限定です。 アクセスするには、アップグレードをお願いします。
今すぐアップグレードMindmap

このセクションは有料ユーザー限定です。 アクセスするには、アップグレードをお願いします。
今すぐアップグレードKeywords

このセクションは有料ユーザー限定です。 アクセスするには、アップグレードをお願いします。
今すぐアップグレードHighlights

このセクションは有料ユーザー限定です。 アクセスするには、アップグレードをお願いします。
今すぐアップグレードTranscripts

このセクションは有料ユーザー限定です。 アクセスするには、アップグレードをお願いします。
今すぐアップグレード関連動画をさらに表示
Sistema de Irrigação Automática com Arduino e Sensor de Umidade do Solo
PROYEK ARDUINO PENYIRAM TANAMAN OTOMATIS DENGAN SENSOR KELEMBABAN TANAH SIMULASI TINKERCAD ARDUINO

Prototipe Penyiram Tanaman Otomatis

Penyiram Tanaman Otomatis Soil Moisture Sensor VLOG118

Project Membuat Palang pintu otomatis Jalan tol

Membuat Pintu geser otomatis | automatic sliding door
5.0 / 5 (0 votes)
