OV7670 Camera module to PC with Arduino (SIMPLIFIED!)
Summary
TLDRThis tutorial demonstrates how to use an Arduino to stream images from the OV7670 camera module to a computer. It highlights the setup process, including the necessary components, wiring instructions, and code configuration for effective communication. The tutorial emphasizes using a clone Arduino for higher baud rates and covers troubleshooting tips for common issues. By following the steps outlined, users can achieve successful image streaming, making it a valuable resource for DIY electronics enthusiasts looking to explore camera integration with Arduino.
Takeaways
- 📷 This tutorial teaches how to stream images from the OV7670 camera module to a computer using Arduino.
- 💻 The focus is on the OV7670 model without the FIFO chip for better image streaming.
- 🛠️ Users need to download the 'Ardu Image Capture' plugin and set it up in the Arduino IDE for image capture.
- 🔌 Ensure to use an Arduino Uno or Nano, preferably a clone with a CH340 chip, for optimal baud rates.
- 🔌 Components required include the OV7670 camera, resistors, a breadboard, and jumper wires.
- 📥 Download the live OV7670 project from GitHub and set it up in the Arduino libraries folder.
- ⚙️ Modify the code in the setup.h file to enable serial communication instead of using a tiny screen.
- 🔍 After uploading the code, use the 'Ardu Image Capture' tool to test the communication with the camera.
- 🔧 Create a voltage divider to adapt the Arduino's 5V clock signal down to 3.3V for the camera module.
- ⚠️ Troubleshoot by checking connections and wiring if the camera does not display images correctly.
Q & A
What is the main purpose of this tutorial?
-The tutorial teaches how to stream images from the OV7670 camera module to a computer using Arduino.
Which model of the OV7670 camera module is used in this tutorial?
-The tutorial focuses on the OV7670 camera module without the FIFO chip.
What type of Arduino is recommended for this project?
-An Arduino Uno or Nano is recommended, preferably a clone with the CH340 chip for better performance.
What resolution can you achieve with a genuine Arduino?
-With a genuine Arduino, the maximum resolution achievable is a quarter VGA, which is 320 by 240 pixels.
What are the main components needed to set up the OV7670 camera module?
-You need the OV7670 camera module, resistors for the I²C connection, a breadboard, jumper wires, and an Arduino board.
What is the function of the voltage divider in the setup?
-The voltage divider is used to reduce the 5V clock signal from the Arduino to about 3.3V for the camera module.
How do you check if the communication between the Arduino and the camera is working?
-You should see a solid red rectangle in the Ardo Image Capture interface, indicating communication but no camera detection.
What should you do if the image appears as green and wavy?
-If the image is green and wavy, check the I²C wiring connections to ensure they are correct.
What is the purpose of pulling the camera's reset pin to 3.3V?
-Pulling the reset pin to 3.3V ensures the camera module powers up correctly and functions properly.
Can you achieve higher frame rates with this setup?
-Yes, by connecting the OV7670 to a tiny LCD screen, you can achieve frame rates of up to 10 frames per second.
Outlines

Dieser Bereich ist nur für Premium-Benutzer verfügbar. Bitte führen Sie ein Upgrade durch, um auf diesen Abschnitt zuzugreifen.
Upgrade durchführenMindmap

Dieser Bereich ist nur für Premium-Benutzer verfügbar. Bitte führen Sie ein Upgrade durch, um auf diesen Abschnitt zuzugreifen.
Upgrade durchführenKeywords

Dieser Bereich ist nur für Premium-Benutzer verfügbar. Bitte führen Sie ein Upgrade durch, um auf diesen Abschnitt zuzugreifen.
Upgrade durchführenHighlights

Dieser Bereich ist nur für Premium-Benutzer verfügbar. Bitte führen Sie ein Upgrade durch, um auf diesen Abschnitt zuzugreifen.
Upgrade durchführenTranscripts

Dieser Bereich ist nur für Premium-Benutzer verfügbar. Bitte führen Sie ein Upgrade durch, um auf diesen Abschnitt zuzugreifen.
Upgrade durchführenWeitere ähnliche Videos ansehen

Membuat Alat Kontrol Peralatan Listrik Jarak Jauh - ARDUINO PROJECT INDONESIA

SIM800L with arduino Tutorial. How to send, receive SMS and make a call.
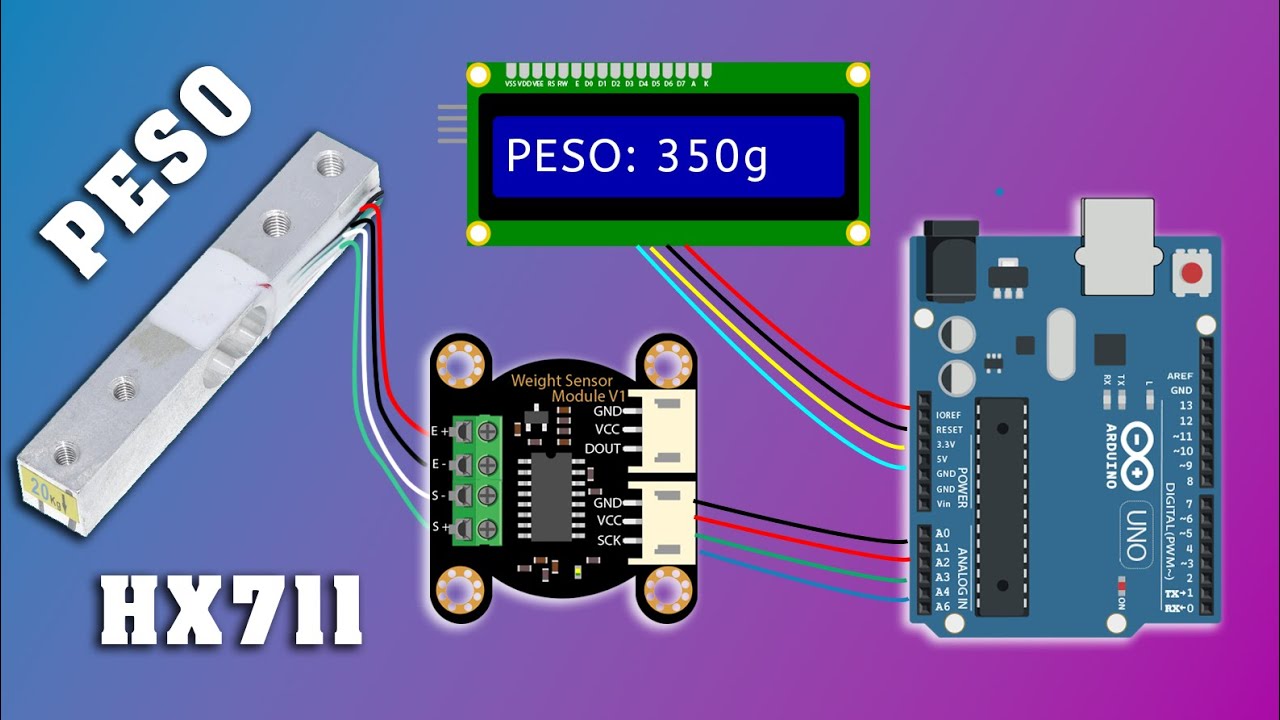
TODO sobre EL SENSOR de PESO con MODULO HX711 , Peso EXACTO con arduno || Tutorial
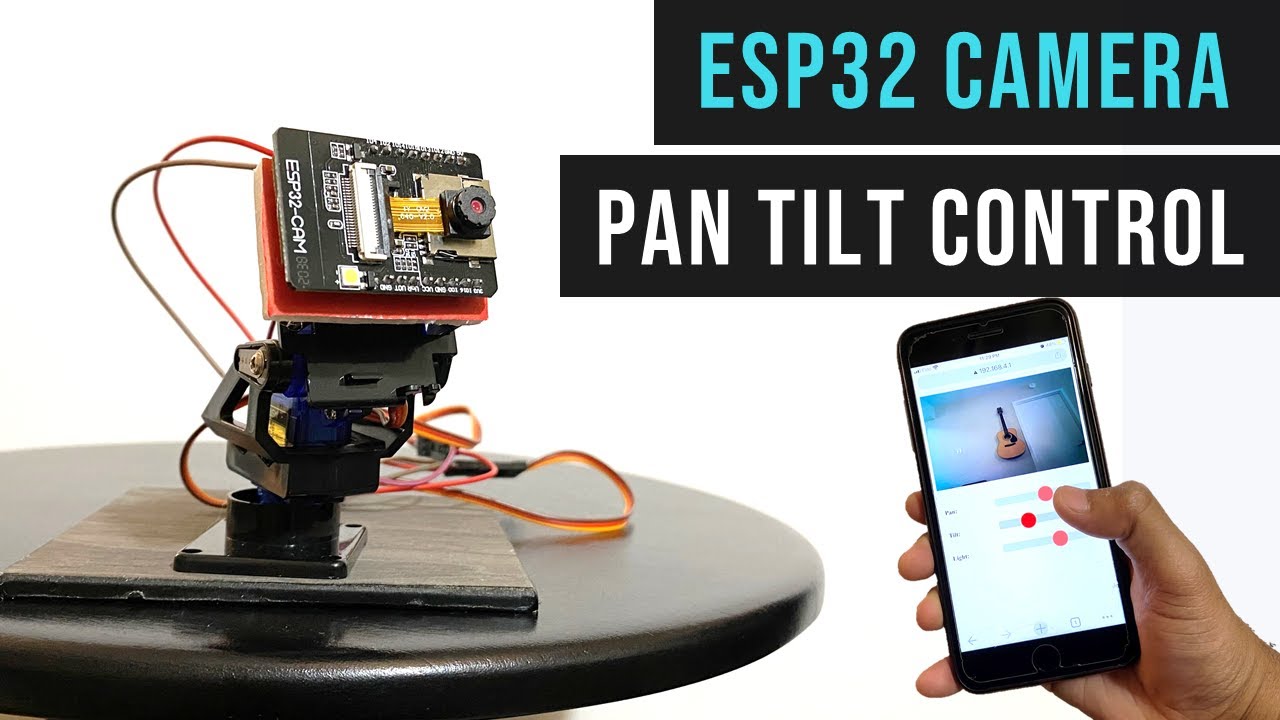
Pan Tilt Control using Servos for ESP32 Cam | WiFi Security Camera
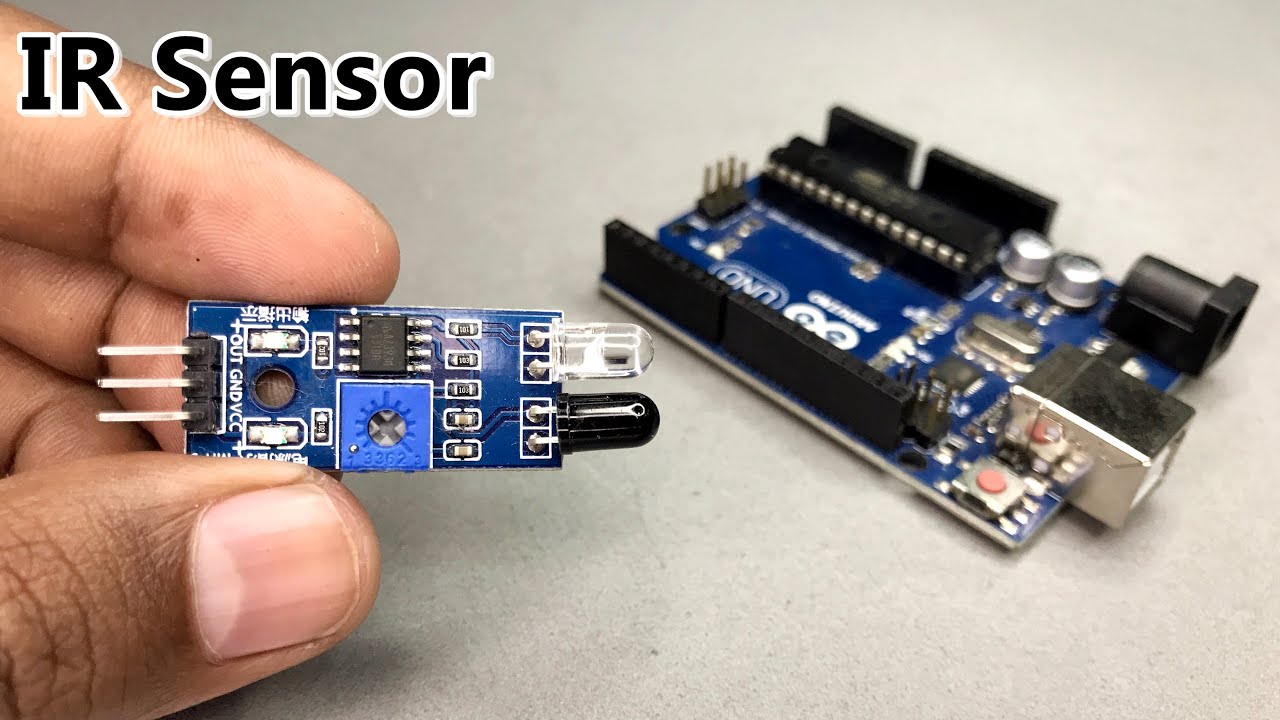
VERY EASY Arduino IR Sensor Tutorial for Beginners | IR Sensor Arduino Tutorial | Infrared Sensor
Arduino Analog Inputs
5.0 / 5 (0 votes)
