#234 ANODIZZARE ALLUMINIO COLORATO FAI DA TE - How to ANODIZE and COLOR ALUMINIUM DIY [SUB ENG]
Summary
TLDRIn this video, the process of anodizing aluminum is explained step by step, focusing on creating a protective layer of aluminum oxide. This layer increases hardness, provides resistance to wear and atmospheric agents, and allows for coloring the metal. The presenter demonstrates the entire procedure, from cleaning and preparing the aluminum to calculating the correct current for anodizing and applying dyes for vibrant colors. Key safety precautions, such as working with chemicals like sulfuric acid, are highlighted. Viewers are encouraged to try anodizing at home using easily accessible tools.
Takeaways
- 🔧 Anodizing is a chemical/electrochemical treatment for aluminum, creating a hard aluminum oxide layer (alumina) that protects the surface.
- 🔬 The anodized layer has a hardness of 9 on the Mohs scale, similar to corundum, offering excellent protection against wear and atmospheric agents.
- 🎨 Anodizing allows for coloring aluminum in various colors like red, blue, green, and purple by introducing dyes into the porous oxide layer.
- 🧪 Anodizing involves creating deep pores in the surface oxide layer of aluminum, which can be used to hold dye, resulting in a colorful, durable finish.
- ⚙️ Sodium hydroxide (10g per 100ml) is used to pickle and clean the aluminum surface before anodizing, ensuring better adherence of the anodized layer.
- 🔌 The current applied during anodizing affects pore size, with tighter pores resulting in more resistance and looser pores allowing for better coloring.
- ⚗️ A sulfuric acid solution (170g per liter) is used for anodizing, and it's critical to maintain the solution below 21°C to prevent degradation of the oxide layer.
- 📏 The formula for calculating current density during anodizing is 0.03 x time (in minutes) x current density (mA per cm²), controlling the thickness of the oxide layer.
- 🎨 Jet printer ink is recommended for more consistent and precise color results, compared to food or clothing dyes, allowing for custom color mixes.
- 💧 After dyeing the anodized piece, it is sealed in boiling water or steam to close the pores and lock in the dye, making the color permanent.
Q & A
What is anodizing, and why is it done?
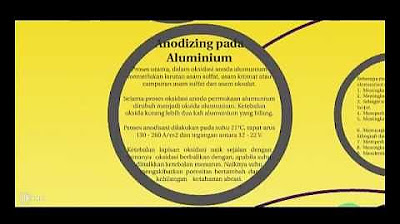
-Anodizing is a chemical or electrochemical treatment primarily used on aluminum at an industrial level. It creates a protective layer of aluminum oxide (alumina), which is very hard and helps strengthen the external surface, protecting it from atmospheric agents and wear.
How does anodizing enhance the surface of aluminum?
-Anodizing creates a thick layer of aluminum oxide that increases surface hardness (9 on the Mohs scale, similar to corundum), which makes the material more resistant to wear and environmental damage. Additionally, anodizing allows for coloring the material by introducing dyes into the pores of the oxide layer.
What is the process of preparing aluminum for anodizing?
-The aluminum part must first be mechanically cleaned and degreased to avoid stains. Then, it is treated with a sodium hydroxide solution to pickle the surface, removing any pre-existing anodizing or impurities.
How does the oxide layer formed by anodizing enable the coloring process?
-Anodizing creates pores on the aluminum surface that deepen into the metal, forming a honeycomb structure. These pores allow the introduction of dye, and their size can be controlled by adjusting the current during the anodizing process, affecting both surface strength and coloring quality.
What are the different thicknesses of anodizing, and what applications are they suitable for?
-Anodizing thickness can range from 5 microns for aesthetic purposes to 25 microns for architectural structures. Thicker anodizing layers offer greater protection, with 10 microns for indoor applications, 15 microns for outdoor use, and up to 25 microns for highly corrosive environments like those near the sea.
How is the current for anodizing calculated?
-The current density is calculated using the formula: (oxide thickness in microns) / (0.03 * treatment time in minutes). For example, to achieve 10 microns of oxide in 50 minutes, the current density would be 6.6 milliamps per square centimeter, which is then multiplied by the part’s surface area.
Why is temperature control important during anodizing?
-Temperature control is crucial because excessive heat can degrade the oxide layer being formed. The electrolyte solution should remain below 21°C, and for larger parts, a cooling system may be needed to maintain this temperature.
What are the advantages of using inkjet printer ink for coloring anodized parts?
-Inkjet printer ink offers more precise and consistent results than fabric or food dyes, which are harder to dose. The ink percentages can be accurately measured, allowing for better control over color intensity and consistency across multiple parts.
How does sealing the anodized part in boiling water affect the final result?
-Sealing the anodized part in boiling water closes the pores in the oxide layer, trapping the dye inside. This process ensures that the color is locked in and won’t fade or wash out over time.
What safety precautions are necessary when handling sulfuric acid during anodizing?
-It is important to always add acid to water, not the other way around, to avoid heat buildup and dangerous splashes. Gloves and protective eyewear should be worn, and sturdy containers made of glass or thick plastic should be used to handle the sulfuric acid solution.
Outlines
🔧 Introduction to Anodizing and its Applications
The video introduces the concept of anodizing, a chemical or electrochemical process primarily applied to aluminum to create a protective layer of aluminum oxide (alumina) with a hardness of 9 on the Mohs scale. This process strengthens the surface, providing resistance against atmospheric agents and wear. Additionally, anodizing allows for the application of vibrant colors like red, blue, and green. The host explains the purpose of the video: a practical, easy-to-follow guide on how to anodize aluminum, including creating deeper pores in the oxide layer for better coloring.
⚗️ Preparing Sodium Hydroxide Solution for Cleaning
This section explains the importance of cleaning the aluminum part before anodizing, using a sodium hydroxide solution (10 grams of sodium hydroxide per 100 milliliters of water). The host highlights the safety precautions needed when handling caustic soda, such as cooling the solution to prevent heat buildup. The aluminum alloy may take on different colors during this process, but it's only a temporary oxidation effect. The host prepares a lead strip and a robust container for the sulfuric acid-based anodizing bath.
📐 Anodizing Process: Formula, Thickness, and Current
This paragraph covers the detailed technical aspects of anodizing, including the formula to calculate current density and the typical conditions for the process. The thickness of the oxide layer (ranging from 5 to 35 microns) is based on the current density, anodizing time, and desired surface protection. The host performs a calculation for an 8 cm² piece to achieve a 10-micron thickness using a current density of 6.6 mA per square centimeter, set at 53 mA for 50 minutes. Safety measures to prevent the electrolyte temperature from exceeding 21°C are also discussed.
⚡ Anodizing in Action: Voltage, Current, and Color Change
The anodizing process is demonstrated with a power supply set to 24 volts, controlling the current to 53 mA. The host explains how the impedance increases as the oxide layer forms, gradually raising the voltage. As the process continues, the piece returns to its natural aluminum color, signifying successful anodizing. The host gives an overview of how the oxide layer changes the impedance and completes the process after 50 minutes. They also explain how to monitor the voltage and current during the treatment.
🎨 Creating and Applying the Dye for Coloring
This part focuses on the dyeing process, recommending the use of inkjet printer dye for consistent results, as fabric or food dyes often lead to uneven colors. The host demonstrates creating a custom color by mixing cyan and magenta for a vibrant blue ('Blu The Strike'), calculating the correct proportions of dye for a small part. The dye is heated to 70°C, and the anodized piece is submerged for 15 minutes. The importance of using demineralized water for rinsing and preventing impurities is also emphasized.
🔒 Sealing the Anodized and Dyed Aluminum Piece
In the final stage, the anodized and dyed piece is sealed by placing it in boiling demineralized water for 10 to 30 minutes. This step locks the dye into the aluminum pores through capillary action, ensuring the color remains vibrant. The host explains the physical changes happening during the sealing process, such as the pores closing and the light interacting with the dyed oxide layers. After cooling the piece in demineralized water, the host proudly reveals the final result: a beautifully anodized and dyed aluminum piece, free of ink dispersion.
Mindmap
Keywords
💡Anodizing
💡Aluminum oxide
💡Pores
💡Sulfuric acid
💡Sodium hydroxide
💡Current density
💡Inkjet printer ink
💡Sealing
💡Mohs scale
💡Pickling
Highlights
Anodizing is a chemical/electrochemical treatment primarily for aluminum, creating a protective aluminum oxide layer with a hardness of 9 on the Mohs scale.
Anodizing not only protects aluminum but also allows for the coloring of the material in various shades like red, blue, green, and purple.
A thin natural oxide layer forms on aluminum (40 Ångstrom) which protects it from corrosion, but anodizing deepens this oxide layer for further protection.
Anodizing creates a honeycomb-like structure on the aluminum surface, allowing for deeper pores to hold color dyes, strengthening the material.
The process requires meticulous mechanical cleaning of the aluminum part to avoid stains on the anodized surface.
A sodium hydroxide solution is used to pickle the surface of aluminum, and proper safety precautions, including cold distilled water, must be taken to avoid heat buildup.
Anodizing thickness varies depending on the application, ranging from 5 microns for aesthetics to 25 microns for architectural structures.
Mixing sulfuric acid and water produces heat; care must be taken to avoid accidents, such as splashes, by adding acid to water slowly.
The ideal temperature for anodizing electrolyte solution is below 21°C to avoid destroying the newly formed oxide layer through overheating.
Inkjet printer dyes are recommended for anodizing because they provide better color consistency compared to fabric or food dyes.
After anodizing, the part is dyed at 70°C for about 15 minutes, followed by a sealing process in boiling demineralized water to lock the dye in place.
Different current densities and treatment times can affect the thickness of the oxide layer, which determines the durability and color absorption of the anodized part.
The sealing process in boiling water closes the pores on the anodized surface, locking in the dye and enhancing the final color.
The voltage increases during anodizing as the oxide layer thickens, indicating successful formation of the protective layer.
The final product, after sealing, should not disperse any dye, confirming that the anodization process was successful.
Transcripts
Bella ragazzi! This evening we're going to speak about ANODIZING
Anodizing is a chemical / electrochemical treatment made principally
on aluminium at industrial level, and it serves because
with anodizing we create a layer of aluminium oxyde, alumina,
which is a very hard material, hardness of 9 on the Mohs scale
similar to corundum
This is done to strengthen the external surface
and this creates a layer of protection
against atmospheric agents and wear of the piece.
We like anodizing because in addition to protecting the material,
we can also color the part! So we like these red, blue, green, purple colors.
Today we will show you so simple and practicable by everyone how to do it
You will find dozens of videos on this topic
but unfortunately none of them are clearly explained
We will try, starting from the bases
So that everyone can choose the treatment they prefer
Okay, let's start with the aluminum block, which is this
normally it protects itself, through atmospheric oxygen,
with a very thin layer of 40 Ångstrom
(a thickness invisible to the naked eye) of aluminium oxide
this helps the aluminum to remain shiny
and don't become rusty like iron. With anodizing
practically We create, through some pores that there are on the surface
of this oxide, some deepest holes
that sink deeper and deeper into metal
creating a honeycomb structure
like this. So here we have here our aluminum block
and this thick layer of oxide
it allows the coloring by introducing inside these pores
the dye. So, based on the current that we will apply, these pores
they can be very tight, like these, and therefore we will have a more resistant surface
or we could have a surface like this
which will be weaker, but will allow for better coloring
So let's proceed to anodize and color something!
You saw this carbide lamp in video number #184, we will color this aluminum cap.
The first procedure is to mechanically clean the part,
in our case it is already quite clean
but we recommend brushing it, of degrease it above all very well
to prevent stains from remaining on the anodized part
Now we will prepare a sodium hydroxide solution
We always use distilled water
it costs very little and if you have a dryer
You can use the water produced by that, after filtering it
You will however find all the links in the description
We use 10 grams of sodium hydroxide
for every 100 milliliters of water
So let's weigh 10 grams of sodium hydroxide
this process will be used to pickle the surface
Always be careful that adding caustic soda quickly to the water
this produces a lot of heat. In fact we use this water
which we normally keep in the refrigerator, to avoid this thermal increase
We can also measure it
It is now at 12 degrees Celsius,
but slowly it will rise
We repeat saying that precisely the cleaning of the piece is fundamental, therefore
from now on or we'll fix it here and not we will never touch our hands until
the end of treatment. And now we leave it bath in water and sodium hydroxide
from 2 to 5, to 10 minutes. If instead you already have an anodized part
and you want to take away the anodizing; for example you have a red part
and you want to make it blue, you can leave it to soak in water and sodium hydroxide
and the previous anodizing will go away
Now let's pause for a moment and then we will come back later when the piece is ready.
Okay, it's been 5 minutes
any type of aluminum alloy takes a different color inside
sodium hydroxide; for example this should be Ergal, so it takes this color
a little black, do not be frightened, because there is nothing of strange: there is magnesium,
there are other metals, so it takes this color. As soon as we introduce it
in sulfuric acid it will resume its natural aluminum color.
here it is that it has now turned black but it is not the coloring of the anodizing
it's just a small layer of oxide that has formed. We rinse very well
in distilled water, leave it there, and in the meanwhile we prepare the Nutella jar for anodizing
You need a glass container or very thick plastic container
because, working with sulfuric acid, it is preferable to have a robust container
We cut a strip of lead
from this which is a lead that is used in Germany for windows
or doors
You will find an equivalent product in the video description
In this anodizing jar you can use lead or aluminum as cathodes
however it is necessary to use pure aluminum
if you don't find 2 sheets of pure aluminum
you can also use aluminum foil
folding it several times.
Ok, this is our cathode, the negative pole.
Now let's see: these types of anodization exist in a main way:
we talk about 5 microns thickness only for aesthetics
so if we just have to coloring a decorative object.
10 microns thick for indoor applications
15 microns thick for outdoor applications; rain, sun etc.
20 microns thick for more aggressive atmospheres, such as smog, sea salt, etc.
Near the sea there is a more aggressive atmosphere for aluminum
25 microns thick for architectural structures
In short, the greater the thickness of the anodizing,
the greater the surface protection.
We have already prepared the sulfuric acid solution because we need it cold (remember that mixing acid and water produces heat)
Contains 170 grams of pure sulfuric acid in 1 liter of water
Remember that acid must be added to water and not vice versa
otherwise a great deal of heat would form,
splashes of acid everywhere,
in short, a very dangerous situation would arise
Always wear gloves and glasses when you handle these substances!!!
If you don't remember "the acid and water thing"
then remember the phrase: "You should never give a drink to the acid "
Now we need the formula to calculate the current density
you've probably heard of rule 720
but here in Europe we use metric measurements
so we did a conversion.the thickness of oxide that will be formed
(in microns) is obtained with this formula:
0.03 multiplied by the time in minutes in which we will do the treatment, multiplied by the current density
in milliamps on square centimeter. And now, slowly we will go to see in detail
The inverse formula, because what we need is current density,
it's this one. So, the conditions typical of this treatment vary from
10 to 60 minutes, however you can also do even 7/8 hours treatments
that will be much much more precise; currents ranging from 10 to 20 milliamps to
square centimeter and you get thickness, with this treatment with
sulfuric acid, from 5 to 35 microns; therefore even much higher than
those used in the industrial processes.
Then we'll show you the ink too. So, let's take this part here,
let's go get it a caliper and we do the surface calculations.
Ok then we measured the our piece and we calculated its
surface, which turns out to be 8 square centimeters. So now let's go do the math:
in this case we have decided
to make an anodization that lasts a long time, about 50 minutes, why?
because normally the piece, when it comes anodized, it produces a lot of heat too;
the heat goes to "eat" the layer of oxide that we have just formed!
So 2 things are very important: the first fundamental is that the temperature
of our acid-based electrolyte sulfuric never exceeds 21 degrees
Celsius. The second is
precisely that the piece does not heat up. However which for small pieces like these,
a screw, a small detail, we can confidently trust
the thermal inertia of ours container that will keep it cold,
if you have to make big parts it will be need to introduce a cooling circuit or
or to put the container in a water bath with some ice
so that the temperature stays below of the due. (21°C)
So 0.03 multiplied by 50 is 1.5, we decide to make a thickness of
10 microns for example. So 10 microns divided by 0.03 multiplied by 50 we said 1.5
we get a density 6.6 mA current for each
square centimeter, so let's multiply for 8 and we have a current of 53 mA
So now let's go to set our power supply:
we can safely bring it to one voltage of 24 volts, you will see that
normally the working voltage with current limit will remain
much lower, we will short circuit and limit at 53 mA
So 400... 300... 200...
I don't have a very delicate hand. Here they are, 50 mA! At this point we connect
the negative to our lead strip and the positive, since we have to
anodize, to our part. Look at the color of the piece that from black
will slowly begin to change color and will resume its natural aluminium color
and see what happens in the meantime at the voltage:
starting from even half a volt. Let's go up a bit with the current, which we said
50 mA, as we go will form the oxide layer will rise the
the impedance of this circuit for which the tension will slowly begin to rise.
And now let it pass these 50 minutes to complete the treatment.
Ok now more or more have passed minus 40 minutes, and as we can see
after 2-3 minutes our part has taken on the natural color of aluminum
slowly it is anodizing
and the oxide layer is forming; If we look at the power supply, we will see
that this oxide layer will have made the voltage rise,
even reaching 18.6 volts. Very well, while this piece ends up anodizing
let's prepare our ink. Then, as ink normally in the videos
you see that they use dyes for clothes like these or even
food coloring; they are very, very much uncomfortable because they are in this format:
they are very light powders, they are pigments and are very difficult to dose
so you never get one homogeneous result:
if you want to make ten pieces they come out of ten different colors,
you have to be careful of concentration,
it is not possible to obtain a homogeneous result. The best solution,
which is the one we recommend, also because it is the one on which we worked harder,
is to use this ink for jet printers which also allows you to make the tint of
the color you want; so now we're going to get a computer for a moment and
we will also see how to customize our color
(you will find the link in the description) Here we are! So on this site
but there are many on the net, we have the option to convert a
color whose shades we know so what do I know: a 50% of
red, now I'm doing a random color, a little bit of green and all blue
we have this violet here, click on "convert" and this program
will give us how much color percentage cyan, which is that classic blue
of inkjet printers it will take, how magenta, how yellow
in this case 0, and how much black. In this way we will go here now
one of our colors, one of ours favorites we called "Blu The Strike"
which is a very blue very intense, very beautiful to look at
on aluminium. So there ink percentage is 6 grams of ink for
every 100 milliliters of water. Our part is small,
so we will only use 25 milliliters of water
and we will have to make the percentage of each color on 1.5 grams of ink. (6x0,25)
Let's start with cyan
here too we recommend you four syringes: one for each color,
so as not to confuse them
half a gram...
1.2 grams... 1.3...
you don't need absolute precision
ok a gram and a half of cyan, then we need a 10%
magenta, so on a gram and a half we are talking
about 0.15 grams, so we take the magenta
(I hope there are no people emotional with needles...)
we do the tare, sorry, here not we have a flat surface
ok
12... 13... 14... 0,15!
and this color will have to be worn at a temperature of 70 degrees celsius
so now we're going to set the heater for this magnetic stirrer
to a temperature of 70 degrees
waiting for time to expire, now very little is missing. Well we have now
reached the end of ours 50 minutes and at this point we take
our anodized piece, we remove more acid is possible, we rinse
it in demineralized water, always advisable compared to tap water,
which may contains salts that could dull the coloringe. And at this point we put the part
in our ink. The ink must be around 70°C
We will leave it here for 15 minutes
so let's set our timer and see you soon.
Ok there are still a few seconds, but I would say that we can already stop
at this point we take out our part
and we can already see the coloring it has taken. At this point we rinse it
always in demineralized water and we put it in boiling water
from 10 minutes to half an hour. What happens in this time? Then, we
have created, in this case at constant current, so we will have these walls perfectly parallel,
these layers of oxide, the ink has penetrated
inside by capillarity filling all these channels
that we created, now by putting it in boiling demineralized water
or even you can put it in a stream of steam
they will close and seal these pores, so the ink will remain
inside and the light that will hit these these pores will come out of the shade
of the of the color we have chosen.
There are different types of current variations according tothe different types of industrial processes
that can form "V" slots, they can even form
slots made like this, trapeze, or they can even be personalized
making almost spheres: in this case the light that enters will bounce here,
pass through our pigment and exit out
this type of treatment is the one that allows the most color rendering on the part.
And now there we will review in 15-20 minutes
when this piece will be sealed and we will see the final result.
Well, it's been 20 minutes now, the piece is now sealed, we can
extract it from the boiling water
in this case the demineralized water no longer needed, but I use it now to
to cool the piece and be able to take it with the hands.
As you can see it no longer disperses ink. And here is the result!!!
Belle ragazzi! Please sign up at the Kaos La Leggenda channel, you will find all the components
to accomplish this anodizing in your home
below in the description of the video.
Have fun and good anodizations!
浏览更多相关视频
GCSE Chemistry - What is Corrosion and How to Stop it #71
Preparing a soluble salt | 14–16 Practicals
How to Install Torch Down | Torch Down Roofing Guide
What is Supercapacitor| How supercapacitor works| Supercapacitor in Electric Vehicles
Thermit Welding Used to Join Railway Tracks | Manufacturing Processes
Formulae Of Ionic Compounds & Their Names - Part 1 | Properties of Matter | Chemistry | FuseSchool
5.0 / 5 (0 votes)