Sistem penyiraman tanaman otomatis esp8266 (BLYNK)
Summary
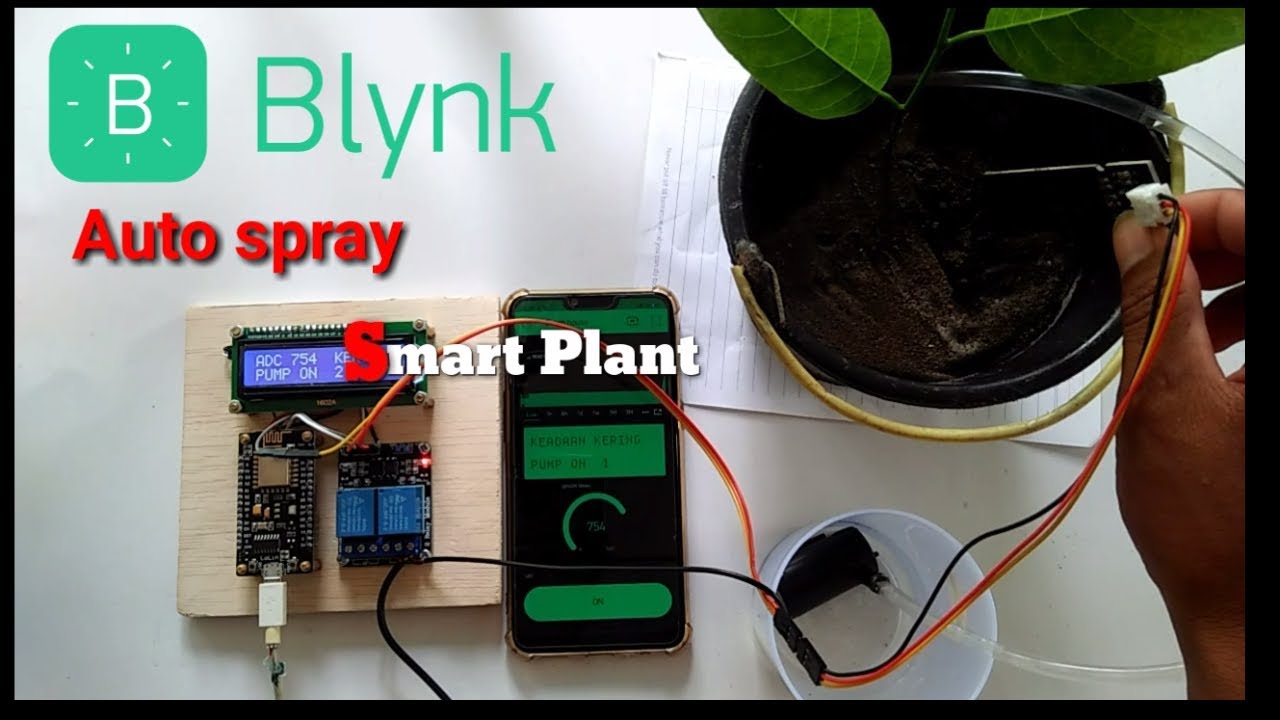
TLDRThis video showcases the setup of an automatic plant watering system using an ESP8266, moisture sensors, and a water pump controlled by a relay. It demonstrates how to connect the system to the Blink app for real-time monitoring and remote control. The program reads soil moisture levels and triggers the pump accordingly, either watering the plant when the soil is dry or stopping when the moisture level is sufficient. The system integrates a digital LCD display for status updates and relies on Wi-Fi connectivity for seamless interaction through the Blink app.
Takeaways
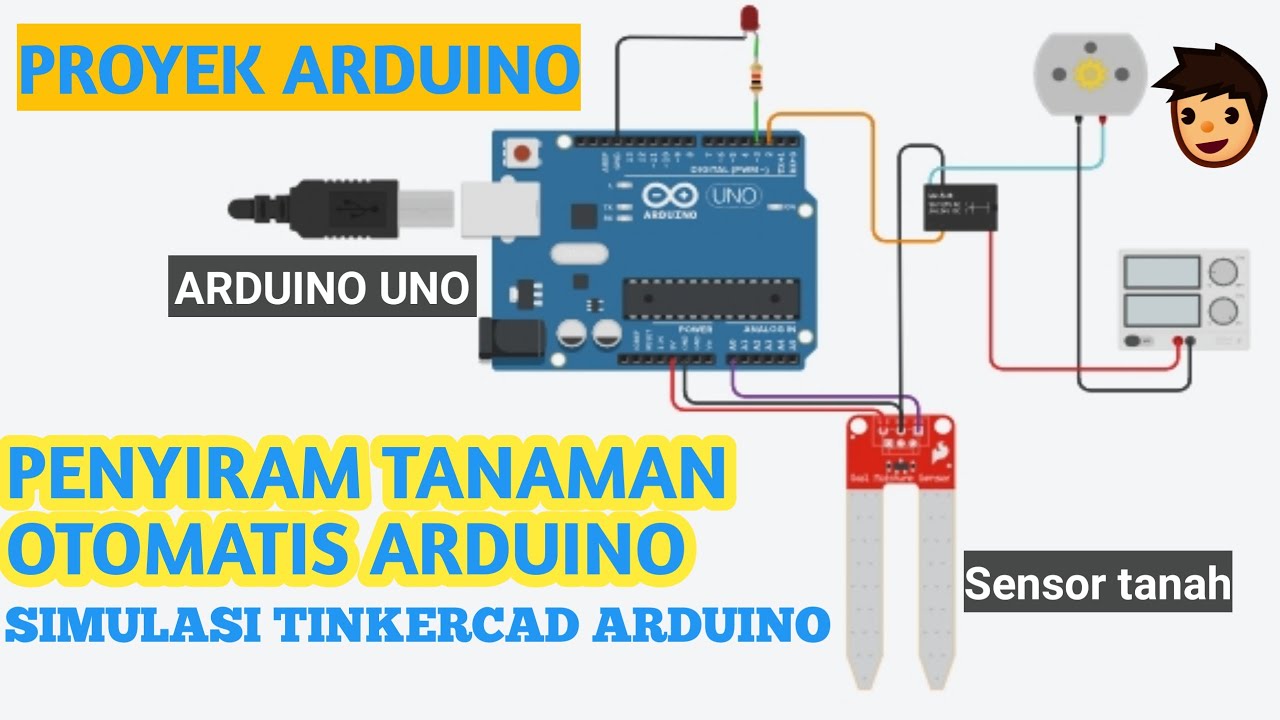
- 😀 The system described is an automated plant watering setup using various components like sensors, relays, and an LCD display.
- 😀 A moisture sensor is connected to the circuit to monitor the soil's moisture level, sending data to the system.
- 😀 The system includes a relay to control a pump, which activates based on the moisture sensor's input.
- 😀 The LCD display shows real-time status, including the soil moisture level and the pump's operation state.
- 😀 The Blink app is used to create and manage the project, offering remote control and monitoring features.
- 😀 The program is built in the Arduino IDE, with libraries for Blink, sensor reading, and LCD management.
- 😀 NodeMCU ESP8266 is used as the microcontroller, which connects to Wi-Fi to interact with the Blink app.
- 😀 The system uses analog input to read sensor values and determines whether the soil is dry or wet based on specific thresholds.
- 😀 The pump turns on when the soil is dry and turns off when the soil moisture level is sufficient, all controlled automatically by the system.
- 😀 The system's setup and configuration involve ensuring the correct board settings and libraries in the Arduino IDE for seamless functionality.
Q & A
What are the key components used in the automatic plant watering system?
-The key components used are a soil moisture sensor, relay module, LCD display, NodeMCU ESP8266 microcontroller, water pump, and Blink app for remote control.
How does the soil moisture sensor work in this system?
-The soil moisture sensor measures the moisture level in the soil. It sends an analog signal to the NodeMCU, which is then processed to determine whether the soil is dry, normal, or wet.
What is the function of the relay module in the system?
-The relay module controls the water pump. It turns the pump on when the soil is dry and off when the soil is wet or at normal moisture levels.
How does the system determine whether the soil needs watering?
-The system reads the soil moisture sensor. If the moisture level exceeds a certain threshold (greater than 1000), the soil is considered dry, and the pump is activated. If the moisture level is below 600, the soil is considered wet, and the pump is turned off.
How is the LCD display used in this system?
-The LCD display shows real-time information, including the soil moisture value and the status of the pump (on/off). It provides immediate feedback on the soil condition and watering action.
What is the role of the Blink app in this project?
-The Blink app is used for remote control and monitoring. It connects the system to Wi-Fi, allowing the user to view the status of the system and control the pump through virtual pins.
What is the purpose of using NodeMCU ESP8266 in this project?
-NodeMCU ESP8266 acts as the microcontroller that connects the system to Wi-Fi, processes data from the soil moisture sensor, and communicates with the Blink app for remote control and monitoring.
How do you set up the NodeMCU in Arduino IDE for this project?
-You need to install the necessary ESP8266 board in the Arduino IDE, configure the Wi-Fi credentials, and upload the appropriate code that handles sensor reading, pump control, and communication with Blink.
How does the code in this system control the pump?
-The code reads the soil moisture value from the sensor. If the moisture value is higher than the set threshold, the code activates the pump by sending a signal to the relay. If the value is below a certain level, it turns the pump off.
Can this system be modified for different types of plants?
-Yes, the moisture threshold values can be adjusted in the code to accommodate different plants that require varying moisture levels. The sensor can be placed in different types of soil to suit different plant needs.
Outlines

This section is available to paid users only. Please upgrade to access this part.
Upgrade NowMindmap

This section is available to paid users only. Please upgrade to access this part.
Upgrade NowKeywords

This section is available to paid users only. Please upgrade to access this part.
Upgrade NowHighlights

This section is available to paid users only. Please upgrade to access this part.
Upgrade NowTranscripts

This section is available to paid users only. Please upgrade to access this part.
Upgrade NowBrowse More Related Video
Penyiraman tanaman otomatis berbasis IOT(Internet Of Things) graph chart blynk nodemcu esp8266

Automatic Plant Watering System using Arduino & Soil Moisture Sensor | LCD display [with CODE]

New Blynk IOT Smart Plant Monitoring System

REKA:BIT RBT Project Kit | Project 3B: Auto Plant Watering System #microbit #stemeducation
PROYEK ARDUINO PENYIRAM TANAMAN OTOMATIS DENGAN SENSOR KELEMBABAN TANAH SIMULASI TINKERCAD ARDUINO

Prototipe Penyiram Tanaman Otomatis
5.0 / 5 (0 votes)