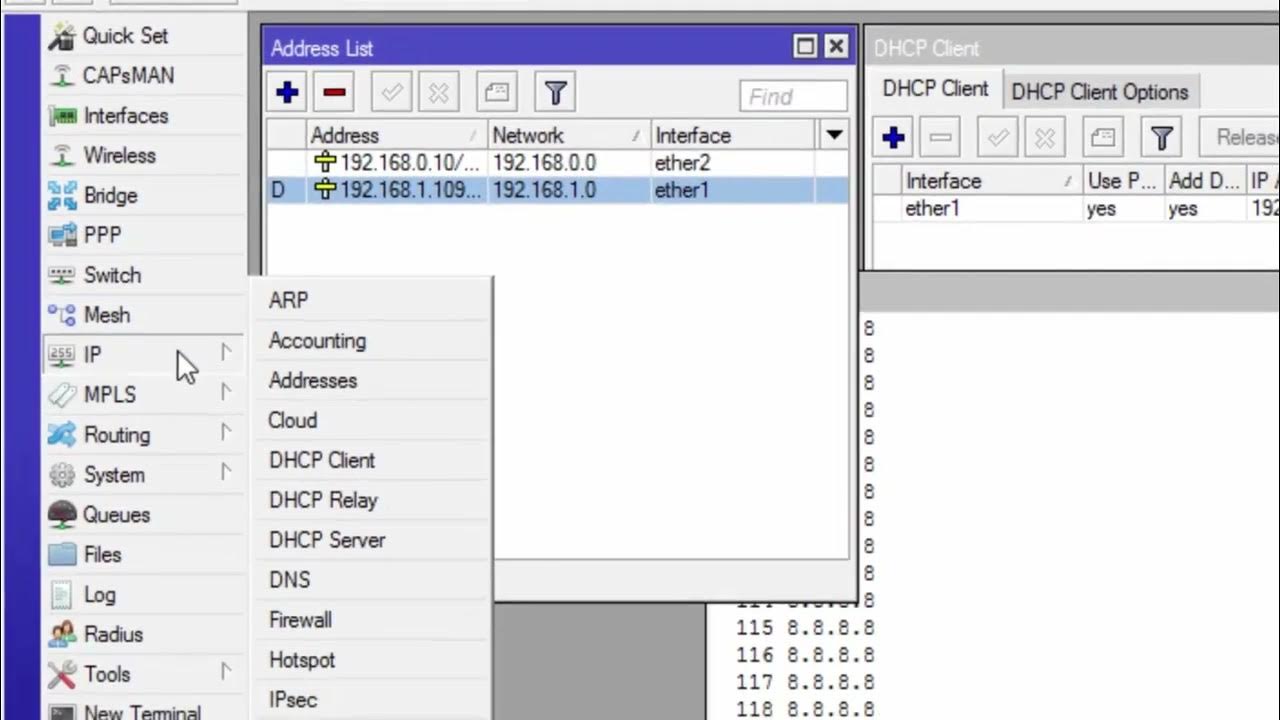
How to setup Mikrotik to access the Internet
Summary
TLDRIn this tutorial, learn how to configure a Mikrotik router to connect computers to the internet by setting it up as a gateway between a private network and the internet. The video walks you through essential steps including logging into the Mikrotik router, configuring interfaces, setting static IPs, enabling DHCP for the LAN, setting up routing, and configuring NAT. By following the step-by-step guide, viewers will successfully set up a Mikrotik router to allow internet access for all connected computers.
Takeaways
- 😀 Log in to Mikrotik router using WinBox to begin configuration.
- 😀 Rename the interfaces to 'WAN' for the internet-facing port and 'LAN' for the internal network.
- 😀 Assign static IP addresses to both WAN and LAN interfaces in the 'IP > Addresses' section.
- 😀 Enable and configure DHCP for the LAN network to dynamically assign IP addresses to connected devices.
- 😀 Set up the default route in 'IP > Routes' with a destination of '0.0.0.0/0' and the ISP router's gateway IP.
- 😀 Configure NAT (Network Address Translation) to allow internal LAN devices to access the internet using the Mikrotik router.
- 😀 Add NAT rules under 'IP > Firewall' to masquerade internal IPs when accessing external networks.
- 😀 Ensure devices connected to the LAN interface can access the internet after configuration.
- 😀 Verify that the internet is accessible from any computer connected to the Mikrotik’s internal network.
- 😀 The configuration process involves using WinBox, static IP setup, DHCP, routing, and NAT for proper network operation.
- 😀 The tutorial is aimed at helping users set up a Mikrotik router as a gateway between a private network and the internet.
Q & A
What is the purpose of configuring a MikroTik router in this video?
-The purpose is to set up a MikroTik router as a gateway between a private network and the internet, allowing computers on the LAN to access the internet.
How do you access the MikroTik router for configuration?
-You access the MikroTik router by logging in through WinBox, which is a management tool used for configuration.
What is the first thing you need to do after logging into WinBox?
-The first step after logging in is to go to the 'Interfaces' menu and name the interfaces, typically naming them WAN (Wide Area Network) and LAN (Local Area Network).
Why is it important to name the interfaces WAN and LAN?
-Naming the interfaces as WAN and LAN makes it easier to identify and manage the connections between your internal network and the internet in the future.
How do you assign static IP addresses to the interfaces?
-You assign static IP addresses by going to 'IP' > 'Addresses' and manually setting an IP address for both the WAN and LAN interfaces.
What is the purpose of enabling DHCP on the MikroTik router?
-Enabling DHCP (Dynamic Host Configuration Protocol) allows the router to automatically assign IP addresses to devices connected to the LAN, simplifying network configuration.
How do you set up DHCP on a MikroTik router?
-To set up DHCP, go to the 'DHCP' menu, then to 'DHCP Server,' and follow the configuration steps to enable DHCP for the network.
What does configuring the default route accomplish?
-Configuring the default route ensures that the MikroTik router knows where to send internet-bound traffic by setting the ISP's router IP address as the gateway.
How do you set the default route on a MikroTik router?
-To set the default route, go to 'IP' > 'Routes,' add a new route with the destination IP as 0.0.0.0/0, and set the gateway to the ISP's router IP address.
What is the role of NAT (Network Address Translation) in this setup?
-NAT allows devices on the LAN to access the internet by translating their private IP addresses into the public IP address of the WAN interface.
How do you configure NAT on the MikroTik router?
-To configure NAT, go to 'IP' > 'Firewall,' and set up a NAT rule that allows traffic from the LAN to be translated to the public IP of the WAN interface.
How can you test if the MikroTik router setup was successful?
-After completing the configuration, you can test the setup by connecting a device to the LAN interface and checking if it can access the internet.
Outlines

This section is available to paid users only. Please upgrade to access this part.
Upgrade NowMindmap

This section is available to paid users only. Please upgrade to access this part.
Upgrade NowKeywords

This section is available to paid users only. Please upgrade to access this part.
Upgrade NowHighlights

This section is available to paid users only. Please upgrade to access this part.
Upgrade NowTranscripts

This section is available to paid users only. Please upgrade to access this part.
Upgrade NowBrowse More Related Video

Setting Router Mikrotik RB750 sampai Konek ke Internet (Untuk Pemula)

Tutorial konfigurasi dasar mikrotik beserta sharing file & sharing printer

Cara Mudah Seting Mikrotik Dari Awal Sampai Bisa Online || How to setting mikrotik routerboard

Koneksi Jaringan Lan Ke Internet Melalui Mikrotik Rb941 2Nd

Konfigurasi Dasar Router Mikrotik agar terhubung ke Jaringan Internet

CARA KONFIGURASI MIKROTIK AWAL KONEKSI INTERNET otomatis
5.0 / 5 (0 votes)