Sketching - Edit a Sketch
Summary
TLDRThis video tutorial focuses on editing sketches in Autodesk Fusion 360, a crucial skill for the Autodesk Certified User exam. It covers methods to access and edit sketches, including using the model history tree or browser. The instructor demonstrates common editing tasks like modifying lines, applying dimensions, and adjusting constraints. Additionally, the video introduces inspection tools to measure distances and align dimensions, emphasizing precision as per exam requirements. This comprehensive guide prepares viewers for the exam by combining sketch creation, dimensioning, and constraints.
Takeaways
- 🖥️ The video focuses on the 'Editing a Sketch' objective for the Autodesk Certified User exam in Fusion 360.
- 📚 The 'Editing a Sketch' objective appears twice on the exam, hence covered in one video.
- 🛠️ There are multiple ways to edit a sketch in Fusion 360, including through the model history tree or browser.
- 🔄 Editing a sketch involves modifying dimensions and constraints that may already be present.
- 📏 The exam might require you to change the orientation of a line and apply new dimensions.
- ✂️ You may need to delete certain constraints, such as parallel constraints between lines.
- 🔄 The 'Control Z' or 'Undo' function can be used to revert changes if needed.
- 📐 The 'Inspect' panel and 'Measure' tool are commonly used to verify dimensions after editing a sketch.
- 🔢 The precision of measurements can vary; the exam may specify the required level of precision.
- 📏 The 'Dimension' tool can be used to measure the distance between two points in a sketch.
- 📝 The video suggests that editing a sketch builds upon skills from previous lessons on sketch creation.
Q & A
What is the primary focus of the video script?
-The primary focus of the video script is to provide guidance on editing a sketch in Autodesk Fusion 360, specifically for the Autodesk Certified User exam.
How many times does the 'editing a sketch' objective appear on the exam?
-The 'editing a sketch' objective appears twice on the exam.
What are the two main ways to edit a sketch in Fusion 360 as mentioned in the script?
-The two main ways to edit a sketch in Fusion 360 are: 1) Right-clicking on the sketch in the model history tree and choosing 'edit sketch', or 2) Right-clicking and expanding the sketches folder, then choosing 'edit sketch'.
What is the significance of the model history tree in editing a sketch?
-The model history tree is significant in editing a sketch because it allows the user to access and edit the sketch directly or through the sketches folder.
What is an example of an editing task that might be required on the exam?
-An example of an editing task on the exam might be to change a line to a vertical line and apply a dimension of four inches to it.
What is the role of constraints in editing a sketch?
-Constraints play a role in editing a sketch by defining the relationships between different elements within the sketch, such as parallelism or perpendicularity.
How can you undo changes made while editing a sketch?
-You can use the 'Control Z' or 'Undo' command to revert changes made while editing a sketch.
What tool in Fusion 360 can be used to measure distances within a sketch?
-The 'Inspect' panel's 'Measure' tool can be used to measure distances within a sketch.
Why is the precision of measurements important in the exam?
-The precision of measurements is important in the exam because it requires考生 to input values exactly as they appear on their screen, which may include a specific number of decimal places.
What is the difference between an aligned dimension and a horizontal or vertical dimension?
-An aligned dimension measures the exact distance between two points, whereas a horizontal or vertical dimension measures the distance along a specific axis.
How do the exam objectives for sketching build upon each other?
-The exam objectives for sketching build upon each other by requiring knowledge of previous objectives, such as sketch creation and dimensioning, to successfully complete editing tasks.
Outlines

This section is available to paid users only. Please upgrade to access this part.
Upgrade NowMindmap

This section is available to paid users only. Please upgrade to access this part.
Upgrade NowKeywords

This section is available to paid users only. Please upgrade to access this part.
Upgrade NowHighlights

This section is available to paid users only. Please upgrade to access this part.
Upgrade NowTranscripts

This section is available to paid users only. Please upgrade to access this part.
Upgrade Now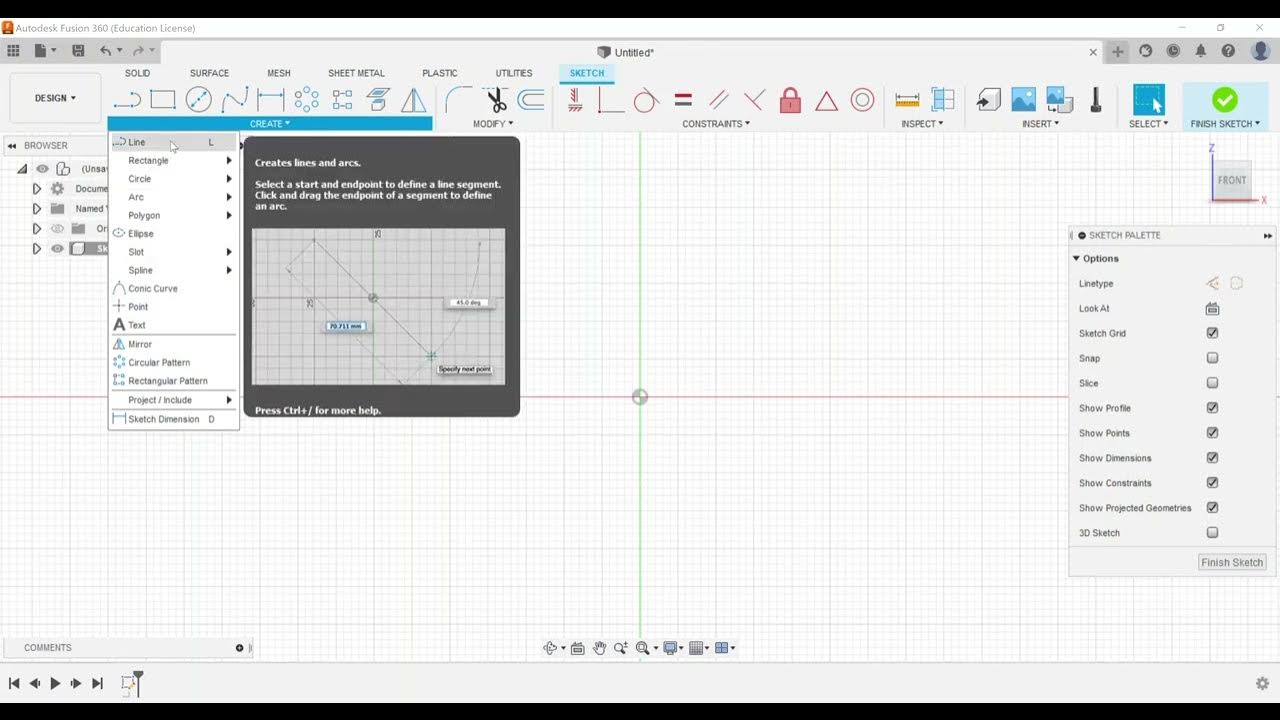


5.0 / 5 (0 votes)