Part Modeling - Create a Pattern of Features

Craig Hughes
30 Apr 202209:41

Summary

TLDRThis video tutorial focuses on mastering patterning features for the Autodesk Fusion 360 Certified User exam. It covers creating circular, rectangular patterns, and pattern on a path. The instructor demonstrates how to select features, choose axes or edges for patterning, and use options like suppress, optimized, identical, and adjust for precise control. The video highlights the editable nature of these patterns in Fusion 360, making it easier to modify designs.

Takeaways

  • πŸ”΅ The video discusses exam objectives for the Autodesk Fusion 360 Certified User exam, focusing on part modeling and creating patterns of features.
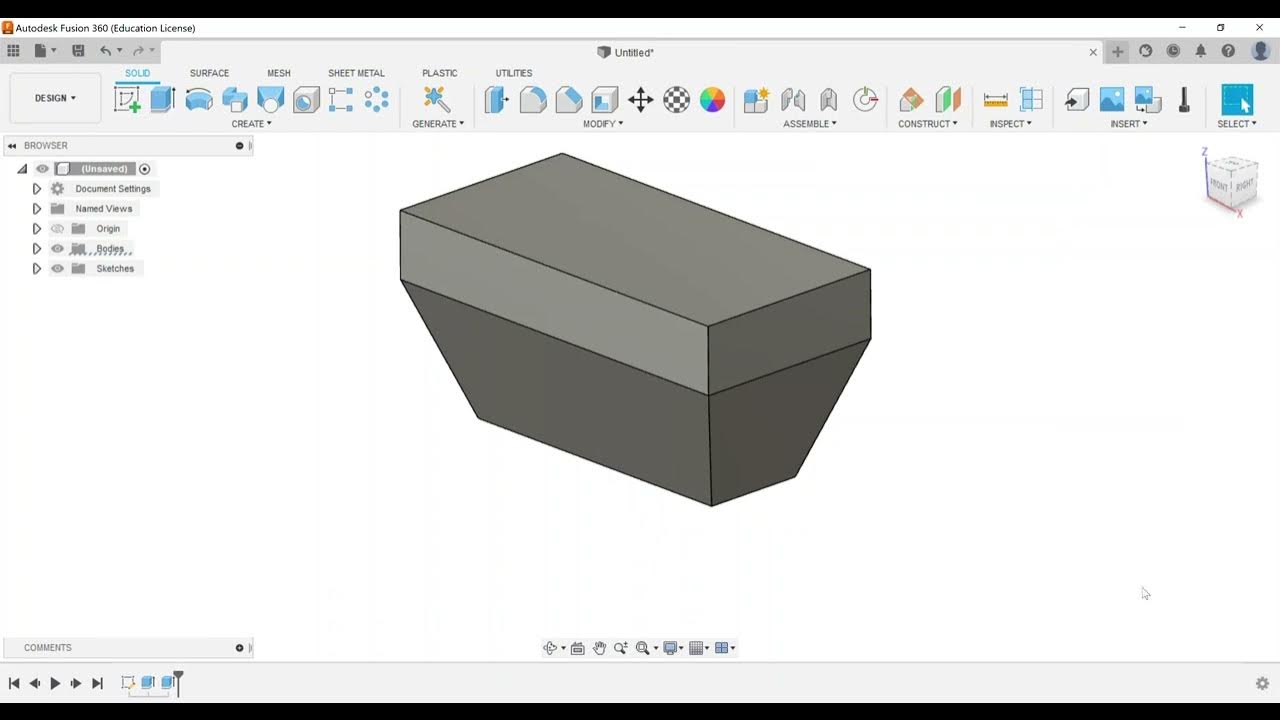
  • πŸ”§ The tutorial demonstrates how to create a circular pattern around a green axis using a rectangular feature on a plate with a square opening.
  • πŸ“ The user can choose to pattern around an axis or edge, and select the type of patterning (full circular, angle, symmetric).
  • πŸ”„ The 'Suppress' option allows for creating a pattern while excluding certain instances from the pattern.
  • πŸ’» There are three compute options: Optimized, Identical, and Adjust, with 'Optimized' being the fastest method.
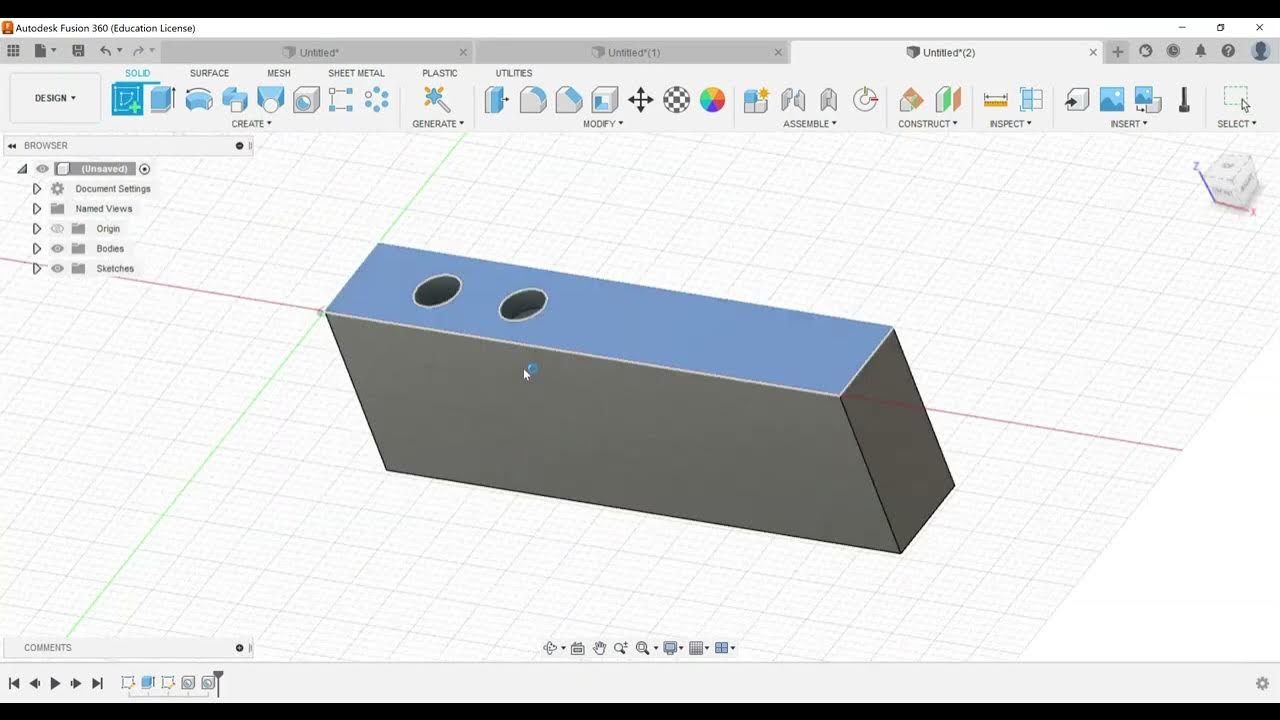
  • πŸ“¦ The tutorial also covers creating a rectangular pattern by selecting features and defining direction types (extent or spacing).
  • πŸ“ The 'Rectangular Pattern' tool offers flexibility, allowing for patterning in one or both directions.
  • πŸ›€οΈ 'Pattern on a Path' is a feature that allows patterning along a selected path, such as an arc.
  • πŸ”„ The 'Geometric Pattern' is a new option, but for the exam, 'Pattern on a Path' is likely the only one that will be tested among the four options.
  • πŸ“ˆ The video emphasizes the importance of getting familiar with these patterning tools for the exam.

Q & A

  • What is the main topic discussed in the video?

    -The main topic discussed in the video is creating patterns of features in Autodesk Fusion 360, specifically focusing on circular, rectangular, and pattern on a path.

  • What is the first patterning feature the video creator demonstrates?

    -The first patterning feature demonstrated is the circular pattern, where the video creator shows how to pattern a rectangular shape around a circular axis.

  • What is the purpose of the 'Suppress' option in patterning?

    -The 'Suppress' option allows users to create a pattern while excluding specific instances from the pattern without affecting the others.

  • What are the three computation options available when creating a pattern?

    -The three computation options available are 'Optimized', 'Identical', and 'Adjust'. Optimized creates identical copies of patterning the feature faces, Identical replicates the results of the original features, and Adjust creates potentially different copies by calculating the extents or terminations of each instance individually.

  • Why is it beneficial to use the circular pattern feature in the 3D create menu?

    -Using the circular pattern feature in the 3D create menu is beneficial because it is easily editable and can be adjusted after creation, unlike patterns created in the sketch environment.

  • How does the 'Rectangular Pattern' feature differ from the 'Circular Pattern'?

    -The 'Rectangular Pattern' feature allows for patterning in two directions, either by specifying the extent or spacing, whereas the 'Circular Pattern' is limited to a circular path.

  • What does the 'Extent' option do in the Rectangular Pattern?

    -The 'Extent' option in Rectangular Pattern automatically calculates the number of instances based on the available space in the selected direction.

  • Can you edit a pattern after it has been created in Fusion 360?

    -Yes, you can edit a pattern after it has been created. The video demonstrates editing a Rectangular Pattern by changing the quantity to zero in one direction to create a pattern in only one direction.

  • What is the 'Pattern on a Path' feature used for?

    -The 'Pattern on a Path' feature is used to create patterns that follow a specific path or curve, such as an arc, allowing for more complex and dynamic patterning.

  • What are the direction options available in the 'Pattern on a Path' feature?

    -In the 'Pattern on a Path' feature, you can choose to pattern in one direction, symmetrically, or have the pattern follow the path's direction.

  • How does the video creator suggest optimizing the computation time when creating patterns?

    -The video creator suggests using the 'Optimized' computation option to reduce computation time, as it is the fastest method available.

Outlines

00:00

πŸ”„ Circular Pattern Creation in Fusion 360

The paragraph discusses creating a circular pattern in Autodesk Fusion 360. The instructor begins by selecting a feature from the model history tree and chooses the green axis to pattern around. Options for creating a pattern include a full circular pattern, an angle, or symmetric. The 'suppress' checkbox allows the user to toggle individual instances of the pattern. The user can decide on the number of pattern instances and the method of patterning: optimized, identical, or adjust. The optimized method is the fastest and creates identical copies of the feature, while 'adjust' is the slowest and calculates each instance individually. The benefit of using the circular pattern tool in Fusion 360 is its ease of editing and flexibility.

05:01

πŸ“ Rectangular Pattern and Pattern on a Path

This section covers the creation of a rectangular pattern and a pattern on a path in Fusion 360. The instructor starts by selecting a feature to pattern and choosing the direction, either by axes or edges. The user can select the number of instances and the spacing or extent. The 'suppress' checkbox is available for use, and the user can choose between optimized, identical, or adjust methods for patterning. The instructor also demonstrates editing a rectangular pattern to create a pattern in only one direction. Lastly, the 'pattern on a path' feature is introduced, allowing the user to pattern features along a specific path, such as an arc. The user can set the quantity, spacing, and direction of the pattern, and choose between identical orientation or following the path direction. The compute option is set to optimized for faster processing.

Mindmap

Keywords

πŸ’‘Autodesk Fusion 360

Autodesk Fusion 360 is a cloud-based 3D CAD, CAM, and CAE software platform that provides a wide range of tools for creating, editing, and simulating 3D models. In the video, the software is used to demonstrate various modeling techniques, particularly focusing on patterning features, which is a key part of the certification exam.

πŸ’‘Certified User Exam

The Certified User Exam refers to the official test that users must pass to become certified in using Autodesk Fusion 360. The video script is focused on preparing for this exam, specifically discussing how to use patterning features, which is one of the exam objectives.

πŸ’‘Pattern of Features

A 'pattern of features' in CAD software like Fusion 360 refers to duplicating a feature or set of features in a specific arrangement. In the video, this is demonstrated by creating circular and rectangular patterns, which are essential skills for the exam.

πŸ’‘Circular Pattern

A 'circular pattern' is a type of feature patterning where a selected feature is duplicated around a central axis to form a circular arrangement. The video explains how to create a circular pattern by selecting a feature and an axis, and then specifying the number of instances and the type of computation method.

πŸ’‘Rectangular Pattern

A 'rectangular pattern' is similar to a circular pattern but duplicates features in a rectangular or linear array. The video script describes how to create this pattern by selecting a feature and defining the direction and spacing or extent of the pattern.

πŸ’‘Model History Tree

The 'model history tree' in Fusion 360 is a panel that shows the sequence of features created in a model. It allows users to select features for operations like patterning. The video mentions using the model history tree to select a feature for patterning.

πŸ’‘Axis

In 3D modeling, 'axis' refers to the imaginary lines around which objects can be rotated or mirrored. The video script explains selecting an axis (like the green axis) to pattern features around, which is crucial for creating circular patterns.

πŸ’‘Suppress

The 'suppress' option in Fusion 360 allows users to temporarily disable certain instances in a pattern without affecting the others. The video demonstrates how to use the suppress checkbox to control which instances of a pattern are created.

πŸ’‘Optimized

The 'optimized' computation method in patterning creates identical copies of the patterned feature quickly. The video script mentions using the optimized method for efficiency when creating patterns in Fusion 360.

πŸ’‘3D Create Menu

The '3D create menu' in Fusion 360 contains tools for creating and modifying 3D models. The video mentions that while circular and rectangular patterns can be created in the sketch environment, using them in the 3D create menu allows for easier editing.

πŸ’‘Pattern on a Path

'Pattern on a path' is a feature in Fusion 360 that allows users to pattern features along a predefined path or curve. The video script explains how to select a feature and a path to create a pattern that follows the shape of the path, such as an arc.

Highlights

Introduction to creating a pattern of features in Autodesk Fusion 360

Explanation of circular pattern creation

Selection of feature for patterning

Choosing the axis for circular patterning

Understanding the suppress option in patterning

Options for creating copies: optimized, identical, and adjust

Advantages of editing patterns in the 3D create menu

Introduction to rectangular pattern creation

Choosing the object and direction for rectangular patterning

Using distance type: extent versus spacing

Previewing the pattern and adjusting quantities

Editing a rectangular pattern to pattern in one direction

Introduction to pattern on a path

Selecting features and path for pattern on a path

Adjusting distances and orientations in pattern on a path

Options for pattern direction: symmetric or one direction

Computing options: optimized, identical, and follow path direction

Finalizing the pattern on a path

Summary of patterning tools in Fusion 360

Encouragement to practice and prepare for the exam

Transcripts

play00:01

hey everyone in this video we're going

play00:03

to talk about another

play00:04

exam objective for the autodesk fusion

play00:06

360 certified user exam and in this one

play00:10

we're going to continue on in part

play00:12

modeling and we're going to be looking

play00:13

at creating a pattern of features

play00:16

so with that we're going to move into

play00:18

fusion

play00:19

here i've already got some pre-made

play00:21

parts

play00:22

that i've created so i have this plate

play00:24

has a has a square opening in it and i'm

play00:27

going to create a rectangular

play00:31

well one of the options is a rectangular

play00:33

pattern i'm going to use that rectangle

play00:34

to create a circular pattern so i want

play00:36

to pattern it around there so circular

play00:38

pattern will be the first thing i do

play00:39

so when i click on it first thing that

play00:42

you're going to look for probably by

play00:43

default

play00:44

is the type is set to faces so

play00:47

if we want to look at that we can also

play00:49

pattern bodies features we can also

play00:51

pattern components so in this case i

play00:54

want to pattern a feature so in this

play00:56

scenario if i select this feature or if

play00:59

i go down here to my model history tree

play01:01

i can also choose it down here and it

play01:02

will highlight in the graphics area so

play01:05

i'm going to go ahead and choose you can

play01:06

choose it on the part

play01:08

sometimes it can be kind of hard to do

play01:10

that so that's why i go down and choose

play01:11

the feature from the timeline

play01:14

most often and then i'm going to hit

play01:16

select next to axis and i want to choose

play01:18

what access to pattern around so i'm

play01:19

going to choose the green axis and you

play01:21

can see we're going to do either you can

play01:23

do a full

play01:25

circular pattern you can do an angle

play01:27

this kind of works very similar to

play01:28

revolve

play01:30

and or you can do a symmetric so you can

play01:32

kind of see how it kind of does that so

play01:34

right now i'm gonna go ahead and i'm

play01:34

gonna do a full uh rotation i'm gonna go

play01:37

ahead and you'll notice there's a check

play01:38

box for suppress

play01:40

so you'll notice we get all these little

play01:41

check boxes so the suppress option

play01:43

allows us to go through and still create

play01:45

a pattern so if i uncheck one of these

play01:48

you'll notice it does not adjust or

play01:51

manipulate the others it just simply

play01:53

does not put in that one instance so i

play01:56

could turn off by toggling off or

play01:58

turning these back on depending upon you

play02:00

know what is desired and then i can go

play02:03

through and take a look at putting in

play02:04

maybe

play02:05

how many that i want so if i put 10 in

play02:07

there and then the compute option will

play02:09

kind of tell you with the tooltip

play02:11

is that optimize creates identical

play02:14

copies of patterning the feature faces

play02:16

which is the fastest method that can be

play02:19

done so the other one is identical which

play02:21

creates identical op

play02:23

copies of replicating the results of the

play02:25

original features

play02:27

so we use it says to use when optimized

play02:29

is not possible and then you have adjust

play02:31

which creates potentially different

play02:33

copies

play02:34

by calculating the extents or

play02:36

terminations of each instant

play02:38

individually which is the slowest it

play02:40

takes the most amount of computing power

play02:42

in order to go through and do so so a

play02:44

lot of times i do

play02:46

optimized whenever we can and when i

play02:48

choose okay

play02:49

it still provides us with that same

play02:51

effect

play02:52

so it's just creating the faces and then

play02:54

it's going through and patterning and

play02:55

extruding those through

play02:57

as we go along so that's circular

play02:59

pattern

play03:00

and the best part about utilizing

play03:02

circular pattern this is in the of

play03:04

course the 3d create menu

play03:07

and there is a circular pattern and a

play03:09

rectangular pattern in the sketch

play03:10

environment but the benefit of utilizing

play03:13

it here is that this is easily

play03:16

can be edited it's an easily easily

play03:19

editable kind of feature that we have

play03:21

and within fusion 360. so

play03:23

that's one benefit to doing it here

play03:26

all right here with the rectangular

play03:27

pattern i have a part here i'm going to

play03:29

go to create pattern it's going to

play03:31

operate very similar to circular pattern

play03:34

first thing it wants to make me do is it

play03:36

wants me to choose what kind of type of

play03:38

item that i want to pattern so i'm going

play03:40

to choose features and it wants me to

play03:42

select the object so i'm going to select

play03:43

this little cylinder that's on the top

play03:45

of the rectangle here and it wants me to

play03:47

choose the directions so i'll choose

play03:49

select and then either you can choose

play03:50

the axes or you can choose like edges on

play03:52

the part

play03:53

either option gives you some more

play03:55

flexibility so i'm going to choose this

play03:56

horizontal line you'll notice the blue

play03:58

arrow gets highlighted which means we're

play04:00

going to start going kind of

play04:01

horizontally first

play04:03

going across

play04:04

like as far as to cover the width and

play04:06

then the other one will cover the depth

play04:08

going from front to back so here on our

play04:10

distance type we can either do extent or

play04:12

we can do spacing so either one and

play04:15

again we have that suppressed checkbox

play04:17

that we can use as well so let's try

play04:19

four of these and then the spacing the

play04:21

distance

play04:23

we will have will be let's try one inch

play04:26

and this kind of gives us a preview so

play04:28

one inch may be a little too short on

play04:30

our spacing between our components two

play04:33

inches should work pretty well and

play04:34

that's what we're seeing there so

play04:36

there's four cylinders being pattered in

play04:38

if i change that to extent

play04:40

you know you'll see it changes

play04:42

automatically to six inches so because

play04:44

that's the width of our

play04:46

of our part there so

play04:48

and that's kind of what's going on is

play04:49

it's determining how many that we can

play04:51

fit within the extent or how many that

play04:53

we want to fit in there so if i bump

play04:55

this up to five you can see that goes

play04:57

through and just puts in a little bit

play04:59

closer spacing and does some of the

play05:00

calculation for us if i put six in there

play05:03

you can see we start getting a little

play05:04

closer

play05:05

with some of our

play05:06

cylinders on our spacing so that's the

play05:09

extent versus spacing

play05:11

is that would be and here it

play05:13

automatically calculated if we went

play05:15

through and we you know it's got 1.2

play05:17

inches between each cylinder so here i'm

play05:20

going to change i'm going to leave it at

play05:21

extent and then i'm going to go ahead

play05:22

and move to the second direction so i

play05:25

can usually what i like to do is either

play05:26

you can click on usually i click on the

play05:28

arrow and then it allows me to see that

play05:31

now you can click and grab on the arrow

play05:33

and kind of see by default it's got

play05:34

three inch spacing with three which

play05:37

looks like it works pretty well with our

play05:39

model but we could always go through and

play05:41

make some changes and the same options

play05:43

we have direction types we could do

play05:44

symmetric or we could do one direction

play05:47

and i would do

play05:48

in this case you can see what the

play05:50

effects are for both

play05:52

so

play05:53

and again the adjust or the identical or

play05:56

optimized so we'll try optimized again

play05:59

that's going to be the fastest computing

play06:00

option

play06:01

that we have available and we're going

play06:03

to say okay and that's going to give us

play06:04

our rectangular pattern

play06:06

now the other thing is as well i'm going

play06:08

to right click and i'm going to edit the

play06:09

rectangular pattern

play06:11

is you could go through and have for

play06:13

example you just not want to do both

play06:15

directions so i can put in here i could

play06:18

have

play06:18

now you see that has quantity of zero

play06:21

so

play06:22

i could go one

play06:24

and then just go through and have that

play06:26

there where i just have one row

play06:29

and i have six of these being pattern

play06:31

across and say okay so you can just

play06:33

rectangular pattern in one direction and

play06:35

that's one benefit of of utilizing this

play06:38

option so or we could have also gone

play06:41

through

play06:42

done the exact same thing change this to

play06:44

one

play06:46

change this to three

play06:48

and pattern just in the one direction

play06:51

so

play06:51

that's the really flexible benefit of

play06:54

utilizing rectangular pattern

play06:56

all right the last one here that will be

play06:59

would be covered on the fusion 360 exam

play07:01

is called pattern on a path

play07:03

so i know there's a new pattern option

play07:05

that has just been put in here recently

play07:08

called geometric pattern but for the acu

play07:10

exam

play07:11

pattern on a path might be the only it's

play07:13

probably the only one that's going to be

play07:14

of these four options the first three

play07:17

are the ones that are going to show up

play07:18

so pattern on a path is a really cool

play07:20

option

play07:21

you can choose again

play07:22

what features you want i'm going to

play07:24

change this little take this little

play07:25

rectangular prism and i'm going to

play07:27

choose the path that i want to follow so

play07:29

i'm going to choose the arc at the top

play07:31

and then i'm going to kind of turn this

play07:33

to the top edge as well

play07:35

and here you can again choose the

play07:37

suppress option if you wish what kind of

play07:39

distances i'm going to click and grab

play07:41

the grip you can see the distances will

play07:43

go through and change and as you turn

play07:45

around you're going to see here again

play07:47

you're going to see this square this

play07:49

rectangular prism will kind of get just

play07:51

a little bit

play07:52

a little bit cut off as we do so but

play07:55

this could give you an option as far as

play07:57

you want to pattern these along this

play08:00

particular path

play08:01

and so here what quantity we want maybe

play08:04

we want five

play08:06

again this is going to go a distance so

play08:08

a certain distance you'll see that it

play08:10

climbs you can set a start point if you

play08:13

want

play08:14

extent and spacing

play08:15

are the options that we have so for

play08:18

example if i want

play08:20

them to be one inch apart

play08:22

that would go through again this one

play08:24

running on the edge so i might suppress

play08:26

it

play08:26

and then you have one direction you

play08:28

could go symmetric so you can see the

play08:30

effect that has it just takes the middle

play08:32

component and or makes the first

play08:34

component kind of the middle and kind of

play08:36

goes on each side

play08:37

and then you can either have identical

play08:39

for the orientation or you could have it

play08:41

follow the path direction so you can

play08:42

kind of see here it kind of turned my

play08:45

my objects as they went along and they

play08:48

follow the path so depending upon what

play08:51

they have and again

play08:52

i'm going to go optimized on the compute

play08:55

option and i can say okay

play08:57

and this allows me to see you know that

play08:59

this is going to follow and pattern

play09:00

along the the arc path that i selected

play09:03

so

play09:05

again a lot of the same options you see

play09:06

in all three of these

play09:08

patterning

play09:10

tools and so that's just kind of getting

play09:12

more familiar with those and seeing what

play09:13

you have to work with

play09:16

all right this is the

play09:18

end of looking at the patterning

play09:20

features so in another video we'll cover

play09:22

another autodesk fusion

play09:25

certified user exam objective

play09:28

and with that

play09:30

keep studying keep trying out if you got

play09:32

questions

play09:34

contact me but otherwise check out other

play09:37

videos for more exam objectives

Rate This
β˜…
β˜…
β˜…
β˜…
β˜…

5.0 / 5 (0 votes)

Related Tags
Autodesk Fusion3D ModelingCertification PrepCircular PatternRectangular PatternPattern on PathDesign TutorialCAD SoftwareFeature Creation3D Printing