Sketching - Create Dimensions
Summary
TLDRThis video tutorial focuses on teaching viewers how to create and manipulate dimensions within the sketching environment in Fusion 360. It covers the use of the sketch dimension tool, accessed via the menu or shortcut ('D'), and explains the difference between driving and driven dimensions. The instructor demonstrates how to select lines or points to set dimensions, toggle between radius and diameter for circles, and use aligned, vertical, or horizontal dimensions. The video aims to help viewers prepare for the Autodesk Certified User exam by familiarizing them with essential sketching and dimensioning techniques in Fusion 360.
Takeaways
- 🎯 The video is focused on teaching exam objectives for the Autodesk Certified User certification exam.
- 📚 It specifically covers creating dimensions within Fusion 360's sketching environment.
- 🖥️ The instructor demonstrates how to access the sketch dimension tool through the menu, create, or the keyboard shortcut 'D'.
- 📏 There are two main methods for creating dimensions: selecting the entire line or using a two-click method to select points.
- 🔢 For linear dimensions, you can set a specific value, such as changing a length to two inches.
- 🔵 When dimensioning a circle, the default is diameter, but you can switch to radius by right-clicking.
- 📐 The two-point method is recommended for more precise control over dimension placement.
- 📏 Aligned dimensions ensure that the dimension is parallel to the line being measured, either vertically or horizontally.
- 🔄 The difference between driving and driven dimensions is explained, with driving dimensions being editable and driven dimensions being informational.
- 🛠️ Editing a driving dimension can alter the geometry of the sketch, which is crucial for accurate creation.
- 📝 The video aims to help viewers become proficient with Fusion 360, especially for those preparing for the Autodesk Certified User exam.
Q & A
What is the main topic of the video?
-The main topic of the video is covering exam objectives for the Autodesk Certified User certification exam, specifically focusing on creating dimensions within Fusion 360.
What is the purpose of creating dimensions in Fusion 360?
-Creating dimensions in Fusion 360 is essential for accurately defining the size and relationships of the sketch elements, which is necessary for the correct creation of the geometry.
How can you access the sketch dimension tool in Fusion 360?
-You can access the sketch dimension tool in Fusion 360 by going to the menu and selecting 'Sketch Dimension', clicking on 'Create' and choosing the last option, or by using the keyboard shortcut 'D'.
What are the two common methods to create dimensions mentioned in the video?
-The two common methods to create dimensions mentioned in the video are selecting the entire line to grab its length or using the two-click method to select specific points on the sketch.
How do you set a specific value for a dimension in Fusion 360?
-To set a specific value for a dimension in Fusion 360, you select the dimension line or points, then enter the desired value and press 'Enter'.
What is the difference between a diameter and a radius dimension for a circle in Fusion 360?
-In Fusion 360, a diameter dimension measures the full distance across a circle, while a radius dimension measures half of that distance from the center to the edge.
How can you create an aligned dimension in Fusion 360?
-To create an aligned dimension in Fusion 360, you select the points you want to align the dimension to, right-click, and choose 'Aligned' from the options, then set the desired value.
What is the difference between driving and driven dimensions in Fusion 360?
-Driving dimensions in Fusion 360 are those that can be edited to change the geometry of the sketch, while driven dimensions are for visibility and informational purposes only, and cannot be edited.
Why is it important to be familiar with different types of dimensions in Fusion 360?
-Being familiar with different types of dimensions in Fusion 360 is important because it allows for precise control over the geometry creation, ensuring that the design meets the required specifications.
What is the significance of the dimension tool for the Autodesk Certified User exam?
-The dimension tool is significant for the Autodesk Certified User exam because it tests the ability to accurately create and modify sketches, which is a fundamental skill in using Fusion 360 effectively.
How can viewers get in touch with the presenter if they have questions about the video content?
-Viewers can get in touch with the presenter by emailing them, as mentioned at the end of the video script.
Outlines

This section is available to paid users only. Please upgrade to access this part.
Upgrade NowMindmap

This section is available to paid users only. Please upgrade to access this part.
Upgrade NowKeywords

This section is available to paid users only. Please upgrade to access this part.
Upgrade NowHighlights

This section is available to paid users only. Please upgrade to access this part.
Upgrade NowTranscripts

This section is available to paid users only. Please upgrade to access this part.
Upgrade Now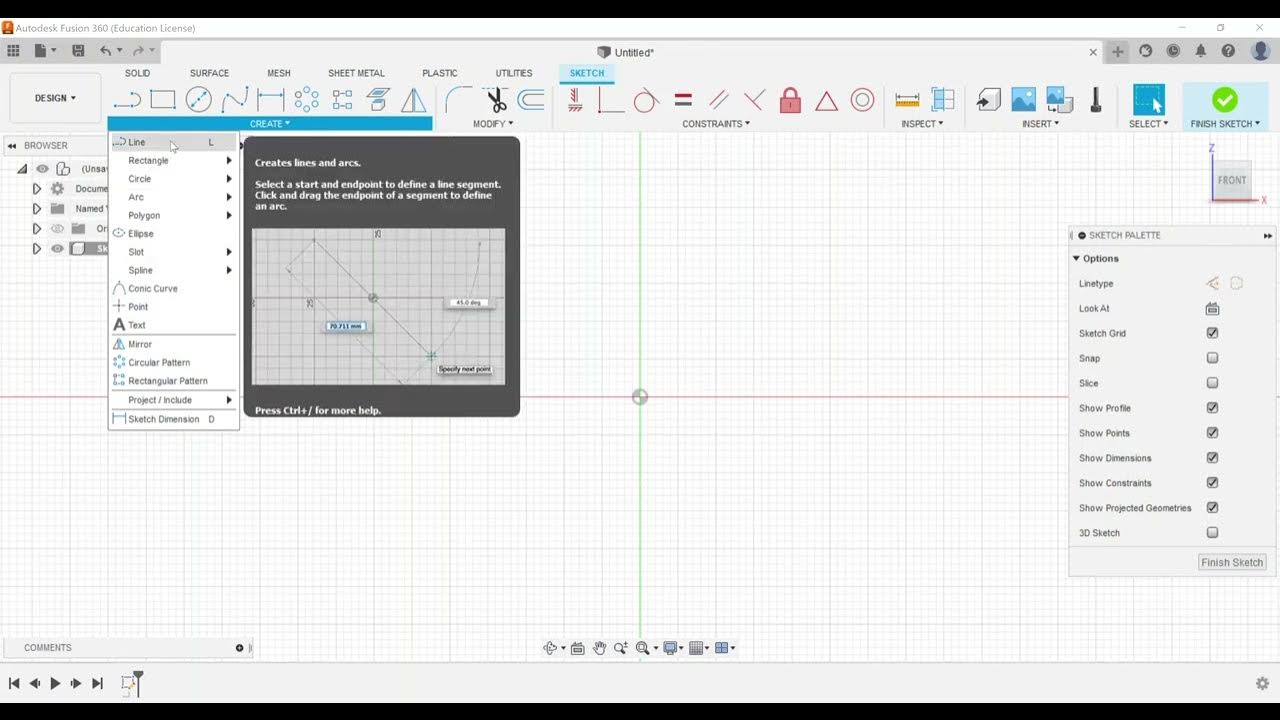
5.0 / 5 (0 votes)