Building a SOLID $1200 Gaming PC!
Summary
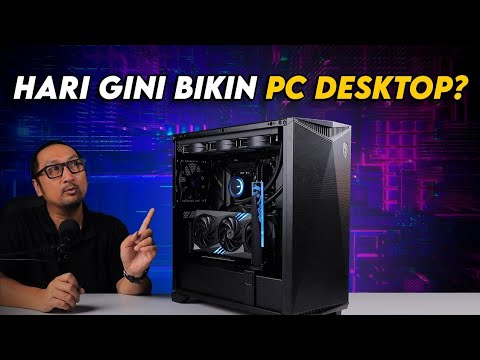
TLDRIn this PC build guide, the narrator walks through assembling a $1,200 mid-range gaming PC in 2024. He chooses affordable yet capable components like a Ryzen 5 5600X CPU, B550 motherboard, RTX 4070 Super GPU, T-Force SSD, and Thermaltake case. After detailing the build process, he benchmarks the PC in 1440p across several games, achieving strong performance around 100fps average. Despite some minor software issues, the narrator is happy with the power and aesthetics of this balanced rig, making it a compelling option for smooth 1440p gaming without breaking the bank.
Takeaways
- 😊 The recommended budget for a good gaming PC in 2024 is $800 - $1200
- 👾 You can build a balanced $1200 gaming PC without the latest/greatest parts
- 💻 A previous gen CPU like the Ryzen 5 5600X is quite affordable at $150
- ⚙️ Paired an older, cheaper CPU with a motherboard and GPU to save money
- 💡 A cheaper CPU means you likely won't need an expensive power supply either
- 🎮 Tested performance at 1440p resolution to balance CPU and GPU load
- 📈 The system scored well in benchmarks and achieved 100+ fps in most games
- 😕 Did see some compatibility issues in one game - need to debug
- 🌈 Added some color with orange cabling to contrast the black components
- 👍 Very happy overall with the $1200 balanced gaming PC build
Q & A
What is the recommended budget for a good gaming PC in 2024?
-The recommended budget is around $800 to $1,200. This allows flexibility to choose good components without overspending on things that won't improve performance.
Why was the Ryzen 5 5600X CPU chosen for this $1,200 gaming PC build?
-The Ryzen 5 5600X is an affordable previous generation CPU that still offers great performance. Using an older CPU allowed budget for a better graphics card without compromising too much on the CPU.
What kind of motherboard was used with the Ryzen 5 5600X CPU?
-An affordable B550 motherboard was chosen to pair with the Ryzen 5 5600X. Older, cheaper motherboards can still be purchased new to save money.
What graphics card was used in this gaming PC build?
-The Nvidia RTX 4070 Super was used. It offers great 1440p performance at a reasonable price point for a $1,200 budget.
How did the system perform in game benchmarks?
-It performed very well overall, averaging over 100 FPS in Call of Duty and up to 200 FPS in Shadow of the Tomb Raider at 1440p. Star Wars Battlefront 2 saw more variable frame rates due to possible driver optimization issues.
What case was used for the build?
-The Lian Li LANCOOL 205 Mesh C case was used. It has great airflow and cable management options.
What power supply was chosen?
-A 750W power supply was used. The older CPU and efficient GPU did not need an expensive high-wattage unit.
What storage was included in the $1,200 budget?
-A 512GB T-Force M.2 SSD was used for primary storage. Additional hard drives could be added later if more space is needed.
What memory was used?
-16GB (2x8GB) of DDR4 memory recycled from a previous build was used to save money.
What tips are provided for choosing a power supply?
-Look for adequate wattage, good efficiency rating, and long manufacturer's warranty for confidence in build quality.
Outlines
🖥️ Overview of Ideal Budget for a Gaming PC in 2024
The ideal budget for a gaming PC in 2024 is around $800 to $1200. This provides flexibility to choose good components without overspending. For example, you can get an older, affordable CPU like the Ryzen 5 5600X for $150 and pair it with a cheaper compatible motherboard. The GPU doesn't need to be the latest either. A system in this budget range will have enough versatility and power for a great 1440p gaming experience.
👨💻 Assembling the $1200 Sample Gaming PC
The video assembles a sample $1200 gaming PC with a Ryzen 5 5600X CPU, B550 motherboard, RTX 4070 Super GPU, T-Force SSD, Be Quiet! power supply, and Lian Li 205 Mesh case. Key steps are installing the CPU, RAM, M.2 SSD, motherboard in the case, adding case fans, routing cables, and finally installing the GPU. There are some cable management challenges but overall it looks good.
🎮 Testing Performance of the Sample $1200 Gaming PC
The video tests performance of the sample gaming PC in 1440p on 3DMark Time Spy, Horizon Zero Dawn, Shadow of the Tomb Raider, and Star Wars Battlefront 2. It scores very well in synthetic benchmarks. Real game tests show 100+ FPS in Horizon and 130-200 FPS in Tomb Raider with the GPU and CPU both cruising. However Battlefront 2 has big frame rate drops, likely indicating a driver optimization issue.
📝 Final Thoughts on the $1200 Budget Gaming PC
Overall the $1200 gaming PC performs very well at 1440p with the RTX 4070 Super GPU and Ryzen 5600X CPU combination. The GPU delivers as expected. The video cautions not to cheap out too much on CPU either. There are some frustrations like clunky RGB software and limited VRAM capacity on the GPU. But overall it's a solid balanced build within a reasonable $1200 budget for 2024.
Mindmap
Keywords
💡Gaming PC
💡Components
💡1440p
💡Bottleneck
💡Value
💡Future-proof
💡Pairing
💡Airflow
💡Cable management
💡Benchmark
Highlights
For a $1200 gaming PC in 2024, a Ryzen 5600X and RTX 4070 Super provide good performance.
The Lian Li Lancool 205M case has good airflow and cable management options.
Using an older, cheaper CPU like the Ryzen 5600X allows budget for a better GPU.
With a $1200 budget, you don't need the most expensive components for a good experience.
The RTX 4070 Super is an efficient graphics card that doesn't require a high wattage PSU.
A B550 motherboard provides modern features at an affordable price.
Look for sufficient wattage, good efficiency, and a long warranty when choosing a PSU.
The RTX 4070 Super gets over 100 FPS at 1440p in tested games, limited mainly by the CPU.
Higher frame rates lead to higher CPU utilization, so balance your CPU and GPU.
The RX 4070 Super stays relatively cool, peaking around 65C under load.
Some games may have compatibility issues with new GPUs, so check carefully.
Use cable combs and extensions for a clean, professional build aesthetic.
RGB software can be tricky to work with - be prepared to troubleshoot.
The RX 4070 Super offers good 1440p performance around $600.
A $1200 budget allows a balanced gaming PC without buying excess components.
Transcripts
as you can imagine I'm asked all the
time what an ideal budget is for a
gaming PC and in 2024 well that depends
see if you're coming into this without a
budget in mind I like to push folks
somewhere around the $8 to $1,200 range
you can get a lot of Versatility from a
budget like that you can pick and choose
from several different components you're
not so locked down from a financial
perspective and at the same time you're
not just senselessly throwing money at
things that won't necessarily increase
your experience in game case in point
your case you could Cho a very expensive
case that ultimately won't give you any
better performance than a cheaper
airflow option like this 205 mesh C so
in this video we'll be building a $1,200
gaming PC that I think is quite balanced
it won't use the latest and greatest
platform and that's kind of the point
I'm trying to show you that you don't
have to spend I don't know $400 or $500
on a new gaming CPU you can choose
something from the last gen that's
actually quite affordable like our 5600
x here for about 150 USD brand new that
means you get to pair it with an older
usually cheaper motherboard as well and
these you can still actually buy new
today on sites like Amazon and you might
not even need the most expensive power
supply either because well if it's an
older cheaper CPU it's probably not
pulling a lot of power and the graphics
card you pair that with well isn't going
to be super power hungry if you buy
something modern because most graphics
cards today are actually quite efficient
when it comes to power usage so 1,200
bucks what will it get you it'll get you
something like this if you want to
follow along we'll have all these parts
linked below without further Ado let's
get to building are you ready stay with
me thermal Grizzly cryo sheets are
excellent substitutes for traditional
thermal paste thanks to their graphing
construction and extremely high thermal
conductivity making them more effective
than traditional carbonaut thermal pads
they're super easy to install never dry
out and can be purchased in various
sizes ranging from 24x 12 mm all the way
up to 50x 50 in theory you never have to
change one of these making them peace of
mind for servers gaming PCs and even
high-end workstations and best of all no
mess just keep in mind that these are
electrically conductive so be sure to
use them as directed check out thermal
Grizzly's cryo sheets via the links
below for your CPU or GPU today now I
don't usually start things off with the
case but I want to give the Lano 205
mesh C just a quick run through for
those who haven't seen us already
building this in a past video on the
channel I don't expect any of our
Hardware to conflict with the dimensions
of this chassis but if you want to build
something similar this will at least let
you know what you're getting yourself
into 12 seconds later
Jesus okay the anticipation I saw the
electricity I I just I knew that that
was going to be rough I literally could
see the little lightning bolt come up
from the case um material yeah that was
that was painful now for starters we've
got up to a 280 mil fan rad combo Mount
up front we do have a nice perforated
front panel that's going to be great for
airf flow you'll see this cable bar next
to it and this looks very in zxt and it
has the same functions here in the Le
and Le version so you write your cables
through these holes running all the way
down the motherboard tray speaking of up
to eatx motherboards here that's nice in
a case this Compact and up top you can
see mounts for up to a 280 mil AIO
although I recommend only 240s because
you might have some motherboard
clearance issues of course at the rear
we get a single 120 mil Mount that's
going to act as our exhaust and we can
slide that up or down the platform going
in that case is going to be pretty
straightforward to assemble you guys
know b550 by this point is going to be a
uh fairly affordable platform which is
why we chose it for this ,200 is build
if I can get this motherboard placed on
top of the box this will act as a nice
little test bench building assembly
setup we'll get our CPU in look at that
lovely ryzen 5 5600x you getting all
that Raymond looking all right okay and
uh let's see here I don't know if I've
actually built with this chip before
it's been sitting in the drawer for a
while and felt like putting it to some
good use so we're going going to install
it like that there lower the retention
arm we'll get both of our dims installed
now some of you might recognize these
specific modules we pulled these from
that broken eBay system that we
purchased and uh were able to fix for I
think like what what what what was the
issue I don't remember what the issue
was what was the issue uh it was a bad
motherboard that's right so everything
else worked and we recycled the ram so
it's going in here yeah not bad got our
trusty iFixit toolkit we'll install our
m.2 next just removing the single
Phillips screw ah there we go and uh
this I don't actually know the name of I
don't remember where I even got it from
but it's a team group one taby in V you
can find these all day on Amazon not
just from Team group from other
reputable manufacturers as well for
around 50 bucks or so we're going to use
a thermal Grizzly cryo sheet that should
uh make things a bit easier to clean up
later on so we'll set this nice nice and
gently on top of our CPU coolers going
down now I might have mixed these
coolers up I don't remember if the 5600
x comes with this cooler or the lower
profile one the W stealth but uh either
way I think you'll be okay unless you're
doing some serious overclocking all
righty and That Just About Does it for
our platform so uh have a look almost
totally matte black which is great it's
going to look nice when paired with our
4070 super speaking of let's go and get
this platform in the case now and
conveniently with this board we have an
integrated rear IO Shield just going to
line things up
like this you know I really wish case
manufacturers would just stick to one
type of screw like either a 3M or 6m I
forget which one this is or a 632s it
would just be nice to have things
uniform I think we have a type c uh we
don't have a type c what oh no we do
down here okay so it's way down there at
the bottom which is going to make this
uh keyable routing a bit awkward I'm not
even sure if Raymond's going to see what
I'm doing down here but uh just trying
to wiggle and jiggle this oh and it's
upside down why don't they make the
type-c connector for
cases like bir directional it's just
really annoying they make the regular
type-c cable bidirectional can we just
be consistent please please right so not
bad so far we're going to add just a few
fans and then it's time for the power
supply that's going to clutter things up
a bit more but you'll see Cable
Management behind the mother W tray she
ain't too bad going to Route front panel
cables first initially they were down
this side but I think they look better
and I'm just going straight down like so
and then we can run our fatter 24 pin
along the very front I found these two
pure Wings 31 140 mil fans in the closet
they are pwm which is nice and I think
for the record the 205 mesh C does come
with fans but I don't remember what I
did with them so we're putting these in
instead if you like to spend a few more
dollars on some extra fans just remember
to account for that in your budget I
think you'll have room to spare we
actually have a bit of room to spare in
our $1,200 budget for some custom cable
extensions which will look nice later on
in the video I'm debating on adding a
third fan you certainly could for
exhaust it wouldn't hurt I think
temperature- wise though we're going to
be okay and our graphics card especially
should have plenty of fresh air coming
in from the front thanks to this large
140 at the bottom and
here we are woo that was loud sorry
folks check out how clean she looks uh
it's not about to look this way after we
install the power supply speaking of
let's get to that right now and no
matter who you ask you'll always have
different opinions on power supplies the
three things I like to look for
obviously you want to make sure your W
is taken care of make sure that your
efficiency is also well expected and
then the third thing I look for is the
manufacturers warranty that tells me how
much confidence the brand has in their
own product you could also reference
other sites that'll create little tier
lists and things for units that'll kind
of give you an idea of the construction
the build quality and the just the
internal components being used voltage
Ripple and things like that you might
want to care about in a higher end
system in she goes it is going to be a
big help that this unit is not super
long uh it's getting snagged on this HD
audio cable okay did not see that one
coming a few moments later
Mount have you ever seen a cringier
power supply install I'd be willing to
bet you haven't just got to tighten it
down and now it's time for cable
extensions I thought we were going to go
with like pure black cables but I think
we're going to add a bit of color I saw
the orange and while nothing else in the
rig currently is orange I think just a
splash of color will do this rig a lot
of good space out these cable Combs a
bit and then connect the extension
cable to the 24 pin this one's always a
bit stubborn so to sit
sort of like that right there we'll
connect it to the power supply at the
back and uh be smooth sailing eight pin
EPS up top with of course accompanying
cable Combs and here's the outcome back
here now you notice two extra cables
just kind of dangling it's because we're
waiting on the final component the final
install that is our graphics card this
beautiful Nvidia RTX 4070 super like I
said it is matte black it does
unfortunately come with this stupid
12volt high power to dual 8 Pin adapter
and I don't have a 12vt high power cable
extension which means we're stuck using
this which means it's not going to look
as great as it otherwise
would which means we got to deal with it
two PCI slot covers to remove this
actually isn't a a big card at all it's
only going to stretch about the length
of our ATX motherboard which is nice
just be careful this is a bit of a
fingerprint magnet you know you can have
it both ways it's either got to look
really pretty and be a fingerprint
Magnet or it looks ugly and it's not so
I'll take this in she goes
then let's see yeah so there you get a
good perspective there of how long this
card is it's literally the length of a
standard ATX motherboard so I imagine
this will fit in a lot of smaller cases
as well which is nice considering how
much power this thing's packing this is
about as good as we can get it with this
dual a pin adapter at least you can see
a smidge of the orange to fit the theme
and here we are with an unexpected turn
toward a slightly orange theme but I
think it looks really really good
considering uh we were just going after
something that was rather monochromatic
and if you're curious this is what the
backside looks like so it's still not
bad just don't look at anything at all
down here perks of having a nonm modular
power supply and here comes the tricky
part so Raymond you're going to want get
a top down shot of this uh we are going
to try to fit this right panel on and
what I'm really worried about is this
piece right here because it kind of just
wants to stick up and I don't think it's
going to play well with this so let's
give it a shot
uh is
seriously that's like way easier than I
thought it would be okay um yeah I
totally expected that here's the hoping
the power on process is just as
simple I'm not gonna I'm not going to
jinx it we're just gonna go for it here
we go uh Power on nice got a little bit
of RGB we can fix that I think we're
just going to sync it up to straight
orange to fit the cabling we might need
to use the key flash plus function which
thankfully is included in this board oh
no look at that we get our post that's
great we just have to reset the uh TPM
and then we should be able to load into
windows and test a few games I know you
guys are curious about the 470 super I'm
personally curious about how the 470
super plays with the 5600x still in 2024
for the right price you can still
justify am4 in a, or so dollar PC build
budget so let's see how it fares now I
wanted to emphasize the 1440p resolution
you tend to find find a nice balance
between both CPU and GPU utilization in
this resolution and starting first with
3D Mark time spy which is a 1440p
synthetic in dx12 we score better than
85% of all submitted results our
Graphics score is around 21,000 but our
CPU score is around 8,000 suggesting
that this is where our true bottleneck
will lie with most titles out there
unless you're running in 4k uh you're
probably going to see some CPU
limitation in most games since the frame
rate is expected to be quite high with a
system of this caliber and in general a
higher frame rate leads to higher CPU
utilization in 1440p medium preset and
no dlss enabled you can see we're
averaging just over 100 FPS which is
great no frame time spikes this game is
extremely smooth very well optimized for
especially noer Hardware I don't think
you're going to sweat this one at all
and you can see a Peak at our GPU and
CPU utilizations here uh both are kind
of just cruising and temperatures
actually look really good as well next
up shadow of the Tomb Raider now this
was an Nvidia touted title but we don't
have dlss enabled no Ray tracing uh
anything of that sort we're just running
the medium preset with TAA and depending
on the scam we're averaging somewhere
between 130 FPS and upwards of 200 which
I think is very very acceptable for a
title that looks this good even in 2024
this game NOS how attack a graphics card
and despite this being a built-in
Benchmark this is actually the hottest
AR graphics card ever got somewhere
around the mid 60s with utilization
peaking at around 90 to 95 and in this
scene where it's probably the most
intensive around 150 FPS is still
excellent last up the remake of Star
Wars Battlefront 2 now this one
surprised me a bit because while the
frame rate seems okay at this point in
1440p medium preset TAA only you'll see
that when scenes get especially
intensive the frame rate dips quite
alarmingly down to around 30 40 50 FPS a
place you would never expect a game this
well optimized historically to be with
something like a 470 super and all I can
really chalk this up to is just young
drivers maybe the game isn't well
optimized for the new driver release in
this graphics card maybe it it's the
driver itself I don't have enough uh
data at my disposal to make a claim one
way or the other regardless it's clear
this specific title seems to have an
issue so just be careful with the games
you play if you notice some
incompatibilities or some frame rate
dips that are unexpected uh be sure to
reach out to either Nvidia directly or
the game developer hopefully can get
these Kinks worked out I also want to
point out that the main menu was
averaging around 9 FPS which yeah Count
Dooku is looking a bit rough now
Battlefront to a side I'm sure most of
you aren't surprised by the performance
the system is packing the graphics card
is going to be doing a lot of the work
but you want to make sure that you don't
cheap out too much on your CPU because
it will play a role especially if you
play in lower resolution starting with
something like the 5600x we used here at
around 150 USD you'll also probably
notice we managed to sync up the orange
LEDs that was a bit of a pain I've never
worked with thermal take RGB software
before but like most RGB software Suites
out there it was um difficult to say the
least and I also cannot for the life of
me get this outer RGB ring in this AMD
cooler to sync up with the other orange
ones so it does look a tad clunky but
all in all still very happy with the way
this rig looks and of course like I said
earlier we're going to have all these
parts linked below if you want to build
something similar today so that's it for
this one thank you so much for watching
leave some feedback in the comment
section below consider subscribing if
you haven't already let us know what you
think about this build uh what do you
think about the 470 super we haven't
actually published a review and I don't
think we will a lot of other channels do
far more thorough jobs than we ever
could in the review department at this
point so we'll defer to them but we at
least wanted to build with it kind of
give you a taste of performance it's
where you'd expect it to be right above
a 4070 and uh for a price that I don't
think will shock too many folks which in
this day and age I guess will take it
could could be worse it's sad that
that's the mentality we have nowadays
but uh I guess the the one other
complaint I could voice is the fact that
it still only has what 12 gigs of vram
um and I know that's going to be a point
of contention for a lot of folks who are
not keen on paying $600 for a 12 gig
card it is what it is but uh overall I
think it looks really good obviously it
performs well it actually stays quite
cool and I'm super happy with the
entirety of this build as it stands
subscribe like I already said this stuff
why am I saying it again what the heck
I'll catch you in the next one my name
is Greg thanks for learning with
[Music]
me
Посмотреть больше похожих видео
2024년 최고의 QHD 컴퓨터 견적 추천해드리겠습니다 (RTX 4070 SUPER)
This is what $1500 gets you in 2024! - PC Build Challenge
PC GAMER COMPLETO CUSTO BENEFÍCIO QUE RODA TUDO, O MELHOR!
55만원으로 역대급 가성비 만렙 게이밍 컴퓨터를 조립해봤습니다!
Value for Money ALL AMD White Gaming Pc Build Under Rs.70,000/- ONLY | Ryzen 5 5600X RX 6600
БЮДЖЕТНАЯ ИГРОВАЯ СБОРКА ЗА 25К / ДОСТУПНЫЙ КИТАЙСКИЙ ПК
5.0 / 5 (0 votes)