Microsoft PowerPoint Tutorial - Beginners Level 1
Summary
TLDRIn this beginner's tutorial by Teachers Tech, Jamie guides viewers through creating professional PowerPoint presentations using Microsoft Office PowerPoint 2016. The video covers the basics such as inserting new slides, adding content, and utilizing templates. Jamie also demonstrates how to customize presentations with design features, animations, and transitions. The tutorial includes practical tips for managing slides, formatting backgrounds, and enhancing images. Jamie emphasizes the use of the 'Tell Me' feature for quick help and offers additional resources for advanced PowerPoint techniques. By the end, viewers will be equipped to create and refine engaging presentations.
Takeaways
- 😀 The tutorial is aimed at beginners, focusing on the basics of PowerPoint to help create visually appealing presentations.
- 📚 The instructor uses Microsoft Office PowerPoint 2016 and provides tips on finding and opening the application.
- 📌 The video offers a quick walkthrough of PowerPoint's interface, highlighting the ribbon and tabs for easy navigation.
- 📁 The importance of organizing presentations is emphasized, with a feature to pin important presentations to the top of the list for easy access.
- 📐 The use of templates is encouraged for time-saving, with the flexibility to alter and customize them as needed.
- 🖋 The video demonstrates how to add text, such as titles and names, to slides and adjust their position and formatting.
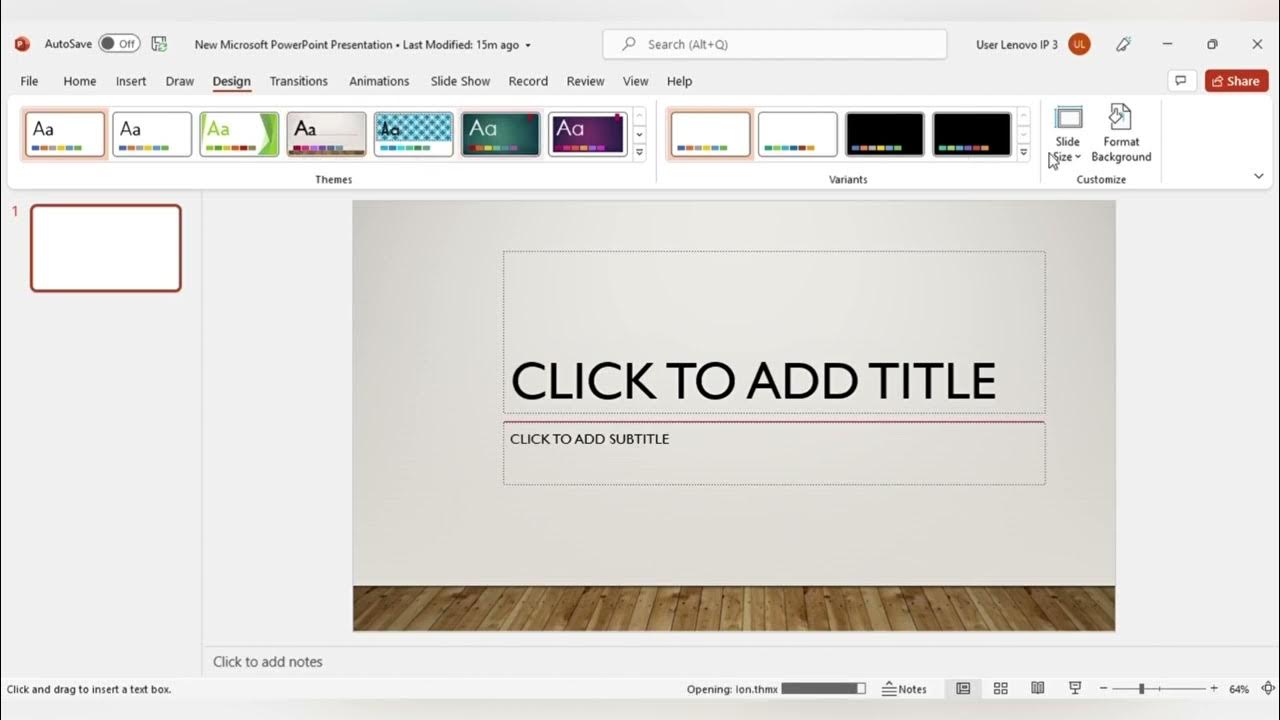
- 📑 It explains how to insert new slides and offers various options for slide layouts, including comparison and blank slides.
- 🎨 The design tab is introduced for applying themes and styles to slides, allowing for quick visual enhancements.
- 🌈 Background customization is covered, including solid fills, gradients, and picture backgrounds, with the option to adjust transparency and effects.
- 🖼️ The process of inserting and manipulating images, including resizing, layering, and removing backgrounds, is detailed.
- 🎉 Animation and transition effects are showcased as ways to add dynamism to presentations, with options to preview and adjust the sequence.
Q & A
What is the main focus of this tutorial?
-The main focus of this tutorial is to teach beginners how to use PowerPoint, covering the basics of creating and customizing presentations.
What version of PowerPoint is used in the tutorial?
-The tutorial uses Microsoft Office PowerPoint 2016.
How can viewers find the tutorial if they can't locate it on their taskbar?
-Viewers can search for PowerPoint by typing its name in the search bar on their computer.
What is the purpose of the 'pin' feature in PowerPoint?
-The 'pin' feature allows users to keep a specific presentation at the top of the list for easy access while working on it.
Can users change the template of their presentation after starting with a blank one?
-Yes, users can change their presentation's template and customize it at any point, even after starting with a blank presentation.
How can users find more templates for their presentations?
-Users can search online for more templates directly through the PowerPoint application by using the search function.
What is the purpose of the 'Tell Me' search bar in PowerPoint?
-The 'Tell Me' search bar allows users to quickly find features and functions within PowerPoint by typing in what they are looking for.
How can users add a new slide to their presentation?
-Users can add a new slide by right-clicking in the slide area, using the 'New Slide' button under the 'Home' tab, or selecting 'New Slides' under the 'Insert' tab.
What is the difference between a title slide and a blank slide in PowerPoint?
-A title slide comes with a pre-designed layout that includes a title placeholder, while a blank slide provides a clean canvas for users to add any content they want.
How can users customize the design of their slides?
-Users can customize the design of their slides by using the 'Design' tab, which offers various themes and layout options, or by manually adjusting elements like fonts, colors, and backgrounds.
What are some ways to adjust the background of a slide?
-Users can adjust the background of a slide by using a solid fill, gradient fill, pattern fill, or by inserting images or textures as the background.
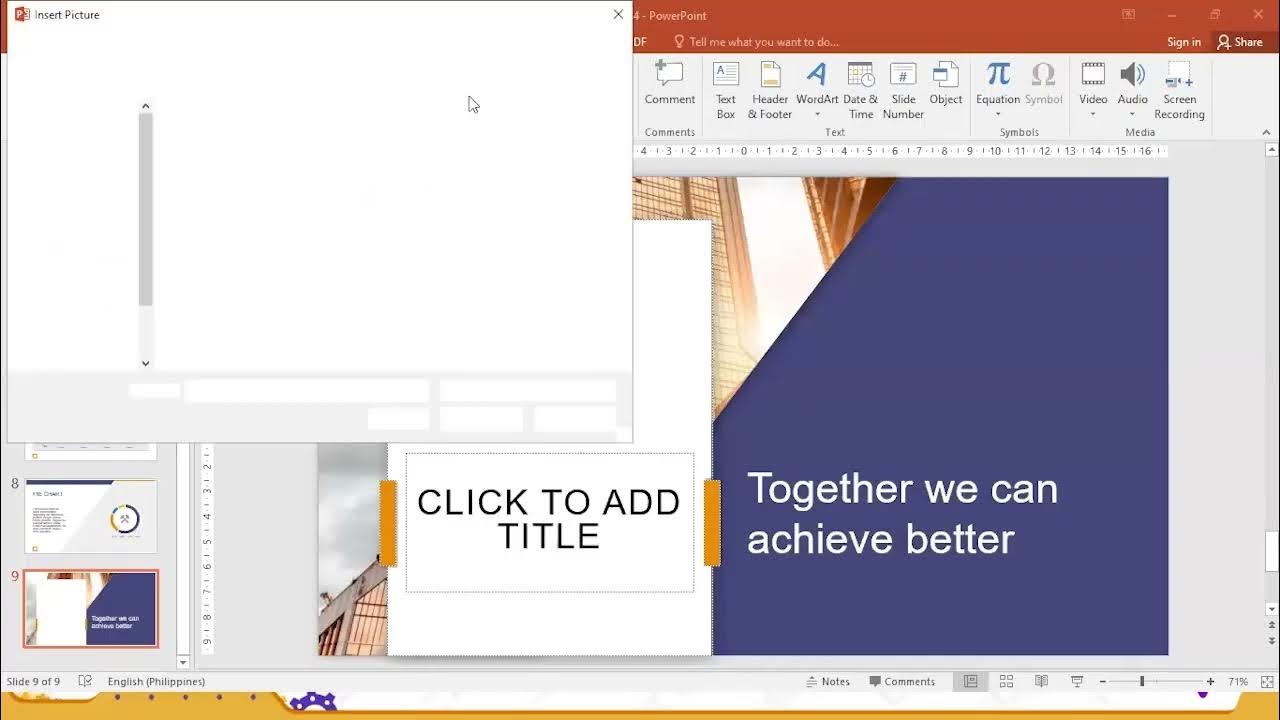
How can users insert images into their slides?
-Users can insert images by uploading them from their computer or searching for and using images available online within the PowerPoint application.
What is the 'Remove Background' feature used for?
-The 'Remove Background' feature is used to make the background of an image transparent, allowing for better integration of the image into the slide design.
How can users add animations to elements on their slides?
-Users can add animations to elements by selecting the element, going to the 'Animation' tab, and choosing from various animation effects.
What are transitions and how are they applied in PowerPoint?
-Transitions are animations that occur between slides during a presentation. They can be applied by selecting a slide, going to the 'Transitions' tab, and choosing an effect.
How can users change the order of slides in their presentation?
-Users can change the order of slides by clicking on a slide to highlight it, and then dragging it to a new position in the slide sorter view.
What is the purpose of the 'Save' and 'Save As' options in PowerPoint?
-The 'Save' option is used to save changes to the current presentation, while 'Save As' allows users to save a copy of the presentation under a new name or in a different location.
Outlines
📊 Introduction to PowerPoint Basics
This paragraph introduces a beginner's tutorial on Microsoft PowerPoint, focusing on the essentials for creating presentations. The speaker mentions an additional video with 10 powerful tips for enhancing PowerPoint skills and provides guidance on accessing and navigating PowerPoint, including searching for it, opening a new presentation, and pinning important presentations for easy access. The paragraph also explains the use of templates and the flexibility to alter them, as well as the basic layout and features of PowerPoint's interface, such as tabs and the ribbon.
📑 Adding and Customizing Slides
The speaker demonstrates how to add new slides to a PowerPoint presentation, offering multiple methods such as right-clicking, using the 'Home' tab, or the 'Insert' tab. The paragraph covers the process of typing content onto slides, such as seasons of the year, and how to insert text boxes for additional text. It also explains how to manipulate text boxes, including moving, tilting, and deleting them. The paragraph includes a walkthrough of presenting slides in slideshow mode, changing the view of slides, and rearranging or deleting slides as needed.
🎨 Designing PowerPoint Slides
This section delves into the design aspects of PowerPoint slides, starting with the 'Design' tab and its ability to apply different themes and layouts to slides. The speaker discusses how to customize fonts, including changing size, color, and applying effects like gradients. Background customization is also covered, with options to apply solid colors, gradients, or images. The paragraph highlights the ability to adjust the transparency of backgrounds and how to use the 'Tell Me' feature for quick access to formatting options.
🖼️ Enhancing Presentations with Images and Text Effects
The speaker explores the insertion of images and text effects to enhance presentations. They demonstrate how to insert pictures from the computer or online sources, adjust their size, and remove backgrounds for a transparent look. The paragraph also covers the use of WordArt for creative text effects and the application of different fills and outlines to text. Additionally, the speaker shows how to apply text effects like reflections to make the presentation more visually appealing.
🌟 Adding Animations and Transitions
This paragraph focuses on animating elements within a slide and transitioning between slides. The speaker shows how to add basic animations to images, such as swivel and fly-in effects, and how to adjust the order of animations. They also demonstrate adding transitions between slides, like random bars, fall over, and drape effects, and how to apply these transitions to all slides for a cohesive presentation flow.
💾 Saving and Sharing PowerPoint Presentations
The final paragraph wraps up the tutorial by instructing viewers on how to save their PowerPoint presentations. The speaker explains the 'Save' and 'Save As' options, the ability to save directly to a PC or to OneDrive for cloud access, and the importance of saving work regularly. They also encourage viewers to subscribe for more PowerPoint tips and conclude the tutorial with a reminder to explore additional resources for further enhancement of presentation skills.
Mindmap
Keywords
💡PowerPoint
💡Templates
💡Ribbon
💡Insert
💡Design
💡Animation
💡Transitions
💡Tell Me
💡Customization
💡Save
💡Undo
Highlights
Introduction to using Microsoft PowerPoint for beginners, covering basics such as inserting new slides and adding content.
Demonstrates how to access PowerPoint, including using the taskbar and search functionality on a computer.
Explanation of how to use and navigate templates, and the flexibility to change templates even after starting a presentation.
Details on the PowerPoint interface, including tabs and ribbons, and how to use them effectively.
Tips on pinning important presentations to the top of the list for easy access.
Step-by-step guide on creating a blank presentation and adding new slides, including different layout options.
Instructions on how to insert and format text boxes, including moving and resizing them.
Overview of slideshow presentation modes and how to navigate through slides during a presentation.
Design tips for making slides look more professional, including using the Design tab and applying themes.
Techniques for changing font styles, sizes, and colors to enhance the appearance of text.
Methods for adjusting slide backgrounds, including solid fills, gradients, and inserting images.
Guidance on inserting and formatting images, including resizing and layering images.
How to use PowerPoint's image editing tools, such as cropping and removing backgrounds.
Explanation of adding animations to images and text, and how to control the order and effect options.
Instructions on applying transitions between slides to create a smooth presentation flow.
Tips on saving and sharing PowerPoint presentations, including saving to the cloud for easy access.
Encouragement to explore more advanced PowerPoint features and to watch additional tutorial videos for further learning.
Transcripts
tire there Jamie keyed here today a
teachers tech hope you're having a great
day today today I want to show you how
to use PowerPoint so this is going to be
a beginners tutorial to make sure you
can start creating some great-looking
powerpoints right away I'm gonna go over
the basics how to make sure you insert
new slides how to add to the slides to
get the most out of it also make sure
you check out my other video that I have
on 10 powerful tips for PowerPoint it's
gonna show you ten quick tips with some
great features to even get more out of
it I'll put the link down below in the
description or check above in the card
also on that so I do have everything
time-stamped in this video so you want
to skip to different parts again in the
description and click on that part and
jump to that part of the video if you're
looking how to do something specifically
so today let's get started on this
beginners tutorial of Microsoft
PowerPoint
so I'm just gonna go ahead and open up
my powerpoint I am using Microsoft
Office PowerPoint 2016 in this tutorial
when I go down I have it just in my
taskbar pinned right here but if you
can't find it there you might wanted to
check to see if you have it set anywhere
but you can search for everything too so
if you're not finding something on your
computer you can see as they just start
typing PowerPoint it will show up there
so a few different ways you can get to
that or any of the other applications on
your computer so when I first opened up
PowerPoint just some things that I want
to point out to you you see all these
templates and I'll explain that in a
moment and we have our blank
presentation but what I want to talk
about first is over here on the left
hand side when I open this up you can
see I have a presentation that this is
what I'm working on right now I have
some older ones too so these would be
the older ones that would be there based
usually on the when I created them let's
say you're working on a really important
PowerPoint you just want it always to be
on the top of the list so you can easily
find it when you open it back up again
take a look at this little pin right
here so that when I click on this little
pin it will pin it to the top you can
see how it says pinned right here well
that means that it will always stay at
the top and I can unpin it once maybe
I'm not working on that one anymore and
I want to put a different one you can
just unpin it like that so just a little
tip when you're working on it so I have
all these templates great templates I
love working with templates saves you a
lot of time in this tutorial today I'll
be focused on the blank presentation
because after you know how to do these
things in a blank presentation you can
go ahead and open a template and you'll
understand everything but at any point
you can change your presentation around
to make it you're not stuck with the
template that you chose at the beginning
you can alter it and change all the
details of it still so don't worry about
that just to point out if I was picking
a template I would just click on it you
can see that I get options that I can
pick some different colors to choose
from and then I can go ahead and hit
create and I would start with those
colors but so for this here today I'll
be just starting with a blank
presentation if you're looking for more
presentations you can see you can search
online the templates right through here
and I could
look through categories and just type in
what you're searching for hit search and
you're gonna find even more templates to
use so I'm gonna go ahead and create my
blank presentation so it opens up just I
want to do a little quick walkthrough of
how things are set up in PowerPoint
across the top we do have our tabs so if
I be referring to a certain tab all
these ones they look like tabs you can
click across them and get to different
parts of the ribbon so the next thing is
the ribbon which is this part right
through here so every tab will have a
different ribbon to it everything's
broken into the different categories you
can see under insert I have things in
different kind of categories inside of
it from images to illustrations to
add-ons well if you're there's one more
section you can take a look at if I
click in notice if I'm under let's say
well fonts right here if I go ahead
there's this little launch button here I
can click on this and it's going to give
me even more information to do some more
customization let's say of the fonts so
whenever you see that you can open that
up something I want to point out if
you're ever looking for something in
PowerPoint or any of the other Microsoft
Microsoft products make sure you use
this right up here to tell me you can
just type in what you're looking for for
example if I was looking at animate
something you can see right away it
comes up and it's even starting to kind
of guess maybe things that I might want
and gives me a few more options but
whenever you're stuck just take a look
at that type that in what you're looking
for and you're going to get a lot of
good suggestions that will probably
solve very quickly that what you're
looking forward to all right so let's
start by just creating a presentation
and it's gonna be about the season so
I'm gonna do what it says click to add
title I'm just gonna click in here and
I'm gonna write the seasons on this one
spell it correctly and put my name
underneath I'll just write my name here
Jamie and I have a slide here so on the
left hand side you notice it's like a
little miniature one this is where I'm
working with and a little slide over
here that will show all the different
slides that are coming now right away
before I make any changes to design I
want to add some more slides and show
you how to present work
so what I'm gonna do is add a new slide
and I can do this in a few different
ways I could right click and add new
slide right here when I do that a lot of
the time but you can also under home you
can see there's new slide right here or
under insert we have new slides so
there's a few different ways you can do
this so I'm gonna right click and add a
new slide and let's just start with
spring and I'm just going to type right
in the top of it I could add a list of
different things maybe that I would want
to talk about it's getting warmer and I
could do a list and so on I'm gonna put
insert another slide but this time I
just want to show you you have options
on the how would the setup of this is so
under insert I'm still an insert and
this would work under home too but if
you click under new slide this time
rather than right up top on it you have
some options of how you might want it
already set up you can see so this one
set up for comparison maybe you want a
blank one maybe you want another title
slide a section of your PowerPoint on
here so if I was doing a comparison
maybe I can set this up if I wanted to
compare fall and over here I'd have
winter and I could do a list
comparing the two different things on
this one so now I'm just gonna put one
new slide one more slide here and this
time I'm gonna go do the same way and
I'm gonna put a blank slide in here the
reason why I'm showing you a blank slide
is that so if you wanted to type
anything in here you can just go up to
insert whenever you want to put anything
on a slide use the insert so we go to
insert and you can see we have text box
so I could go here and click and I could
have maybe this time I'll just write
spring again on this one and now I can
click off and I can move this around
anywhere I want on the page too so if I
click on it if I click on it once the
lines are dotted but if I click on the
edge it goes to a filled in line at that
point I can do a few different things I
can move it around on it you can use the
circle to tilt if you wanted things on a
different angle on it if you wanted to
work inside you click once and you can
be changing the words in here
but remember click on the line if you
wanted to make move it around the page
if I wanted it gone
I now since I have it selected like that
I can hit delete and it will be gone so
if you ever want to undo what you just
did click the undo up top here and it
will put it back you can actually go
through multiple steps here at a time I
could go back in history you can see and
I can do multiple things at a time and I
can even read you to go back what I had
before now I just want to show you too
Bruce present this and I know this is
kind of boring yet but to actually take
a look at your slideshow at your slides
what you can do is go to slideshow right
up here and you can see I can present
from the beginning I could present from
the recurrence line I'm on I'm just
going to do it for the beginning click
it and now I have the seasons I could
arrow through it on my keyboard so if I
hit to the right I go to the right if I
hit to the left I go back on the slides
that I already have I could use my
spacebar to move ahead
I could even click on my mouse and it
would move ahead let's say you want to
get out of this presentation mode use
the escape on your top left hand corner
of your keyboard the ESC and click it
and you'll be back in edit mode the
other thing I just wanted to point out
is you can kind of change this look too
down at the bottom right hand corner you
can see if you wanted to start your
presentation you can start it from down
here too if I click and I'm back in
presenting mode hit my escape I'm out I
could change it up if I just wanted only
to see the thumbnails of this I can
change it back like so now at any time
if you wanted to change the order of
your presenting of things you can click
on a slide make sure it's highlighted
and drag it around like so so I could
just move these around in different
order I could even delete them if I want
so if I hit the delete on my computer I
mean on the keyboard it will be gone
try right-clicking I right-click on a
lot of things usually if I'm looking for
something it's gonna be under the right
click once I have that item selected you
can see where I can cut copy I can make
a duplicate of a slide I could delete a
slide take a look and you can even
change your layout so even after you've
picked a certain slide layout you can go
through and adjust the layout right from
there too so if I wanted this to be the
comparison you can see how they've added
and adjusted for that so that's just
some kind of a setup and just getting
your slides ready let's get into the
important part of making some
great-looking slides let me show you you
some quick ways to make some great
adjustments to your PowerPoint and the
first one using the slides I already
have here go up to design and when you
go up to design in your tabs pick one of
the items up here I'm gonna go to this
one right here and I'm gonna click on it
notice what happens right here is it
adjusted all of these for me so I put on
a title slide and now it gave me a
different look and I'll click on
different one that matched kind of a
theme on it what I like about also about
doing this is they give you design ideas
you can click on different ones if you
wanted a different look for each one
they'll give you an idea if it's not
there then they don't have it but and
then for something like this if I wanted
a different one
I could try different just different
ideas to get for the presentation I mean
it's gonna go back actually on this one
because I just wanted to show you how
quickly it would be this is almost like
using a template with it but you can
quickly adjust any of these or change on
the fly you can pick a different one and
it won't change your content it's just
going to change the look to it but let's
look at a different way let's make some
adjustments to this and let's start with
just the font here if I wanted to make
some quick adjustments to the font if I
you want to select something if I go in
here I'm gonna triple click and show you
what happens so I'm gonna go in here and
triple click when I triple click on a
line it selects the whole line notice
how the gray area is all selected and it
also gives me this this right here which
is the same that's in my under the tab
and under the rate up here and the font
1 so rather than going up there each
time I can trouble click select it and I
can make changes to my font right
through here and if I wanted a different
color I'm just gonna pick some colors
just to be able to show you you can see
how quick you can make those adjustments
on it too so once you get
in place so if I double-click so just so
you know the difference between a
double-click if I double-click if I
double-click garden that was a trouble
click if I double click it will select
the one word here if I double click it
will select the word here but a triple
click selects the whole line on it so
making some quick adjustments to the
font let's make some quick adjustments
to the background to how I like to do
this is if you're going through you can
change each background if you want to
reply it to all I right click on this so
if you're ever looking for something
again use the tell me I could type in
background up here and you can see how
it starts to go through I want format
background right here and it pops up
over here the way I usually do it is if
I right click I just go to format
background right here but I just want to
make sure you knew that tell me it will
find the things that you're looking
forward to so let's say if I just wanted
to adjust the background here I could do
it with a solid fill the color is right
here so if I want it maybe blue like
this and you can see the font doesn't
work too well with this one so maybe I
adjust it to a yellow and that will show
a little bit better on it I could go
through and use a gradient to gradient
is a nice way to maybe soften up the
background or try a few different things
I can adjust the gradient through a few
different ways you can see there's the
preset gradients through here but I can
change it from the type if I wanted more
of a radial I could change the color of
each point so with a gradient it's it's
all these different things that are
happening right through here so I'm
going to just pick a different one here
I'm gonna pick a linear and I'm gonna
adjust the colors in this one so I can
drag this a bit and you can see how it
just been but when I have a certain one
selected I can go through and pick a
different color I'm just gonna pick this
one
and you can see how it changes
everything up so I could go through and
change each of these up I'll pick a
different color here and a little bit
down in the corner that it had changed a
little bit more if I wanted to adjust
this and I'm bringing out the corner a
little bit more I can adjust all these
things here to get the look that I want
I could apply it to all the slides or I
could reach at the background so I'm
gonna reset the background
I don't want to use it I just wanted to
show you guys the other thing you can do
is put a picture or a fill so if I put
the picture of fill it defaults to the
text or fill that's there but what I
want to do is show you the if you had a
picture you want to upload it you could
go through file this way and grab it
from your computer
I like searching online a lot of time so
if I go through here online and then I
can go through and then I go let's say
if I'm looking for summer and maybe I'll
pick this one right here and insert it
now I have this image here on it maybe I
move my title around because I want it
to be in the sky so it just sees a
little bit more so same thing with my
name here too so just some quick
adjustments to the background the other
thing yet you can adjust through this
background notice on the font here so if
I have my font selected there's text
options too now I can go through and
actually do a fill or saw this so you
can see if solid fill I can do the
gradient fills on all these I could even
put pictures inside my font so for
insults like office so you can see a
little bit more so if I went to a
gradient fill you can see it's the same
gradient that was there before maybe I
use a preset and it changes changes to
it we have our pattern fill like so we
also have our different options look at
text effects here so if I want it to
I'll just go to reflection I can adjust
a reflection here to come down and you
can see right at the bottom to it so you
can do a lot of these things right
inside PowerPoint to get kind of almost
something like a Photoshop that you used
to have to do in Photoshop just by going
through and playing with all these
different options so that's some ways to
make some design changes with this and
remember if you wanted to apply this to
all you could apply it to all and the
image goes right through and then you
could take a look at how it how it
presents after that but you can also go
back don't don't worry about anything
that you've done remember you just go
back and get it back to the way you had
it so let's do a few more things to get
the design even better now so let's look
at a few more things you can insert
under
the insert tab I'm gonna go up here
click on insert so remember when you
want to put something into your
PowerPoint it's gonna be inserted in now
first of all I've already talked about
some fonts but I just want to point out
word art also is another way that you
can write some things and a nice-looking
font and I'll just pick an example here
and I'll just put I'll just write winter
and I can move this around and you can
see how it comes out in a word art form
if I increase the size of it it you can
see how I can make the font larger at
any time I can go through and click on
different designs and change the text
fill or have a different outline to it
so very quickly to do differ just a
different way to add it and of course
you can click it delete when you're in
done so let's say you want to put some
images in here I'm just going to show
you a couple different ways to do that
from uploading from your computer or
from online so if I want to get maybe
some stuff that matches these pictures
let's go I'm gonna insert and I'm gonna
insert a picture right here and right
from here and I'm gonna take it from my
computer so I'm just gonna take this son
right here hit insert comes out really
large white background I can resize this
here too so I'm just gonna resize it
grab the corner drag in and I'm gonna
put it just over here because this is
where I have summertime but I can also
search for things I write inside online
so if I look at inside insert pictures
again if you had more you could go from
there but you can also use online and
let's say this time I want something for
a ring and I'll just use these clouds
here hit insert and I have these
transparent rain clouds so no white
background on this one notice at the
bottom it comes at all sites the
pictures that comes through from if you
want that gone you can select the bottom
hit delete and I can resize these ones
here at any time too so once you put
your images in you can actually make
changes to them if I look on this one if
I wanted to make some adjustments you
double click on these and what you're
gonna get it ghost brings you to the
format but see how you can make correct
right through here so if I wanted you
know if it brighter you can see how I
can quickly make some adjustments to it
just by using the different options so
you can go through and look at all these
different different ways to enhance your
picture so I'm just gonna go back a few
steps here and I'm gonna insert one more
picture on this page or I'll just go
from online and I'll just type snow and
I'll put this one right here in it like
so and this one I'll move and you can
resize these pictures like I showed you
before the other thing it was when
you're working with different layers you
can also put if I drag this over notice
this one is on top of this one if I look
up top here bring forward send to back
if I click on if I click on this one
sent to back now it's behind so you can
always change the order of your images
very quickly on it a lot of times I'll
just right-click on it and you can see
how you can bring to front send to back
just through there too I'm just gonna
move this over to this over here so the
other thing I want to show you with your
images here are these different formats
so you can easily put things in frames
on it if I click on these you can see
how you can adjust really really quickly
to get some neat looking one so it takes
this white square makes it look a lot
more interesting what I like with
PowerPoint what you can do is I'm just
gonna undo these steps here I'm gonna
get rid of the white background and I'll
show you how easy it is to do I want to
make sure this is transparent so I'm
just gonna double click on this you see
over here it says remove background I'm
gonna click on this and if I look though
added right now it didn't get everything
quite right I want the hand to stay in
and these points I can go here mark as
key to keep and I'll click on this I'm
just gonna add now mark the mark the
hand here and just put a few dots and
it's gonna grow over here a little bit
more just here and I think it's getting
better and better I get a couple more
places maybe this one right here and
I'll just I won't make this perfect but
that's getting pretty good right here
and I go one more spot when I
I get it the way I want I can go ahead
and hit keep changes and now I have the
transparent background so go ahead if
you put in that white background you can
kind of you can make it transparent
right inside PowerPoint on this so
that's just some ways you can play with
your images enhance your images layer
them on top of each other and make some
a changement changes to the look to it
let's go through a little bit more and
let's look how we can add some animation
to these pictures and then transitions
in between the slides one more thing I
just wanted to show you with the images
is cropping so if you want to crop an
image if you double click on the image
make sure you're under the format the
crop is over here so if I click on crop
I can go through and bring my handles in
and get it to the point where I want or
bring in the sides and I'll adjust this
a little bit when you get to where you
like you can just click off of it and
that image will be cropped all right so
let's move over to some animation here
so I'm gonna use these images just to
show you some basic animation and I'll
click on this know this little snowflake
first when I click on it you need to
click on it we can go to animation and
we can add an animation in so let's say
if I wanted it to swivel so I'm going to
go with go over here and click swivel
and it does the swivel now I'm just
gonna I'm gonna view this through my I'm
gonna present it just this slide click
here slideshow nothing's there but when
I click it appears so if I'm going
through giving my presentation when I
click the animations come out when I
wanted to I'm gonna hit escape let's add
some more animation here I'm gonna go to
let's have this one fly-in comes in from
the bottom don't want it to come from
the bottom take a look right here
effects options I want it to go from
bottom left you can see I can change the
direction where I want it to come from
now this one I'll just add one more here
and I'll just make this one pulse no
yeah I'll leave it at that one so I'll
now I'll hit play so this one will
swivel this one flies in and when I
click again that one pulse so I can also
change the order notice that there's a
one two three here I can change the
order of these around
from one's depending on which one I want
to come first so now the if I played it
again through this one I can go through
and play it and it's going to go through
in the different order now I like going
through and hitting the present mode
from there but there is also the preview
rate up top here you can see it will
just go through and play it
automatically for you just the way you
have everything set up so you don't have
to play it I just like to do it with to
click to test it out
all right so let's look at transitions
here so that's the what's happening in
between the slides so if I go to this
first slide here transitions is rape
side animation and what I can do is
let's just put I'm gonna put random bars
on and that's the transitions that it
will start with I can apply this to all
so if I click apply those random bars go
in between each one right here but I
want let's say a different for this
purpose a different transition so I can
click on this one and I'm gonna go fall
over and then that was kind of a cool
one and I'll pick one more and we'll go
with drape for this last one so I'm
gonna go ahead and present my slideshow
so I'm gonna go to slideshow and play
from beginning so I have my transitions
you can see how we've dealt with some of
the fonts the how we can make
cool-looking fonts here we have another
transition we have an animation another
animation another animation we've
changed our background color and as I
click through another one with different
images and crop so now it's up to you to
kind of change you know change the look
and get things your plan of what you
want at any time remember what I showed
you before if you go back to your design
you could just simply click on these and
get a whole new design system there and
you can go through and use these design
ideas to quickly adjust your
presentation into so it's never done you
can just quickly adjust or you can undo
it too when you get to where you want to
be remember to be saving your your
PowerPoint so if we go we can click up
here under the save or else you can if I
go back to file you can see the first
time you'd probably want to hit
save as and save it to a certain spot a
lot of times I'll be just saving on this
B's PC but you can save on onedrive so
you have access through the cloud to get
through this or you can share with
different people so when you're saving
it on this PC I would just click and I
would find a certain spot give it a name
I'll just call this the seasons here and
then I can find the spot right and
through here the folder I'll just leave
it on my desktop for me hit save and I
can in its safe now so this is just the
beginning of the PowerPoint you know to
start playing around with it just show
you some of the cool things you could do
with it take a look at that other video
that I showed you about those 10
powerful tips to get a little bit more
out of it I'll have some more PowerPoint
information coming out so if you're
interested a hit that subscribe button
in that little Bell notification so you
know when my new videos come out thanks
for watching this week and I'll see you
next time here at teachers tech
Просмотреть больше связанных видео
(4 soft skills) Soft Skills (Presentation and Creating Power Point Slides) Part 2
5 QUICK Ways to Improve Your PowerPoint Design
SketchUp - Tutorial for Beginners in 13 MINUTES! [ FULL GUIDE ]
Michael Alley (Penn State) 2: Assertion-Evidence Slides for a Research Talk
21 Ai Tools (ज़िंदगी बदल देने वाले) Better than ChatGPT
Automatic Lower Thirds
5.0 / 5 (0 votes)