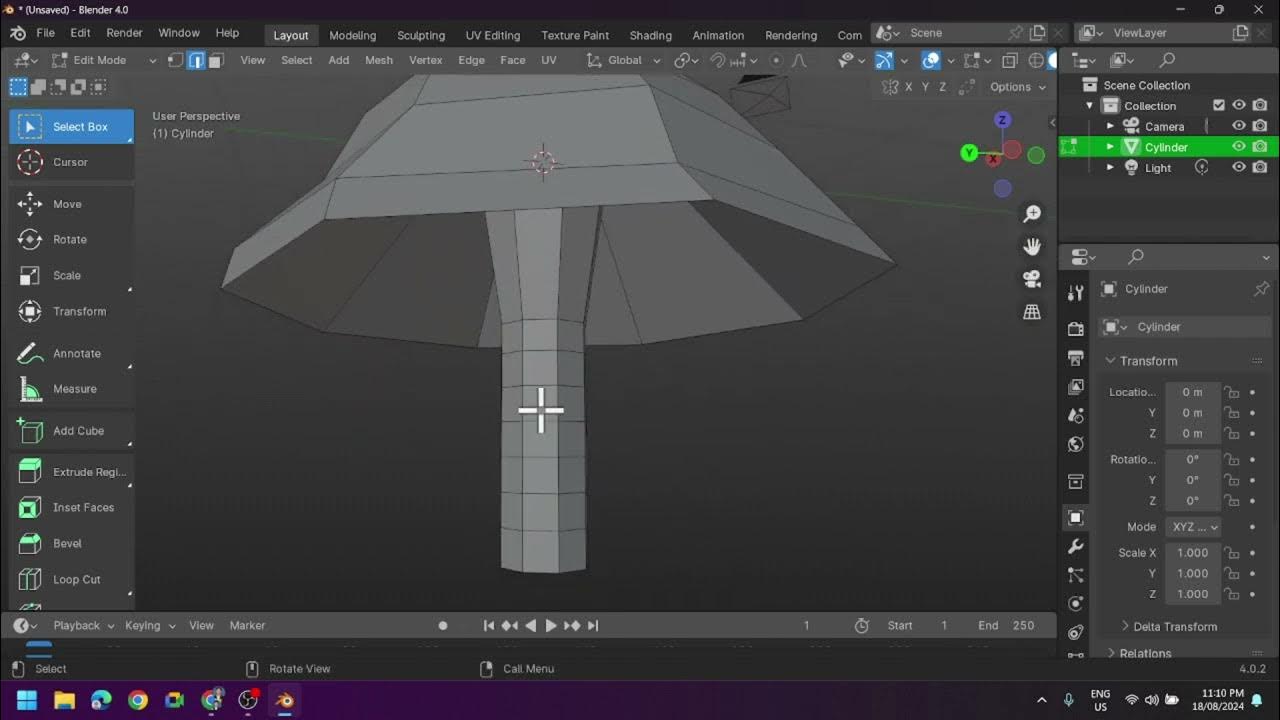
Creating a Low Poly Mushroom and Applying Different Shading in Blender
Summary
TLDRThis tutorial guides viewers through creating a low poly mushroom model. Starting with a basic cylinder, the instructor modifies its vertices and scales the top and bottom faces. Using inset and extrude functions, the mushroom's cap and stem are shaped. The tutorial also covers adding cuts for texture, bending the stem for realism, and applying randomness to the design. Finally, it demonstrates coloring the mushroom with different shades, focusing on the cap and stem, and concludes with a simple yet effective low poly mushroom model.
Takeaways
- 📌 The tutorial is about creating a low poly mushroom model in a 3D modeling software.
- 🗑️ The first step involves deleting the default object in the scene.
- 🍄 A cylinder is used as the base for the mushroom, with the vertices number changed to eight.
- ✂️ The tutorial proceeds to edit the model by selecting and scaling the top face of the cylinder to form the mushroom cap.
- 🔄 Negative Z direction is used to access and edit the bottom of the object.
- 🔍 The 'Inset' tool is utilized to create an indentation for the mushroom's stem.
- 👁️ The 'X-Ray' mode (Alt+Z) is activated for better visibility while editing.
- 🔧 The 'Move' and 'Scale' tools are used to adjust the shape of the mushroom's stem and cap.
- 🔪 'Loop Cut' is applied to add details to the stem and cap by creating cuts and sliding them into place.
- 🎨 The final model is colored, with the cap being red and the stem a nude or tan color.
- 🖌️ The 'Shading' mode is used to apply the colors to the different parts of the mushroom model.
Q & A
What is the default object that needs to be deleted at the beginning of the tutorial?
-The default object that needs to be deleted is not specified in the transcript, but it is implied that it is the initial object loaded in the 3D modeling software.
What shape is used as the base for creating the mushroom in this tutorial?
-A cylinder is used as the base for creating the mushroom.
How many vertices are used for the cylinder in this tutorial?
-Eight vertices are used for the cylinder.
What mode is used to select and edit the faces of the polygon?
-Edit mode is used to select and edit the faces of the polygon.
What key combination is used to enter and exit the xray mode?
-The Alt + Z key combination is used to enter and exit the xray mode.
What is the purpose of using the 'inset' tool in the tutorial?
-The 'inset' tool is used to create an indentation in the bottom of the mushroom to give it shape.
What tool is used to extrude the selected faces in the tutorial?
-The 'extrude' tool is used to extrude the selected faces.
How many cuts are added to the stem of the mushroom in the tutorial?
-Six cuts are added to the stem of the mushroom.
What is the purpose of applying loop cuts to the stem in the tutorial?
-The purpose of applying loop cuts to the stem is to create bends and give the stem a more realistic shape.
What key combination is used to select multiple edges in the tutorial?
-The Shift + Alt key combination is used to select multiple edges.
How are the faces of the mushroom converted into triangles in the tutorial?
-The faces of the mushroom are converted into triangles by using the Ctrl + T shortcut.
What is the final step in coloring the mushroom in the tutorial?
-The final step in coloring the mushroom is to assign the selected faces to different color slots and then add new colors for each slot.
Outlines

Этот раздел доступен только подписчикам платных тарифов. Пожалуйста, перейдите на платный тариф для доступа.
Перейти на платный тарифMindmap

Этот раздел доступен только подписчикам платных тарифов. Пожалуйста, перейдите на платный тариф для доступа.
Перейти на платный тарифKeywords

Этот раздел доступен только подписчикам платных тарифов. Пожалуйста, перейдите на платный тариф для доступа.
Перейти на платный тарифHighlights

Этот раздел доступен только подписчикам платных тарифов. Пожалуйста, перейдите на платный тариф для доступа.
Перейти на платный тарифTranscripts

Этот раздел доступен только подписчикам платных тарифов. Пожалуйста, перейдите на платный тариф для доступа.
Перейти на платный тарифПосмотреть больше похожих видео

Creating a Low Poly Mushroom and Applying Different Shading in Blender

Modeling Your First 3D Object: Creating a Low Poly Tree

Modeling a low poly house | Blender 3.4 Tutorial

TUTORIAL MODELING KUCING LOWPOLY DI BLENDER | TUTORIAL PEMULA BLENDER 3D

3dsMax basics: Make a LowPoly Character

Outdoor Mushroom Beds | The Easiest Way to Grow Edible Mushrooms in Your Garden or Back Yard!
5.0 / 5 (0 votes)
