Rancang Bangun Vlan di Aplikasi Cisco Paket Tracer
Summary
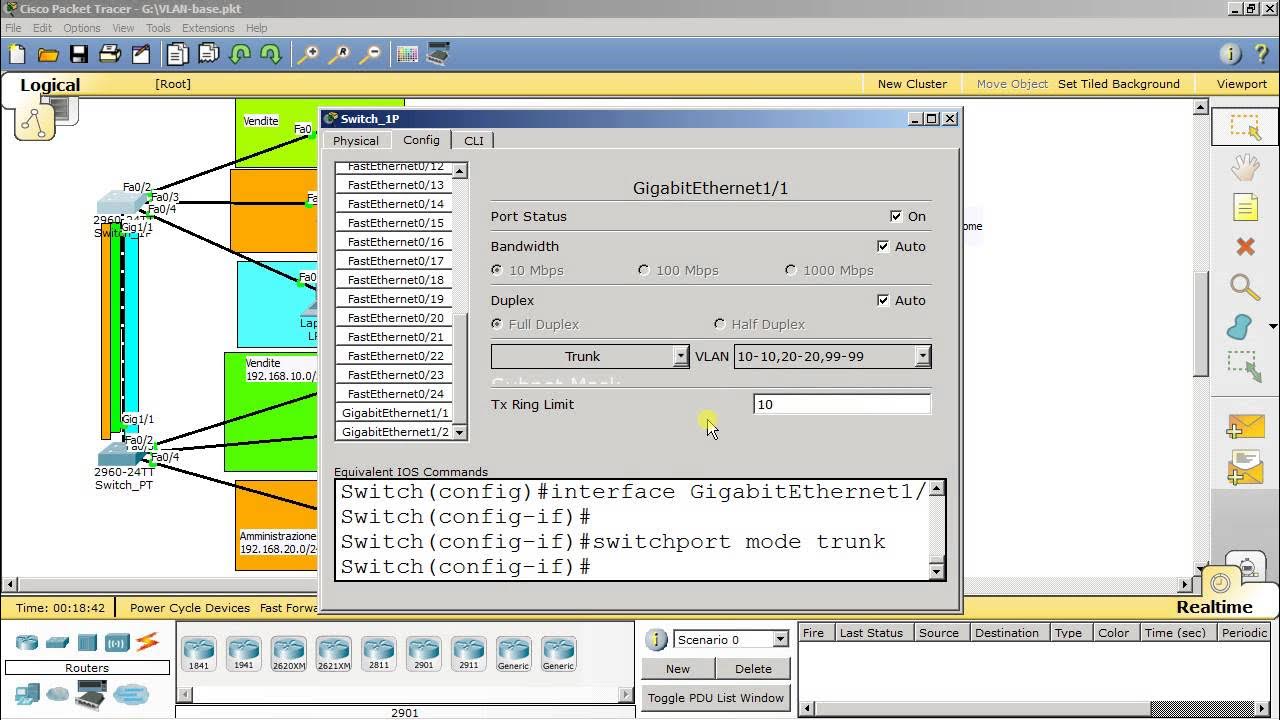
TLDRThis tutorial guides users through setting up a network with multiple PCs, laptops, and switches. It covers configuring IP addresses, creating VLANs, connecting devices with proper cables, and assigning VLANs to different ports. The tutorial walks through configuring switches using CLI commands, assigning room names, and testing connectivity through ping tests to verify proper network setup. By the end, users will have successfully set up a functional network with VLANs, ensuring devices in different rooms can communicate efficiently.
Takeaways
- 😀 Begin the setup by connecting four PCs and two laptops to the network.
- 😀 Use the Desktop menu on each PC to configure the IP address, which will automatically adjust Smart Network settings.
- 😀 The subnet used in this setup is `255.255.255.248`, corresponding to a Class C IP range (/29 subnet mask).
- 😀 Assign names to IP addresses and rooms for easier identification during setup.
- 😀 Connect PCs to a Cisco 2960 switch using straight-through cables and connect switches using crossover cables.
- 😀 Press 'R' to label rooms and areas in the network for easy management.
- 😀 Access CLI mode on the switch by typing `enable` and configure VLANs using the `vlan database` command.
- 😀 Create VLANs by assigning names like 'Lab 1' for VLAN 10 and 'Lab 2' for VLAN 20.
- 😀 Configure switch ports to assign them to specific VLANs using commands like `switchport access vlan 10`.
- 😀 Verify the network configuration by using the `show` command to display the connected ports for each VLAN.
Q & A
What is the first step in the network setup process?
-The first step is to connect 4 PCs and 2 laptops, and then configure the network settings.
What should be done after clicking the PC in the configuration process?
-After clicking the PC, select the 'desktop' menu and then choose 'configuration'. Next, input the IP address, which will automatically configure the Smart network.
What is the subnet mask used in this tutorial?
-The subnet mask used in this tutorial is 255.255.255.248, as shown in the provided diagram.
How are the rooms identified in the network setup?
-Rooms are identified by giving them names and IP addresses, and a square symbol is used to represent different rooms in the setup.
What role does the Cisco 2960 switch play in the network setup?
-The Cisco 2960 switch is used to connect the computers to each other and the network, allowing them to communicate.
What type of cables are used to connect the PCs to the switch and the switches to each other?
-Straight cables are used to connect the PCs to the switch, and cross cables are used to connect one switch to another.
What does the command 'enable' do in the switch configuration?
-The 'enable' command is used to enter the user mode on the switch, allowing access to further configuration commands.
What is the purpose of the 'vline database' command?
-The 'vline database' command is used to enter VLAN configuration mode, where virtual LANs can be defined.
How do you assign a name to a VLAN in the tutorial?
-To assign a name to a VLAN, the command 'vline 10 name Lab 1' is used for the first lab, and similarly for other VLANs.
How do you verify that the VLAN setup is successful?
-You can verify the VLAN setup by using the 'show' command to display the status of the ports, and then testing connectivity between PCs in the same and different VLANs.
Outlines

Cette section est réservée aux utilisateurs payants. Améliorez votre compte pour accéder à cette section.
Améliorer maintenantMindmap

Cette section est réservée aux utilisateurs payants. Améliorez votre compte pour accéder à cette section.
Améliorer maintenantKeywords

Cette section est réservée aux utilisateurs payants. Améliorez votre compte pour accéder à cette section.
Améliorer maintenantHighlights

Cette section est réservée aux utilisateurs payants. Améliorez votre compte pour accéder à cette section.
Améliorer maintenantTranscripts

Cette section est réservée aux utilisateurs payants. Améliorez votre compte pour accéder à cette section.
Améliorer maintenantVoir Plus de Vidéos Connexes

Tutorial Cisco Packet Tracer - DHCP Server dan Menghubungkan 2 LAN

KONFIGURASI CISCO PACKET TRACER || UKK JURUSAN TKJ 2025 PAKET 2

Cara Membuat Koneksi Printer Wireless Untuk Semua Device - Cisco Packet Tracer

2.9.2 Packet Tracer - Basic Switch and End Device Configuration - Physical Mode

Tutorial Packet Tracer 1 router 2 switch 6 PC #packettracer

VLAN trunking
5.0 / 5 (0 votes)
