Annotation
Summary
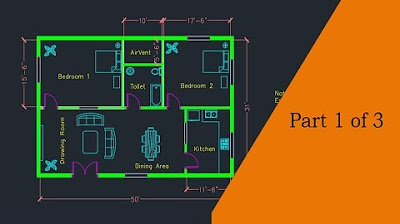
TLDRThis tutorial guides viewers through annotating an AutoCAD drawing with dimensions and text. It demonstrates how to access and modify annotation styles, add various dimensions such as linear, angular, radial, and diameter, and adjust precision. The video also covers adding center marks, continuous dimensions, and multi-line text annotations. Finally, it explains transitioning from model space to paper space for printing or plotting the completed drawing.
Takeaways
- 📏 Annotation is crucial for completing an AutoCAD drawing, with dimensions and text being key elements.
- 🔧 Users can access annotation styles through the Annotation dropdown list, where they can view and modify text style and dimension settings.
- 📐 Adding a linear dimension involves selecting endpoints and adjusting precision, such as setting the number of decimal places.
- ✏️ Dimension style can be modified to change the appearance and precision of dimensions, like setting two decimal places for linear dimensions.
- 🔼 A tip for placing dimensions is to use the right-click option to select the object directly, streamlining the process.
- 📐 Angular and radial dimensions can be added to drawings, with center marks being a default feature for radial dimensions.
- 🔄 To add center marks to other circles, users can access the Center Mark tool from the Annotate tab and modify its appearance in the Dimension Style.
- 📏 Continuous dimensions can be added to parts of the drawing to show measurements across multiple points.
- 📄 Switching between model space and paper space is necessary for printing or plotting the drawing, with paper space providing a layout view.
- 🖨️ To finalize the annotation, multi-line text can be added to provide additional information, such as material type and thickness.
- 🔙 After adding text, it's important to return to paper space to ensure all elements are visible and correctly positioned for plotting.
Q & A
What are two examples of annotation required to complete an AutoCAD drawing?
-Dimensions and text are two examples of annotation required to complete an AutoCAD drawing.
How can you access the annotation styles in AutoCAD?
-You can access the annotation styles by going to the annotation drop-down list in AutoCAD.
What information can be seen under the text style in AutoCAD?
-Under the text style, you can see the font name, the style, and the height.
How can you add a linear dimension to an object in AutoCAD?
-To add a linear dimension, you mention the vertical line on the right-hand side of the object, select the two endpoints, and place the dimension.
How do you adjust the precision of the dimension output in AutoCAD?
-You can adjust the precision of the dimension output by going to the dimension style, modifying it, and selecting the desired number of decimal places from the precision list on the primary units tab.
What is a quick way to place a linear dimension in AutoCAD?
-A quick way to place a linear dimension is to right-click on the linear option and then select the object.
How do you add angular and radial dimensions in AutoCAD?
-To add angular dimensions, you go to the angular option and place it. For radial dimensions, you select the radius, select the arc, and a center mark is added by default.
Why might you need to add center marks to circles in AutoCAD, and how can you do it?
-You might need to add center marks to circles for clarity in the drawing. You can do this by going to the annotate tab, selecting center mark from the drop-down list, and customizing the appearance in the dimension style.
What is the process for adding continuous dimensions to a part in AutoCAD?
-To add continuous dimensions, you start by adding a linear dimension, select the endpoint of the center mark, and then use the continuous dimension option to add subsequent dimensions along the same line.
How do you switch from model space to paper space in AutoCAD to prepare for printing or plotting?
-You switch from model space to paper space by selecting the layout (e.g., Layout 1), and then clicking on 'paper' in the status bar to access the drawing.
How can you add multi-line text to a drawing in AutoCAD?
-You can add multi-line text by going to the annotate tab or the home tab, selecting the multi-line text option, clicking on the starting point, dragging to select the rectangle area, and then inputting the text lines.
What steps are necessary to ensure that the newly added text is visible in the layout in AutoCAD?
-To ensure the newly added text is visible, you need to return to layout 1, click on 'paper' to zoom extents, and verify that the text is included in the viewable area.
Outlines

Cette section est réservée aux utilisateurs payants. Améliorez votre compte pour accéder à cette section.
Améliorer maintenantMindmap

Cette section est réservée aux utilisateurs payants. Améliorez votre compte pour accéder à cette section.
Améliorer maintenantKeywords

Cette section est réservée aux utilisateurs payants. Améliorez votre compte pour accéder à cette section.
Améliorer maintenantHighlights

Cette section est réservée aux utilisateurs payants. Améliorez votre compte pour accéder à cette section.
Améliorer maintenantTranscripts

Cette section est réservée aux utilisateurs payants. Améliorez votre compte pour accéder à cette section.
Améliorer maintenantVoir Plus de Vidéos Connexes
5.0 / 5 (0 votes)


