Auth Page Logic | To Do App | FlutterFlow for Beginners

FlutterFlow
15 Mar 202419:27

Summary

TLDRThis video tutorial guides viewers on setting up logic for a user interface with non-functional buttons, focusing on integrating Firebase authentication for sign-up and login processes. It covers configuring text fields, including password security features, and binding actions to buttons. The tutorial also addresses form validation, error handling, and conditional visibility for different user interface elements based on the active tab. Finally, it demonstrates testing the application and navigating between pages upon successful authentication.

Takeaways

  • 🔧 The video focuses on setting up logic for a sign-up and login page using Flutter Flow.
  • 🔄 The UI for the page is already set up, but the buttons need to be bound with actions for user interaction.
  • 🔗 The backend services using Firebase are prepared to handle authentication for the logic defined.
  • 📝 The user input for email, password, and confirmation password is required to create a user account.
  • 🔑 The tutorial guides through selecting and configuring the correct action blocks for authentication.
  • 📱 Flutter Flow recognizes text fields and their properties, which are used to bind data for authentication.
  • 🛠️ Password fields are configured with security features like hiding the password and providing a clear field icon.
  • 🔄 The 'submit type' for password fields is set to navigate to the next field or dismiss the keyboard.
  • 📑 The video demonstrates creating a user document in Firebase and binding fields from the UI.
  • 🚀 Automatic navigation after account creation is an option, but it's turned off to handle onboarding manually.
  • 🔄 Conditional visibility is used to show and hide sign-up and login buttons based on the selected tab.

Q & A

  • What is the main focus of the video?

    -The main focus of the video is to set up the logic for a page with a user interface that includes buttons for signing up and logging in, ensuring they are functional and connected to Firebase authentication.

  • What backend services are mentioned as being prepared for the logic?

    -Firebase is mentioned as the backend service prepared for the logic, specifically for handling user authentication.

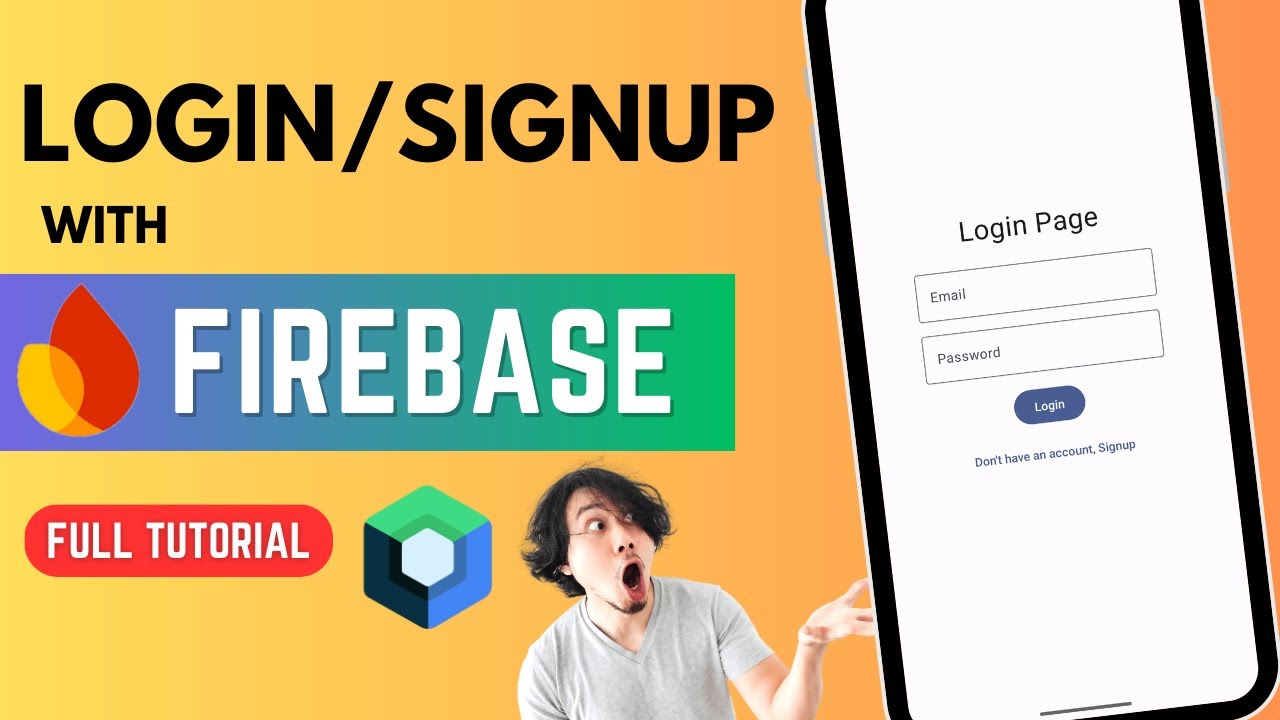
  • What are the two tabs that the user can interact with in the UI?

    -The two tabs in the UI are a 'Login Tab' and a 'Signup Tab', which allow users to either create a new account or log into an existing one.

  • How does the video suggest triggering the action flow for user sign up?

    -The video suggests using the 'onTap' event of the signup button to trigger the action flow for user sign up.

  • What is the purpose of the 'action flow editor' mentioned in the video?

    -The 'action flow editor' is used to define blocks of logic that should be executed when certain actions or conditions are met, such as a user clicking a button.

  • What authentication provider is used in the video for user account creation?

    -The video uses the email provider for user account creation, as it was the only one set up during the authentication setup.

  • How does Flutter Flow recognize text fields for binding?

    -Flutter Flow automatically recognizes text fields based on their widget names, which are used to bind data to actions within the action flow editor.

  • What is the significance of setting the submit type on a password field?

    -Setting the submit type on a password field determines the text of the button on the keyboard and the action it triggers, such as moving to the next field or dismissing the keyboard.

  • Why might the video suggest creating a user document in the same action as account creation?

    -Creating a user document in the same action as account creation is suggested to streamline the process by avoiding the need for an additional action, thus simplifying the workflow.

  • What is the role of the 'conditional visibility' widget in the video?

    -The 'conditional visibility' widget is used to show or hide UI elements based on certain conditions, such as which tab is currently selected, allowing for dynamic UI adjustments.

  • How does the video handle the navigation after a user signs up?

    -The video handles navigation after a user signs up by manually directing the user to an 'onboarding' page instead of automatically navigating to the login page, as is typical after account creation.

  • What is the purpose of form validation as discussed in the video?

    -Form validation is used to ensure that user inputs meet certain criteria, such as password length, before the data is accepted and processed, enhancing security and data integrity.

Outlines

00:00

🛠️ Setting Up UI Logic for User Authentication

The video begins by outlining the process of setting up the logic for a user interface that includes a sign-up and login feature. The UI is ready, but the buttons do not yet function. The focus is on binding actions to these buttons to enable user sign-up and login. It's mentioned that Firebase and authentication have already been set up in previous videos, so the backend services are ready for the logic that will be defined. The video then walks through the process of setting up the sign-up tab, explaining how to trigger actions when the user clicks the sign-up button. It introduces the action flow editor in Flutter, where logic for actions is defined, and demonstrates how to add action blocks and conditions. The process of creating a user account through Firebase authentication is detailed, including how to select the email provider and input fields for email, password, and confirmation password.

05:01

🔑 Configuring Text Fields and Authentication Logic

This paragraph delves into configuring text fields for password input, emphasizing security and usability features like the hide password icon and submit button types. It also covers setting up the confirmation password field and disabling autofocus to enhance the user experience. The video script explains how to bind text fields to widget states for dynamic data input. The authentication logic is further detailed, including creating a user document in the 'users' collection and setting default variable values to avoid null errors. The video also discusses conditional navigation after account creation, opting to handle it manually due to the presence of an onboarding page, and demonstrates how to add an additional action in the action flow editor to navigate users to the onboarding page after sign-up.

10:02

🔄 Adjusting UI for Conditional Visibility and Login Logic

The script moves on to address the need for conditional visibility of sign-up and login buttons based on the selected tab. It suggests adding an additional button and using a stack to manage which button is visible, then demonstrates how to set conditional visibility based on the tab bar's current index. The process involves checking the tab bar's current index against a condition to show or hide the buttons. The video also revisits the login button's logic, removing duplicated actions, and redefines the action block for logging in a user. It sets up navigation to the main tasks page after successful login and discusses the importance of form validation, showing how to wrap text fields in a form validation block and set validation criteria.

15:04

🔒 Implementing Form Validation and Final Testing

The final paragraph focuses on implementing form validation to ensure data integrity, such as checking for valid email formats and minimum password lengths. It explains how to set up validation options and error messages within the form validation block and demonstrates integrating validation logic into the action flow editor. The video shows how to test the sign-up feature, including form validation, and addresses any errors that arise. It also mentions setting up a logout button and testing the login feature, suggesting that viewers set up validation for the login form as a challenge. The video concludes with a reminder to check the users' collection in Firebase to confirm that a new user document has been created successfully.

Mindmap

Keywords

💡Flutter

Flutter is an open-source UI software development kit created by Google. It is used to develop applications for Android, iOS, Linux, Mac, Windows, Google Fuchsia, and the web from a single codebase. In the video, Flutter is used to build the user interface, including buttons and text fields, for a login and signup page.

💡Firebase

Firebase is a platform developed by Google for creating mobile and web applications. It provides services like analytics, databases, messaging, and crash reporting. In the video, Firebase is used for backend services, particularly for authentication, to handle user sign-up and login.

💡Authentication

Authentication is the process of verifying the identity of a user. In the context of the video, it refers to the process of creating user accounts and allowing users to sign in using email and password, facilitated by Firebase Authentication.

💡Action Flow Editor

The Action Flow Editor is a tool within the Flutter Flow interface where developers define the logic for UI elements. In the video, it is used to bind actions to buttons, such as sign-up and login, and to define the sequence of actions that occur when these buttons are clicked.

💡UI

UI stands for User Interface, which is the space where interactions between the user and a device occur. In the video, the UI setup includes the login and signup tabs, as well as the email and password fields for user interaction.

💡Text Field

A text field is a UI element that allows users to input and edit text. In the video, text fields are used for email addresses and passwords. They are configured to be password fields with features like hiding the password and providing a clear field icon.

💡Conditional Visibility

Conditional Visibility is a feature that allows UI elements to be shown or hidden based on certain conditions. In the video, it is used to show or hide the signup and login buttons depending on which tab (login or signup) is selected.

💡Form Validation

Form validation is the process of checking user input to ensure it meets certain criteria before it is accepted. In the video, form validation is used to ensure that the password meets a minimum length requirement and that the email is in a valid format before the authentication process occurs.

💡Widget State

Widget State in Flutter refers to the current state of a widget, which can be used to manage and track changes. In the video, widget state is used to access the values from text fields and to determine the current index of the tab bar for conditional visibility.

💡Stack

A Stack in Flutter is a widget that positions its children relative to the edges of its box. In the video, a Stack is used to overlay the signup and login buttons, allowing them to be shown or hidden based on the selected tab.

💡Onboarding Page

An Onboarding Page is typically the first experience a user has with an app, often used to introduce features or gather additional information. In the video, after a user signs up and logs in, they are navigated to an onboarding page to collect their birthday and profile image.

Highlights

Setting up logic for a sign-up and log-in page using Flutter Flow.

Binding actions to buttons for user interaction.

Utilizing Firebase for backend services and authentication.

Creating user accounts with email and password through the sign-up tab.

Defining triggers for action flows based on user interactions.

Exploring the action flow editor for organizing logic blocks.

Selecting and configuring action blocks for authentication.

Setting up text fields for email and password with Flutter Flow.

Configuring password fields with security features like hiding the password.

Adjusting submit types for keyboard actions on text fields.

Disabling autofocus for text fields to enhance user experience.

Creating a user document in Firebase upon successful sign-up.

Manually navigating users to an onboarding page after sign-up.

Setting up conditional visibility for buttons based on the active tab.

Adding logic to the login button for user authentication.

Testing the UI and logic in Flutter Flow's test mode.

Implementing form validation for secure user input.

Using form validation to ensure password length and email validity.

Adjusting error border color for better visual feedback on validation errors.

Challenge for viewers to set up validation in the login form.

Transcripts

play00:00

in this video we're going to set up the

play00:01

logic for this page so all we've got is

play00:04

the UI set up right here but none of the

play00:06

buttons actually work so we're going to

play00:08

bind our actions our logic to these

play00:11

buttons so that the user can sign up and

play00:14

log in now in the previous videos we

play00:16

already set up Firebase right here and

play00:20

authentication so our backend services

play00:23

are prepared for the logic that we're

play00:25

going to Define now all right so what do

play00:27

we want to happen well we have two tabs

play00:30

right here a login Tab and a signup Tab

play00:32

and so let's start up with the signup

play00:34

tab so when the user puts in their email

play00:37

and their password and a confirmation

play00:39

password and presses this button we want

play00:41

them to be able to sign in we want to

play00:44

create a user account for them okay so

play00:46

where do we start with this logic well

play00:48

we want this to trigger when the user

play00:50

clicks on the button so let's select the

play00:52

button and in flutter flow all of our

play00:55

logic is defined in this second tab here

play00:58

where we have our action flow Ed edor so

play01:00

here you'll add actions blocks of logic

play01:04

that you want executed and here you can

play01:06

add it by clicking this button or if you

play01:08

want to check for some condition first

play01:11

and then execute some action based on

play01:12

whether that condition is true or false

play01:15

you could click on this but let's add an

play01:17

action now I find that it's easier to

play01:19

Define our action inside this action

play01:21

flow editor so let's open that up and

play01:24

this is the same thing as what we just

play01:25

saw but we have more space now the first

play01:27

thing to look at is our triggers up here

play01:29

here that is what will be the event that

play01:32

initiates this action flow whether we

play01:35

have one action or multiple actions so

play01:38

right now we have on tap so when the

play01:40

user Taps this button then all of this

play01:43

logic will execute if we go over here

play01:45

there's no actions defined yet so let's

play01:47

go back to over to our ontap and here's

play01:49

our first action block so let's select

play01:52

it here and you can see that we have all

play01:55

the different action blocks that we have

play01:56

available to us what we want to do is we

play01:58

want to do something with authentic

play02:00

ation so I know that it's in this

play02:01

backend in database right here and we've

play02:03

got a whole section devoted to Firebase

play02:06

authentication so when we tore this open

play02:08

we see a bunch of different action

play02:10

blocks we have available and what we

play02:11

want to do is we want to create a user

play02:14

account now after we select the action

play02:16

block then over here we'll be given the

play02:18

options that are particular to that

play02:21

action block if you want to change that

play02:23

action block of course you can come in

play02:24

here and select a different one but this

play02:26

is the one that we want so let's just

play02:28

walk through these options so the first

play02:30

one is the off provider that is what

play02:33

kind of authentication is this well back

play02:36

when we set up our authentication we

play02:37

only set up email at this point so

play02:39

that's the only one that we can do right

play02:41

here and then we have these next three

play02:44

options where we have to pass this data

play02:46

send this data to Firebase

play02:48

authentication so we need to send an

play02:50

email address a password and then a

play02:53

confirmation password so let's set our

play02:55

email field and you can see this is

play02:57

pre-populated with a bunch of stuff

play03:00

right here well where are these coming

play03:01

from well flutter flow automatically

play03:03

recognizes text Fields those are those

play03:06

text inputs right here on the page and

play03:09

we have three here and two in this tab

play03:11

so that's why we're seeing five in our

play03:13

action flow editor right here and these

play03:15

names are coming from the names of the

play03:17

widgets so if you see down here that's

play03:20

this first one up here and this name is

play03:22

coming from there okay so then we can

play03:24

just bind it to our signup email widget

play03:27

beautiful next we've got a password

play03:30

field and when we twirl this open we

play03:32

can't even twirl it open because there's

play03:34

no available password field but why is

play03:37

this happening well this is because we

play03:39

haven't actually set up this text field

play03:42

to be a password text fields are very

play03:45

robust widgets because they're the

play03:47

fundamental way that you're going to

play03:49

pass information into your app and into

play03:51

your backend so it needs to have a bunch

play03:54

of features for security and

play03:56

accessibility and usability so let's

play03:59

take a look at some of these now now

play04:01

these first options up here are going to

play04:02

have to do with styling and when you

play04:04

scroll down to the end here you're going

play04:06

to see some of these options and the

play04:09

first one is the password field so let's

play04:12

click this on and after we turn this on

play04:14

we can see that now that error has gone

play04:16

away and we have one field available to

play04:18

us so we can just select that now but

play04:20

let's look at a few other options on

play04:22

this text field widget when we click

play04:23

this on this new Option appeared toggle

play04:26

hide password icon and so let's just

play04:28

give it a size of here of say 24 pixels

play04:31

and you can see that we get this hide

play04:33

password icon so by default their

play04:35

password will be hidden so it'll use

play04:37

those dots instead of the actual

play04:39

password to ensure security so people

play04:41

can't see it when they're typing in you

play04:43

can set the icon color we'll just leave

play04:44

it at the default and that's all we need

play04:46

for this password field now the one

play04:48

other thing we're going to do is we're

play04:49

going to set this submit type now what

play04:52

this will do is it'll set the text of

play04:54

the button on the keyboard so the

play04:56

keyboard that pops up what should the

play04:58

big button at the bottom right say and

play05:00

what action should that trigger well we

play05:02

want it to trigger to go to the next

play05:04

field okay great that's all we need here

play05:07

next let's set our confirmation password

play05:09

configuration so we want this to be a

play05:11

password field as well we can set the

play05:13

same toggle size and we'll set the

play05:16

submit type to done so it'll dismiss the

play05:18

keyboard so they can press the button

play05:20

the last thing we're going to do is

play05:21

we're going to turn off autofocus right

play05:23

here whichever text field has

play05:24

autofocused that's where the cursor will

play05:26

end up with the keyboard popping up when

play05:29

the page loads we're not going to set

play05:31

this on anything because the user has an

play05:33

option whether to sign in or log in and

play05:35

if they're trying to log in but it auto

play05:37

focuses to email then they'll have to

play05:39

click away to close the keyboard and

play05:41

then click login next we're going to

play05:43

show clear field icon that's just an X

play05:46

that allows them if they make a mistake

play05:48

to clear it quickly it's helpful for

play05:50

accessibility and user experience next

play05:52

let's scroll down to our keyboard type

play05:54

and this is very helpful to set because

play05:56

it'll determine what will appear on the

play05:59

keyboard board so here will be an email

play06:01

address so we'll add that as the

play06:03

keyboard type and we'll set the submit

play06:05

type to next beautiful next let's go

play06:07

over to login and we'll set the fields

play06:10

here first let's just fix this text

play06:12

right here cuz that should be email

play06:13

address so let's go down here and say

play06:17

email and then we can scroll down here

play06:20

we don't want our autofocus and this

play06:22

will be an email address we also want

play06:24

that clear field icon so let's set that

play06:27

and accept the default color and set our

play06:30

submit type to next and come down to our

play06:32

password turn off autofocus turn on

play06:35

password field give it an icon size and

play06:38

select our submit type to done all right

play06:40

our text fields are set up so let's go

play06:43

back into our authentication logic and

play06:45

complete that so we can come into our

play06:47

button right here let's go back to this

play06:49

tab select our button and come into our

play06:52

confirm password field and we've got

play06:55

this confirm password beautiful we're

play06:57

almost done here we've got a toggle

play07:00

about whether we want to create a user

play07:02

document now what this is saying is that

play07:04

we have set up a collection of users

play07:07

here and this is just a normal

play07:09

collection and normally you want to have

play07:12

a user document so this is just a

play07:14

helpful way to create one inside of this

play07:17

action so you don't have to have an

play07:18

additional action we just select which

play07:20

collection it is it's our users

play07:22

collection and then we need to set the

play07:24

fields what are the fields well the

play07:26

fields are each one of these individual

play07:29

things here so we can set our email and

play07:32

let's open this up this is the email

play07:34

field it's already selected if you want

play07:37

a specific value so you would hardcode

play07:39

it in here but we want it Dynamic we

play07:41

want it coming from this field here so

play07:43

we want it from a variable and so when

play07:45

we click in here we can see all of the

play07:47

data sources we have available to us now

play07:50

there's a shortcut here where you can

play07:51

just click on the canvas right here and

play07:54

it'll bind it but so you know where it

play07:56

comes from let's go edit this binding

play07:58

right here and it's coming from this

play08:00

widget State because it's coming from

play08:02

the widget itself and because we've got

play08:04

these named helpfully we know that it's

play08:06

coming from our sign up email so those

play08:09

are two ways to do the same thing and

play08:11

finally we always want to set our

play08:12

default variable value this is to avoid

play08:15

any null errors and we can just put

play08:17

example at email.com and confirm let's

play08:21

set one more field and that's the

play08:23

created time so let's go to that and we

play08:26

can bind this from the global property

play08:29

of the current time and confirm now

play08:31

we're not collecting any of the other

play08:33

fields so we're all done lastly we've

play08:35

got this option about whether we want to

play08:37

automatically navigate the users if this

play08:39

is on this will navigate the user to the

play08:42

page you have specified right here the

play08:45

log in page because after we create the

play08:47

account they will be logged in and so

play08:49

they can be forwarded here now we

play08:52

actually don't want to navigate them

play08:53

automatically because in our designs we

play08:56

have an onboarding page where we're

play08:58

going to collect their birthday and

play09:00

profile image so we're going to handle

play09:02

navigation manually so we can just click

play09:05

this off so let's just create that page

play09:07

right now so we'll create a blank page

play09:10

we'll call it onboarding and go back to

play09:12

our login page to this button and now we

play09:15

want to navigate the users to that page

play09:17

well how do we do that well we don't

play09:19

want to do it in this view right here

play09:21

because we can only apply and configure

play09:23

logic that has one block so let's open

play09:25

up our action flow editor here and we

play09:27

just want to add this Plus right here

play09:29

we're going to add an additional action

play09:31

next we want to navigate the user so

play09:33

let's search this time navigate and we

play09:35

want to navigate to this onboarding page

play09:38

now the only option that we want to

play09:40

change right here is allow back

play09:42

navigation so that's when a user swipes

play09:44

their finger from the left to the right

play09:46

and we want to disallow that action

play09:48

because they've already been logged in

play09:50

so we're going to turn that off and

play09:51

everything else will keep at the default

play09:53

beautiful so let's close this and we're

play09:55

almost ready to test but let's just

play09:57

finish out the logic for this page so

play09:59

we've got this other tab of our login

play10:01

right here we've already configured our

play10:03

text Fields so we can just go straight

play10:05

to our button except for that won't work

play10:09

that's of course because we've already

play10:10

defined our Logic on this button and

play10:13

this will often happen sometimes you

play10:14

won't discover what your UI needs until

play10:17

you start building out the logic and

play10:19

there's nothing wrong with this so how

play10:20

do we solve this well the easiest way to

play10:23

solve this is to add another button so

play10:25

we have one button for signing up and

play10:28

one for logging in and then show and

play10:30

hide them based on what tab is selected

play10:33

so we can come into this button right

play10:35

here and let's change the text in here

play10:37

and change it to sign up and then let's

play10:40

wrap this inside a stack so that these

play10:43

two buttons will be stacked on top of

play10:45

one another so we'll use one of our

play10:47

three most important keyboard shortcuts

play10:49

Commander control B to wrap a widget and

play10:51

we'll wrap it in a stack then we'll just

play10:54

grab our button again we'll command D

play10:56

duplicate it and we'll change this one

play10:58

to Lo Lo in and let's change the name of

play11:01

them so we know what these are in the

play11:02

widget tree and our other button this

play11:05

will be sign up button great now

play11:08

remember the little aphorism in Stacks

play11:10

the top is the bottom so the top of the

play11:13

stack that you see right here will be

play11:15

the bottom widget if we just hide this

play11:17

for a second here we can see our login

play11:20

so we're hiding the bottom one which is

play11:22

the top one so we can see this one here

play11:24

okay so how do we conditionally show and

play11:27

hide these well we're already in here in

play11:30

visibility and we're on our sign up

play11:32

button right here so let's click on our

play11:35

conditional visibility widget and come

play11:37

in here and so what do we do well what

play11:40

we want to do is that this expression

play11:43

that is what's in here is expecting a

play11:46

Boolean whatever this evaluates to if

play11:49

it's true then this will be shown and if

play11:52

it's false it will be hidden so what do

play11:54

we want to check for well we want to

play11:56

check for something about this tab bar

play11:59

that is is if the user is on the right

play12:01

Tab and if we want to check for

play12:02

something in the tab bar then we want to

play12:04

look to widget state so if we twirl this

play12:07

open we can see that the first option is

play12:10

what we want the tab bar current index

play12:13

that is it gives us an index a number

play12:16

that flutter flow will automatically

play12:18

update when the user clicks between the

play12:20

different tabs so that's what we want

play12:22

let's grab that now flutter flow did a

play12:24

nice thing for us right here because we

play12:27

actually did something wrong this this

play12:29

is expecting a Boolean a true or false

play12:31

value but we selected an integer a

play12:35

number so what it did is it pop that

play12:38

inside a conditional this would be the

play12:40

same as if we did something like this

play12:42

come into a condition single condition

play12:44

and then set this value to our widget

play12:47

state of our tab bar this is just a

play12:50

really helpful utility function and

play12:52

these are all over the place okay so we

play12:54

want to check if the first value our

play12:56

Tabb bar index is equal to

play12:59

what well we're on the sign up button

play13:01

right here and these tab bars are zero

play13:04

indexed so this first one over here

play13:06

isn't one but it's zero okay so we want

play13:09

to check if it's equal to zero so if

play13:12

it's equal to zero then this expression

play13:15

right here that is tab bar current in

play13:17

index equal to zero will evaluate will

play13:20

be true and so it'll be shown now if you

play13:23

see these two equals here and might and

play13:25

think that it's a typo it's not a typo

play13:27

in most programming languages if you

play13:28

have 1 equals that is assignment that is

play13:32

you're assigning the value of whatever

play13:34

is on the left hand right here to

play13:36

whatever is on the right hand over here

play13:38

if you want to check for a condition

play13:40

like equality here then you use two

play13:42

equal signs okay so this is great let's

play13:45

confirm this then let's set up the same

play13:48

logic on our second button but instead

play13:50

of just doing all that work again we can

play13:53

come in here and just grab this value

play13:56

let's copy this value then come over to

play13:58

our Lin button come into our conditional

play14:01

visibility in here and then you see

play14:04

we've got this little paste button and

play14:05

we paste it in then we just have to

play14:07

change this value to one because the

play14:10

login is an index of one and confirm

play14:13

beautiful and because we have

play14:14

conditional visibility set we have these

play14:16

little icons right here okay so we're

play14:19

almost ready to test it but we have to

play14:21

add the logic to our login button now

play14:24

you can see here we already have two

play14:26

actions bound here and that's just

play14:27

because we duplicated the button so

play14:30

let's come in here we're in our login

play14:31

button let's open this up and let's

play14:34

delete this second action here and we

play14:36

can come in here and we can redefine

play14:38

this action block we want to log the

play14:41

user in so let's come into backend

play14:43

database Firebase authentication and log

play14:47

in here the email provider is set

play14:49

correctly but we don't want to sign up

play14:51

the email we want the login email

play14:53

remember these are the widgets where

play14:55

this data is coming from and then login

play14:59

password finally we've got the navigate

play15:01

automatically and we can do that here

play15:04

because if the user is logging in

play15:06

they've probably already completed that

play15:08

onboarding and just want to go to the

play15:09

main tasks page beautiful so this is all

play15:12

set up and we're ready to test it so

play15:14

let's come up here to test and it'll pop

play15:17

open a new window this will take 2 to 3

play15:19

minutes to spin up the first time but

play15:21

then it'll hot reload instantly whenever

play15:24

we make a change all right so first

play15:26

let's test our conditional visibility so

play15:29

we see our sign up button that looks

play15:30

good so let's click over to our login

play15:33

and we can see that now we've got our

play15:34

login button beautiful that works so

play15:36

let's sign up a user and sign up

play15:39

beautiful it looks like it worked but

play15:40

let's go over and check our users's

play15:42

collection to see if a user document was

play15:44

created so we can come over to our fire

play15:47

store here and into manage content and

play15:50

there I am beautiful next let's test our

play15:53

our login feature but we need some way

play15:55

to log our user out and this is simple

play15:57

so we can just go to our task screen

play16:00

let's just add a button right here and

play16:02

call this log out then we can just

play16:04

Define some logic and let's search for

play16:06

log out and there it is then we go back

play16:09

to our test mode Let's instantly reload

play16:12

then we can log out and come over to

play16:14

login and put in those same credentials

play16:16

and log in beautiful now there's one

play16:19

other best practice I want to show you

play16:21

that we haven't covered yet and that is

play16:23

form validation whenever you're

play16:24

receiving data there's normally rules

play16:27

that you want applied before you accept

play16:29

the data and you can check for those

play16:30

with form validation and these would be

play16:32

things like making sure your password is

play16:34

of sufficient length and you can do that

play16:36

by wrapping your text fields in a form

play16:39

validation block and it doesn't have to

play16:42

be the immediate parent so here I've got

play16:44

three and I'm going to go up to my

play16:46

column here and use my trusty command B

play16:49

to wrap these in a form validation block

play16:52

so now here I'm in my form validation

play16:55

block and when I scroll down I've got

play16:57

with properties and I'm just going to

play16:59

leave that as is because I'm handling

play17:00

that elsewhere and then I've got these

play17:02

options under validation which are the

play17:04

most important ones now these will be

play17:07

populated with any fields that support

play17:10

validation and if you want them

play17:12

validated you can just select them here

play17:15

and when you select them you'll see what

play17:16

validation options you have available so

play17:19

you can put in a specific message

play17:21

minimum maximum allowed characters and

play17:25

text validator so here from my email I

play17:27

want to make sure that it's a valid

play17:29

email for my password and confirmation I

play17:31

want to make sure that they are a

play17:33

minimum of seven characters so I'm going

play17:35

to add that in Okay so we've set up the

play17:38

validation criteria but then we need to

play17:40

tell flutter flow when to execute this

play17:43

logic and because this is logic it

play17:45

should go where all the rest of the

play17:47

logic goes in the action flow editor but

play17:50

we don't want it on this form block

play17:52

because we want to defined on the actual

play17:54

buttons so let's come over to our sign

play17:57

up button over here come into our action

play17:59

flow editor let's give some more space

play18:01

right here and when do we want to run

play18:03

this well we want to run this before the

play18:06

authentication action occurs because we

play18:08

want to stop the execution flow if it's

play18:11

not valid but how do we get it up there

play18:13

let me show you so let's add in a

play18:15

validation action so just search for

play18:18

validation validate form select which

play18:21

form we haven't named it yet so it's

play18:23

just this form one and then we can use

play18:25

these arrows to move this up beautiful

play18:28

let's name this so let's close this out

play18:30

let's come into our form here and let's

play18:33

call this form dasign up beautiful so

play18:36

when we come back into our action flow

play18:38

editor here we can see that name all

play18:40

right let's try this out to see these

play18:42

changes we're going to instantly reload

play18:45

let's put in a new user but let's put in

play18:47

a password that's insufficiently long

play18:50

and when we click sign up we can see

play18:51

that we get this error message and we

play18:54

get our error color and we also have an

play18:56

overflow error so where is this color

play18:58

coming from and let's fix this error

play19:00

this color is coming from when you're in

play19:03

your text field down here and scroll all

play19:05

the way down you can see we get this

play19:07

error border color so that's where

play19:09

that's coming from let's come up to our

play19:10

container here and give a little bit

play19:12

more room so we have room for that error

play19:15

and this authentication is done lastly

play19:17

we need to set up validation in our

play19:19

login form and then this authentication

play19:22

page is done I'll leave that up to you

play19:23

for a challenge for this video and we'll

play19:25

see you in the next one

Rate This

5.0 / 5 (0 votes)

Etiquetas Relacionadas
Flutter FlowUI LogicUser AuthenticationFirebase SetupEmail LoginPassword SecurityForm ValidationApp DevelopmentBackend ServicesFlutter Tutorial
¿Necesitas un resumen en inglés?