Tutorial Mastercam X5 CNC Mill / Fraish
Summary
TLDRIn this tutorial, Taufik Setiawan from Universitas Negeri Semarang guides viewers through the process of CNC milling using Mastercam. The video walks through creating a detailed sketch, including designing shapes like rectangles, hexagons, and circles, and applying tool paths for milling. Taufik demonstrates selecting tools, setting machining parameters, and simulating cuts for optimal results. He also covers setting up the CNC machine and saving the project for machine transfer. This comprehensive guide helps learners understand the CNC milling process and Mastercam software functions, making it a valuable resource for beginners and enthusiasts alike.
Takeaways
- 😀 Introduction of the video by Taufik Setiawan from Universitas Negeri Semarang, focusing on learning CNC milling using Mastercam.
- 😀 The tutorial begins by explaining how to create basic sketches, starting with a rectangular shape with specified dimensions (100mm x 75mm).
- 😀 Instructions on how to create and adjust radii on the corners of the rectangle using the Mastercam tool icons.
- 😀 A six-sided polygon (hexagon) is created with a 20mm size, demonstrating how to use the polygon tool in Mastercam.
- 😀 A circle with a diameter of 60mm is created, followed by a smaller 10mm circle, for future drilling operations.
- 😀 The process continues with the creation of another sketch with specific dimensions (30mm width and 10mm height), along with a 5mm radius on the edges.
- 😀 The machine type for CNC milling is selected, and the material properties such as thickness (20mm) and dimensions (100mm x 75mm) are defined.
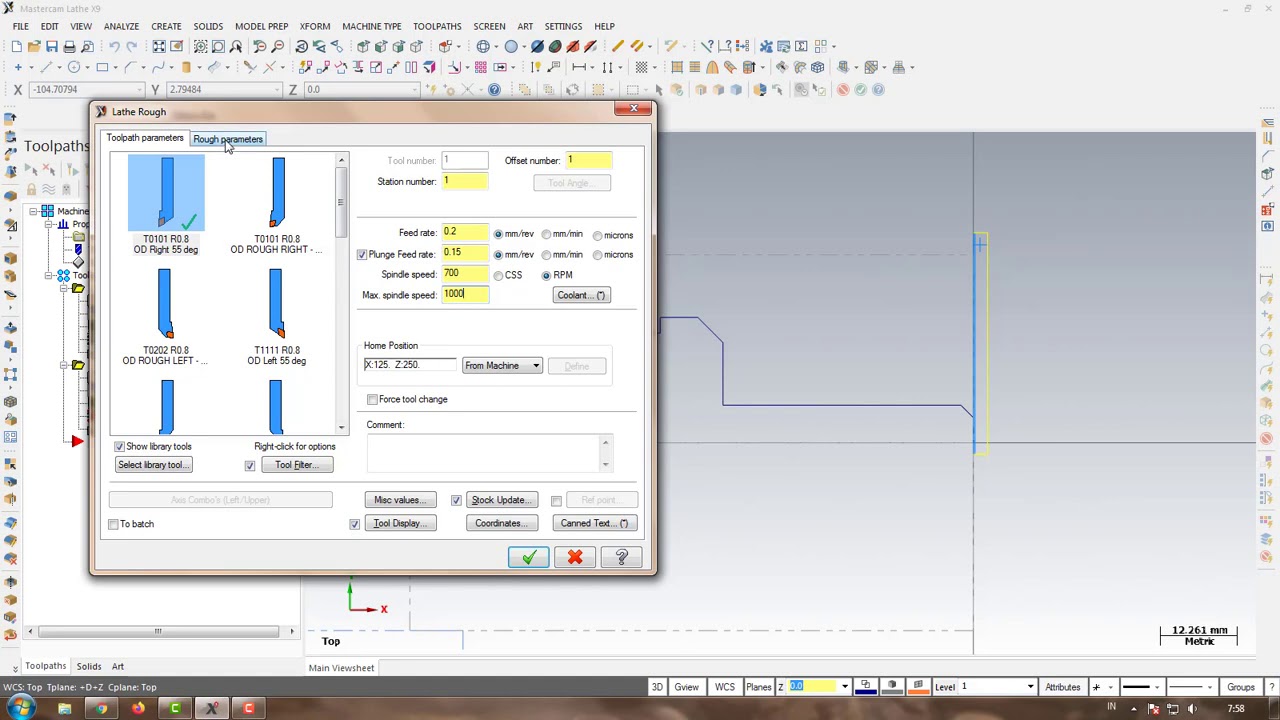
- 😀 Tool selection for milling operations is demonstrated, with a focus on selecting the correct diameter and cutting tool for precise machining.
- 😀 Several machining operations are simulated, including pocketing and contouring, with details on tool parameters like depth of cut, tool radius, and multi-pass settings.
- 😀 The process also involves drilling specific areas with a 10mm diameter drill bit and adjusting the cutting depth for precision.
- 😀 The tutorial concludes by explaining the saving process of the CNC milling operation and generating the necessary G-code to transfer to the CNC machine.
Q & A
What is the purpose of the video?
-The purpose of the video is to teach viewers how to use the Mastercam software for CNC milling, with a focus on creating and processing sketches for CNC machining.
Who is the presenter in the video?
-The presenter is Taufik Setiawan from the Mechanical Engineering Department at Universitas Negeri Semarang.
What kind of object is being worked on in the video?
-The object being worked on is a mechanical part, as shown in the video, with various geometric shapes, including rectangles, hexagons, and circles.
What are the initial steps in creating the design in Mastercam?
-The initial steps include opening Mastercam, activating the necessary settings, and drawing a rectangle with dimensions of 100 mm by 75 mm.
How does the presenter create a rounded rectangle in Mastercam?
-The presenter creates a rounded rectangle by adding radii to the corners of the initial rectangle using the appropriate icon in Mastercam.
What geometric shape does the presenter create next, and what are its specifications?
-Next, the presenter creates a hexagon with a side length of 20 mm using Mastercam's polygon tool.
How is the circle drawn and what is its specification?
-The presenter draws a circle with a diameter of 60 mm, using Mastercam's circle tool and centering it at the desired location.
How does the presenter define the milling machine settings?
-The presenter defines the milling machine settings by selecting the machine type, setting the material thickness to 20 mm, and inputting the length and width of the workpiece.
What is the significance of selecting the right tool for the milling process?
-Selecting the right tool is important to ensure the correct cutting and shaping of the material. For this project, a tool with a small diameter, such as a 3 mm tool, is chosen to handle the detailed milling requirements.
How does the presenter handle the process of drilling holes in the design?
-The presenter drills holes by selecting the appropriate drill tool, setting the tool diameter to 10 mm, and defining the hole depth based on the thickness of the material (20 mm), using a negative value to ensure the proper depth.
Outlines

Dieser Bereich ist nur für Premium-Benutzer verfügbar. Bitte führen Sie ein Upgrade durch, um auf diesen Abschnitt zuzugreifen.
Upgrade durchführenMindmap

Dieser Bereich ist nur für Premium-Benutzer verfügbar. Bitte führen Sie ein Upgrade durch, um auf diesen Abschnitt zuzugreifen.
Upgrade durchführenKeywords

Dieser Bereich ist nur für Premium-Benutzer verfügbar. Bitte führen Sie ein Upgrade durch, um auf diesen Abschnitt zuzugreifen.
Upgrade durchführenHighlights

Dieser Bereich ist nur für Premium-Benutzer verfügbar. Bitte führen Sie ein Upgrade durch, um auf diesen Abschnitt zuzugreifen.
Upgrade durchführenTranscripts

Dieser Bereich ist nur für Premium-Benutzer verfügbar. Bitte führen Sie ein Upgrade durch, um auf diesen Abschnitt zuzugreifen.
Upgrade durchführenWeitere ähnliche Videos ansehen

Job Facing Master CAM Mill

MASTERCAM X5_BUBUT DASAR BIDANG BERTINGKAT
Gambar Mastercam + Edit + Eksekusi LANGSUNG

UNNES Laporan Keuangan Konsolidasi pada Akuisisi Metode Ekuitas 1
Program CNC Turning Menggunakan MasterCAM X9 (Pembuatan PIN)

VIDEO TERBAIK - PENYUSUNAN LAPORAN BIAYA PRODUKSI - Metode Rata Rata dan FIFO - AKUNTANSI BIAYA
5.0 / 5 (0 votes)
