Set up company-wide email signatures in Microsoft 365 (new 2022 Exchange Online guide)
Summary
TLDRThis video tutorial guides viewers on implementing email signatures and disclaimers for Microsoft 365 users. It explains the process of setting up organization-wide signatures using mail flow rules in Exchange Online. The tutorial covers creating a transport rule, defining conditions, and adding HTML signature code. It also addresses handling encrypted messages, preventing signature stacking in email threads, and managing user data for personalized signatures. The video concludes with a mention of CodeTwo Email Signatures for Office 365 as an alternative for enhanced signature management.
Takeaways
- 🔧 Microsoft 365 allows the addition of email signatures and legal disclaimers through mail flow rules in Exchange Online.
- 📝 To create a mail flow rule for signatures, access the Microsoft 365 admin center and navigate to the Exchange admin center's 'Mail flow', 'Rules' section.
- 📋 Define conditions and exceptions for the transport rule to specify when and how the signature should be applied.
- 👤 Use the 'Sender condition' to apply the rule to emails sent by users within the organization.
- 🖼️ Include the signature by selecting 'Apply a disclaimer to the message' and 'append a disclaimer' actions, then enter the HTML signature code.
- 💻 Utilize an email signature generator to create and obtain the HTML code for the signature.
- 🔗 Transform user data into placeholders that update with Azure Active Directory information for personalized signatures.
- 🔄 Choose the action to take when the signature cannot be added, such as 'Wrap' to include the original message as an attachment.
- ✉️ Prevent signature stacking in email threads by setting exceptions based on unique parts of the signature.
- 🛠️ Configure advanced settings as needed, but typically the defaults are sufficient.
- 🔄 After creating the mail flow rule, enable it to start automatically adding signatures to符合条件的emails.
Q & A
How can you add email signatures and legal disclaimers in Microsoft 365?
-You can add email signatures and legal disclaimers in Microsoft 365 by creating mail flow rules in Exchange Online through the Microsoft 365 admin center.
Where do you manage organization-wide signatures and disclaimers in Microsoft 365?
-Organization-wide signatures and disclaimers are managed using mail flow rules in Exchange Online.
What is the first step to create a mail flow rule for adding a signature in Microsoft 365?
-The first step is to open the Microsoft 365 admin center and navigate to the Exchange admin center.
How do you access the mail flow rules in the Exchange admin center?
-In the Exchange admin center, you go to 'Mail flow', then 'Rules'.
What type of rule should you create to apply a disclaimer in Exchange Online?
-You should create a rule by clicking 'Add a rule' and selecting 'Apply disclaimers'.
How do you define the conditions for the mail flow rule to apply a signature?
-You define the conditions by setting up various rules such as applying the rule only to internal or external emails using the 'Sender condition'.
What action is required to add a signature to all messages sent by users in your company?
-Choose 'The sender is located inside the organization' and select 'Apply a disclaimer to the message' with 'append a disclaimer' in the action field.
How can you obtain an HTML signature code if you haven't created one yet?
-You can use a free email signature generator to design a signature and get its HTML code.
What does the 'Wrap' option do when the signature cannot be added to an email?
-The 'Wrap' option adds the original message as an attachment to a new message envelope, with the signature added to this envelope.
How can you prevent signatures from stacking in email conversations?
-You can add an exception by copying a unique part of your signature and setting the condition 'The subject or body includes any of these words'.
What happens to the signature when you reply inside an email conversation in Microsoft 365?
-The signature will not pile at the bottom of the thread due to the configured exception, ensuring there's always only one signature.
Why might external recipients have trouble viewing images in your email signature?
-External recipients may have images blocked by default, requiring them to use a dedicated option to view them.
Outlines

هذا القسم متوفر فقط للمشتركين. يرجى الترقية للوصول إلى هذه الميزة.
قم بالترقية الآنMindmap

هذا القسم متوفر فقط للمشتركين. يرجى الترقية للوصول إلى هذه الميزة.
قم بالترقية الآنKeywords

هذا القسم متوفر فقط للمشتركين. يرجى الترقية للوصول إلى هذه الميزة.
قم بالترقية الآنHighlights

هذا القسم متوفر فقط للمشتركين. يرجى الترقية للوصول إلى هذه الميزة.
قم بالترقية الآنTranscripts

هذا القسم متوفر فقط للمشتركين. يرجى الترقية للوصول إلى هذه الميزة.
قم بالترقية الآنتصفح المزيد من مقاطع الفيديو ذات الصلة
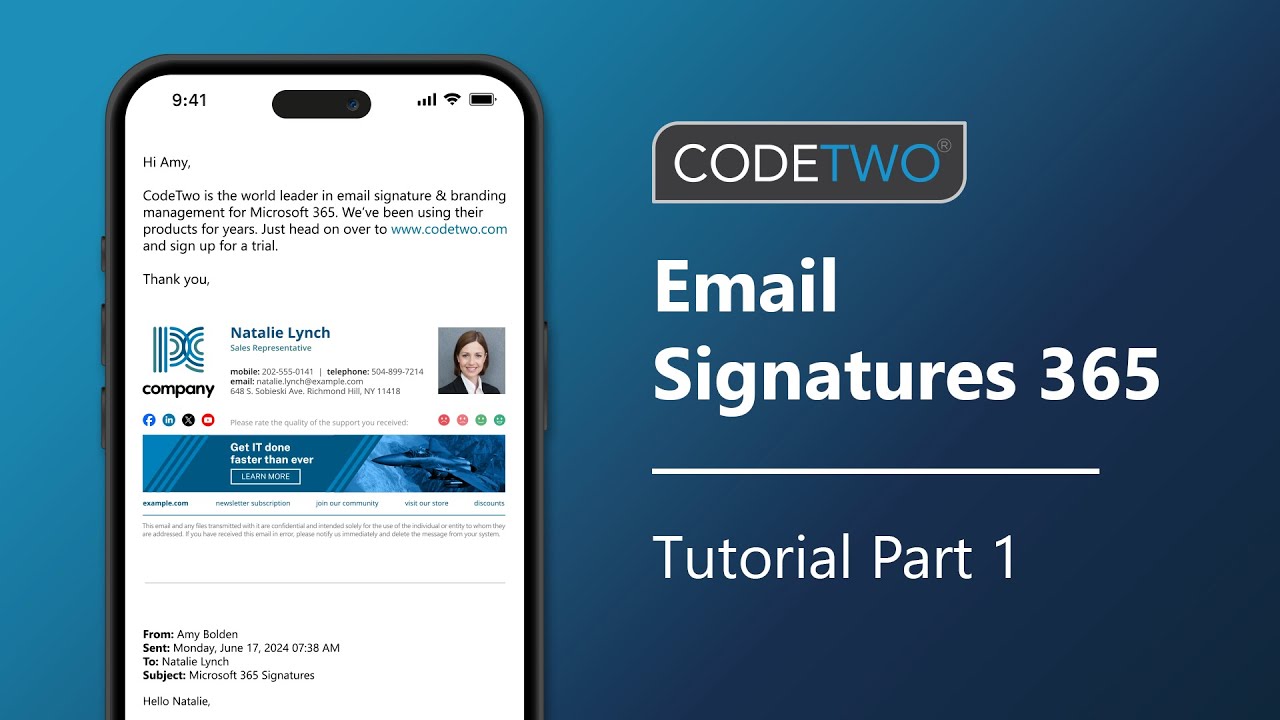
CodeTwo signatures tutorial part 1: Create a CodeTwo account & register a tenant

How to Automate Regular Emails in Microsoft Outlook
How to Set Up Defender for Office 365: A Complete Guide

Microsoft Defender for Business EDR to XDR Security Upgrade Using Microsoft 365 Business Premium
Hướng dẫn sử dụng Outlook mail cho người mới
Microsoft Defender for Endpoint: The Simplified Way!
5.0 / 5 (0 votes)
