FaceFusion: The Definitive Deep Dive & Walkthrough - Everything You Always Wanted to Know About...
Summary
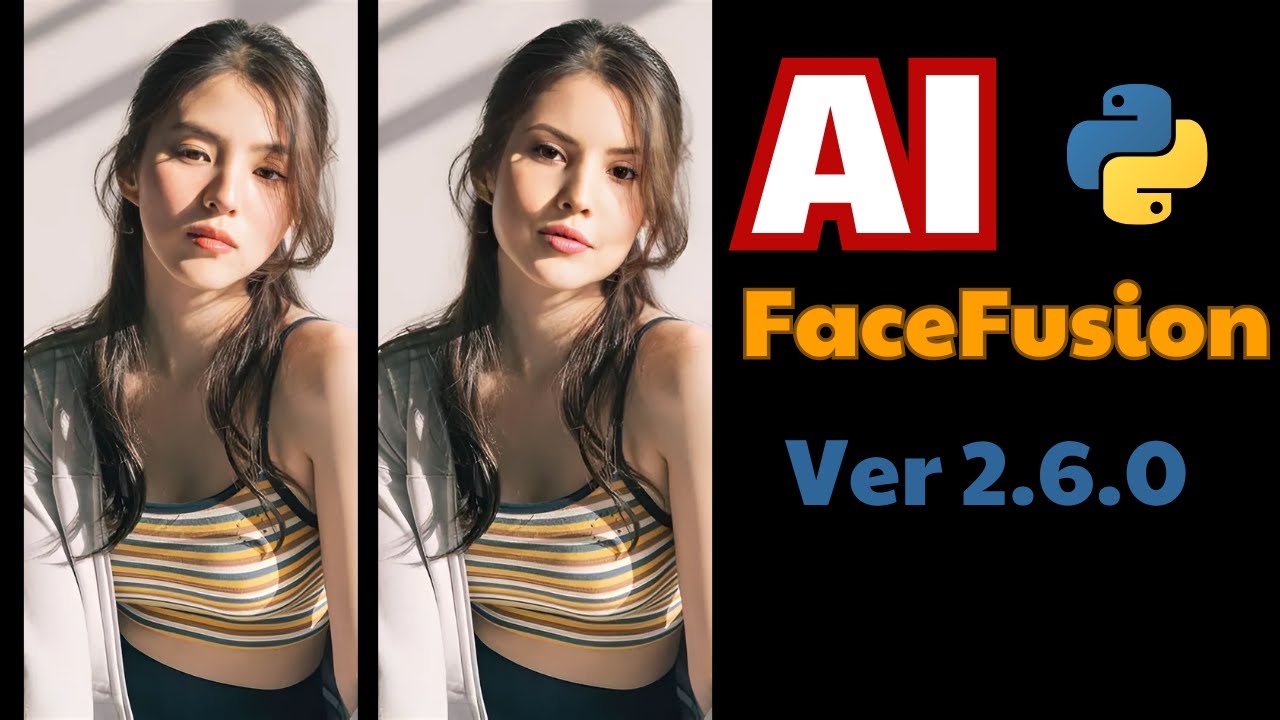
TLDRThis tutorial video guides users through updating and using Face Fusion 2.1.1 for face swapping in images and videos. It covers installation, selecting execution providers, and adjusting settings for optimal performance. The script explains how to choose face swapper models, enhancers, and use face debugger tools for precise masking, ensuring a natural look in the final output. Viewers are encouraged to experiment with different settings for the best results.
Takeaways
- 📝 Ensure you have the latest version of Face Fusion (2.1.1 at the time of the video) for the best experience and features.
- 🔄 If you have version 2.0.0, follow the upgrade instructions in the video to update to the latest version.
- 💻 Use the terminal to navigate to the Face Fusion directory and execute commands to pull the latest version from GitHub.
- 🛠️ Create a virtual environment for Mac/Linux or use specific commands for Windows to prepare for the installation.
- 🖥️ Select the appropriate execution provider based on your system (Core ML for Mac, CUDA for Nvidia, etc.).
- 🔄 Be prepared for additional downloads and installations when you first run the updated Face Fusion.
- 🔧 Adjust the execution thread count based on your GPU's VRAM for optimal performance.
- 📁 Set a custom output path for your creations, but be aware of potential issues with spaces in the path and the path not being saved.
- 🎥 Use the face swapper tool to replace faces in images or videos by selecting a source and target.
- 🔍 Utilize face analyzers to select specific faces in the video based on order, age, and gender when needed.
- 🛡️ Experiment with different face mask types and settings in the face debugger for precise control over the face swap effect.
Q & A
What is the latest version of Face Fusion mentioned in the video?
-The latest version of Face Fusion mentioned in the video is 2.1.1.
If someone has never installed Face Fusion, what should they do according to the video?
-If someone has never installed Face Fusion, they should watch the clean install video linked in the top right of the video or in the information below.
What is the first step to upgrade Face Fusion if you already have version 2.0.0 installed?
-The first step to upgrade Face Fusion is to open the terminal application and ensure you are in the Face Fusion directory.
What command should be typed in the terminal to pull the newest version of Face Fusion from GitHub?
-The command to pull the newest version of Face Fusion from GitHub is 'git pull'.
For Mac and Linux users, what commands should be used to create a virtual environment after pulling the latest version?
-For Mac and Linux users, the specific commands to create a virtual environment are not provided in the transcript, but it is mentioned that they should type the commands for Mac and Linux.
What is the purpose of the 'face selector mode' in Face Fusion?
-The 'face selector mode' in Face Fusion is used to choose the face that you want to swap in the target image or video.
How many face swapper models are available in Face Fusion by default?
-By default, there are five different face swapper models available in Face Fusion.
What does the 'keep FPS' option do in Face Fusion?
-The 'keep FPS' option in Face Fusion keeps the output file to its original target's frame rate instead of converting it to the default 25 FPS.
What does the 'face debugger' tool in Face Fusion do?
-The 'face debugger' tool in Face Fusion is used for face masking and helps to visualize which face will be swapped and what area will be affected.
What are the three different face mask types available in Face Fusion's face debugger?
-The three different face mask types available in Face Fusion's face debugger are 'Box', 'Occlusion', and 'Region'.
What is the recommended face enhancer model for a more realistic film look according to the video?
-The recommended face enhancer models for a more realistic film look, according to the video, are 'Code Former' and 'GPen etc'.
Outlines
📲 Face Fusion Software Update and Installation Guide
This paragraph provides a step-by-step guide for ensuring the viewer has the latest version of Face Fusion software, version 2.1.1, and how to upgrade it if they already have an older version installed. It covers the process of opening the terminal, navigating to the Face Fusion directory, pulling the latest version from GitHub, and setting up a virtual environment for different operating systems. The instructions also include choosing the correct system for the installation, such as default for M1 Macs or Cuda for Nvidia GPUs, and the initial steps to run the software after installation.
🛠️ Customizing Face Fusion Settings and Interface Overview
The second paragraph delves into the customization options available within Face Fusion, including execution providers, thread count, and memory settings. It discusses the importance of selecting the right execution provider based on the user's hardware and the impact of the thread count on rendering speed. The paragraph also touches on the output path settings, which dictate where the final videos and images are saved, and the limitations encountered with path customization. Additionally, it outlines various options like keeping the original frame rate, retaining temporary files, and skipping audio or downloads for certain models.
🔍 Face Selection and Swapping Process in Face Fusion
This section explains the process of selecting and swapping faces within Face Fusion. It introduces the face selector mode, which allows users to choose a reference face or select multiple faces for the swap. The paragraph discusses the use of face analyzers to refine the selection based on order, age, and gender. It also covers the 'many' mode, which applies the source image to as many discernible faces as possible, and the importance of the face detector model and face detector score in accurately identifying faces for the swap.
🎨 Face Swapper Models and Enhancer Settings in Face Fusion
The fourth paragraph focuses on the different face swapper models available in Face Fusion and their respective performance in terms of rendering time and output quality. It presents a comparative analysis of models like INS-Swapper 128, Blend Swap, and Sim Swap 256, highlighting the best options based on the test results. The paragraph also explores the face enhancer settings, detailing various models like GFP-GAN 1.4, Code Former, and Gpen bfr 512, and their impact on the final output's realism and plasticky appearance. It concludes with a discussion on the blend setting in the face enhancer and the use of frame enhancer for video upscaling.
🖼️ Advanced Masking Techniques and Face Debugger in Face Fusion
This paragraph introduces advanced masking techniques in Face Fusion, such as the face debugger, which allows for precise control over which parts of the face are affected by the swap. It explains the use of face mask types like the box, which can be adjusted for padding to fine-tune the area affected, and the blur setting, which helps in making the swapped face look more natural. The paragraph also covers the occlusion mask, which intelligently handles objects partially covering faces, and the region mask, which can be used to preserve specific facial features. Additionally, it discusses the use of the face detector score to fine-tune face selection and avoid switching between similar-looking individuals.
📝 Conclusion and User Engagement Invitation
The final paragraph wraps up the video script by summarizing the key points covered in the tutorial and inviting viewers to engage with the content. It encourages viewers to ask questions in the comments section if they have any, and to like, subscribe, and leave a comment if they found the video helpful. The paragraph ends on a positive note, wishing viewers a wonderful day and reminding them to take care.
Mindmap
Keywords
💡Face Fusion
💡Virtual Environment
💡Terminal Application
💡GPU (Graphics Processing Unit)
💡Face Swapper
💡Source Image
💡Target Image/Video
💡Preview Window
💡Face Debugger
💡Occlusion
💡Face Mask
Highlights
Ensure having the latest version of Face Fusion (2.1.1) for new features and improvements.
Watch a clean install video for initial Face Fusion setup if not installed.
For version 2.0.0 users, a quick upgrade process is outlined.
Using terminal commands to pull the latest Face Fusion version from GitHub.
Creating a virtual environment for Mac/Linux and specific commands for Windows users.
Installing the new version with system type selection for optimal performance.
Potential automatic downloads and installs when running Face Fusion for the first time.
Basics of using the app, including selecting face swapper and execution providers.
How to choose the correct execution provider based on the platform and GPU type.
Using the source and target images or videos for face swapping.
Explaining the execution thread count based on VRAM and optimal speed.
Adjusting the output path for saving created videos and images.
Options for keeping the original frame rate or skipping audio in the output.
Using face selector mode to choose which face to swap in a video.
Utilizing face analyzers to select the desired face based on order, age, or gender.
Different face swapper models and their impact on render time and quality.
Choosing the best face enhancer model based on the desired output look.
Adjusting the face detector score for better face selection accuracy.
Using the face debugger for fine-tuning the face mask and ensuring accurate swaps.
Exploring different face mask types for various scenarios in face swapping.
The importance of fine-tuning face mask padding and blur for natural results.
How to use occlusion for handling face swaps with objects partially covering the face.
The use of region masking to preserve specific facial features during a swap.
Invitation for viewers to ask questions and engage in the comments section.
Transcripts
hey everyone before we begin looking at
the interface and figuring out what
everything does make sure you have the
newest version of face Fusion installed
which as of this video is release is
version
2.1.1 that added a few new features and
improvements if you do not have face
Fusion installed at all make sure to
watch my clean install video that I will
have linked in the top right of the
video right now or in the information
below the video however if you already
have version 2.0.0 installed let's do a
quick upgrade on it you can skip to the
next chapter if you've already done this
first open up your terminal application
and make sure you are in the face Fusion
directory you should be able to just
type
CD face
Fusion once you're in the proper
directory type the following command get
poll and hit
enter what this will do is it'll it'll
pull or basically download the newest
version of face Fusion from GitHub as
I've had problems in the past I'm going
to next create the virtual environment
so type the commands for mac and Linux
if you're on either of
those
and and there now you're in a virtual
environment for Windows users these are
the commands that you should be using
instead of those last
two then to install the new version
that's been hold type in this
command at this point as per before you
need to pick out which type of system
you're using so for me I'll just be
picking default as I am on M1 Mac or any
Mac you'll be picking default if you're
using an Nvidia based GPU choose Cuda
otherwise I believe rocm is for anyone
using an AMD GPU CPU I'm not sure who
would actually pick just
that then for another part of the
install you choose again kind of the
same things but instead for Mac you will
choose between Legacy which is if you're
on an Intel Mac otherwise you will
choose silicon if you are on an M1 M2 or
M3
Mac Cuda again once again if you are on
Nvidia and I'm not sure which of these
two are what you're supposed to be using
if you're on AMD I believe it's one of
those
two watch it do its
installation and that's
it at this point it should be installed
but as per usual I believe when you run
it for the first time you will get some
more downloads and installs
automatically let's find out and as
always to run it type the command
python
run.py looks like there aren't any more
installs that was it so you're ready to
go at that point pick up the URL here
and copy that and put it into your
browser and here we are starting off I'm
going to show you the absolute Basics so
that you can easily and quickly create
your first swap if you already know the
app pretty well or just need to know
about specific parts of the app feel
free to skip around the chapters I've
set
up first up in the top left you should
already have face swapper
selected next go down to the execution
providers and depending on which
platform you are working on make sure
you have the correct selections um well
selected on a Mac if you can make sure
core ml is
selected
on an Nvidia GPU machine make sure you
have Cuda
selected on an AMD GPU machine make sure
you have well whatever option you're
supposed to have not sure to be honest
weirdos again for quick and simple skip
everything else on the left now in the
middle you'll drag an image to
Source or you can click on and find your
file this is the image you want the
person in the new image to look like
below that is the target drag or click
and find your image or video that you
want to change the person's face from
into the source
images at this point if your image or
video only has one obvious person in it
that you want to swap you should be able
to click the start button Below in the
middle and then wait for the output and
done that at times can be literally all
there is to it now what the heck is
everything else El let's look at the
execution providers I already mentioned
it but just make sure you have corl Cuda
or whatever it is for AMD selected
otherwise renders will take much much
longer the execution thread count is
based on the amount of vram you have so
this depends on the GPU that you have I
have a 16 GB M1 Mac Mini so I set it to
16 and that seems to work closest to the
optimal speed but because it's shared
memory on Apple silicon anywhere from
about 10 to 16 gets roughly the same
results apparently with dedicated
graphics cards you can go with a 2:1
ratio so if it's a 16 GB card you can go
with 32 threads the execution Q count I
don't touch most people will probably
keep that at one I would only try
increasing it if you are already getting
really good speeds but try it out with a
small file and test it for
yourself max memory is there more as a
limiter leave it at zero and it will use
as much memory as it can otherwise if
you need a certain amount of memory
available for other tasks on your
computer you can change it to suit your
needs now output path is something that
I wish worked a little bit better you
can see that by default it has a very
weird path this is where any videos and
images you create will automatically
reside you can change it to whatever
directory you like however I ran to a
problem where it doesn't seem to like
any spaces in the path and if it did
have any spaces it would fail if I tried
to Output anything the other problem
that I have with it is that it doesn't
save the path that you change it to so
the next time you come into phas Fusion
it will be set back to its default I
just don't change it and I make sure I
have easy access to the finder for that
directory on a Mac in order to see that
directory you need to show hidden files
to do this type command shift period and
again to hide them once visible you can
easily find the V or VAR directory in
your user directory and go from there on
Windows and Linux I'm not sure what the
deal is sorry but it's actually probably
just easier to get to the options are
pretty simple Concepts keep FPS will
keep your output file to its original
targets frame rate instead of converting
it to the default 25
FPS keep temp will make it so that all
of the images created for each output
before it merges them will be kept in
the default folder therefore no longer
temporary skip audio will strip the
audio from your target well technically
it just won't add it back in when it's
creating the output file and Skip
download is kind of a weird one that has
little use in my opinion when you switch
to a particular face swapper model or a
face enhancer model it has to download
it the first time if you have this
selected it won't download it at least
that's how I've come to understand it
it's something I've never never had to
use for but maybe useful in some case
that I don't understand maybe if it's
corrupt or something for the rest of the
features we're going to need to actually
show what is going on so I'm going to
put in a Target I'll use a short clip
from a Tyler hubard video with that in
now you can see a ton of stuff lighting
up and change so let's start from the
top right with the preview
window this is probably the most
important window as it's where you can
see any and all changes before or
rendering out your final picture or
video just below that is the preview
frame slider it's currently on frame
zero but you can slide it around to a
different number to see a different
specific frame in the preview window
switching between which frame it is on
is very useful when you have multiple
Cuts or scenes within a single video for
reasons I'll explain with the options
below first with trim frame start and
end by default they will be set to the
first and and last frame of your entire
clip and if you don't change it it will
render the entire video when you hit
start but if you only want one portion
of the video you use the preview frame
above to see what frames you actually
want to render out and then set the
start and end to those say I only wanted
to show one quick cut of Terry Crew
dancing I can see that at frame
24 it starts this cut and then it ends
at frame 40
so I can just easily change the trim
frame start and the trim frame end to 24
and 40 and that way it'll only render
out that one little cut of 16 or so
frames under face selector
mode you can see there are three options
reference one and many with reference
selected you can see the reference face
just below that shows a bunch of
faces to show how this Works we're going
to need to bring in our source
image it seemed appropriate to use
Robert Dy Junior for this example I'm a
dude playing a dude disguises another
dude you might not see anything happen
at first and that could be because it's
trying to put the face on someone that
was in the beginning of the clip but not
in this shot so what you want to do now
with reference turned on is select the
face that you want to swap Robert Dan Jr
on to
you can just as easily pick someone else
from the references because the preview
is such a low resolution it can be
difficult to see how much is actually
changing until you render it out while
still using reference let's look at the
reference face
distance I'm not really sure why it's
called distance but what it does is find
faces that are either less or more like
the image you chose if you turn it up
too high it will start to think everyone
is your reference and and change
multiple
faces but if you turn it down too
low it will think it's a different
person just between frames or scenes
with different lighting when it's still
the same person so you'll get flashing
in and out if it's close or just shots
that aren't changed at all usually the
default works great but you'll find
reasons to play with it a bit depending
on your video after reference is one
this will always only pick one face from
the entire video the trick is getting it
to pick the one you want now if you only
have one person in the entire video then
it's going to be pretty simple if you
have two three maybe still pretty easy
but when you have more faces in the
video especially when you get pretty
high up this can become a huge
paa but if you skip down to the face
analyzers which they spell incorrectly
here you have a few tools to try and
pick the the one you want and these
analyzers work for reference and mini
also first with order given the first
two options you'd either get the person
on the far right or the far left of the
picture and it's for the first frame of
your video if it's someone not in the
first frame good luck if we wanted to
pick Terry Cruz top to bottom would work
and with large to
small I have no idea how best or worst
are decided but in this situation if you
wanted one of the guys just to his left
or right I don't see how this would work
the age analyzer it's pretty obvious but
it will allow you to narrow down if you
have a range of obvious age differences
within the video if I quickly go back to
reference you can see that accurately
portrays them all as adults no children
teens or seniors the last one is
gender I shouldn't have to explain this
one as it's the the same as age but well
gender male or female however this one
doesn't seem to work as well just to
show what I
mean if I choose
male there's only one image and that
looks like it's a female and for some
reason that's it for reference if I put
the female for some reason that thinks
all of them including Terry Cruz is a
female so back to the face selector
mode let's check many what this one is
going to do is use your Source image on
as many faces as it can make out well
enough and you can use the analyzers for
exclusions 99% of the time I'm using
reference mode and almost never use the
analyzers there are rare occasions where
I find them useful but not too often the
last thing on the right side that isn't
part of the masking is the face detector
model section I've always left this on
retina face however with Retina face
selected it makes the next part the face
detector size absolutely worthless if
you try anything other than the than the
default 640x
640 it will come up as an
error if you switch it to
unet and then switch it
around it will allow you to change a
size I haven't played around with this
much but what it seems to be is
something that helps you select faces
when they're too close to the edge or
cut off normally I wouldn't use it but
if you can't seem to get a face selected
try this
out as for the face detector
score though I don't use this too often
it can be useful this is usually good
set to the default Center but this is
how tight or Loosely determines what a
face is within your image or video
turn it down a bit to try to recognize a
face that wasn't all that
obvious but go too low and it will think
all random things are
faces turn it
up and you'll get fewer faces which may
be a good thing as the ones that doesn't
pick up still probably wouldn't have had
much of a good output anyway but go too
high and it won't pick up
anything now let's switch back over to
the very first thing we looked at for a
half second earlier frame processors
face swapper is what you're going to
want to use almost all of the time for
obvious reasons this gives you the
option of five different face swapper
models by default it's set to ins
swapper 128 and it's a pretty good one
in fact maybe the best option I was
going to let you figure it out what is
best on your own but instead I ran a
test of each one to show you what they
all look like with the basic settings
here you can see that blend swap looks
pretty bad and it took 56
seconds in swapper looks pretty good and
took 15
seconds in swapper fp16 looks marginally
better but also took 2 minutes and 53
seconds Sim swap 256 looks pretty bad
but only took 15 seconds
and the 512 unofficial took longer at 26
seconds but looks even worse so as I
said in swapper 128 is probably the best
option unless time really is of no
concern and you want the marginally
better output of the
fp16 and just to show you how it turns
out if you put on the default face
enhancer on the two good ones and the
maybe okay one here are how they turned
out both of the in swappers look pretty
darn good but I don't think the face
enhancer was able to save the Sim swap
so definitely no point in trying the
other
two now that you've seen what the
default face enhancer can do let's take
a look at its other models and
settings face Fusion gives you seven
different model options I've not tried
all of them but I'm pretty happy with
the ones I've used like face swapper
let's look at the outputs of the four
that I have used first here's what the
clip looks like without turning on the
enhancer for not being enhanced I'd say
it turned out pretty decent and now here
are the four results gfp Gan 1.4 looks
great and took 2 minutes and 3 seconds
to
render however it can look a bit
plasticky depending on the
scene code forer took a bit longer at 2
2 minutes and 58 seconds looks a bit
better by not looking so
plasticky gpen bfr 512 looks almost
identical to code former and took the
exact same amount of time at 2 minutes
and 58
seconds restore former took 4 minutes
and 2 seconds and seems to have some
problems you can see how it even
distorted a large portion of the clock
so to me it's a tossup between code
former and gpen etc for the more
realistic film look while gfp
gan4 is faster and also works very well
for cartoonish and current AI videos
being made with Pika Moon Valley and Gen
2 Etc there's still one more setting for
face enhancer and that's the
blend it's default is set to 80 and
tends to be good enough but you can put
it down a bit to get rid of some of the
plasticky look I never go below 50 or up
for some reason if you want more more
now frame
enhancer I never use basically it's a
video upscaler if you need your video to
be larger in scale then maybe this will
be useful for you you have three options
of
models the first one will double the
resolution while the other two will
quadruple the resolution so if you start
with a 1080p it'll get 4k or 8K
respectively I use real ESR Gan so
either one of these two all the time for
still images and would recommend going
with that the main reason I never use it
though is the additional time is kind of
insane if you're ever wondering why a
render is taking so long double check
that you didn't accidentally choose
frame enhancer instead of face
enhancer now the last one is face
debugger which I think should be renamed
personally as you aren't really doing
any debugging but this is where all the
face masking comes into play Let's turn
that on and see what we get so let me
bring in a new
Target and a new
source just to make sure that she is the
one that's being selected let's choose
her in the reference face and it's
actually doing the wrong thing right now
it should be showing a box and not doing
what occlusion actually does let me try
switching those around see what
happens
there we go weird so now with just her
selected you can now see a red square
around her face that's the face mask box
to show you which face will be swapped
and what area will be affected as you
can see face mask is selected under the
face debugger
items turn that off and the square goes
away KPS is also turned on but it
doesn't seem to be doing anything with
this Frame as I believe her face is too
small in this to show up so let's go to
a later point in the
clip and because I don't want this to
get too weird let's pick a different
Source picture for
this you can see when I pick his
reference face that he now has a square
and five dots that signify where his
eyes nose and lips are for tracking I
think KPS stands for key points or
something like that now let's make him
Steve Corell
now B
box I'm assuming bounding box as far as
I can tell doesn't really do anything
other than highlight which face will be
swapped turn that
on okay now it's not getting any so
maybe this is a bug and this is
hopefully something they'll fix really
soon but it seems whenever I actually
put the source image in now during face
debugger it will then completely get rid
of all the information in the preview
frame to see what is actually shown for
masking so like right now if I put Steve
car back
in it changes the image however the
masking information for the debugging is
gone changing frames or whatever does
not change that if I get rid of Steve
krell's
image sure enough there the information
is back again if I choose somebody else
let's go with Michael J
fox it changes the image but again lose
all the
information so for now I'm just going to
keep the source out of there so you can
see what's supposed to be happening
without the image changing and the last
of the face debugger items is score you
turn that on it puts up a number in the
box and based on that number that's how
high you can put up the face detector
score slider and still have it select
that face so seeing that it's 0.9 91
right now I should be able to put it all
the way up to
0.9 sure enough it still shows his face
selected if I put that to
0.95 no longer
selected the real reason for using this
is maybe if you have so many people that
are in it that looks somewhat similar
and you want to get as close to possible
to only selecting that person maybe you
can fine-tune it so that it won't
switch I don't know so now back to face
mask let's first turn off the score and
let's turn off the bounding box now take
a look over on the right where all the
masking tools are available first we'll
take a look at the box that's titled
face mask type as it set up now you can
see where that square is around his head
everything within the square can be be
affected by the face swap including his
jacket and shirt most likely nothing
will happen to them with a simple shot
like this but if you want to make sure
not as much is affected that's where you
can choose the different padding sliders
to make the square smaller or larger in
this case maybe you just want to slide
it up a little bit from the bottom so
you don't get so much of a shirt so you
just do the face mask
padding bottom and slide that over a
little bit see how much that changes
oh that changed the left side for some
reason let's try that
again okay I don't know where that came
from but all of a sudden the left side
is all messed up so let's do the
left bring that in a
bit that seems to be
working you just want to get close you
don't want to go over the actual head in
any way whatsoever unless there's
something on the face you do not want to
be mased
the other option is the blur this is the
amount or I believe more accurately the
width of the outside of the mask that is
blurred to make the new face look more
natural on the target video or image
it's very difficult to see anything
change on such a small preview that
you'll have to test it out for yourself
on your own
projects now instead of the Box face
mask type there is
occlusion
this seems to be a bit smarter masking
tool and I hope it is as there are no
settings for it with this current shot
though there isn't much of a reason to
use a cusion so let's take a look at
another
frame you can see here that the man in
the middle has a beer mug partially
covering his face usually this would
have been a big issue and caused weird
artifacting now with
occlusion let me first select his
face you can see how it automatically
mask out the mug with zero work go back
a few
frames and you can see how the mask
opens up at the bottom as more of his
face is
revealed and for the final option which
is
region let's bring in one last
clip
this is what you use if you don't want
something to change say you want to keep
someone's crazy eyes or keep their
specific eye color and the way they look
around you can turn off the
eyes and they won't be affected by the
swap looking at the other options I'm
sure you get the idea you can of course
also use the different face mask types
at the same time so if you like those
eyes but he's drinking a beer at the
same time use both occlusion and
Regen
anyway I think that's more than enough
for now if you have any questions please
feel free to ask in the comments I
appreciate you watching the video please
like subscribe and leave a comment below
have a wonderful day and take
care
Browse More Related Video
![](https://i.ytimg.com/vi/Lyc_tFiDKNE/hq720.jpg)
NEW Adjustment Brush in Photoshop. the advanced tutorial
![](https://i.ytimg.com/vi/t1x5ZTI-tq4/hq720.jpg)
Text to Image generation using Stable Diffusion || HuggingFace Tutorial Diffusers Library
![](https://i.ytimg.com/vi/OKJM3jMwWCI/hq720.jpg)
How I Created Realistic AI Influencer from Scratch | AI Model
![](https://i.ytimg.com/vi/TA_NCwJmhS4/hq720.jpg?v=64e09e87)
Create Hyper-Realistic AI Influencers | AI Instagram Model | Step-by-Step Tutorial ✨
![](https://i.ytimg.com/vi/7X_wRiQp4Kc/hq720.jpg)
How to Create a Professional LinkedIn Profile Photo with Midjourney
![](https://i.ytimg.com/vi/RVSxqUBEp6E/hq720.jpg)
Print de ideale foto voor jouw fotolijst
5.0 / 5 (0 votes)