PEMASANGAN JARINGAN LAN SEKOLAH//TUTORIAL KONFIGURASI LAN
Summary
TLDRThis tutorial demonstrates how to set up a local area network (LAN) using a TP-Link 28-port hub, with step-by-step instructions on configuring server and client computers, disabling antivirus and firewalls, and sharing data across devices. The tutorial also covers sharing internet from a mobile device via USB tethering, ensuring all clients can access the network and the internet. Practical troubleshooting tips are included to resolve common connection issues, such as ping timeouts and firewall interference, making this guide ideal for those setting up a small network or seeking to share internet across devices.
Takeaways
- 😀 Connect all computers to a TP-Link 28-port hub to establish a local network.
- 😀 Disable antivirus software and Windows Firewall on all computers to prevent connectivity issues.
- 😀 Assign static IP addresses for the server and clients using the same subnet, ensuring unique IPs for each device.
- 😀 Configure the server with IP 192.168.1.1 and clients sequentially (192.168.1.2, 192.168.1.3, etc.) with the same default gateway.
- 😀 Enable file sharing on the server by granting 'Read/Write' access to everyone and disabling password-protected sharing.
- 😀 Verify network connectivity by pinging clients from the server using Command Prompt.
- 😀 For internet access, connect a mobile phone via USB/OTG and enable sharing through the server computer.
- 😀 Configure DNS and internet connection sharing on the server to allow clients to access the internet.
- 😀 Test the network by accessing shared folders and browsing websites on client computers to ensure proper setup.
- 😀 Troubleshoot common issues like timeout errors, which often occur if antivirus/firewall is still active or cables are faulty.
- 😀 Maintain consistent IP and gateway settings across all clients for stable client-server communication.
- 😀 Sequentially add clients and verify each connection to ensure smooth network operation.
Q & A
What is the first step in setting up the network with the TP-Link hub?
-The first step is to ensure that all the ports on the TP-Link hub are properly connected, and that the hub is powered on.
Why is it important to disable antivirus and the network firewall during the setup?
-Disabling the antivirus and network firewall is crucial because they can block the network setup and cause connection issues. This ensures that no software is interfering with the configuration process.
How do you disable the antivirus and firewall on Windows 10?
-To disable the antivirus and firewall on Windows 10, go to the 'Network and Internet' section, open the 'Windows Firewall' settings, and turn off Windows Defender and any active firewall settings.
What is the significance of setting the IP address to '192.168.1.1' on the server?
-Setting the IP address to '192.168.1.1' on the server ensures that the server is on the correct local network. It is a common default IP for private networks, and it is used to set up the server's gateway and DNS.
How do you set the IP address for the client computer?
-To set the IP address for the client computer, go to 'Change Adapter Settings,' right-click the Ethernet connection, select 'Properties,' and then choose 'Internet Protocol Version 4.' Here, you enter a unique IP address that matches the server's network configuration.
What is the role of DNS in this network setup?
-DNS (Domain Name System) in this network setup is used for resolving domain names to IP addresses, allowing internet access for both the server and clients. The DNS address should be configured according to the internet provider or local network.
What should you do if the server-client ping test shows a timeout error?
-If the ping test results in a timeout error, it usually means that the firewall or antivirus is still active, blocking the connection. Ensure that both the server and client firewalls and antivirus programs are fully disabled.
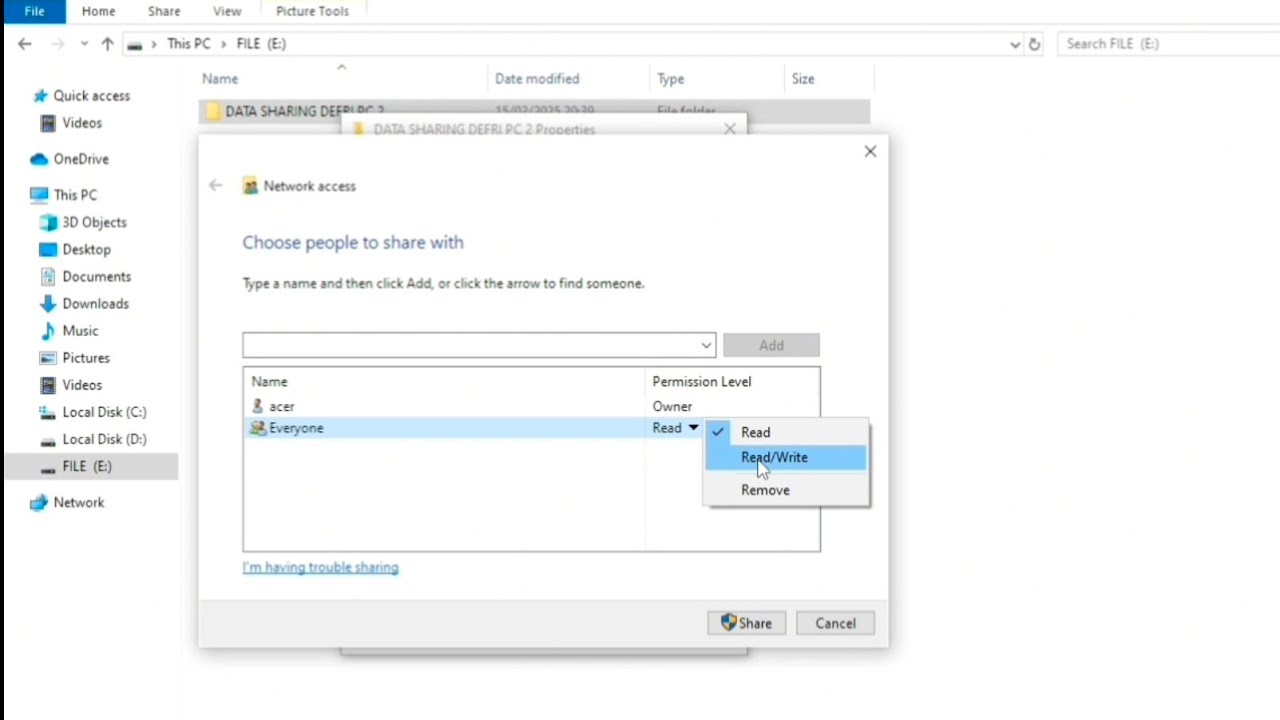
How do you share data between the server and client on the network?
-To share data between the server and client, you need to enable file sharing. Right-click the folder you want to share, select 'Give access to,' and choose 'Specific people.' Then, allow 'Everyone' to read and write to the folder, ensuring access for all networked devices.
What should be done to allow internet sharing between the server and clients?
-To allow internet sharing, connect the server to the internet via USB OTG or mobile hotspot, go to 'Change Adapter Settings,' right-click the internet connection, and select 'Properties.' Enable 'Share this connection' and ensure that all settings are properly configured.
How can you verify that the network is working correctly?
-To verify that the network is functioning correctly, test by opening a browser and checking if a website (such as YouTube) loads properly. If the internet connection is stable and the client is connected to the server, the network is set up correctly.
Outlines

This section is available to paid users only. Please upgrade to access this part.
Upgrade NowMindmap

This section is available to paid users only. Please upgrade to access this part.
Upgrade NowKeywords

This section is available to paid users only. Please upgrade to access this part.
Upgrade NowHighlights

This section is available to paid users only. Please upgrade to access this part.
Upgrade NowTranscripts

This section is available to paid users only. Please upgrade to access this part.
Upgrade NowBrowse More Related Video

Koneksi Jaringan Lan Ke Internet Melalui Mikrotik Rb941 2Nd

Tutorial Sharing Data PC To PC, Menggunakan Kabel UTP

Implementasi Static Routing pada Jaringan VPN
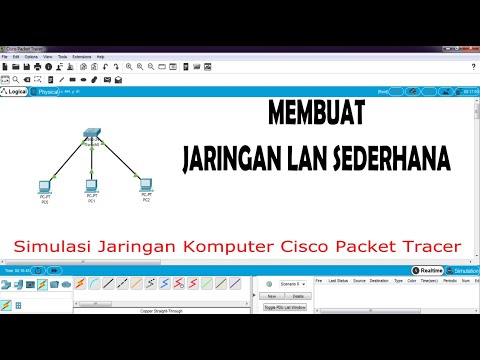
Cara Membuat Jaringan LAN Sederhana Cisco Packet Tracer
Uji Kompetensi Keahlian TKJ Paket 4 - Cara Sharing File Menggunakan Kabel UTP (Peer to Peer)

TUTORIAL - CARA MEMBUAT JARINGAN LAN DI RUMAH ATAU KANTOR
5.0 / 5 (0 votes)