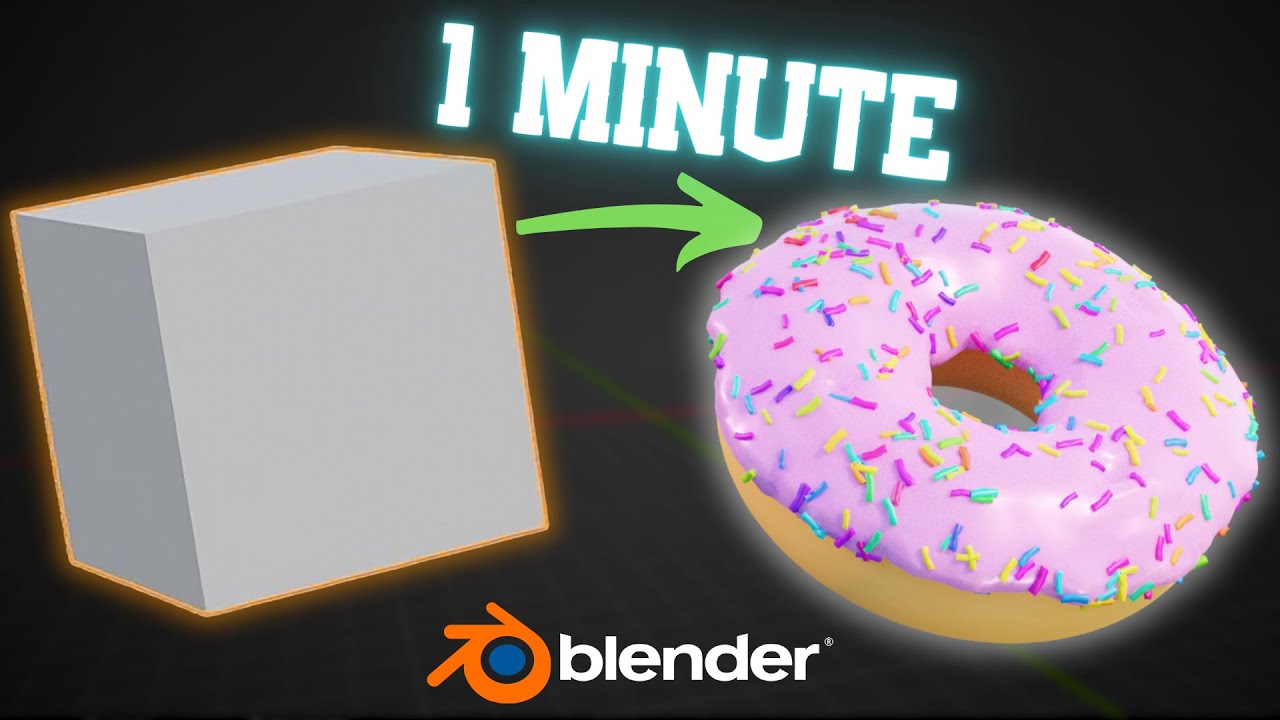
Beginner Blender 4.0 Tutorial - Part 2: Basic Modelling

Blender Guru
16 Nov 202318:39

Summary

TLDRThis tutorial walks viewers through creating a realistic 3D donut in Blender, starting from a new scene to avoid any unwanted elements. It covers selecting the appropriate mesh primitive, adjusting dimensions and resolution, and using modifiers like subdivision surface for higher detail. The script emphasizes the importance of avoiding overly high poly models for ease of rendering and editing. It also introduces tools like smooth shading and proportional editing to refine the donut's shape and make it appear more natural, with tips on making imperfections for a more realistic look. The tutorial concludes with saving the Blender file and offers additional support through a Discord channel.

Takeaways

  • 😀 Start with a new Blender scene to ensure no leftover objects from previous projects interfere.
  • 📦 Delete the default cube and use Shift+A to add a new object, starting with primitives under the 'Mesh' category.
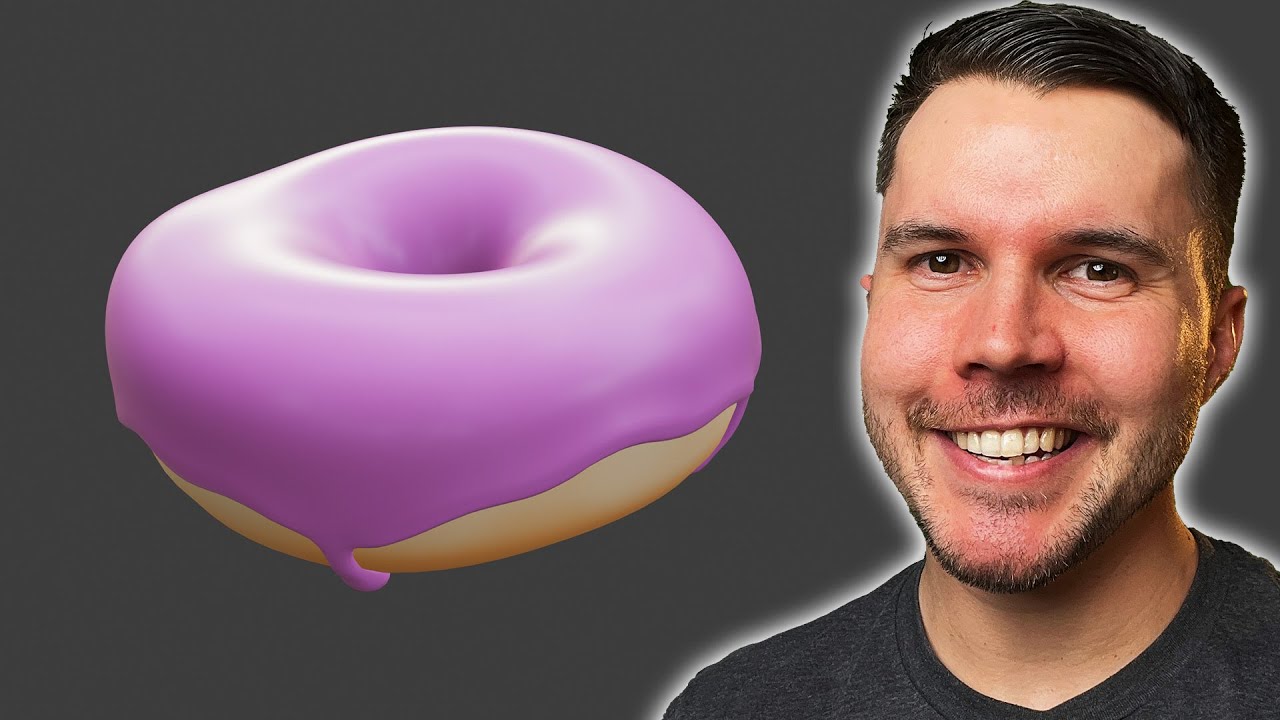
  • 🍩 For creating a donut shape, select the torus primitive, which mathematicians may refer to as a 'Torus'.
  • 🔧 After creating an object, immediately access the modification options from the bottom left corner to adjust its dimensions and resolution.
  • ⚠️ Be cautious with high-resolution meshes as they are difficult to work with and slow to render, especially for beginners.
  • 🔄 Use the 'F9' shortcut to bring back the object options if accidentally deselected, allowing for further adjustments.
  • 🛠️ Apply 'Smooth Shading' from the shading menu to give the torus a smoother appearance without increasing render time.
  • 🔧 Utilize the 'Subdivision Surface' modifier for adding detail and smoothing out the torus, adjusting levels for both viewport and render as needed.
  • 🎨 Edit the mesh in 'Edit Mode' to manually adjust vertices, edges, and faces to introduce imperfections and make the donut look more natural.
  • 🔄 Use 'Proportional Editing' to efficiently create lumps and variations in the mesh, adjusting the 'Circle of Influence' for different effects.
  • 💾 Save your Blender project as a .blend file for easy access and editing in the future.
  • 👍 Encourage persistence in learning Blender, as 3D modeling has a steep learning curve but is achievable with practice and online resources.

Q & A

  • What is the first step in creating a new Blender scene for a donut?

    -The first step is to start with a completely new scene, delete the default cube, and ensure no remnants of previous objects are present.

  • What is the hotkey for adding a new object in Blender?

    -The hotkey for adding a new object in Blender is Shift + A.

  • Why is it recommended to start with a Torus for a donut shape in Blender?

    -A Torus most closely resembles the shape of a donut, which is why it's the preferred starting point for modeling a donut in Blender.

  • What is the term used by mathematicians for the shape of a donut?

    -Mathematicians refer to the shape of a donut as a 'Torus'.

  • How can you change the dimensions of a Torus immediately after creation in Blender?

    -You can change the dimensions of a Torus by clicking the box in the bottom left-hand corner that appears immediately after the object is created.

  • What is the purpose of the 'F9' hotkey in Blender?

    -The 'F9' hotkey in Blender is used to temporarily bring back the object options to tweak it after it has been deselected.

  • Why should beginners avoid starting with a high-poly model when learning Blender?

    -High-poly models are slow to render and difficult to work with, especially for beginners. It's easier to add resolution later on than to remove it if it's not needed.

  • What is the recommended resolution for a donut in the script?

    -The recommended resolution for a donut in the script is 32 major and 12 minor.

  • What is the purpose of 'Smooth Shading' in Blender?

    -Smooth Shading in Blender is used to make an object look smoother and more realistic without actually increasing its polygon count.

  • What is the role of the 'Subdivision Surface' modifier in Blender?

    -The 'Subdivision Surface' modifier increases the mesh resolution, making it appear smoother and more detailed, which is useful for creating organic shapes like a donut.

  • How can you make a donut look more natural and less perfect in Blender?

    -To make a donut look more natural, you can manually adjust the vertices in Edit Mode to add lumps and variations, or use the Proportional Editing tool to quickly create uneven shapes.

  • What is the hotkey for toggling between Object Mode and Edit Mode in Blender?

    -The hotkey for toggling between Object Mode and Edit Mode in Blender is 'Tab'.

  • How can you select multiple vertices along an edge in Blender?

    -You can select multiple vertices along an edge in Blender by holding down 'Alt' and clicking on the edge.

  • What file extension is used for saving Blender projects?

    -The file extension used for saving Blender projects is '.blend'.

  • How can you get immediate help if you're stuck while following the script?

    -If you need immediate help, you can join the creator's Discord server where there is a specific channel for asking for help.

Outlines

00:00

🍩 Starting a New Blender Project for a Donut

The video tutorial begins with instructions on setting up a new Blender scene to create a donut. The presenter emphasizes the importance of starting with a clean slate, deleting the default cube, and adding a new mesh object. The choice of the torus shape, also known as a 'doughnut' shape in mathematics, is explained as the best primitive to start with for this particular project. The tutorial then covers how to adjust the dimensions and resolution of the torus using the options that appear immediately after its creation, with a cautionary note about the common beginner's mistake of over-polygoning a model, which can lead to difficulties in rendering and editing later on. The presenter opts for a moderate resolution to balance between performance and appearance, and introduces the concept of smooth shading to improve the visual appearance of the torus without increasing its polygon count.

05:01

🛠️ Using Modifiers to Enhance the Donut Mesh

This paragraph delves into the use of modifiers in Blender to refine the donut mesh. The presenter introduces the 'Subdivision Surface' modifier, which increases the mesh's resolution and smoothness. The explanation includes how to add the modifier and the difference between 'Viewport' and 'Render' levels, which affect the mesh's appearance in the 3D workspace and the final render, respectively. The tutorial also addresses the issue of making the donut look less perfect and more realistic by adding imperfections to its shape, which is a common practice in 3D modeling to avoid an overly artificial appearance. The importance of not relying on high levels of subdivision for achieving realism is reiterated, as it can complicate the modeling process and slow down rendering times.

10:02

⚒️ Editing the Donut Mesh in Edit Mode

The script continues with a detailed explanation of how to manipulate the donut mesh in Edit Mode. The presenter describes the fundamental components of a mesh, including vertices, edges, and faces, and how to select and move them using hotkeys. The focus then shifts to the use of the 'Proportional Editing' tool, which allows for the simultaneous adjustment of surrounding vertices when one is moved, creating a more natural and lumpy shape for the donut. The tutorial provides practical tips on adjusting the 'Circle of Influence' for proportional editing to achieve different sizes of deformation, emphasizing the importance of achieving a balance between realism and simplicity in the model's appearance.

15:04

🔄 Adjusting the Donut's Shape for Realism

In this section, the presenter discusses further adjustments to the donut's shape to enhance its realism. The tutorial explains how to select and scale the vertices along the circumference of the donut to mimic the effect of uneven heating during the cooking process, which results in a flatter top surface. The use of the 'Edge Select' tool to quickly select and modify multiple vertices simultaneously is introduced, along with a reminder to save the Blender file using the '.blend' extension. The presenter encourages viewers to experiment with the shape and not to worry if their donut does not exactly match the one in the tutorial, as personal variation can lead to better results. The paragraph concludes with an invitation to join a Discord community for immediate help and support, and words of encouragement for those new to 3D modeling.

Mindmap

Keywords

💡Blender

Blender is an open-source 3D computer graphics software toolset used for creating animated films, visual effects, art, 3D printed models, motion graphics, interactive 3D applications, and computer games. In the video, it is the primary software being used to demonstrate the creation of a 3D donut model, highlighting its various features and functions.

💡Torus

A torus is a surface of revolution generated by revolving a circle in three-dimensional space about an axis coplanar with the circle. In the context of the video, the torus is the mathematical shape that most closely resembles a donut, and the script describes how to create and modify a torus in Blender to achieve a realistic donut shape.

💡Modifiers

In Blender, modifiers are a way to change an object without directly altering the mesh. They are non-destructive and can be easily adjusted or removed. The script discusses the use of a 'Subdivision Surface' modifier to increase the mesh's resolution and smoothness, which is crucial for making the donut look more realistic.

💡Resolution

Resolution in 3D modeling refers to the level of detail or the number of polygons that make up a model. The script warns against setting the resolution too high initially, as it can lead to a difficult and slow modeling process. Instead, it suggests starting with a lower resolution and adding detail as needed.

💡Smooth Shading

Smooth shading is a technique used in 3D modeling to give the appearance of a higher polygon count by averaging the angles between faces. In the video, smooth shading is applied to the donut model to make it look smoother without actually increasing its polygon count.

💡Proportional Editing

Proportional editing is a feature in Blender that allows for the influence of transformations to affect surrounding vertices, edges, or faces based on a customizable falloff. The script describes using this tool to easily create natural-looking imperfections in the donut's shape.

💡Vertices, Edges, and Faces

These are fundamental components of a 3D mesh. Vertices are points, edges are lines formed by two vertices, and faces are shapes formed by four or more vertices. The script explains how to manipulate these elements in 'Edit Mode' to change the shape of the donut.

💡Edit Mode

Edit Mode in Blender is a mode that allows users to manipulate the geometry of a mesh directly by selecting and modifying vertices, edges, and faces. The script demonstrates entering Edit Mode to adjust the donut's shape and create a more natural, uneven appearance.

💡Subdivision Surface

The Subdivision Surface modifier is used in Blender to increase the apparent resolution of a mesh by subdividing its faces. The script explains how this modifier can be used to smooth out the donut's edges and create a more refined appearance, with different levels for the viewport and render.

💡Save (.blend)

In Blender, saving a project is done by using the .blend file format, which contains all the data for the current session. The script mentions the simplicity of saving in Blender and how it preserves the state of the project for future editing.

💡Discord

Discord is a communication platform that the script mentions as a place for immediate help and community support for those learning Blender. It is suggested as a resource for getting specific help with modeling tasks, such as creating the donut, beyond the information provided in the video.

Highlights

Starting a new Blender scene for a fresh project without any leftover objects.

Using the Shift + A shortcut to add new objects and selecting the appropriate primitive shape for the project, such as a torus for a donut.

Adjusting the dimensions and resolution of the torus to balance between detail and performance.

The importance of not over-resolving a model to avoid rendering and editing difficulties.

Using smooth shading to improve the appearance of the torus without increasing render time.

Introduction to the subdivision surface modifier for adding detail and smoothing the mesh.

The difference between viewport and render levels in the subdivision surface modifier.

Making the donut look more realistic by adding imperfections and avoiding a 'too perfect' appearance.

Entering edit mode to manipulate vertices, edges, and faces of the mesh for detailed shaping.

Using proportional editing to create natural-looking variations in the mesh efficiently.

Adjusting the influence of the proportional editing tool to create different sizes of deformations.

Creating a more natural donut shape by selecting and scaling edges to represent the cooking process.

The simplicity of saving a Blender project with a .blend file extension.

Offering immediate help through a Discord channel for those learning Blender.

Encouraging persistence in learning Blender despite its steep learning curve and availability of online resources.

Invitation to continue to the next part of the tutorial after saving the blend file.

Transcripts

play00:00

now we know how blender functions let's

play00:02

start building that donut so as before

play00:06

Let's uh well first of all just to

play00:08

repeat make sure you are working with a

play00:10

new scene completely new scene don't

play00:12

want any remaining monkey heads lying

play00:14

around let's begin fresh slate and let's

play00:17

delete our default Cube just with the

play00:19

delete key and let's replace it with a

play00:21

new object you might remember the hot

play00:22

key for that is shift a and as I

play00:25

mentioned before you usually want what

play00:27

is underneath mesh cuz these are your

play00:29

Primitives

play00:30

so we want to start with something that

play00:32

most resembles what it is we're building

play00:34

you if it was a house you might start

play00:35

with a cube if it was a vase you might

play00:37

start with a cylinder in our case we

play00:39

want the donut shaped one although

play00:42

mathematicians call it a Taurus for some

play00:44

reason so let's add that now if I zoom

play00:47

in by scrolling up we can see we have

play00:50

something resembling a dut looks like a

play00:52

pretty weak looking dut you know very

play00:54

flimsy looks like the the doughnut

play00:56

before it's cooked when they just drop

play00:58

it into the vat and it's just this

play00:59

little wispy thing um so immediately

play01:04

after you do some actions in blender you

play01:06

have options to change it and the

play01:08

options are hidden down here in the

play01:10

bottom left hand corner you see a little

play01:11

box and if you click that box you see

play01:14

options and look we can change the

play01:16

dimensions of our Taurus now something

play01:19

to note is that these options in blender

play01:20

only appear immediately after you have

play01:23

done that action if you do another

play01:25

action like say deselect your Taurus by

play01:28

mistake it's gone right because blender

play01:31

has assumed you have moved on you've

play01:33

accepted the state of your donut and

play01:36

this is the one you want right now if

play01:38

you haven't done anything drastic or

play01:40

changed this object in some severe way

play01:42

you can temporarily bring it back by

play01:44

hitting F9 I never actually remember

play01:47

that hotkey I just remember that

play01:49

immediately after I have uh added an

play01:52

object if I want to tweak it now's my

play01:54

chance before I move on to something

play01:56

else okay so we could change you know

play01:58

the size of it here we can also change

play02:02

the resolution I'll use the term

play02:04

resolution Loosely um to uh to make it

play02:08

higher or lower Fidelity and a mistake

play02:10

that a lot of beginners make and I say

play02:13

this because this was the exact mistake

play02:14

I made way back in 2003 when I started

play02:17

learning blender is they go well I need

play02:19

a a realistic looking donut so I guess I

play02:23

need to go really high resolution I

play02:27

remember my first project one of my

play02:29

first projects was for a high school

play02:31

film project and I wanted to have a

play02:32

closeup of a face didn't realize faces

play02:35

were going to be difficult but I went

play02:37

really high poly and then it was just an

play02:39

absolute nightmare to work with so the

play02:41

problem the reason you don't want this

play02:43

is that for starters things that are

play02:45

high poly are very slow to render and

play02:47

they're very hard to work with if you

play02:49

want to tweak the shape of it but also

play02:51

as you learn and you grow with 3D you'll

play02:54

discover that it is a lot easier to add

play02:57

resolution to something later on but is

play02:59

very difficult to take it away if you've

play03:01

already built it into it and you don't

play03:02

need it so long way to say what we

play03:04

actually want is to have as few Poes

play03:08

these are called poy uh as you can get

play03:11

away with so I'm going to go with 32

play03:13

major and 12 minor and don't worry that

play03:16

it looks all Jagged because we will fix

play03:17

that in a moment now the major and minor

play03:20

this is really up to you but I find that

play03:23

something that looks uh looks kind of

play03:25

chunky like a fat donut just looks

play03:27

really delicious so I'm going with

play03:29

something

play03:30

around about this size okay and once I'm

play03:33

happy with this once I'm ready to click

play03:35

off I click off the options are gone and

play03:37

this is it this is the donut that I am

play03:40

now working with so how do we make this

play03:42

look higher resolution less Jagged well

play03:45

one way is to use smooth shading so if

play03:48

you rightclick with your object selected

play03:50

go to shade

play03:52

smooth and look at that this is

play03:55

immediately better without getting too

play03:57

technical this is kind of a fakery it's

play03:59

sort of like the Shader is telling the

play04:01

renderer that this is a really high poly

play04:04

dense mesh when it really isn't it's

play04:06

just basically kind of like averaging

play04:08

out uh V uh faces and anyway it's very

play04:12

technical but basically means it's not

play04:13

going to add anything to your render

play04:15

time but it's going to look smoother and

play04:17

so this is generally what you want for

play04:19

something that is smooth and and organic

play04:21

looking like we want if you were

play04:23

rendering like architectural or like

play04:25

hard surfaces like later on we're going

play04:27

to put this on a counter then the object

play04:29

would obviously want to be flat but in

play04:31

our case we're just going to use shade

play04:32

smooth but you might notice that looking

play04:34

at this especially if you go side on

play04:37

that you've got this sort of uh Jagged

play04:40

shape around here right so the

play04:42

silhouette is really breaking that

play04:44

illusion that this is a high poly or a

play04:46

smooth looking donut but thankfully

play04:49

rather than adding all of that complex

play04:52

density into the mesh itself and then

play04:54

making it hard to remove later on there

play04:56

is another way through modifiers so if

play04:59

we go over here to our properties right

play05:01

this very confusing lots of option

play05:03

looking properties click on the wrench

play05:06

and this is the section called modifiers

play05:10

and this is one of those uh object

play05:13

dependent uh things so if you've got

play05:15

your camera selected you won't see it so

play05:17

it's only when you've got actual meshes

play05:19

that you might see uh this uh this

play05:21

modifier here so it's much easier to

play05:23

explain if we just add one so up here

play05:26

add modify and you got a range of

play05:28

options here that can do a whole number

play05:30

of things the one that we're looking for

play05:32

is underneath generate and it is called

play05:34

subdivision surface and it is a really

play05:38

common modifier that you use all the

play05:40

time in fact it's so common it's

play05:42

actually you can just immediately add it

play05:43

to any object just by hitting control

play05:45

one but don't do that cuz we've already

play05:47

got it so there now some of you might

play05:50

have just discovered that your donut has

play05:52

disappeared if that is the case you need

play05:54

to go to edit preferences and then

play05:56

underneath viewport where it's got

play05:58

subdivision at the very bottom disable

play06:00

GPU subdivision that will then make the

play06:03

subdivision perform on your CPU instead

play06:05

instead of your GPU which is maybe

play06:07

nonexistent or not performing whatever

play06:10

um but disable that and it should appear

play06:12

but if it's already working for you

play06:13

don't disable it keep it going cuz GPU

play06:15

will be faster so what exactly is this

play06:17

doing well it's a lot easier to explain

play06:20

if we look at the shade flat mode

play06:22

because we're not being uh tricked by

play06:24

the the smooth shading there um if I set

play06:27

this levels viewport to zero this is our

play06:31

original mesh this is before we add the

play06:33

subsurface essentially when we increase

play06:36

this you can see that it is adding

play06:38

resolution to our mesh and the more I

play06:40

increase this viewport levels here uh

play06:44

the finer and finer that detail becomes

play06:46

so to explain it because this is such a

play06:48

very very common uh modifier it's kind

play06:51

of important to understand how it's

play06:53

working you can see that uh this is uh

play06:56

these squares here these are called

play06:58

Faces by the way and and for each one of

play07:00

these faces here as I add a level you

play07:02

can see it's becoming four faces right

play07:05

and then now if I zoomed in on this one

play07:07

one face here if I do another level

play07:10

that's now become four faces and then if

play07:12

I zoom in again it's now become four

play07:14

faces so it's exponentially adding

play07:16

detail and you might also know that it

play07:19

is smoothing it out as well like this

play07:21

Jagged Edge that we've got here you can

play07:23

see now becomes smoother so to quickly

play07:25

visualize that if I just draw like

play07:27

imagine you've got like a 90 Dee uh

play07:31

corner right like this if you add a Subs

play07:34

surf modifier what it's going to do is

play07:36

it's going to add uh a point here right

play07:39

because this is uh the extra detail it's

play07:41

also going to take that point there and

play07:42

it's going to average it out it's going

play07:44

to average it out between these points

play07:46

and it's going to create another one

play07:47

there and another one there so you go

play07:48

then from having that really hard corner

play07:51

there to having something that looks a

play07:53

lot smoother so it's going to take a

play07:55

point and it's also going to uh change

play07:57

it to make it look smoother gener

play07:59

speaking so there we go um so now as I

play08:02

increase this you can see it's getting

play08:04

uh smoother and smoother now the reason

play08:06

there are two options here you've got

play08:07

levels viewport and levels render so

play08:09

reminder this gray area that we operate

play08:13

in is called our viewport the render is

play08:15

the pretty version so as an example um

play08:18

you could see if I just turned it off

play08:20

for the viewboard it looks very Jagged

play08:21

but then for my render if I increase

play08:23

that to three if I do my render which

play08:25

you could go up there F uh and render

play08:27

image or remember the hotkey F12 you can

play08:29

see that that donut is now smooth but I

play08:31

go back and you can see it's Jagged so

play08:33

the viewport you want to generally keep

play08:35

it lightweight and then the render time

play08:37

that's where you want to get uh a really

play08:39

nice looking pretty image so you want to

play08:41

often have two different levels um in

play08:43

our case though I don't really think we

play08:45

need to go beyond one even for our final

play08:48

pretty image um because this with uh

play08:51

shade smoothing turned on is good enough

play08:54

and we're going to be adding more to the

play08:56

scene later on so we don't want to make

play08:57

it too complex so this is actually

play09:00

pretty good okay so we have a perfect

play09:04

dut and that's the problem it's too

play09:07

perfect you could spend decades trying

play09:10

to develop a machine in the real world

play09:12

that make it that made a donut this

play09:14

perfect and you never would this is so

play09:17

mathematically precise that the eye will

play09:20

always see this as looking fake so

play09:22

that's actually a problem you learn

play09:24

pretty quickly in 3D that things that

play09:26

are too perfect just look fake so you

play09:28

have to spend time making things look

play09:30

misshapen and adding variation there

play09:33

like you see in the real world because

play09:34

your eye expects to see it so how do we

play09:37

do that how do we make this doughnut

play09:39

look a little more lumpy and interesting

play09:42

I do that by changing the mesh itself so

play09:45

this mode that we are in right now where

play09:47

we can uh you know click on different

play09:49

objects is called object mode and I know

play09:52

that because in the top leftand corner

play09:53

you can see we are in object mode but if

play09:55

I click the drop down you can see I get

play09:57

a number of other options options here

play10:00

and these options again will change

play10:01

depending on the object you've got

play10:03

selected if I've got a lamp my little

play10:05

light there selected you can see I've

play10:07

only got object mode my camera I've only

play10:09

got object mode but a mesh will give you

play10:12

extra options here so let's enter into

play10:14

edit mode

play10:17

ooh right now you can see our mesh our

play10:20

sorry our object has become something

play10:23

that looks weird it's got a bunch of uh

play10:24

little points on it with lines and very

play10:27

technical well that's because this is

play10:30

actually what the mesh is made up of

play10:32

these little points here which you can

play10:33

click on just by selecting are called

play10:35

your vertices the singular term is

play10:39

called vertex I never say that I like to

play10:41

just call all of them vertices

play10:43

regardless of whether it's one or two

play10:45

just because you always get some

play10:47

comments that go um actually it's called

play10:50

vertex if it is singular anyway so these

play10:53

are called your vertices and if you have

play10:56

two of them joined by a line that is

play10:58

called an edge and if you have four of

play11:01

them forming uh a face then it's called

play11:05

a face so with these I can quickly

play11:09

change the shape of my object by using

play11:11

the same hot Keys as before and if I

play11:13

want to move this then I would simply

play11:16

tap G right and you can see it's now

play11:19

attached to my cursor and then if I want

play11:21

to confirm its movement I just do a

play11:22

single left click and there it is now if

play11:25

I go back into object

play11:27

mode like that you can see that my mesh

play11:30

has changed okay and by the way the hot

play11:32

key for jumping in and out of object and

play11:35

edit mode is Just Tab okay so you can

play11:37

see it's just toggling between those two

play11:39

modes because it's so common that you

play11:42

want to just quickly change things that

play11:44

it's just uh easily accessible by that

play11:46

now this is okay right but you can see

play11:49

it's like it's got like some artifacting

play11:51

it's like it's not the greatest lump

play11:55

right so how do we make it look a little

play11:56

more uh natural well I mean you could

play11:59

you know you move one drag it out Okay

play12:01

click and then I move oh the next one

play12:03

next to it right I'll move that out and

play12:05

then I'll move this one out a little bit

play12:07

and then and then I move this one it's

play12:09

like okay well now I've got the thing

play12:10

but it took me like five action

play12:13

ridiculous right no one wants to do that

play12:15

no one's got time for that thankfully

play12:17

there is a tool in blunder uh just for

play12:20

this and it's called proportional

play12:21

editing and you can enable it up there

play12:24

in your toolbar so if you enable that

play12:27

now if I hit G and I move it out you

play12:30

will see I get a little ring around my

play12:32

cursor there and that is now changing uh

play12:35

the mesh around it now a lot of people

play12:37

in my previous tutorials were like I

play12:38

don't see what's what's going on you

play12:40

have to have something selected first

play12:43

and then when you hit G you will see uh

play12:46

that uh that little circle of influence

play12:50

okay now this circle of influence if I

play12:53

scroll down sorry if I scroll up you can

play12:55

see it's shrinking its circle of

play12:57

influence and if I scroll down it is

play12:59

expanding its influence so it's only

play13:01

going to affect what is in that uh that

play13:04

ring there okay if you are on uh yeah if

play13:08

you don't have a mouse with a scroll

play13:10

wheel you can also change the influence

play13:12

by using page up and page down and if

play13:15

you don't have page up or page down

play13:17

because you're on a Mac keyboard then

play13:19

what you would have to do is go to

play13:20

keymap and then change your page up and

play13:22

page down to something else just so that

play13:24

you could get around that but guys you

play13:26

got to get a mouse get a mouse with a

play13:28

scroll wheel I think they're I don't

play13:30

know 50 cents or just in the nearest

play13:32

landfill somewhere get a mouse cuz it's

play13:34

going to make uh your life in 3D a lot

play13:36

easier okay so with this I can now uh

play13:39

make quick work of uh of lumpy shapes

play13:42

okay so I just drag that out okay I've

play13:44

got a little lumpy shape there maybe I

play13:46

go down here and I pull this up just by

play13:49

hitting G moving it up okay so already

play13:52

this is looking a little more natural

play13:55

right cuz even if we were making a

play13:57

stylized world for a Pixar movie or

play14:00

something like that you can't have just

play14:02

a a spherical looking donut sorry

play14:05

spherical round looking circular

play14:07

doughnut cuz it just your eye will see

play14:09

it as fake so very quickly I'm able to

play14:11

add a little bit of variation to the dut

play14:14

um just all around it just a little bit

play14:16

over here and you can see that I am uh

play14:20

just changing my circle of influence

play14:22

depending on what size of a a lump I

play14:25

want to make so if I just want to make

play14:26

like a little bit that sticks out I can

play14:28

make a small Circle just by scrolling up

play14:30

like that um and you just want to do

play14:32

that until you get something that

play14:34

looks a little more natural I might want

play14:37

to make the the inner part as well maybe

play14:39

just drag that in with a smaller

play14:41

Circle and that's pretty good let's just

play14:44

have a look from the top I might

play14:46

actually just drag that out make it a

play14:48

little bit more like

play14:50

that but there you go that's pretty good

play14:52

for a donut it's still kind of simple

play14:55

it's not too detailed um but it's got

play14:58

just enough variation in it that uh it's

play15:00

more interesting to look at oh one more

play15:03

thing forgot to mention go back into

play15:05

edit mode with tab um Donuts when

play15:08

they're sitting in the uh little vat

play15:11

thing right uh they're only like half

play15:13

submerged then they have to be flipped

play15:15

uh but it means that the bit that's

play15:17

nearest to the surface is getting less

play15:19

heat so essentially what I'm saying is

play15:22

the bit that's around the the dut the

play15:25

the circumference of it is usually a

play15:27

little bit flatter so Donuts aren't like

play15:28

perfectly round all the way around they

play15:30

usually a little bit flatter so what I

play15:32

want to do is I want to select these

play15:34

vertices along here and then I want to

play15:36

shrink them now I could go around one by

play15:39

one like this which is actually what I

play15:41

used to do when I was uh learning

play15:42

blender pre YouTube days and there was

play15:46

uh no tutorials what I would I would do

play15:48

this if I wanted to select this silly

play15:51

because there's a a a function a tool

play15:54

for that and it is Edge select so if you

play15:57

hold down alt on your keyboard board and

play15:58

then do a single left click on not the

play16:01

points but on the edge right this little

play16:04

line here you can see it's selected all

play16:07

the way around so it's anything that's

play16:08

connected along that line is now

play16:11

selected so if I want to shrink this

play16:14

right what would I do well I mean yeah

play16:16

you could like move it around right we

play16:18

want to shrink it we want to change the

play16:19

scale of it so we would change we would

play16:21

use the hotkey S for scale so s and I'm

play16:25

going to scale that in and I actually

play16:27

don't want proportional editor so I'm

play16:28

going to turn that off and now scale in

play16:31

and just make it a little bit flatter

play16:34

and there you go see just feels a little

play16:35

bit more natural doesn't it looks a

play16:37

little bit closer to what a donut looks

play16:39

like and by the way don't worry if yours

play16:41

doesn't look exactly like this like your

play16:42

lump is a little bit off like some

play16:44

people get a little bit too precious

play16:46

with the G I got to match exactly

play16:47

everything I do like I'm just working on

play16:49

the fly as well so just make what you

play16:52

think looks good maybe you think this is

play16:54

not misshapen enough and you want to add

play16:56

more go for it because it might actually

play16:58

turn turn out better than what mine is

play17:00

now before we move to the next part um

play17:03

how to save how to save blender very

play17:06

very easy you just go save as and you

play17:08

just get one file it's called dot blend

play17:11

um very literal file extension really

play17:14

pushing the limits of what a file

play17:15

extension can be that's almost a word

play17:17

blender anyway um dot blend and that's

play17:20

it and then next time you open it up

play17:21

it's exactly like it it's not like

play17:23

zbrush where you got like four or five

play17:25

different ways to save a project or an

play17:27

object or a tool

play17:29

hate zbrush okay um that's how you save

play17:33

now also finally I will say uh if you

play17:35

need help because I know if you if

play17:37

you're stuck and then you leave a a

play17:39

YouTube comment you might not get a

play17:40

reply uh if you want immediate help I've

play17:43

got a Discord so I'll put the link uh

play17:45

below so there's like a little channel

play17:47

in there where you can just ask for

play17:49

specific uh donut help so if you're

play17:51

having issues uh feel free to jump into

play17:54

that and also guys don't beat yourself

play17:56

up like 3D is definitely a uh has like a

play17:59

steepish learning curve so you're in

play18:01

that that steep slope right now and it's

play18:05

it's really common like a lot of this

play18:06

stuff is very foreign 3D is very unique

play18:08

it's very different to a lot of 2D tools

play18:11

um but don't give up like it's it's

play18:14

definitely achievable to learn and

play18:16

self-learn at home you don't have to go

play18:18

to school you don't have to pay for a

play18:19

tutor um it's really easy to uh to get

play18:22

help online nowadays so do make use of

play18:25

that Discord um post uh comments as well

play18:28

in the YouTube comment if you want to um

play18:30

but I hope hope you stay with it so if

play18:32

you're ready to jump to the next part

play18:34

after you've saved your blend file go

play18:35

ahead click here and I will see you

play18:37

there

Rate This

5.0 / 5 (0 votes)

Related Tags
Blender Tutorial3D ModelingDonut CreationMesh EditingSmooth ShadingSubdivision SurfaceProportional Editing3D DesignRendering TipsDIY 3D