Tutorial basic 3D blender pemula | membuat dadu
Summary
TLDRThis tutorial teaches how to create a dice object in Blender 4.1.1. It covers setting up the workspace, enabling screen capture to display mouse and keyboard actions, and basic object editing techniques. The process includes scaling, adding guide lines, editing corners, faces, and applying modifiers like Subdivision Surface for smoothness. The tutorial also demonstrates how to assign colors to the dice and its holes using materials. The steps are clearly explained with keyboard shortcuts, ensuring users can follow along and create a custom dice object in Blender.
Takeaways
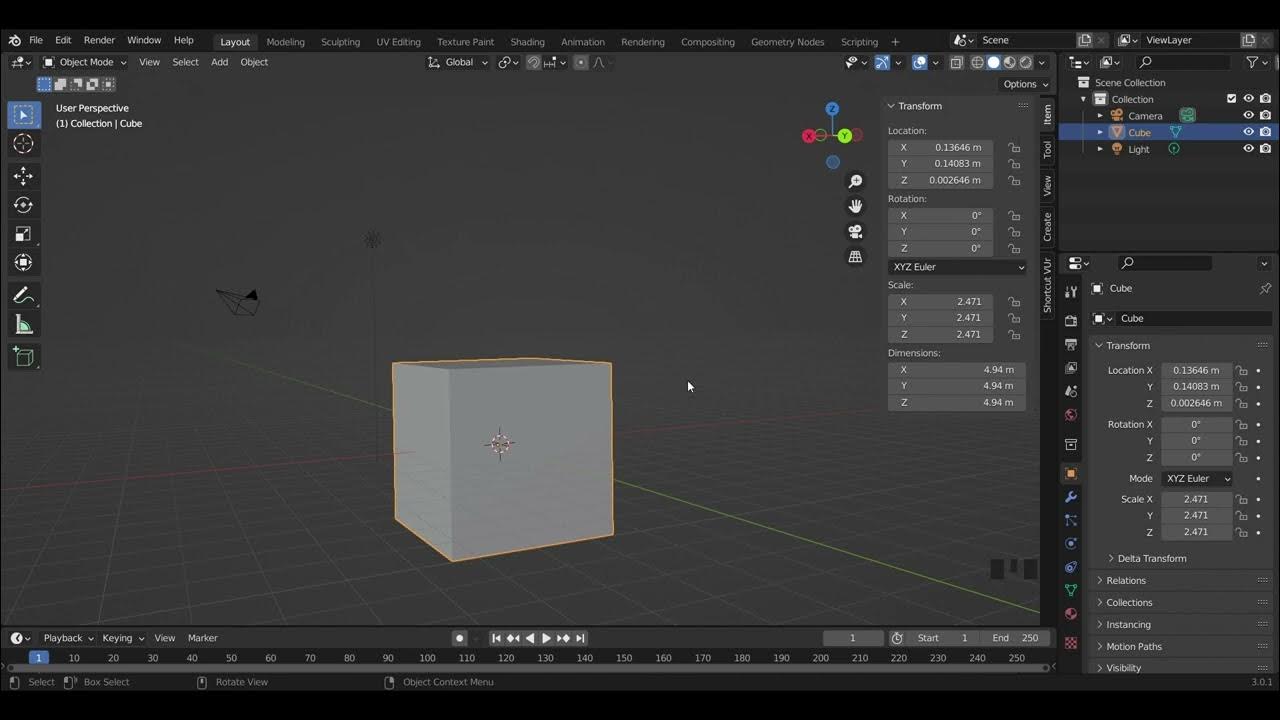
- 😀 Ensure you're using Blender version 4.1.1, as indicated in the bottom-right corner of the screen.
- 😀 Press `N` on your keyboard to enable the Screen Cast feature, which will display mouse and keyboard activities.
- 😀 You can scale the object by pressing `S` and dragging the mouse to resize it in the 3D view.
- 😀 Enter Edit Mode by pressing `Tab` to make changes to the object’s structure.
- 😀 Use `Ctrl + R` to add loop cuts (guide lines) to the object, adjusting the number of cuts with the mouse scroll.
- 😀 You can select and edit the object's corners by pressing `Shift + Click` to highlight them and scaling them with `S`.
- 😀 To create the dice faces, select multiple faces using `Shift + Click` and inset them using `I` to create the necessary indentations.
- 😀 Use the Subdivision Surface modifier to smooth out the object's surfaces and enhance its appearance.
- 😀 Assign colors to the dice by creating new materials and adjusting their properties for different parts of the object.
- 😀 Apply different materials (e.g., metallic) to specific parts of the dice, such as the holes, by selecting them and assigning a new material.
- 😀 After completing your adjustments, don't forget to apply the changes, such as the Subdivision modifier, to finalize the model.
Q & A
What is the first step to begin the tutorial in Blender?
-The first step is to open Blender version 4.1.1 and enable screen capture for mouse and keyboard activity by pressing 'N' to open the properties panel, and then selecting the 'Screen Cast' option.
How can you scale an object in Blender?
-To scale an object, select the object and press 'S' on the keyboard. Then, drag the mouse to adjust the size. You can scale up or down by moving the mouse.
What is the purpose of adding guide lines in Blender?
-Guide lines help in accurately editing the object. You can add vertical and horizontal guide lines using 'Ctrl + R' to create subdivisions that will assist in precise modeling.
How do you add vertical and horizontal guide lines to an object?
-To add vertical guide lines, press 'Ctrl + R' and scroll the mouse wheel to adjust the number of divisions. Then, left-click twice to confirm. Repeat the same process for horizontal guide lines.
What is the method to inset faces on the dice object?
-Select the face you want to inset, then press 'I' on the keyboard. Drag the mouse inward to create the inset, and left-click to confirm the action.
How can you modify the dice object after selecting the corners?
-Once the four corners are selected using Shift+Click, press 'S' to scale them. Drag the mouse to position the corners correctly, then left-click to confirm the changes.
What does adding a 'Subdivision Surface' modifier do in Blender?
-The 'Subdivision Surface' modifier smooths the surface of the object by subdividing it, resulting in a more refined and curved shape for the dice.
How can you assign different colors to the dice object in Blender?
-To assign colors, go to the Material tab, create a new material, and choose the desired color. You can assign different materials to different parts of the object by selecting specific faces or areas.
What is the process for changing the material color of the holes in the dice?
-To change the color of the holes, select the faces of the holes using Shift+Click, go to the Material tab, and create a new material with a different color (e.g., metallic). Then, assign the new material to the selected areas.
What should you do to apply the smooth surface modifier?
-To apply the smooth surface modifier, simply add the 'Subdivision Surface' modifier and ensure it is applied by clicking 'Apply' in the modifier settings. This will smooth out the entire object, including its edges.
Outlines

This section is available to paid users only. Please upgrade to access this part.
Upgrade NowMindmap

This section is available to paid users only. Please upgrade to access this part.
Upgrade NowKeywords

This section is available to paid users only. Please upgrade to access this part.
Upgrade NowHighlights

This section is available to paid users only. Please upgrade to access this part.
Upgrade NowTranscripts

This section is available to paid users only. Please upgrade to access this part.
Upgrade Now


5.0 / 5 (0 votes)