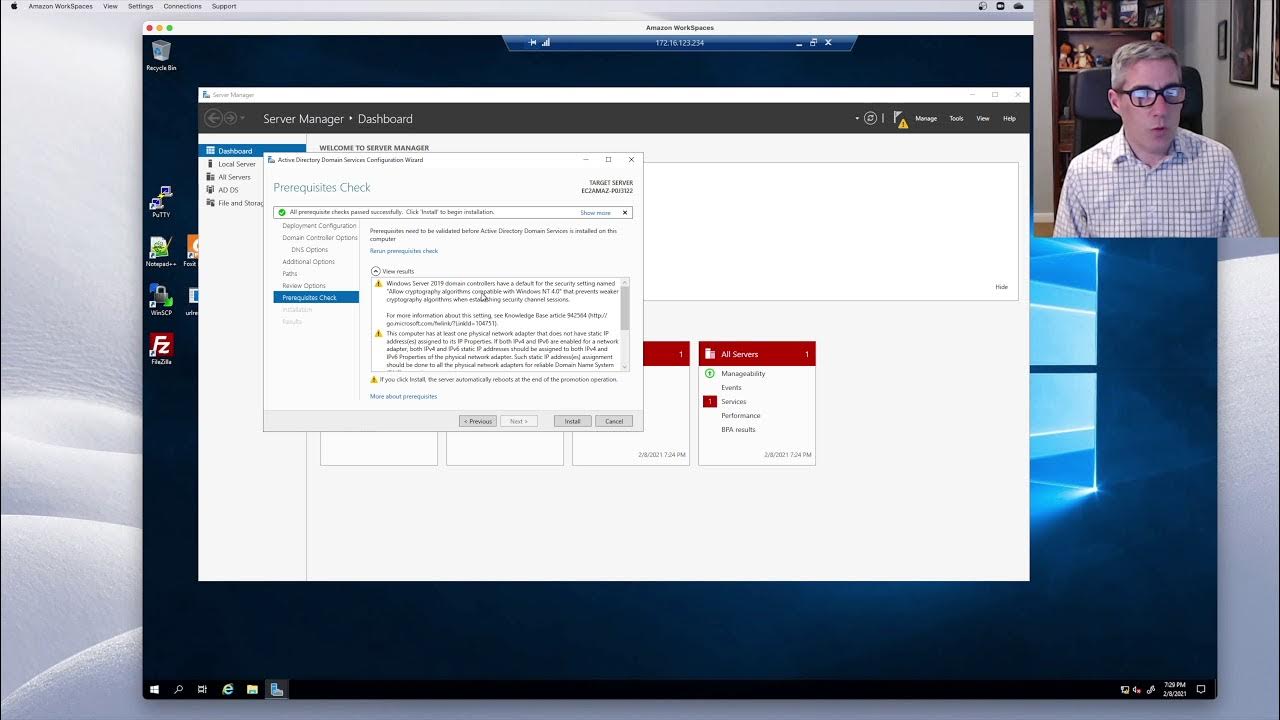
Setting up Active Directory in Windows Server 2019 (Step By Step Guide)

MSFT WebCast
28 Jan 201913:21

Summary

TLDRThis tutorial offers a step-by-step guide on setting up Active Directory (AD) on Windows Server 2019. It begins with verifying prerequisites such as administrative privileges, a static IP address, and server naming standards. The process involves installing the AD Domain Services role and promoting the server to become the first domain controller for a new forest. Additionally, the DNS server role is installed for AD integrated DNS zones. The video demonstrates configuring the server with a static IP, setting up DNS, and running the AD Domain Services Configuration Wizard to establish a new forest with 'my.lab.local' as the root domain. The server is then promoted, and post-installation steps include verifying domain and forest functional levels, managing DNS settings, and confirming the server's role as a domain controller through nslookup.

Takeaways

  • 😀 The video provides a step-by-step guide on setting up Active Directory (AD) in Windows Server 2019.
  • 🛠️ The process starts by installing the Active Directory Domain Services role and promoting the server to be the first domain controller for a new forest.
  • 🌐 The DNS server role is also installed to use Active Directory integrated DNS zones.
  • 🔒 Before proceeding, it's necessary to have administrative privileges, a server with a static IP address, and the server name should follow the company's naming standard.
  • 💻 The server's network adapter is configured to use its own IP address as the preferred DNS server, indicating the intention to install the DNS server role.
  • 📊 The video demonstrates using Server Manager to add roles and features, specifically Active Directory Domain Services and DNS Server.
  • 🏢 The configuration wizard is used to promote the server to a domain controller, with options to add to an existing domain, add a new domain to an existing forest, or create a new forest.
  • 📝 The root domain name 'my.lab.local' is specified during the configuration for a new forest.
  • 🔄 The forest and domain functional levels are set to Windows Server 2016, with options for Windows Server 2019 not yet available at the time of the video.
  • 🛡️ Directory Service Restore Mode password is set for security purposes during the domain controller promotion.
  • 🔄 After the installation, the server restarts automatically, and the new domain administrator is now 'my.lab\administrator'.
  • 🔄 The video concludes with the server ready to act as a domain controller and a preview of joining a Windows 10 computer to the domain in the next video.

Q & A

  • What is the main topic of the video?

    -The video provides a step-by-step guide on setting up Active Directory in Windows Server 2019.

  • What are the prerequisites before starting the Active Directory setup?

    -The prerequisites include having administrative privileges on the server, setting up the server with a static IP address, and changing the Windows Server name according to the company's naming standard.

  • What is the first step in setting up Active Directory?

    -The first step is to install the Active Directory Domain Services role on the server.

  • Why is it necessary to install the DNS server role along with Active Directory?

    -The DNS server role is installed to use Active Directory integrated DNS zones, which is a requirement for Active Directory to function properly.

  • What is the server's static IP address as configured in the video?

    -The server's static IP address is configured as 172.18.72.5.

  • How does the server's preferred DNS server address relate to its role in the setup?

    -The server's preferred DNS server address is set to its own IP address because it will also act as a DNS server, which is necessary for Active Directory integration.

  • What is the process for promoting a server to be the first domain controller?

    -The process involves installing the Active Directory Domain Services role and then promoting the server to be the first domain controller for a new forest.

  • What is the default forest functional level set during the video demonstration?

    -The default forest functional level set during the video demonstration is Windows Server 2016.

  • Why is the Directory Services Restore Mode (DSRM) password required?

    -The DSRM password is required for restoring the Active Directory database in case of a failure and for performing certain maintenance tasks.

  • What is the significance of creating a reverse lookup zone in DNS?

    -Creating a reverse lookup zone in DNS allows for the resolution of IP addresses to their corresponding domain names, which is important for proper name resolution and can assist in network troubleshooting.

  • How can you verify that the server is correctly configured as a DNS server?

    -You can verify the server's DNS configuration by using the nslookup command in PowerShell to perform forward and reverse lookups and ensure the server returns the correct results.

  • What is the next step after setting up Active Directory and DNS as shown in the video?

    -The next step, as mentioned in the video, is to join a Windows 10 computer to the newly created domain.

Outlines

00:00

🔧 Setting Up Active Directory on Windows Server 2019

This paragraph outlines the initial steps to set up Active Directory in Windows Server 2019. It begins with a checklist of prerequisites such as administrative privileges, a server with a static IP address, and adherence to company naming standards. The speaker demonstrates how to verify the server name and static IP address configuration using Server Manager and PowerShell. The process continues with installing the Active Directory Domain Services role and DNS server role through the Add Roles and Features Wizard. The installation is confirmed, and the server is prepared for promotion to a domain controller.

05:01

🌳 Creating a New Active Directory Forest

The speaker proceeds with the configuration of Active Directory Domain Services by promoting the server to be the first domain controller in a new forest. The choice to create a new forest is selected, and a root domain name is specified. The forest and domain functional levels are set to Windows Server 2016 by default, with options for Windows Server 2019 not yet available at the time of the video. The server's roles as a global catalog and DNS server are confirmed, and a Directory Service Restore Mode password is set. The speaker reviews the configuration settings before initiating the installation process, which concludes with the server restarting and the appearance of a new administrator account, indicating successful promotion to a domain controller.

10:03

🖥️ Post-Installation Configuration and DNS Setup

After the server restarts, the speaker opens Server Manager and the Active Directory Users and Computers console to verify the domain and forest functional levels. They then open the DNS management console to create a reverse lookup zone, specifying the network ID and completing the zone creation. The DNS console is used to update the associated pointer record for the domain name. The speaker also changes the preferred DNS server address in the network connection properties to the server's IP address and verifies the DNS setup using the nslookup command in PowerShell, confirming the correct resolution of the domain name and its PTR record.

Mindmap

Keywords

💡Active Directory

Active Directory is a directory service developed by Microsoft for Windows domain networks. It is a key component for network administration and provides a centralized database for storing and managing information about network resources, such as users, computers, and printers. In the video, setting up Active Directory is the main focus, with the process of implementing a new forest for an Active Directory environment using Windows Server 2019 being demonstrated.

💡Windows Server 2019

Windows Server 2019 is an operating system developed by Microsoft, designed to power servers, data centers, and cloud environments. It includes various features and services, such as Active Directory, that enable administrators to manage and secure their networks. The video provides a step-by-step guide on setting up Active Directory specifically on this server version.

💡Domain Controller

A domain controller is a server that manages security and access permissions for users and computers within a domain. It is responsible for authenticating and authorizing all users and computers within the domain. In the video, the process of promoting a server to be the first domain controller for a new forest is explained, which is a critical step in setting up Active Directory.

💡DNS Server Role

DNS, or Domain Name System, is a service that translates human-friendly domain names (like www.example.com) into IP addresses that computers use to identify each other on the network. The DNS Server Role in Windows Server is used to create and manage DNS zones. In the script, installing the DNS server role is part of the setup process to use Active Directory integrated DNS zones.

💡Static IP Address

A static IP address is a fixed IP address that does not change, as opposed to a dynamic IP address that is assigned automatically and can change over time. In the video, it is mentioned that the server must be set up with a static IP address, which is necessary for the proper functioning of the DNS server and Active Directory services.

💡Forest Functional Level

The forest functional level in Active Directory determines the features and capabilities that are available across the entire forest. It affects all domains in the forest. In the video, the forest functional level is set to Windows Server 2016, which is the highest available option at the time of the recording.

💡Domain Functional Level

The domain functional level specifies the features that are available within an individual domain. It is a setting that affects the domain's domain controllers and the operations that are allowed within the domain. In the video, the domain functional level is also set to Windows Server 2016.

💡Global Catalog

The global catalog is a replica of all objects in a multi-domain Active Directory forest. It is used to facilitate searches that span multiple domains and to support universal group membership caching. In the video, the server is configured to also act as a global catalog server, which is typical for the first domain controller in a new forest.

💡Directory Service Restore Mode (DSRM)

Directory Service Restore Mode is a special boot mode for Windows Server that allows an administrator to recover a domain controller if the server is unable to start normally. A DSRM password is set during the domain controller promotion process, and it is used in the video to secure the restoration process.

💡nslookup

nslookup is a command-line tool for querying the DNS to obtain domain name or IP address mapping or other DNS records. It is used in the video to verify that the DNS server is working correctly by looking up the IP address of the domain and the reverse lookup of the server's hostname.

Highlights

Introduction to setting up Active Directory in Windows Server 2019.

Process of implementing a new forest for an Active Directory environment.

Installing Active Directory Domain Services role and promoting the server to be the first domain controller.

Installing DNS server role for Active Directory integrated DNS zones.

Verification checklist before proceeding: administrative privilege, static IP address, and server name change.

Server Manager used to verify server configuration and static IP address.

Configuring the server to use its own IP address as the preferred DNS server.

Confirmation of administrator login using PowerShell command 'Who am I'.

Two-step process: install Active Directory service role and promote server as domain controller.

Using Server Manager to add roles and features for Active Directory Domain Services and DNS Server role.

Promoting the server to be a domain controller using the configuration wizard.

Selecting to create a new forest and specifying the root domain name.

Setting the forest and domain functional levels to Windows Server 2016.

Configuring Directory Services Restore Mode (DSRM) password.

Completing the installation and server restart.

Opening Server Manager and Management Consoles to manage Active Directory Domain Services.

Creating a reverse lookup zone in DNS Management Console.

Updating DNS settings to use the server's IP address as the preferred DNS server.

Validating DNS configuration using nslookup command in PowerShell.

Server readiness to act as a domain controller and joining a Windows 10 computer to the domain in the next video.

Transcripts

play00:00

hello friends welcome to amis octave

play00:02

upcast this is a step-by-step guide on

play00:05

how to set up Active Directory in

play00:08

Windows Server 2019 in this video we

play00:12

will see the process of implementing a

play00:15

new forest for an Active Directory

play00:16

environment using a Windows Server 2019

play00:20

this will be done initially by

play00:22

installing the Active Directory domains

play00:24

service role and then by promoting the

play00:27

server to be the first domain controller

play00:28

for a new forest at the same time we

play00:32

will also install the DNS server role to

play00:35

use Active Directory integrated DNS

play00:38

zones but before proceeding ahead we

play00:42

need to verify certain things like you

play00:44

must have an administrative privilege on

play00:46

a server setup server with a static IP

play00:49

address and change the windows server

play00:51

name according to your company's naming

play00:54

standard

play00:55

so first let's verify all this checklist

play00:58

and then we will move forward so this is

play01:02

the other window so 2019 and I'm going

play01:04

to open saw manager at the saw manager

play01:09

I'm going to click on local server and

play01:12

as you can see our computer's name is

play01:15

ws2 k-19 - this is 0-1

play01:18

in the last video demonstration we have

play01:20

performed some basic configuration tasks

play01:23

on the server and in that those tasks

play01:25

were included as you can see my computer

play01:29

is already configured with a static IP

play01:31

address which is 170 to 180 72.5 let's

play01:36

click on it then I'm going to select the

play01:38

net adapter select properties and select

play01:42

Internet Protocol version 4 and click on

play01:45

properties here the important thing is

play01:47

that on a preferred DNS server address

play01:50

as you can see the server is configured

play01:52

to use its own IP address as a preferred

play01:55

DNS server as we also want to install

play01:58

DNS server drool on this computer so

play02:00

that's why this IP address is set as a

play02:03

preferred DNS server let's close this

play02:08

and in a powershell as you can see c

play02:11

colon slash users slash

play02:13

administrator that indicates we have

play02:15

currently login to the server as an

play02:17

administrator still we want to confirm

play02:19

it and for that I'm going to run come on

play02:22

Who am I as you can see WS took in 19 -

play02:25

DC 0 1 / administrator so we have an

play02:29

admin sir - privilege on the server as

play02:31

well the process is done in a two steps

play02:37

first one we need to install Active

play02:39

Directory - means service role and then

play02:41

we need to promote the server as a

play02:42

domain controller so let's go back to

play02:46

soul manager and I'm going to click on

play02:49

manage and here we have a off sense to

play02:52

add roles and features so let's click on

play02:54

it then on before you begin screen 13

play02:58

things are there that we need to verify

play03:00

before you continue like our visitor

play03:03

account has a strong password network

play03:05

settings and the most current security

play03:08

updates click on next here we have a two

play03:12

options for this installation we need to

play03:14

select rule B's of issue B's

play03:16

installation let's click on next now we

play03:21

have only one server and that is WS -

play03:23

k-19 - DC 0 1 and we want to install the

play03:27

rule on the same server so let's select

play03:29

our local server and then click on next

play03:31

here we have a options to select server

play03:35

rule and in our case it will be your

play03:38

Active Directory domain service so I'm

play03:40

going to select Active Directory domain

play03:42

services it is also gives a 1 pop-up box

play03:46

where it is asking us that it also needs

play03:49

certain features to run Active Directory

play03:52

to means service properly do you want to

play03:54

include yes we also want to include

play03:57

those features as well as include

play03:59

management tools as well let's click on

play04:02

add features and at the same time we

play04:05

also want to install DNS server role so

play04:08

I am going to select this checkbox as

play04:09

well let's again click on add features

play04:13

and then click on next next again

play04:19

next again next again and now I'm going

play04:22

to click on install

play04:29

as you can see Active Directory domain

play04:32

service a server role installation has

play04:34

been completed successfully now here we

play04:37

have a off since su promote this server

play04:40

to a domain controller so let's click on

play04:42

promote this server to a domain

play04:44

controller link that will start Active

play04:48

Directory domain service configuration

play04:49

wizard by using this visit you can

play04:53

promote this server to be a 2 min

play04:55

controller here we have a total three

play04:58

options if you want to add domain

play05:01

controller to an existing domain that

play05:03

time you have to select the first one if

play05:05

you want to add a new dummy into an

play05:08

existing forest that time you need to

play05:11

select the second box and if you want to

play05:13

create a new forest that time you need

play05:16

to select the third one so we are going

play05:18

for a new forest that's why I'm going to

play05:21

select add a new forest now here you

play05:24

need to specify the name of your root

play05:27

domain for this demonstration I'm going

play05:31

to use my lab dot local as root domain

play05:35

name once you specify your root domain

play05:38

name click on next

play05:41

here we have to select the functional

play05:44

level of our forest as well as a root

play05:47

domain so forest functional level as you

play05:49

can see it is set to by default Windows

play05:52

Server 2016 and we are deploying new

play05:55

forests that's why I want to use the

play05:58

maximum available forest functional

play06:00

level as you can see it is Windows

play06:02

Server 2016 and domain functional level

play06:05

let's verify do we have options for

play06:07

Windows Server 2019 functional level no

play06:10

we have only one of sins and that is

play06:12

Windows Server 2016 so at the time of

play06:15

this video recording here we don't have

play06:18

options to select forest functional

play06:20

level and domain functional level to

play06:22

Windows Server 2019 we have a maximum

play06:25

forest functional level is Windows

play06:27

Server 2016 and a specific domain

play06:31

controllers capability as you can see

play06:33

and DNA sell already selected as well as

play06:35

global catalog because we are promoting

play06:38

this server as a first domain controller

play06:40

in a new forest and that's why these two

play06:43

checkboxes are already selected and it

play06:46

is krei out now we need to specify

play06:49

directory service restore mode password

play06:53

okay now click on next button click on

play06:58

next again

play07:00

we have selected my lab that local as

play07:03

our root domain and that's why you can

play07:05

see an advanced domain name is my lab if

play07:08

you don't want this nad bias name for

play07:10

your domain you can change as per your

play07:12

requirement but I'm happy with this nod

play07:15

bias name so I'm going to click on next

play07:18

here we have a options to specify the

play07:21

location of Active Directory database

play07:23

log files and sis wall we are going to

play07:26

use the default location and that's why

play07:28

I'm going to click on Next button so

play07:31

this is all the selection review

play07:34

information that we are going for a new

play07:36

domain which is my lab local and this is

play07:39

also the name of our new forest an

play07:41

adverse name is my lab forest and domain

play07:44

functional levels are set to Windows

play07:45

Server 2016 we have selected global

play07:48

catalog as well as a DNS server and this

play07:52

is a path for your database log files

play07:54

and assess whole folder if you want to

play07:57

change anything then you can click on

play08:00

previous button and change those

play08:02

settings and if you are happy with the

play08:04

selection you can click on next to start

play08:07

installation

play08:10

and this green box means we can start

play08:15

installation so let's click on install

play08:19

one the active directory post

play08:21

installation configuration process

play08:22

completes your server will restart

play08:25

automatically

play08:28

now press ctrl to delete key to unlock

play08:31

of a server and now the most important

play08:36

thing is there instead of only

play08:38

administrator now we can see my laps

play08:40

last administrator is there the only

play08:42

reason is that because now this server

play08:45

is promoted as a domain controller

play08:49

now first of all I'm going to open saw

play08:52

manager and I'm going to click on tools

play09:01

and here we have the management consoles

play09:04

by using those consoles we can manage

play09:07

our Active Directory domain services so

play09:10

first of all I'm going to open Active

play09:12

Directory users and computers consoles

play09:15

ok here we go here we have a my laptop

play09:18

local and that is the name of our two

play09:21

beam

play09:24

that's right click there and select

play09:25

properties here we can see our domain

play09:28

functional level and forest functional

play09:30

level is there Windows Server 2016 let's

play09:33

minimize it and I'm going to open DNS

play09:36

management console so let's click on

play09:38

tools and select DNS going to expand my

play09:42

server which is a WS - k-19 - des is 0-1

play09:45

and under forward look up zone you can

play09:48

see - Active Directory integrated DNS

play09:51

zones are there underscore a master CS

play09:53

thought my lab with local & Mild with

play09:56

local I'm going to create a one a

play09:59

reverse look up zone as well so let's

play10:01

right click on reverse look up zones and

play10:02

select new zone click on next we want to

play10:07

select primary zone as well as Active

play10:09

Directory integrated click on next we

play10:13

are happy with this click on next

play10:15

happy person for realistic of zone next

play10:18

again and I'm going to specific the

play10:20

network ID here it will be a first three

play10:23

octet of your IP address which is 170 to

play10:29

180 72 in my case let's click on next

play10:32

next to clean and finish so now as you

play10:37

can see we have a reverse look up zone

play10:39

or with a start of authority and name

play10:41

server entry let's click on my lab dot

play10:44

local zone and this is the host record

play10:46

for our domain name I'm going to select

play10:49

this check box update associated pointer

play10:52

record click on apply and click on ok

play10:55

now let's again click on our reverse

play10:57

look up zone and hit refresh okay here

play11:03

we have a point at a code as well fine

play11:05

that's closed over DNS console and I'm

play11:09

going to open Network a connection

play11:11

console ok let's click on local server

play11:19

click on this IP address right click on

play11:22

your asana select properties select

play11:25

Internet Protocol was in 4 click on

play11:28

properties and here you can see on your

play11:31

preferred DNS server address 127.0.0.1

play11:35

IP address is there because now this

play11:38

server is acting as a DNS server I'm

play11:41

going to jammu this and instead of I'm

play11:44

going to put 172 1 8 72 dot file which

play11:49

is the IP address of our server and this

play11:52

IP address is a preferred DNS server

play11:55

click on OK click on close and closes

play11:59

console

play12:00

I'm going to open PowerShell and at the

play12:04

powershell i'm going to run command

play12:05

nslookup and here we go

play12:10

our default server is WS 2k 19 - TC 0 1

play12:13

dot my little and IP address is there

play12:17

that is 172 dot 18.7 to do that file now

play12:21

I'm going to type my lab data local and

play12:26

we are getting an answer that my lab dot

play12:29

local as IP address is 170 to 180 72.5

play12:33

I'm going to specify the IP address as

play12:36

well and we are also getting the answer

play12:42

for the same as well that 170 to 180

play12:45

72.5 PTR record is belong to WS 2 k 19 -

play12:51

TC 0 1 dot my laptop local so this is

play12:56

the way how we can set up Active

play12:59

Directory domain service on a Windows

play13:01

Server 2019 now the server is ready to

play13:06

act as domain controller in the next

play13:09

video we will see how we can join a

play13:12

Windows 10 computer to this domain that

play13:15

concludes our video demonstration thank

play13:18

you all for watching this video

Rate This

5.0 / 5 (0 votes)

Related Tags
Active DirectoryWindows Server2019Domain ControllerDNS ServerInstallation GuideNetwork SetupServer ConfigurationIT TutorialAdministration