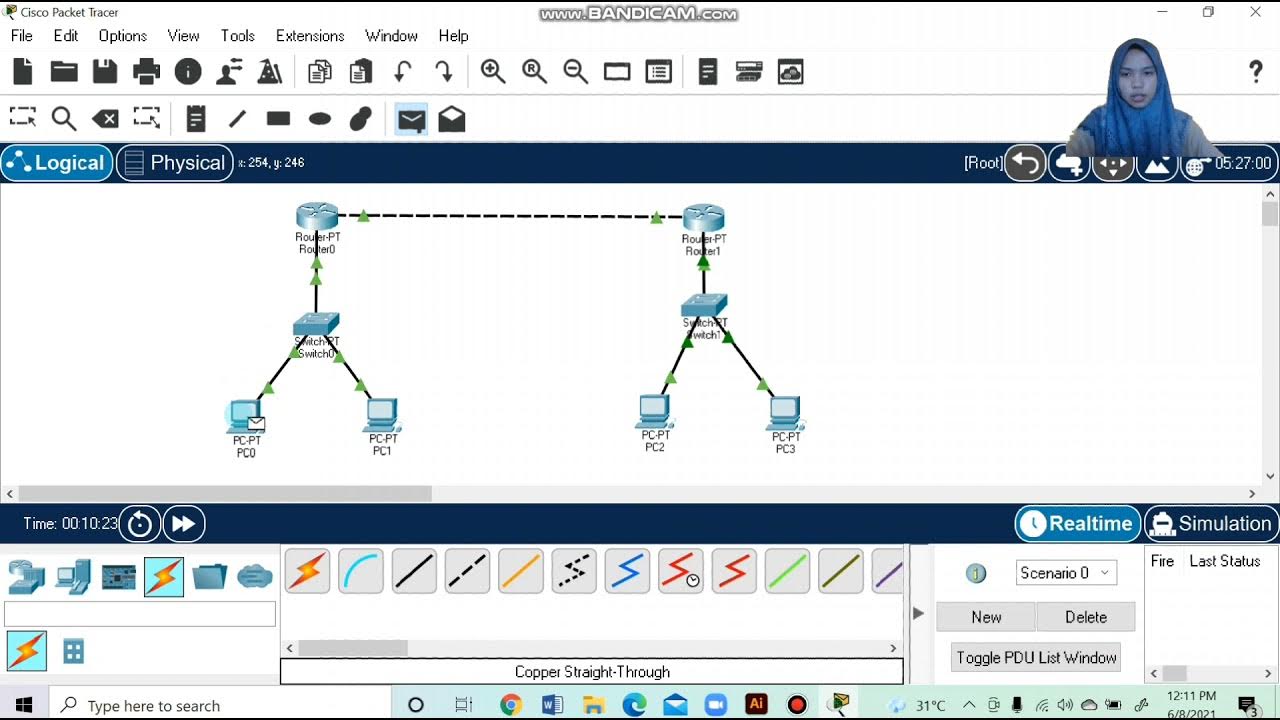
SSH Configuration on Cisco Routers and Switches using Cisco Packet Tracer
Summary
TLDRThis tutorial provides a step-by-step guide to configuring SSH on Cisco routers and switches using Cisco Packet Tracer. It covers network setup, including connecting routers, switches, and end devices, and configuring SSH for secure remote access. The video demonstrates how to assign IP addresses, configure local usernames and passwords, generate RSA keys, and restrict access to SSH only. The tutorial concludes with troubleshooting tips for common connectivity issues, making it a comprehensive resource for network administrators looking to implement SSH securely.
Takeaways
- 😀 Make sure to use Cisco Packet Tracer for the simulation of SSH configuration on routers and switches.
- 😀 Start by creating a network topology with at least two routers, two switches, and two PCs for SSH remote access.
- 😀 Configure a hostname for each router and switch to ensure proper identification within the network.
- 😀 Set a local domain name on the router to support the SSH configuration process (e.g., test.local).
- 😀 Generate RSA encryption keys on the router and switch for secure SSH communication (e.g., `crypto key generate rsa`).
- 😀 Enable SSH version 2 for secure communication and configure the VTY lines to accept SSH connections only (e.g., `transport input ssh`).
- 😀 Assign static IP addresses to router and switch interfaces, making sure to enable them with the `no shutdown` command.
- 😀 Create local user accounts with a username and password for SSH login on both the router and switch.
- 😀 Test the SSH connection from a PC to ensure successful remote login by using the `ssh -l admin` command.
- 😀 Use static routing to allow communication between different network segments if devices are in different subnets.
- 😀 Demonstrate how to manage remote devices (routers and switches) via SSH by performing tasks like shutting down interfaces or saving configurations.
Q & A
What is the primary purpose of this tutorial?
-The tutorial demonstrates how to configure Secure Shell (SSH) on Cisco routers and switches using Cisco Packet Tracer, enabling remote access for secure device management.
Why is SSH preferred over Telnet for remote access?
-SSH is preferred because it encrypts communication, ensuring security during remote management, unlike Telnet, which sends data in plaintext and is vulnerable to interception.
What devices are required for this simulation in Cisco Packet Tracer?
-The simulation requires two Cisco routers, two Cisco switches, and two end devices (PCs) to demonstrate SSH configuration and remote access.
What command is used to change the hostname of the router?
-The command to change the hostname of the router is `hostname RouterA` (or any desired name).
How do you generate RSA keys for SSH on a Cisco router?
-To generate RSA keys for SSH, use the command `crypto key generate rsa general-keys modulus 1024`. This creates the public and private keys for encryption.
What is the purpose of the command `transport input ssh` in the router's configuration?
-The command `transport input ssh` restricts remote access to SSH only, disabling other protocols like Telnet for security reasons.
What is the purpose of the `login local` command in the VTY line configuration?
-The `login local` command allows the router to authenticate SSH users using a locally defined username and password, ensuring secure login.
What IP address configuration should be assigned to the router's serial interface for SSH?
-The router's serial interface should be assigned an IP address like `10.0.0.1 255.255.255.0` (or any other appropriate address within the desired network range).
What is the purpose of configuring the `no shutdown` command on router interfaces?
-The `no shutdown` command is used to enable the router's interfaces, ensuring they are active and ready to send and receive data.
How do you configure SSH on a Cisco switch?
-To configure SSH on a Cisco switch, you need to set a hostname, domain name, create a local username and password, generate RSA keys, and configure the VTY lines to accept only SSH connections.
Outlines

This section is available to paid users only. Please upgrade to access this part.
Upgrade NowMindmap

This section is available to paid users only. Please upgrade to access this part.
Upgrade NowKeywords

This section is available to paid users only. Please upgrade to access this part.
Upgrade NowHighlights

This section is available to paid users only. Please upgrade to access this part.
Upgrade NowTranscripts

This section is available to paid users only. Please upgrade to access this part.
Upgrade NowBrowse More Related Video

Membuat Jaringan Sederhana dengan Cisco Packet Tracert | 1 Server 1 Router 2 Switch 6 Client

Membuat Topologi Jaringan 1 Gedung 3 Lantai Menggunakan Cisco Paket Tracer

Cara Konfigurasi DNS Server Di Cisco Packet Tracer

Topologi Jaringan Menghubungkan 2 Router 2 Switch dan 4 PC Packet Tracer

2.9.1 Packet Tracer - Basic Switch and End Device Configuration

How to Configure RIP Version 1 (RIPv1) on Cisco Router in Cisco Packet Tracer | Expert Guide 🌐🔧
5.0 / 5 (0 votes)