The Classic ScrollTrigger Animation That Always Impresses

Codegrid
26 May 202408:34

Summary

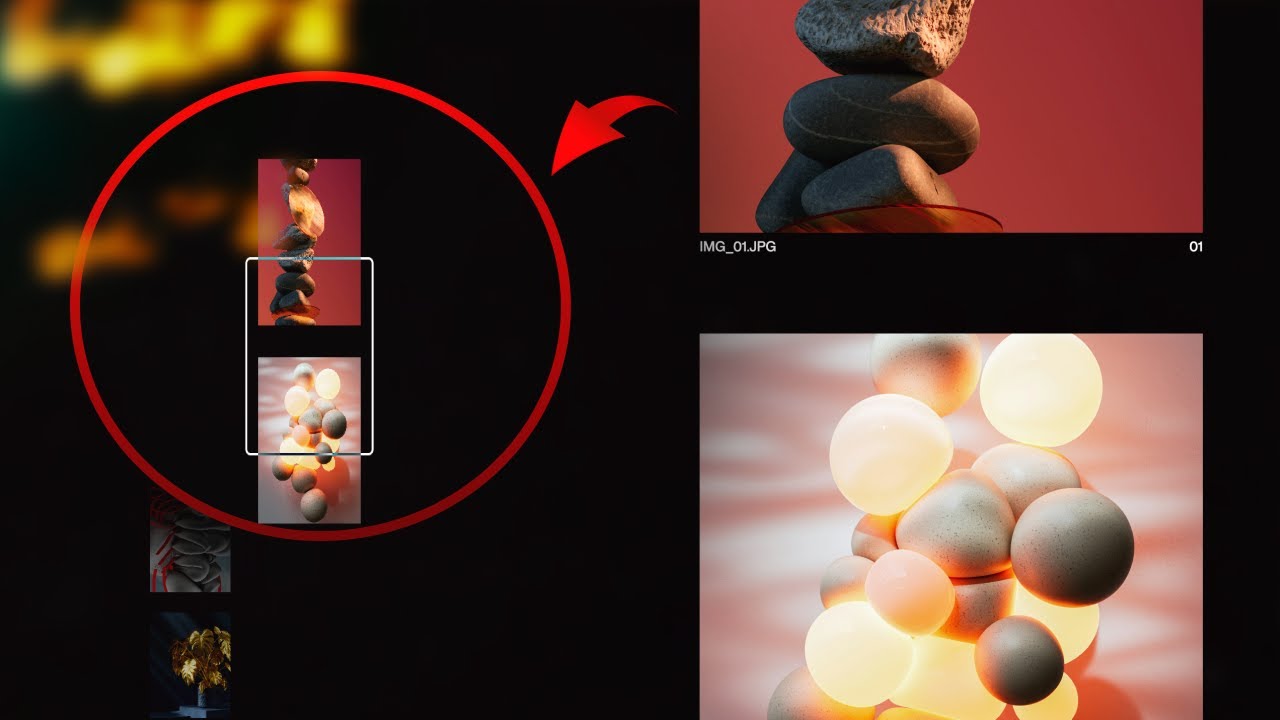
TLDRThis tutorial showcases how to create a dynamic 3D scroll animation using HTML, CSS, GSAP, and ScrollTrigger. It guides viewers through building a website with pinned and animating cards as you scroll. Key steps include setting up sections, applying CSS for layout and design, and using GSAP for smooth scaling animations. The video also demonstrates how to use ScrollTrigger for sticky sections and fading effects, enhancing user interaction and storytelling on the web page.

Takeaways

  • 😀 The video aims to teach viewers how to create a scroll animation with pinned and dynamic 3D style cards.
  • 🔧 Key tools used in the tutorial include HTML, CSS, GSAP (GreenSock Animation Platform), and Scroll Trigger.
  • 💼 The tutorial begins by setting up a basic HTML structure with a logo, sections for content, and a footer.
  • 📱 CSS is used to style the elements, including full viewport sections, centered text, and absolute positioning for images.
  • 🎨 GSAP is introduced to animate the scaling of images as the user scrolls, creating a smooth and engaging visual effect.
  • 🔗 Scroll Trigger is used to pin sections at the top of the viewport and to trigger animations based on scroll position.
  • 📊 The tutorial demonstrates how to calculate the end point for scaling animations to synchronize with the scroll.
  • 📈 A for each loop is utilized to iterate through each pinned section for animation purposes.
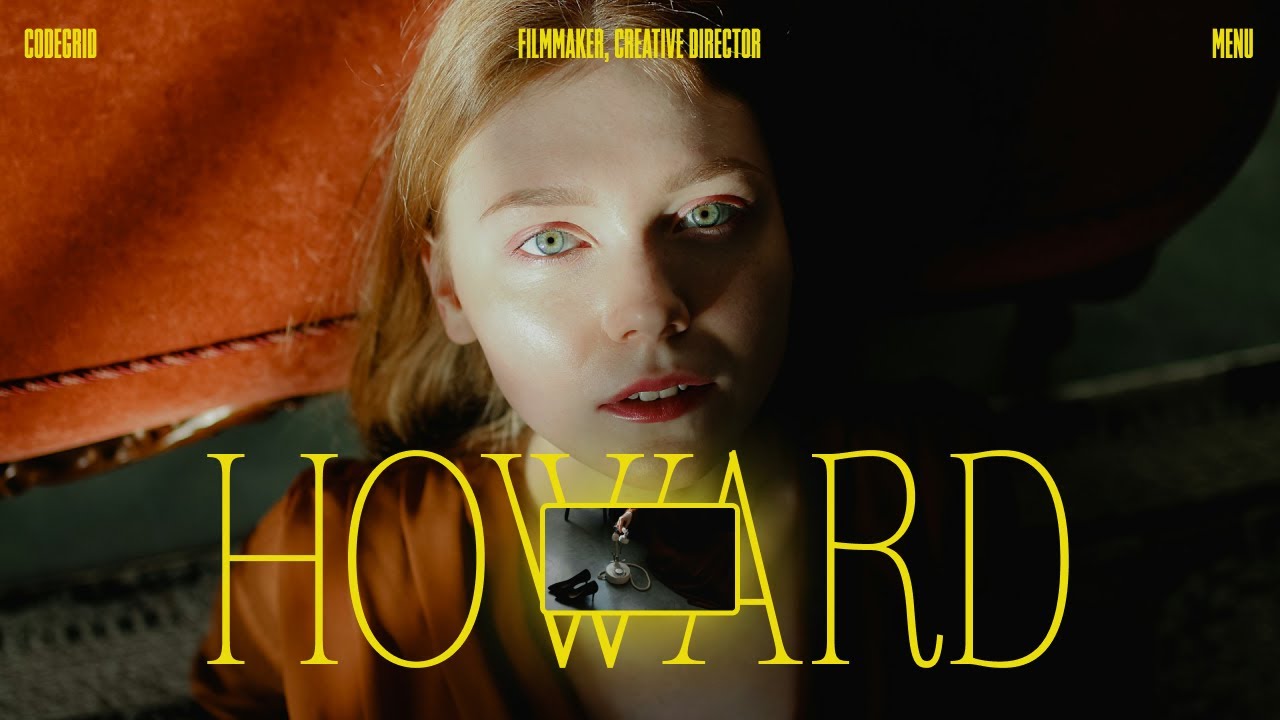
  • 🌟 The hero section's headline fades out as the user scrolls, enhancing the storytelling aspect of the page.
  • 🎞️ The video concludes with a recap of the steps and a prompt for viewers to like and subscribe for more content.

Q & A

  • What is the main topic of the video script?

    -The main topic of the video script is creating a scroll animation with pinned and dynamic 3D style cards as you scroll, using HTML, CSS, GSAP, and ScrollTrigger.

  • Why is ScrollTrigger considered an ideal choice for this animation?

    -ScrollTrigger is considered ideal for this animation because it allows for smooth transformations and ensures that the animations are tied to the scroll position, creating a fluid and continuous effect.

  • What is the first step in creating the scroll animation according to the script?

    -The first step is to create a container and add a logo that acts as a link.

  • How many sections are needed to create the sticky images in the animation?

    -The script suggests creating separate sections for the sticky images, duplicating the section with the class 'card' multiple times based on the number of images desired.

  • What class name is added to the sections that need to be pinned using ScrollTrigger?

    -The class name 'pinned' is added to the sections that need to be pinned using ScrollTrigger.

  • How is the footer section styled in the animation?

    -The footer section is styled to be half the viewport height, centered using Flexbox both horizontally and vertically, and features a large, legible font.

  • What role do the footer and the last card play in the animation sequence?

    -The footer and the last card marked with the class 'scroll' play key roles in the animation sequence, as they are used to determine the end point of the animation and ensure a smooth transition.

  • How is the scaling animation of the image calculated?

    -The scaling animation of the image is calculated by measuring the distance between the top of the next section and the top of the current section, then appending this value to the top property.

  • What property is used to make the sections stick at the top of the viewport as you scroll?

    -The 'pin' property is used with a value of true to make the sections stick at the top of the viewport as you scroll.

  • How is the opacity of the headline in the hero section animated?

    -The opacity of the headline in the hero section is animated by creating a new ScrollTrigger that monitors the entire body of the document, with the opacity starting at one (fully visible) and gradually fading to zero as the user scrolls.

Outlines

00:00

🚀 Introduction to Creating Scroll Animations

The speaker begins by mentioning a request from a pro member to create a scroll animation. They explore a website showcasing a popular scroll animation where cards are pinned and animated in a dynamic 3D style as the user scrolls. The tutorial aims to replicate this effect using HTML, CSS, GSAP, and Scroll Trigger. The speaker briefly explains that a simple version can be achieved with CSS sticky position but for smooth transformations, Scroll Trigger is recommended. They encourage viewers to like and subscribe if they find the content helpful. The tutorial then starts with creating a container, adding a logo link, sections for a hero section, sticky images, and a footer. The sections for sticky images are given a 'card' class, and an image wrapper with an image element is added. The sections that need to be pinned using Scroll Trigger are given a 'pinned' class, while the last section is given a 'scroll' class to ensure it scrolls normally. The video ends with a setup for styling and scripting.

05:01

🎨 Crafting the Scroll Animation with Code

The second paragraph delves into the coding process for the scroll animation. It starts with resetting default margins and padding, setting box-sizing to border-box, and applying a font-family and background color. The images are styled to fill their containers and maintain aspect ratios. The container spans the full viewport, and the logo is positioned at the top center with padding and a high z-index. Each section is designed to take up the full viewport, with the hero section's H1 centrally placed and styled with a large font size and white color. The 'scroll' class is used to allow natural page scrolling, and the image container is positioned at the center within each card section. The footer is styled using Flexbox and is centered both horizontally and vertically. The script starts by registering the Scroll Trigger plugin with GSAP and setting up an event listener for the document load. It then focuses on the sections marked with the 'pinned' class for scroll trigger animations. A for-each loop is used to iterate through each pinned section, targeting the image within the section. The script calculates the end point for the scaling animation by measuring the distance between sections. Each section is configured to stick at the top of the viewport as the user scrolls. The images within each section are animated to scale down as the user scrolls, using GSAP's from method tied to the scroll position through Scroll Trigger. Lastly, a fading effect is added to the hero section's headline, with a scroll trigger monitoring the entire body of the document and adjusting the opacity based on scroll progress.

Mindmap

Keywords

💡Scroll Animation

Scroll animation refers to the visual effects that occur as a user scrolls through a webpage. In the context of the video, scroll animation is the main focus, where dynamic 3D style animations are triggered as the user scrolls. The script describes creating a scroll animation using HTML, CSS, GSAP, and Scroll Trigger, which are technologies used to implement these effects. The video aims to demonstrate how to replicate a popular scroll animation where cards are pinned and animate as the user scrolls.

💡GSAP

GSAP, or GreenSock Animation Platform, is a JavaScript library for creating high-performance, professional-grade animations. In the video, GSAP is used in conjunction with Scroll Trigger to animate the scaling of images as the user scrolls. GSAP is highlighted as a crucial tool for achieving smooth transformations and dynamic effects, illustrating its importance in web animation.

💡Scroll Trigger

Scroll Trigger is a plugin that works with GSAP to create scroll-based animations and interactions. The script mentions using Scroll Trigger to pin sections of the webpage and to trigger animations based on scroll position. It is integral to the video's demonstration, as it enables the creation of the cool 3D style scroll animation effect that the tutorial aims to replicate.

💡Sticky Position

CSS sticky positioning is a technique that fixes an element in place based on the user's scroll position. The video script explains using sticky position to create a simple version of the scroll animation, where certain elements like cards remain fixed in place as the user scrolls, contributing to the dynamic feel of the webpage.

💡Pinned Sections

Pinned sections are parts of a webpage that remain fixed in view as the user scrolls past them. In the script, pinned sections are created by adding a class and using Scroll Trigger to ensure they stay at the top of the viewport. These sections are key to the tutorial's demonstration, as they are the areas that will have the scroll-triggered animations applied.

💡Viewport

The viewport refers to the visible area of a web page that a user sees on their screen at any given time. The script discusses setting elements to take up the full viewport width and height, which is essential for creating an immersive scroll animation experience. Understanding the viewport is crucial for designing responsive and engaging scroll animations.

💡Object Fit

Object fit is a CSS property that determines how an image is resized to fit its container. In the video script, object fit is set to 'cover' to ensure images fill their containers completely while maintaining their aspect ratios. This property is important for creating a polished look in the scroll animation, where images need to look sharp and fit perfectly within their designated areas.

💡CSS Flexbox

CSS Flexbox is a layout mode that makes it easy to design flexible responsive layout structures. The script mentions using Flexbox to center the footer both horizontally and vertically. Flexbox is highlighted as a tool for creating well-organized and aesthetically pleasing layouts that adapt to different screen sizes, which is essential for the scroll animation's effectiveness.

💡Opacity

Opacity in CSS refers to the transparency level of an element, with 1 being fully opaque and 0 being fully transparent. The video script describes using Scroll Trigger to animate the opacity of the hero section's headline, creating a fading effect as the user scrolls. This use of opacity adds to the interactive storytelling aspect of the scroll animation, drawing the user's attention and enhancing the overall experience.

💡GSAP fromTo Method

GSAP's fromTo method is used to animate an element from one state to another. In the script, fromTo is used to scale images down as the user scrolls, creating a dynamic scaling effect. This method is crucial for the tutorial, as it ties the animation directly to the scroll position, providing a smooth and engaging visual transition.

💡Hero Section

A hero section is a prominent area at the top of a webpage, often used to make a strong first impression. In the video script, the hero section contains an H1 tag with large text that fades as the user scrolls, enhancing the storytelling aspect of the page. The hero section is a key element in the scroll animation, setting the tone for the rest of the page's content and animation.

Highlights

Introduction to creating a scroll animation with pinned and dynamic 3D style cards as you scroll.

Using HTML, CSS, GSAP, and Scroll Trigger to replicate the scroll animation.

Explaining the use of CSS sticky position for a simple version of the animation.

Setting up the HTML structure with a container, logo, sections, and footer.

Adding class names for sections to be pinned using Scroll Trigger.

Styling the sections to fill the viewport and maintain aspect ratios.

Positioning the logo and link at the top center of the page.

Creating a hero section with a centrally placed H1.

Setting up the card sections with image wrappers for the sticky images.

Configuring the footer to be half the viewport size and centered.

Registering the Scroll Trigger plugin with GSAP.

Setting up an event listener for the document load to ensure elements are accessible.

Iterating through each pinned section to target and manipulate images on scroll.

Calculating the end point for the scaling animation of the image.

Initializing Scroll Trigger for each section to create the sticky effect.

Animating the images to scale down as the user scrolls.

Adding a fading effect to the hero section's headline based on scroll progress.

Finalizing the interactive storytelling effect with smooth opacity transitions.

Transcripts

play00:00

just yesterday a pro member reached out

play00:02

with a request on how to create a scroll

play00:04

animation when I explored this website I

play00:07

discovered a standout scroll animation

play00:09

where cards are pinned and animate in a

play00:11

dynamic 3D style as you scroll this

play00:13

effect has become very popular and since

play00:15

we hadn't covered it on our Channel it

play00:17

seemed like the perfect opportunity to

play00:19

demonstrate how to replicate this scroll

play00:21

animation using HTML CSS gsap and scroll

play00:24

trigger while a simple version of this

play00:26

can be created using CSS sticky position

play00:29

achieving that cool skill ta animation

play00:30

and ensuring the Transformations are

play00:32

smooth made scroll trigger and ideal

play00:35

choice if you find these videos helpful

play00:37

please leave a like and might subscribe

play00:39

as well if you haven't yet all right

play00:41

without wasting any more time let's dive

play00:43

into the code let's start by creating a

play00:45

container first of all We'll add a logo

play00:48

which is going to be a

play00:54

link next up we need a few sections

play00:57

we'll start by adding a hero section it

play00:59

will contain only an H1 with some text

play01:02

next we need those sticky images so we

play01:04

are going to create separate sections

play01:06

for that I light another section and

play01:08

give it a class name of card I'll add an

play01:11

image wrapper and put an image element

play01:13

inside

play01:15

it let's duplicate this section A few

play01:17

more times based on the number of stick

play01:19

images you

play01:22

want finally I'll add one last section

play01:25

for the footer it will contain an H1

play01:34

now here comes the crucial step

play01:36

whichever sections we want to pin using

play01:38

scroll trigger I'll add another class

play01:40

name of pinned to those

play01:44

[Music]

play01:50

sections except the last one it will

play01:53

have a class name of scroll because we

play01:55

are not pinning the last image and it

play01:57

should scroll regularly that's pretty

play01:59

much it let's get to styling first up

play02:02

we'll reset the default margin padding

play02:04

and set the Box sizing to border box for

play02:06

all

play02:08

elements for the HTML and body we set

play02:11

both width and height 100% apply a font

play02:14

family and set the background color to

play02:16

[Music]

play02:21

black images in our sections will fill

play02:24

their containers completely and maintain

play02:26

their aspect ratios by setting object

play02:28

fit to cover next the container that

play02:30

wraps everything also spans the full

play02:32

width and height of the

play02:36

viewport our logo positioned absolutely

play02:39

at the top center of the page has some

play02:41

padding and a high index to ensure it

play02:43

stays on

play02:46

top the link in the logo has no text

play02:48

decoration a white color and is slightly

play02:51

larger at 24 pixels

play03:01

each section is designed to take up the

play03:03

full viewport with a width of 100

play03:05

viewport width and a height of 100

play03:07

viewport

play03:13

height in the hero section the H1 is

play03:16

centrally placed both horizontally and

play03:18

vertically with a massive font size of

play03:20

200 pixels white color and slightly

play03:22

negative letter spacing

play03:41

the card with the class scroll is

play03:43

positioned relatively to allow natural

play03:45

page scrolling the image container

play03:47

inside each card section is also

play03:49

absolutely positioned at the center with

play03:52

specific dimensions to maintain its

play03:54

prominence on the page

play04:07

lastly our footer is half the viewport

play04:09

side centered using Flex box both

play04:12

horizontally and vertically and styled

play04:14

with a large legible

play04:24

font that wraps up our CSS we kick

play04:27

things off by registering the scroll

play04:29

trigger plug-in with gap next we set up

play04:32

an event listener that waits for the

play04:34

entire document to be loaded before

play04:35

running our script this ensures that our

play04:38

HTML elements are fully loaded and

play04:40

accessible we start by selecting the

play04:42

footer and the last card marked with the

play04:44

class scroll these elements play key

play04:46

roles in our animation

play04:55

sequence we also gather all sections

play04:58

that have the class pinned into array

play05:01

these are the sections that we'll be

play05:02

focusing on for our scroll trigger

play05:05

animations first we use for each Loop to

play05:07

iterate through each pin

play05:12

section initially we grab the image

play05:15

within the section using FY selector

play05:17

this allows us to specifically Target

play05:19

and manipulate the image as the user

play05:21

Scrolls next we determine the next

play05:23

section our script should reference once

play05:25

the current one is done if the current

play05:28

section isn't the last V set next

play05:30

section to the subsequent one otherwise

play05:32

we default to the last card ensuring our

play05:35

animation has reached the end point to

play05:37

create a fluid and continuous animation

play05:40

we calculate the end point for the

play05:41

scaling animation of the image we

play05:43

achieve this by setting and scale point

play05:46

this involves measuring the distance

play05:47

between the top of the next section and

play05:50

the top of the current section then

play05:51

appending this value to the top property

play05:54

this calculation ensures that our

play05:56

animation aligns perfectly with the

play05:58

natural flow of the web page as it

play06:00

Scrolls next we configure each section

play06:02

to stick at the top of the viewport as

play06:04

you scroll using gaps 2 method we

play06:07

initialize a scroll trigger for each

play06:09

section the trigger for this animation

play06:11

is the section itself starting when the

play06:14

top of the section hits the viewport top

play06:16

the sticky effect is maintained until

play06:18

the section reaches a dynamic end point

play06:20

if it's the last pin section this point

play06:22

extends by half the height of the last

play06:24

card otherwise it ends just before the

play06:27

footer becomes visible ensuring a mo

play06:29

transition we enable pinning with pin

play06:32

set to true and set pin spacing false

play06:35

the scrub property is adjusted to one

play06:37

allowing the animation to progress

play06:39

smoothly in syn with your

play06:43

scroll next we animate the images within

play06:46

each section making them scale down as

play06:48

the user Scrolls we start with the

play06:50

images at full size scale of one and

play06:53

animate them to half their size scale

play06:55

of5 we achieve this using GPS from two

play06:58

method where the scaling is tied to the

play07:00

scroll position through scroll trigger

play07:01

the trigger is the current section with

play07:03

the animation starting when the section

play07:05

reaches the top of the viewport and

play07:07

ending at the predefined end scale

play07:11

[Music]

play07:13

point the scrub parameter is again set

play07:16

to

play07:18

[Music]

play07:26

one lastly we add a fading effect to the

play07:29

hero sections headline first we select

play07:32

the H1 element within the hero

play07:38

section we then create a new scroll

play07:40

trigger that monitors the entire body of

play07:42

the document the animation starts right

play07:45

at the top of the page and continues as

play07:47

the page Scrolls down through four times

play07:49

the viewport

play07:51

[Music]

play07:55

height we use the scrub parameter set to

play07:57

one to ensure the opacity trans trans of

play07:59

the headline is smooth and directly tied

play08:01

to the scroll position in the on update

play08:04

function we dynamically adjust the

play08:05

opacity based on the scroll progress the

play08:08

opacity starts at one fully visible and

play08:10

gradually Fades to zero as the user

play08:12

Scrolls enhancing the interactive

play08:14

storytelling of the

play08:18

page that's pretty much it hope you

play08:20

found the video helpful see you in the

play08:22

next one

play08:27

[Music]

Rate This

5.0 / 5 (0 votes)

Related Tags
Web AnimationScroll TriggerGSAP TutorialCSS3 EffectsHTML5 Coding3D EffectsSticky SectionsScrolling InteractionWeb DevelopmentCreative Coding