Proxmox auf einem Hetzner Server installieren

The Morpheus Tutorials
20 Jul 202218:09

Summary

TLDRIn this tutorial, the host guides viewers through the process of virtualizing a server with OpenSense, enhancing flexibility by allowing traffic routing to multiple virtual machines. They demonstrate installing Debian 11 on a Hetzen AX41 server, followed by Proxmox VE for virtual machine management. The video covers server setup, SSH key configuration, and software installation, concluding with accessing the Proxmox web interface. It's a comprehensive guide for those new to server virtualization.

Takeaways

  • πŸ’» The tutorial focuses on virtualizing a server, specifically using OpenSense to manage traffic for multiple virtual machines.
  • 🌐 The video is a collaboration with Hetzen, a provider offering various server administration services including web hosting and dedicated servers.
  • πŸ’Ύ The tutorial uses a powerful AX41 server with 6 cores and 64 GB RAM for demonstration, but mentions that smaller servers can also be suitable for many use cases.
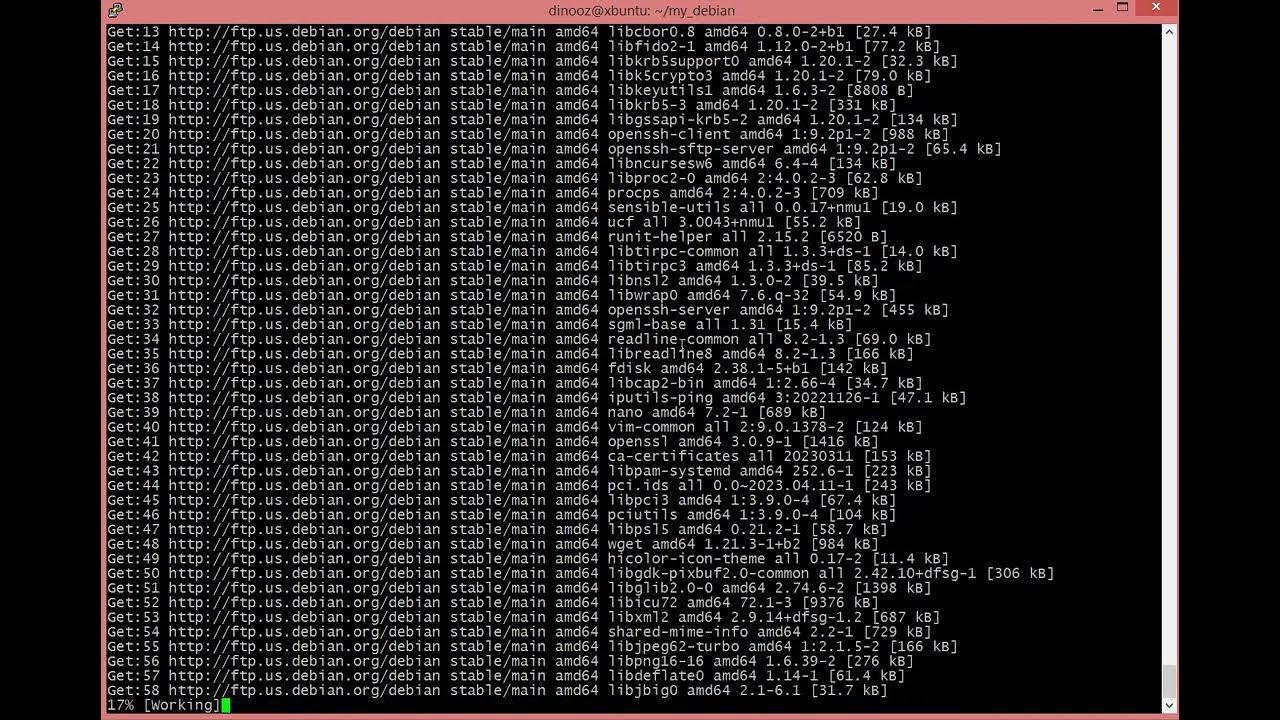
  • πŸ”„ The process starts with 'flattening' the server by installing a new Debian 11 system to ensure a common baseline for all viewers.
  • πŸ”‘ The video emphasizes the importance of using SSH keys for secure server access, with an option to use a root password if a key isn't set up.
  • πŸ› οΈ The tutorial demonstrates how to update the system, set the hostname, and configure the /etc/hosts file for easy server identification.
  • πŸ“ The installation of Proxmox Virtual Environment (VE) is detailed, including adding the Proxmox repository and GPG key for secure package management.
  • πŸ”— The video guides viewers on how to verify the successful installation of Proxmox by checking the usage of port 8006 and accessing the web interface.
  • πŸ” It highlights the security aspect of the web interface, suggesting that while it's not open to the internet, it should be protected.
  • πŸ”‘ The video concludes with setting a root password for Proxmox, which is necessary for logging into the web interface and managing the virtual machines.

Q & A

  • What is the main topic of the tutorial?

    -The main topic of the tutorial is to explain the process of virtualizing a server by installing an operating system like Debian 11 and setting up Proxmox for managing virtual machines.

  • Why is virtualizing a server considered advantageous?

    -Virtualizing a server is advantageous because it allows for more flexibility, enabling the creation of multiple virtual machines through which traffic can be piped, providing a scalable and efficient use of server resources.

  • What is Hetzen and what services do they offer?

    -Hetzen is a service provider mentioned in the script that offers various services for server administrators, including web hosting, storage, managed servers, dedicated servers, and cloud services.

  • What is the significance of the AX41 server with 6 cores and 64 GB RAM mentioned in the tutorial?

    -The AX41 server with 6 cores and 64 GB RAM is significant as it is a powerful server used in the tutorial to demonstrate the techniques for virtualization, ensuring that the presenter can showcase all the desired functionalities.

  • Why is Debian 11 chosen for the server installation?

    -Debian 11 is chosen for the server installation because it provides a stable base for installing Proxmox, which is the virtual machine hosting software that the tutorial focuses on using.

  • What is the purpose of resetting the server and installing a new system?

    -The purpose of resetting the server and installing a new system is to ensure that all participants in the tutorial have a common setup, starting from the same baseline, which simplifies the learning process and ensures consistency.

  • What is the role of the public key in the server setup?

    -The public key plays a role in the server setup by allowing secure login access via SSH without the need for a password, which is a more secure method of accessing the server, especially when the server is accessed remotely.

  • Why is it recommended to update and upgrade the system after installing Debian 11?

    -It is recommended to update and upgrade the system after installing Debian 11 to ensure that all packages are up to date, which includes security patches and the latest software versions, thereby maintaining system stability and security.

  • What is the significance of setting the hostname and updating the /etc/hosts file?

    -Setting the hostname and updating the /etc/hosts file is significant for network identification and communication. It allows the server to be identified on the network and ensures that the server can be reached using its hostname instead of relying on DNS for resolution.

  • How does the tutorial handle the installation of Proxmox VE?

    -The tutorial handles the installation of Proxmox VE by first adding the Proxmox repository to the package sources, downloading the required GPG key, and then updating the package list before installing Proxmox VE using the apt install command.

  • What is the purpose of the postfix configuration during the Proxmox VE installation?

    -The purpose of the postfix configuration during the Proxmox VE installation is to set up the mail server settings. The tutorial suggests configuring it for local only unless there is a specific mail server in the network, which helps in managing mail services for the virtualized environment.

Outlines

00:00

πŸ’» Introduction to Server Virtualization with Hetzen

The tutorial begins with an introduction to server virtualization, focusing on the process of setting up a virtualized environment using a dedicated server from Hetzen. The host explains the benefits of virtual machines (VMs) over containers and mentions previous videos discussing these topics. The tutorial is created in collaboration with Hetzen, a company offering various server-related services. The presenter uses a powerful AX41 server with 6 cores and 64 GB RAM for the demonstration. The audience is directed to Hetzen's website for more information and beginner tutorials. The process starts with resetting the server to a clean state, installing Debian 11 as the base operating system, and setting up SSH with a public key for secure access. The presenter also explains how to handle SSH key changes and verifies the server's IP address for remote access.

05:00

πŸ› οΈ Setting Up Proxmox for Virtual Machine Hosting

This paragraph delves into the installation and configuration of Proxmox, a virtual machine hosting software. The presenter starts by updating the system packages and upgrading the system to ensure all software is up to date. A new color scheme is introduced to improve readability for color-blind viewers. The tutorial then proceeds with setting the hostname and updating the /etc/hosts file to reflect the new hostname. The presenter installs the vim text editor to edit configuration files and adds the Proxmox repository to the system's package sources. The process includes downloading and installing the GPG key for the Proxmox repository to ensure the integrity of the packages. The tutorial concludes with an update of the package sources and a full system upgrade to prepare for the Proxmox installation.

10:02

πŸ” Securing and Configuring Proxmox Repository

The paragraph explains the process of securing the Proxmox installation by downloading and moving the GPG key to the trusted directory. The presenter ensures the key has read permissions and updates the package sources list to include the Proxmox repository. The tutorial then proceeds with an apt update to refresh the package list and an apt full upgrade to install the latest packages, including Proxmox. The presenter also adds the self-specific repository for additional packages. The paragraph concludes with the installation of Proxmox using the apt install command and a discussion on the postfix configuration, suggesting a local-only setup for those without a mail server.

15:03

πŸ”„ Post-Installation and Accessing Proxmox Web Interface

The final paragraph covers the post-installation steps for Proxmox, including a system reboot and verification of the installation's success by checking for errors. The presenter guides the audience on how to access the Proxmox web interface using the server's IP address and port 8006. A new root password is set to allow login to the Proxmox VE. The tutorial concludes with a brief overview of the Proxmox web interface, highlighting the ability to create VMs and other virtualized resources. The presenter invites the audience to explore further tutorials on Proxmox and signs off with a promise of more content in future sessions.

Mindmap

Keywords

πŸ’‘Firewalls

Firewalls are network security systems that monitor and control incoming and outgoing network traffic based on predetermined security rules. In the context of the video, firewalls are part of the server administration discussion, suggesting that they play a role in securing the virtualized server environment being set up.

πŸ’‘Server Administration

Server administration refers to the management and maintenance of computer servers. The video is a tutorial that dives into the specifics of setting up and managing a server, including the installation of an operating system and virtualization software, which are key aspects of server administration.

πŸ’‘Virtualization

Virtualization is the process of creating virtual versions of resources such as hardware platforms, storage devices, or network resources. In the video, the presenter aims to virtualize a server to increase flexibility and efficiency, allowing for multiple virtual machines to operate on a single physical server.

πŸ’‘OpenSense

OpenSense is a term mentioned in the script, which seems to refer to an open-source network platform that can be used for routing traffic to other virtual machines. It's part of the setup process for the virtualized server environment being discussed.

πŸ’‘Virtual Machines (VMs)

Virtual machines are software emulations of physical computers that run their own operating systems and applications. The video discusses the advantages of VMs over containers and the process of setting up a server to host multiple VMs, showcasing their flexibility and utility in a server environment.

πŸ’‘Dedicated Server

A dedicated server is a single computer in a network reserved for serving the needs of the user, application, or organization. The script mentions using a dedicated server from Hetzen, which is the starting point for the tutorial on setting up a virtualized server environment.

πŸ’‘Proxmox

Proxmox is an open-source server virtualization environment that allows users to run multiple virtual machines on a single physical server. In the video, the presenter installs Proxmox on Debian 11 to manage the virtualized server environment.

πŸ’‘Debian 11

Debian 11, also known as Debian Bullseye, is a version of the Debian operating system. The video script describes installing Debian 11 as a base operating system before setting up Proxmox for virtualization.

πŸ’‘SSH (Secure Shell)

SSH is a protocol used for secure remote login from one computer to another. The script mentions using SSH for secure access to the server, which is a common practice in server administration to ensure secure connections.

πŸ’‘Public Key

A public key is a part of a cryptographic key pair used in asymmetric cryptography. In the context of the video, the presenter uses a public key for authentication purposes when accessing the server via SSH, enhancing security by eliminating the need for a password.

πŸ’‘APT (Advanced Package Tool)

APT is a package management system used by Debian and its derivatives, including Ubuntu. The video script includes commands to update and upgrade packages using APT, which is essential for maintaining the server's software up to date.

Highlights

Introduction to virtualizing a server for greater flexibility and performance.

Use of OpenSense to route traffic through virtual machines on a dedicated server.

Explaining the advantages of virtual machines over containers.

Selection of a powerful AX41 server with 6 cores and 64 GB RAM for the tutorial.

Initial setup includes installing Debian 11 on the server as a base for Proxmox.

Detailed steps for performing a fresh installation on a Hetzner dedicated server.

Demonstrating the process of resetting the server and starting the installation process.

Key management and SSH setup for secure access to the server.

Configuring hostname and IP address for the Proxmox environment.

Guide to adding the Proxmox repositories and verifying keys to ensure secure installation.

Installing Proxmox VE, a software for virtual machine hosting.

Post-installation steps, including setting up mail servers and configuring postfix.

Verification of Proxmox installation by checking system status and ensuring port 8006 is available.

Logging into Proxmox through a web interface and accessing the Proxmox Virtual Environment.

Overview of Proxmox features like creating virtual machines and clustering.

Transcripts

play00:00

A wonderful good day, welcome back to our tutorial on Firewalls,

play00:05

but also today in a kind of crossover in general to the server administration,

play00:10

because today we want to clarify an important topic. We want to virtualize our server today.

play00:15

What exactly does that mean? In the end, we don't just want to have a operating system on our

play00:20

server, which is at least a dedicated server that we have here at Hetzen, you know that,

play00:23

but we want to install an OpenSense through which we can then pipe through the traffic

play00:29

and can continue to other virtual machines. And yes, we can have a lot of such

play00:35

virtual machines, which has the advantage that we are much more flexible. I have already made

play00:41

some videos about virtual machines and also about the advantages that they may have in comparison

play00:46

to containers. Yes, but first we have to go into our robot here from Hetzen

play00:52

and flatten our server. This video is created in cooperation with Hetzen. At hetzen.com

play01:00

you can get everything you want from the server administrators heart. From web hosting

play01:05

to storage and managed servers to dedicated servers or cloud, everything is there. For these

play01:11

tutorials we use a dedicated, very powerful AX41 server with 6 cores and 64 GB RAM.

play01:18

So I can show you all the techniques that I want to show you. But for many cases

play01:23

smaller servers make sense. You can find more information and a basic tutorial series

play01:29

for the first important steps on your server by clicking on the link in the description.

play01:33

Have fun! Okay, you can of course have several servers here. It is best to choose the server

play01:39

from which you want to have. We click on it here and we see here directly that we have a

play01:43

lot of options. Among other things, we can choose a rescue CD here. Among other things,

play01:49

we can trigger the reset here. But what we want to do first is we want to install a

play01:54

new system so that we all have the same basis. And we want to have a Debian 11 here,

play02:00

because yes, we can install Proxmox wonderfully via Debian 11. And base means here we have

play02:06

the base image, that is, the original distribution with working ssh and the

play02:13

option for further partitions and so on and so forth. So I would like to

play02:17

enter the public key again and yes, I definitely want to delete all other data here

play02:23

to have a common setup with you so that we all start from the same reason.

play02:28

So activate Linux installation, of course, do the Linux installation first and yes,

play02:34

now we have to restart our server briefly so that the installation can

play02:38

start again and when it is finished, then we can log in with root and our public key.

play02:45

I have already added the public key to the previous tutorials and

play02:50

just set it up and everything. But you can actually log in with a root password

play02:56

if you have not stored a public key. But you should definitely consider that. Okay,

play03:00

we're going to reset here now and say here to trigger automatic hardware reset and

play03:06

send. And then our server will be restarted and while it is restarted, the new system will

play03:12

then be installed completely on it. In the meantime, we can't do anything, it

play03:16

takes a while now. That means get yourself a coffee, take a short break and see you soon.

play03:21

Then open your PowerShell or your terminal or whatever you want to use and

play03:27

maybe make it so that other people can read your terminal if they should.

play03:30

And yes, just add your root ad to your ip address here. That means in my case

play03:39

I can just click on it, copy and then PowerShell again and can

play03:44

enter this here. So now I get a warning right here. This happens if you have already been

play03:51

on your server, for example. Then of course the key of your host changes. Sure,

play03:56

I mean, we just installed a new one. And what you have to do then, if you get this error

play04:00

message, is not flip it out, but you go into exactly this file here.

play04:05

So that means users, your name, point ssh, known hosts. If you are sure that you were

play04:12

just that and not someone else, then open it with the editor, for example. And here should be a line

play04:18

in it with your ip address, in my case 65, 100, 837, 179 and then some key at the back.

play04:25

You can delete that and then you can just save it. So you say, hey, that was an old

play04:32

key, I don't want it anymore. And yes, please, if you do that for the first time, please give me a

play04:38

new key. So now we can do that again and then we have to say here, yes, that is really

play04:42

the real key. We can confirm that with yes. And then we have to confirm here for my key

play04:47

with which I want to log in. What kind of password do I have? Okay, when I

play04:52

did that, then I logged in and have a Linux Debian Bullseye Latest AMD Base 5.10.0 here.

play05:00

That is in the end the latest Debian and I can now install Proxmox with it.

play05:06

Proxmox is the software that I use as a virtual machine hosting software in the end, so to speak,

play05:12

to put it simply. If you want more about virtual machines, I have made an incredible number of videos

play05:17

on this, advantages, disadvantages, containers versus virtual machines and so on and so forth.

play05:21

And you can really enjoy yourself there. What we want to do first, however, is

play05:26

of course we have to do a first, although we are already sudo, whatever, or we are already root,

play05:32

better said. Sudo apt-y update and and apt-y upgrade. So we want to patch everything once.

play05:44

Yes, that's the first thing you should do and that doesn't take too long, as we can see.

play05:49

Ah, and before I want to hear any more sayings about green writing on a black background,

play05:53

etc. I chose that because some of you have complained that you can't read it so well

play05:58

because of color blindness and that I should please take something with more contrast.

play06:02

That's why the new color scheme here. So, let's close that up here first.

play06:08

Then we set our hostname to something correct. We are actually root, why do I keep

play06:12

giving it a sudo? Whatever. Hostname ctl set minus hostname. So, and now I choose

play06:21

a name here with which I can identify that, so a subdomain, in my case proxmox,

play06:27

point the minus morpheus point bits. This is the domain that we have already got so far and

play06:33

put this here on static. So, and now I can look for my IP address interface

play06:42

. I can do that with ip add. IP add is ultimately there so that you can

play06:48

find out all your things here and for us this is important. This is basically

play06:56

my address I want to work with. Although Proxmox can of course also

play07:01

use ipv6 addresses completely. That is also absolutely possible. So, I'll just copy

play07:08

this thing out here for a moment and we go to the vim etc host. Oops, hosts in. Oh, I don't have a vim.

play07:22

Okay, I should install that. So, I'm skipping this installing of vim here, for example,

play07:27

relatively quickly. It's just apt install vim so that I can do what I planned.

play07:32

And we wanted to look into etc host. So, in host, however, it is not yet completely

play07:39

in there what I want. But there is the following in there for my IP, this devian

play07:46

bulls are latest amd64 base. I don't actually want that in there. I want my host name in there,

play07:53

namely proxmox point the minus morpheus point bits. So, and how do we call the whole thing?

play08:02

Just just proxmox. So, that's basically my name for it now. And now I have

play08:08

put that down so that I can also solve it without having to request a dns before.

play08:16

That's basically done for me. So, can we check with hostname minus minus ip minus minus address

play08:22

and we get our ip address back here. That means the 65, 100, 837, 179, which is our ip address.

play08:29

That means we looked up where our hostname is. Give me the ip address there.

play08:34

And that just read it out of the host and we got it, so to speak. So, and that's pretty cool.

play08:40

And now we can really start installing proxmox. Yes, we haven't done that yet.

play08:46

I know, I know, it takes everything. Okay, so what we need next is we need

play08:51

the latest image from proxmox. We have to add that to our package sources, so to speak.

play08:58

The best way to do this is to go to proxmox and the package repositories, where you will find the whole

play09:04

complete guide in the end. You will find the sources list here. I would

play09:09

recommend you to skip this one, because there is also a free version of proxmox.

play09:13

But there is also the proxmox.ve no subscription repository. And yes, here we can

play09:21

also access it without a key. And that's what we want to add in the end. That means we want to

play09:28

copy this line here. Even if it says not recommended for production use,

play09:37

of course they want to make a bit of money. And I'll just copy that here now.

play09:41

And go to the file vim slash etc slash apt apt slash sources dot list dot d slash pve

play10:02

minus install minus repo dot l list. I want to change that and add it.

play10:17

So and then we go out here again and save that. And now we actually have everything

play10:27

we need here. But now we still need the key to do this. So that we can

play10:31

check everywhere, so that the installation is also really verified. I don't do that

play10:36

anymore. And we get it via wget. It is under http double dot slash slash download dot proxmox

play10:46

dot com slash debian. You can actually remember quite well that this is not really something

play10:50

brutal. Proxmox minus release minus bullseye. That's the name of your debian. gpg.

play11:01

So that would be my key. I have downloaded it now. And oh, now it's somewhere

play11:07

where I don't want to have it. We move the key. Move proxmox right there. And we move it

play11:14

in btc apt trusted gpg. So that's basically the key I trust. And here we just call it

play11:29

proxmox minus release minus bullseye.gpg. That's basically, I move my key that

play11:40

I just downloaded, so the key that Proxmox uses to sign things. I downloaded it,

play11:45

unfortunately saved it wrong and now moves it to btc apt trusted, so the trustworthy

play11:51

key. But I'll call it exactly the same. So. Exactly. And now we actually have everything

play11:57

we need. Now we should give the key, however, the right to read it.

play12:02

That means we say here chmod plus r apt slash trusted slash proxmox. Exactly that. So now we can

play12:16

read it. What we are doing now is we are making an apt update. And with that we update

play12:21

all the sources. And well, our updated sources now also include the

play12:26

pve no subscription thing. And now we can actually do an upgrade here.

play12:34

So a full upgrade. Yes, I should enter apt. apt full upgrade, I'm sorry. And

play12:44

by doing this we are now reinstalling everything that would be somehow important. So if we

play12:49

take a quick look around here, then we see that there is more. There is also the self-specific

play12:55

repository. There are a few others that we don't need. These are mainly older ones.

play13:01

And we still want the self-specific repository, but we might add it later.

play13:07

Accordingly, we want to include this here in self.list. That means what we do is

play13:15

exactly the same in the end. I'll prepare a command for you so that we can do it relatively quickly.

play13:20

So and that went relatively quickly. That means just echo first and then copy

play13:30

the thing in here. self-specific bullseye main and then just add it to the self.list

play13:40

that is also at the top. I'll show you that again. You get all these repositories here,

play13:47

you get the dev from there and otherwise it's not really much anymore. Just an echo,

play13:52

then the quotation marks and then pipe with sudo t in etc apt, quasi this file that is here

play14:00

and then this is automatically inserted here. Then it's not such a huge back and forth.

play14:04

We can do that relatively easily. So and now we're doing an apt update again and

play14:11

then we can install Proxmox by installing apt install proxmox-ve.

play14:21

So and yes, that takes a while now. That means we need 1.8 GB more first,

play14:27

but a lot is also changed on your system. Things are added, things are removed,

play14:33

as far as I know. And I'll cut that out. So you will be asked directly at the installation,

play14:39

that actually goes relatively quickly, how do you want to install the whole thing?

play14:43

How do you want to install your postfix, which is actually for mail server?

play14:47

I would actually have you here, except you actually have a mail server in your network,

play14:54

if you have that, if you have a mail server in your network, you should make a satellite system out of it.

play14:59

Otherwise I could do local only here and that's what I'm going to do here.

play15:03

My system mail name should be proxmox.daminusmorphos.bit, that's okay,

play15:10

we can leave it that way and then we'll go on. So, it is important that there are no errors

play15:15

at the end after the installation and if that is the case, then you have done everything right.

play15:21

In that case, you can now restart your system here, systemctl reboot and then of course

play15:29

we have to wait a short time until the system is restarted again. Then we'll look further.

play15:33

So after a while, you can always check that again and then see here connect to host,

play15:39

connection refused. If you don't have that anymore, if you can log in again,

play15:43

then you can with ss-tunnelp, you can see whether a certain port is given somewhere or

play15:52

in use or not. And we are mainly interested in the port 8006.

play15:57

Because the port 8006 is the one that the proxy or the proxmoxve proxy,

play16:08

yes, so the pve proxy, uses. And if it is in use here, then everything is fine.

play16:15

Then you can access it via your web interface. And we'll do that for a moment.

play16:21

You can actually just enter up here https:// your ip address,

play16:29

so in my case 65.100.800.37.179, so that you have the port 8006. And then you will be

play16:36

redirected to this page here. And yes, that's the proxy interface. You can do a lot with it.

play16:42

Of course, that shouldn't be so open on the internet, but at least it is protected.

play16:47

That means we can now sign in with root and your root password. So that actually means

play16:53

your root password from your user. And since we haven't given a root password

play16:59

so far, let's just go over here and put one. Because otherwise we can't

play17:05

log in, if you don't know at least. That means we do sudo passwd root here

play17:13

and then you will be asked what you want to give as a new password. Confirm that and

play17:20

enter it again and confirm it again and then you see password updated successfully here.

play17:24

And now you have access to your Proxmox VE, although of course we don't have a valid

play17:31

subscription yet. That means we can buy one if we want to, but we don't need to.

play17:36

So and that's a very, very big overview that can do a lot. But above all you can see

play17:42

options like create vm, create ct, create bla bla bla. Yes, you can do a lot here.

play17:50

You can cluster here, you can do whatever you want. And now you could of course

play17:56

make your own tutorial series for Proxmox. But I think a few targeted videos should

play18:02

actually fit here for what we have in mind. And in that sense we'll actually hear

play18:06

you again next time. Until then, ciao!

Rate This
β˜…
β˜…
β˜…
β˜…
β˜…

5.0 / 5 (0 votes)

Related Tags
Server VirtualizationProxmox TutorialDebian 11OpenSenseVM HostingServer AdministrationLinux InstallationSSH SetupWeb InterfaceRoot Password