Change management with ServiceDesk Plus Cloud
Summary
TLDRThis video tutorial introduces the change management module in ManageEngine Service-Plus, a cloud-based help desk solution. It guides viewers through creating a change request, either from scratch or by converting a request or problem. The process includes specifying change details, assigning technicians, and defining plans such as impact and rollback. The video also covers the approval workflow involving Change Advisory Board (CAB) members, and the technician's subsequent steps post-approval, like adding tasks and work logs. Additionally, it touches on associating changes with requests and problems, setting up notifications, and generating reports for change management activities.
Takeaways
- π§ The video introduces the change management module in ManageEngine Service-Plus, a cloud-based IT service management solution.
- β Changes can be created directly in the module or converted from requests or problems within the application.
- π Users can specify details such as the name of the requester, change details, and the type of change, including pre-approved change types like 'Standard'.
- π When creating a change, users can schedule a time and date for the change, and also list affected services and involved assets.
- π Attachments can be added to changes with a file size limit of 10 MB per attachment.
- π€ Once a change is created, it can be assigned to a technician who can then define planning details such as impact, rollback plans, and checklists.
- π The approval process involves submitting change requests to CAB (Change Advisory Board) members for review and approval.
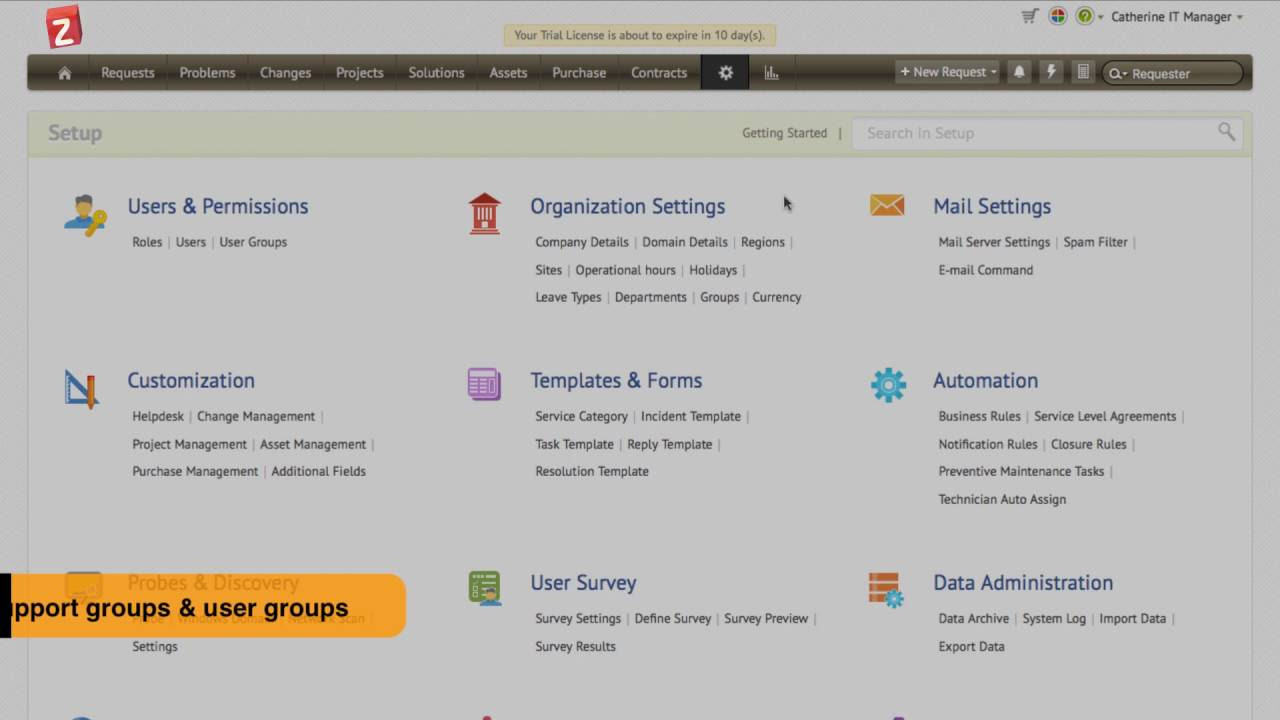
- π₯ CAB members can be added and managed by going to the setup under customization, and any logged-in user can be a CAB member.
- π Notifications are sent to CAB members for change approval, and they can approve or reject changes through email or the portal.
- π The application provides dashboards and reporting features for monitoring and analyzing change management activities.
- π Notifications for changes can be set up in the application to keep stakeholders informed about change statuses and updates.
Q & A
What is the primary focus of the video?
-The video primarily focuses on demonstrating the change management module within ManageEngine Service-Plus, a cloud-based help desk solution.
How can a change be initiated in ManageEngine Service-Plus?
-A change can be initiated by either creating it directly from the change module or by converting a request or a problem into a change within the application.
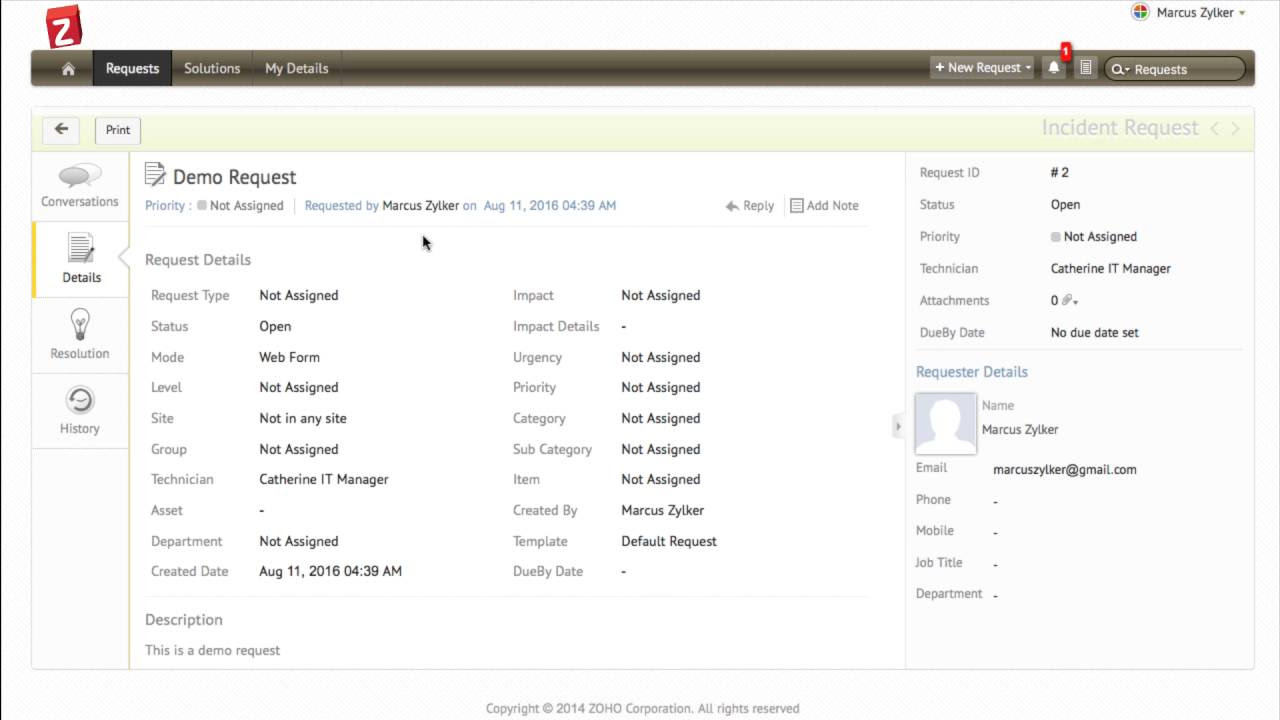
What details are required when creating a new change?
-When creating a new change, you need to specify details such as the name of the requester, the details of the change, and the type of change. You can also define change types in the application, with some being pre-approved by default.
What is the significance of the change type being 'standard' or 'major'?
-The change type being 'standard' or 'major' influences the approval process. A 'standard' change is pre-approved, whereas a 'major' change requires a more detailed review and approval process.
How can the scheduled time and date for a change be specified?
-The scheduled time and date for a change can be specified when creating the change by entering the details in the respective fields within the change creation interface.
What information can be attached to a change request?
-Files can be attached to a change request with a size limit of 10 MB per attachment. This can include documents or other relevant files that provide additional context or details about the change.
How is a change assigned to a technician in the system?
-A change is assigned to a technician by clicking the technician drop-down menu and selecting the appropriate technician's name from the list.
What is the role of the Change Advisory Board (CAB) in the change management process?
-The Change Advisory Board (CAB) is responsible for reviewing and approving change requests. CAB members can be added and managed by going to the setup under customization and selecting the change management section.
How does a CAB member review and provide recommendations for a change?
-A CAB member reviews a change and provides recommendations by either approving or rejecting it, and can add comments to support their decision. This is done through the application interface after the change has been sent for their review.
What actions can a technician take after a change has been approved?
-After a change has been approved, a technician can proceed with specifying tasks, adding work logs, conducting reviews, and setting reminders and notifications. They can also attach reviews as text or files.
How can requests and problems be associated with a change?
-Requests and problems can be associated with a change by clicking on the 'attach' button, selecting the relevant incidents, and then clicking on the 'associate' button.
Are there any reporting and dashboard features available for change management?
-Yes, ManageEngine Service-Plus provides predefined reports and the ability to create custom reports for changes in the report module. Additionally, there is a dashboard that offers a quick overview of the change management activities within the application.
Outlines
π οΈ Change Management Module Overview
This video introduces the change management module in ManageEngine Service-Plus, a cloud-based helpdesk solution. It explains how changes can be initiated directly or converted from requests or problems. The workflow involves creating a new change, specifying details such as the name, requester, and type of change. Pre-approved change types like 'standard' are mentioned. The process includes scheduling the change, identifying affected services and assets, and attaching files with a 10 MB limit. After creation, changes can be assigned to technicians who then define planning details like impact, rollback plans, and checklists. The video also covers the approval process involving Change Advisory Board (CAB) members, who can approve or reject changes after receiving email notifications or through the portal. Once approved, technicians can proceed with tasks, work logs, and reviews, and set reminders and notifications. The video concludes by mentioning the ability to associate requests and problems with changes, and the availability of notifications and reporting features for change management.
Mindmap
Keywords
π‘Change Management Module
π‘Change Request
π‘Pre-approved Change
π‘Change Advisory Board (CAB)
π‘Approval Status
π‘Technician
π‘Asset
π‘Notification
π‘Dashboard
π‘Custom Report
Highlights
Introduction to ManageEngine Service-Plus and its cloud-based helpdesk solution.
Explaining the change management module and its creation process.
Demonstration of creating a change directly from the change module.
Conversion of requests or problems into changes within the application.
Workflow for creating a new change, including specifying details like name, requester, and change type.
Pre-approval of certain change types, such as 'standard' changes.
Creating a 'major' change to illustrate the approval process.
Scheduling changes with specific dates and times.
Specifying affected services and involved assets for a change.
Attachment of files to changes with a 10 MB size limit per attachment.
Overview of the change window and its details post-creation.
Assigning changes to technicians and defining planning details.
Submission of change requests for approval by CAB members.
Creating and managing Change Advisory Board (CAB) members.
Process of submitting changes for approval and receiving email notifications.
Technician's role in reviewing and acting on CAB recommendations.
Change manager's authority to approve or reject changes after CAB recommendations.
Technician's ability to proceed with the change after approval, including task specification and work log addition.
Association of requests and problems to changes for better tracking.
Enabling notifications for changes in the application settings.
Generation of predefined and custom reports for changes.
Utilization of the dashboard for a quick overview of change management activities.
Transcripts
hello and welcome to another video for
manage engine service - plus the
cloud-based help the solution today we
will be taking a look at the change
management module a change can be
created directly from the change module
or a request or a problem can be
converted to a change in the application
let's take a look at the workflow go to
the changes tab to create a new change
click the new change button and specify
the details of the change like the name
of the requester the details for the
change and what type of a changes it you
can define change types in the
application where some of the change
types can be pre-approved by default
standard will be a pre-approved change
let's create a major change to take a
look at the approval process specify the
scheduled time for the change and the
scheduling date you can also specify the
services that are getting affected and
the assets that are involved for this
particular change like for the requests
and the problems you can also attach
files for changes with a size limit of
10 MB per attachment click Save to
create a new change once a change has
been created this is how your change
window will look like you get the
details of the change and on the right
hand side you get the details like the
change ID the approval status the
schedule start and end times you can
make changes to the change details by
simply clicking on the category field or
any field for that matter and selecting
a value once the change has been created
you can assign it to a technician by
clicking the technician drop-down and
choosing the technician name once
assigned the technician can go ahead and
define the planning he can add their
details like the impact plan the rollo
plan the back out of the checklist the
technician can add it as a text or file
in the application once added the
technician will be able to submit a
change request for approval change
requests can be submitted for approval
to the cab members you can create a
number of cabs by going to setup under
customization click on change management
and choose the change Advisory Board
chap click on the new cab button and
specify a name for the cab any user who
has logged into the application can be a
change advisory board member choose the
users and click on save now let's go
back and submit the change for approval
click the add cab member button and
select the cab for which you want to
submit the change choose the user who
needs to approve the change you can
either select one user or multiple users
as well once you have added the cab
member click on send for recommendation
to send the change for approval the user
would have received an email
notification which will also contain the
link to approve the change or he can log
into his portal and click the pending up
rules icon on the top right here he will
find the details of the change and he
can either approve it or reject it while
making a recommendation he can provide
with some comments once the decision has
been recorded the technician will also
get a notification on his mailbox the
technician can come back to the
application and he will find the
recommendation under the approvals tab
based on this recommendation and another
technician who will have the change
manager role can come in and he will be
able to approve or reject a change he
can do that from the right-hand side
panel
as you saw the approved status won't
change if a cab member makes a
recommendation a technician will the
change manager must come in to the
change and approve a change in the
application and once it is approved the
technician can proceed further with the
change like specifying a task adding
work logs and if he has conducted a
review he can either add it as a text or
attach it as a file and also set
reminders notifications and get a
history on what has happened on that
particular change you can also associate
requests and problems to change by
clicking on the attach button set the
relevant incidents and click on the
associate button likewise you can
associate problems as well you also have
notifications for change in the
application go to setup and under
automation click notification rules
click the change tab to enable the
required notifications you can also
generate reports for changes in the
vacation by going to the report module
where you will have predefined reports
and also you can create custom report
for changes in the application you also
have a dashboard which will give you a
quick idea and what is going on in the
change management section in the
application
Browse More Related Video
5.0 / 5 (0 votes)