PHOTOSHOP TRICK #01 : POTRAIT TEXT PHOTO (Bahasa Indonesia)
Summary
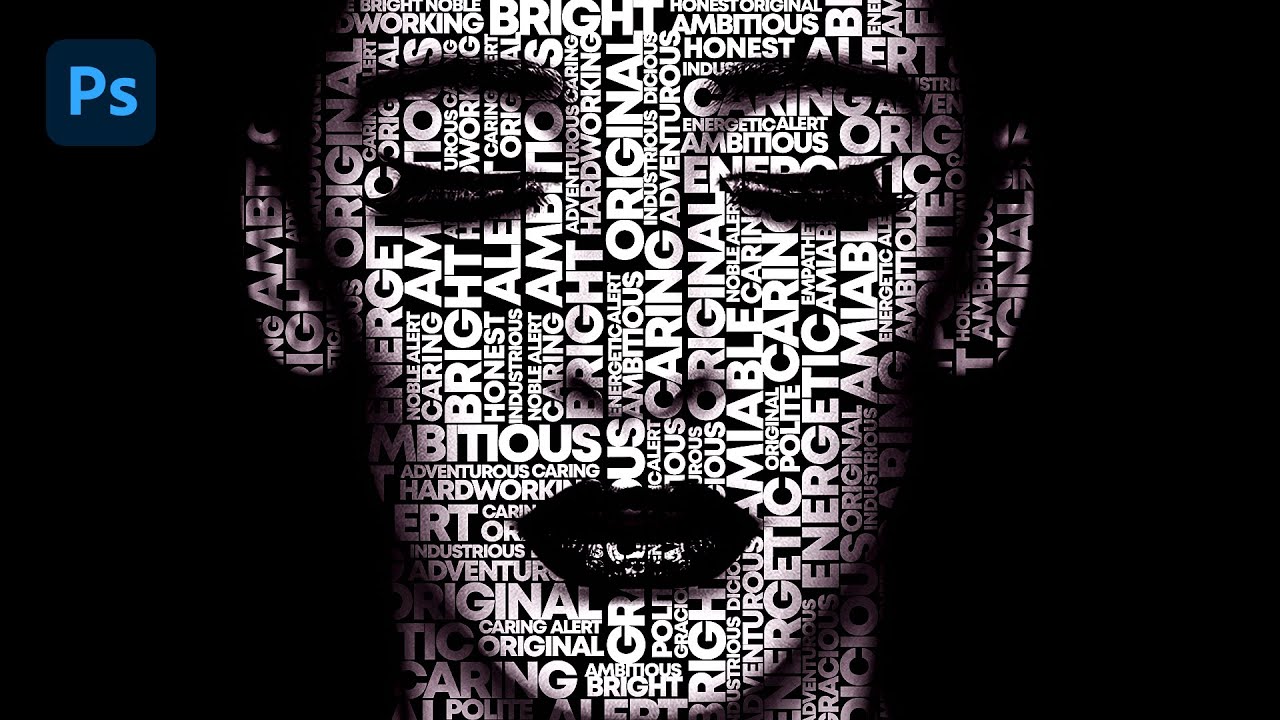
TLDRThis tutorial offers a straightforward guide on creating text portraits on photos using Adobe Photoshop. It begins with preparing a displacement map and saving it in Photoshop format. The script advises selecting text areas and inputting text, recommending smaller fonts for a refined look. It then details the process of converting the text to a Smart Object, applying a displacement filter with specific values, and using a dark layer as a base. Finally, it suggests saving the result in PNG format for optimal quality.
Takeaways
- 🖼️ The tutorial is about creating text portraits on a photo using Adobe Photoshop.
- 🌐 The process requires a single photo with the desired shape and size.
- 📸 It's optimal if the photo has a plain background for better text integration.
- 🗂️ A displacement map is prepared by saving the photo in Photoshop format.
- 📝 The text is selected and inputted, with a recommendation to use a small font size for a more relaxed look.
- 🔄 The text is converted into a Smart Object for further manipulation.
- 🔧 The 'Filter' and 'Distort' options are used to apply the displacement effect with a value of 5.
- 🎨 The displacement map makes the text follow the pattern of the photo.
- 🖌️ A dark layer is added as a base to enhance the text's visibility.
- 🔗 The photo layer is clipped to the text layer using a clipping mask.
- 💾 The final result is saved in PNG format for high-quality output.
Q & A
What is the main topic of the video script?
-The main topic of the video script is explaining a method to create a text portrait on a photo using Adobe Photoshop.
What is the first step mentioned in the script for creating a text portrait?
-The first step is to prepare a displacement map by saving the file in Photoshop with a specific format that will give a pattern to the text.
What is the significance of having a background in the photo for the text portrait?
-Having a background in the photo is more optimal as it allows the text pattern to follow the photo's pattern more effectively.
What does the script suggest for the selection of text in the portrait?
-The script suggests selecting the area of the photo where the text will be applied.
Why does the script recommend using a small font size for the text?
-Using a small font size is recommended to make the text portrait appear more relaxed and natural.
What is the purpose of converting the text to a Smart Object in Photoshop as per the script?
-Converting the text to a Smart Object allows for non-destructive editing and easier manipulation of the text within the portrait.
What filter is used in the script to apply the displacement effect to the text?
-The script uses the 'Distort' filter with the 'Displacement' option to apply the effect.
What values are suggested for the displacement filter in the script?
-The script suggests using a value of 5 for both the horizontal and vertical displacement.
How does the script suggest applying the text pattern to the photo?
-The script suggests applying the text pattern by dragging the layer of the text pattern onto the photo and using a clipping mask.
What is the recommended file format for saving the final text portrait photo for high quality?
-The script recommends saving the final text portrait photo in PNG format for high quality.
What is the final outcome described in the script after completing the text portrait process?
-The final outcome is a photo with a text portrait that follows the pattern of the photo's background, creating a visually appealing and integrated effect.
Outlines

This section is available to paid users only. Please upgrade to access this part.
Upgrade NowMindmap

This section is available to paid users only. Please upgrade to access this part.
Upgrade NowKeywords

This section is available to paid users only. Please upgrade to access this part.
Upgrade NowHighlights

This section is available to paid users only. Please upgrade to access this part.
Upgrade NowTranscripts

This section is available to paid users only. Please upgrade to access this part.
Upgrade NowBrowse More Related Video
Text portrait Effect in Photoshop
How To Create Pixelated Text Effect in Photoshop [Free File] - Photoshop Tutorials
Make Thumbnails Like Pro | YouTube Thumbnail Tutorial

Tutorial Dasar Adobe Photoshop untuk Pemula | 15 MENIT LANGSUNG PAHAM | Adobe Photoshop #1
Pictavo Walkthrough
# 8 TUTORIAL PHOTOSHOP - Membuat Ukuran Foto (Cropping)
5.0 / 5 (0 votes)