Text portrait Effect in Photoshop
Summary
TLDRIn this tutorial, you'll learn how to create a striking text portrait effect using Photoshop. The video walks you through downloading images, adjusting layers, applying solid black color, and using clipping masks. You'll duplicate layers, create a new guide layout with two columns, and apply a layer mask to achieve the desired effect. By following these simple steps, you can create stunning text-based portraits. Don't forget to subscribe for more Photoshop tutorials and explore other useful content on the channel.
Takeaways
- 🎨 The video demonstrates how to create a text portrait effect in Photoshop.
- 🖼️ You can download the images used in the tutorial from a link in the description.
- 🔲 Start by dragging the images into Photoshop and temporarily hiding them.
- 🖌️ Go to the adjustment layer, select 'Solid Color', and choose black for the background.
- 👁️ Unhide the images, ensuring the image layer is placed above the text layer.
- 🔗 Use the 'Create Clipping Mask' option to clip the image to the text.
- 🔄 Press Ctrl+J to duplicate the image layer.
- 📏 Set up a new guide layout with two columns using the 'View' option.
- 📐 Use the Marquee Selection Tool to select areas of the image as needed.
- 🔧 Add a layer mask to finish the effect.
Q & A
What is the main topic of the video?
-The video is about creating a text portrait effect in Photoshop.
Where can you download the images used in the tutorial?
-You can download the images from the link in the description below the video.
What is the first step after importing the images into Photoshop?
-The first step is to hide the images temporarily.
How do you add a solid color background in Photoshop?
-Go to the adjustment layer and choose 'Solid Color,' then select the black color and press 'OK.'
What should be the order of layers for this effect?
-The image layer should be over the text layer.
How do you apply the image to the text layer?
-Click on the image layer and choose 'Create Clipping Mask.'
What is the shortcut for duplicating a layer in Photoshop?
-The shortcut for duplicating a layer is 'Ctrl + J.'
How do you create a guide layout with two columns?
-Go to 'View,' choose 'New Guide Layout,' set the columns to two, and then press 'OK.'
Which tool is used for making selections in the tutorial?
-The 'Marquee Selection Tool' is used for making selections.
How can you finalize the text portrait effect?
-Add a layer mask to complete the text portrait effect.
What additional content does the creator encourage viewers to check out?
-The creator encourages viewers to subscribe to the YouTube channel and watch other tutorials available on the channel.
Outlines

This section is available to paid users only. Please upgrade to access this part.
Upgrade NowMindmap

This section is available to paid users only. Please upgrade to access this part.
Upgrade NowKeywords

This section is available to paid users only. Please upgrade to access this part.
Upgrade NowHighlights

This section is available to paid users only. Please upgrade to access this part.
Upgrade NowTranscripts

This section is available to paid users only. Please upgrade to access this part.
Upgrade NowBrowse More Related Video
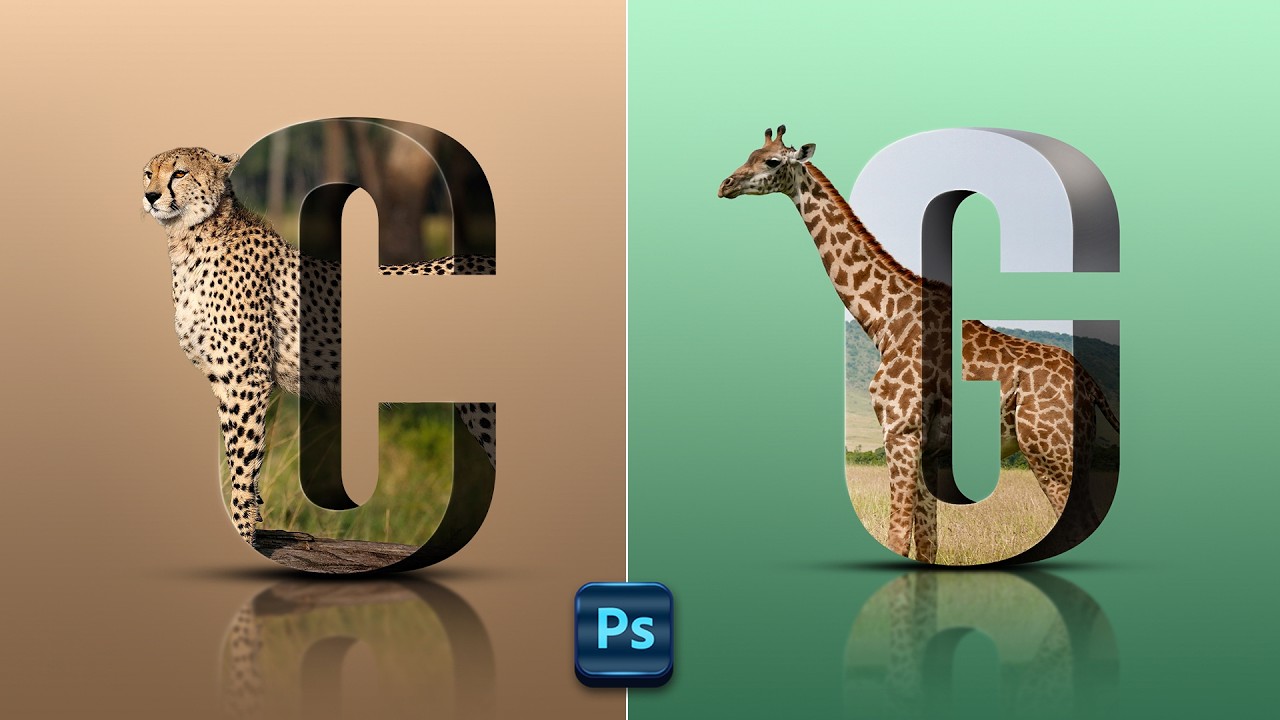
3D Letter Manipulation in Photoshop | Best Tutorial for Beginners
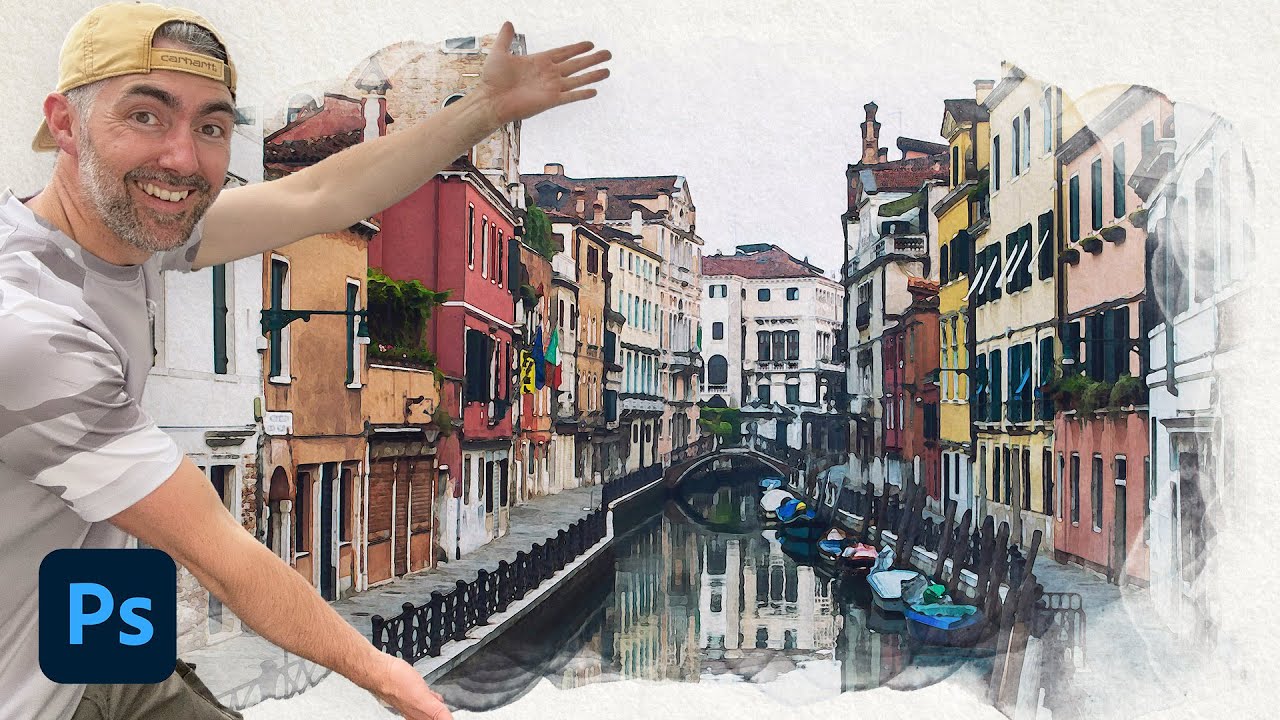
How to Create a Watercolor Painting Effect in Photoshop

How to Make Creative Poster Design in Photoshop

How To Create a Vintage Postcard Design (Illustrator & Photoshop Tutorial)
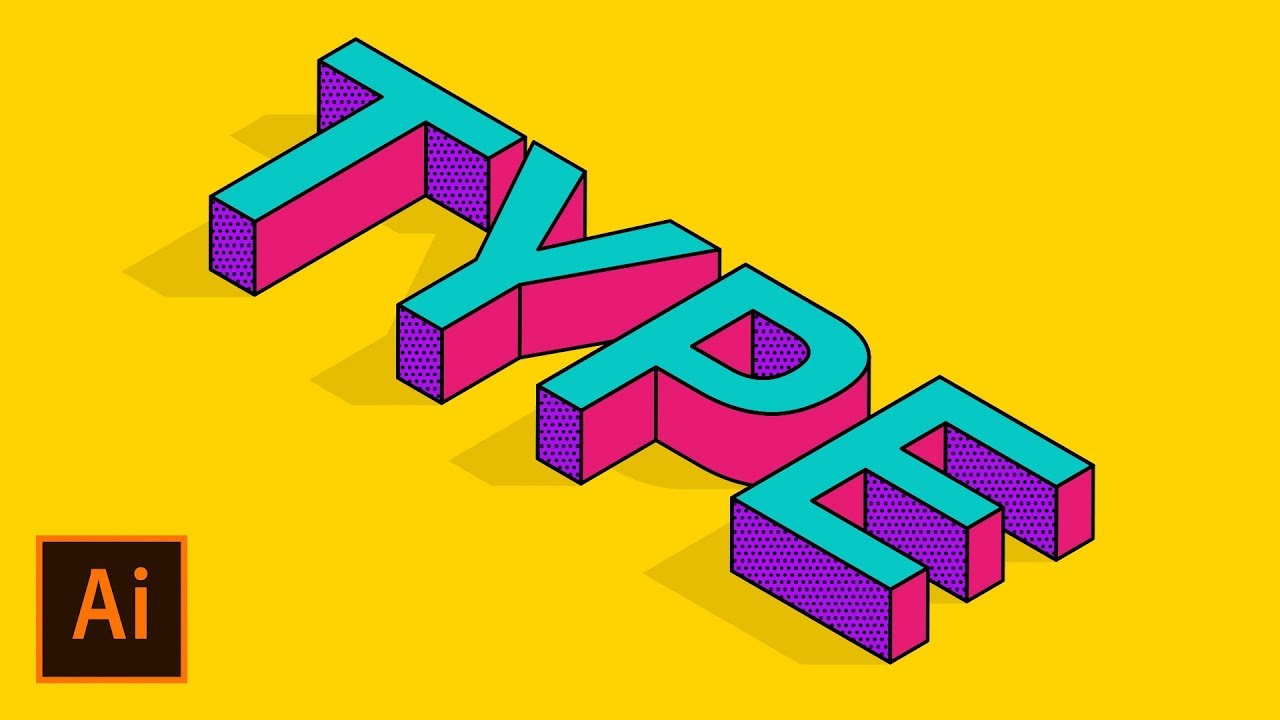
How to Create an Isometric Text Effect in Adobe Illustrator

Tutorial KineMaster - Membuat Opening Video (Gold Particles Text)
5.0 / 5 (0 votes)