The 11 Steps to Great Gesture Drawing
Summary
TLDRThis video script delves into the art of gesture drawing, emphasizing the importance of understanding and capturing the essential forms and movements of a figure. It outlines 11 key ingredients for successful gesture drawing, including recognizing anatomical landmarks, simplifying forms, maintaining intuitive proportions, and using specific line types. The script encourages artists to practice with a risk-taking mindset, build confidence, and develop a personal mark-making strategy. It also suggests a challenge for further improvement and community engagement.
Takeaways
- 🎨 **Importance of Fundamentals**: Even if you're missing one of the 11 ingredients for gesture drawing, it can significantly impact the outcome, emphasizing the importance of understanding the basics.
- 👀 **Landmarks and Relationships**: Recognizing key anatomical landmarks and their relationships is crucial for capturing the essence of a figure's gesture.
- 📏 **Understanding Big Forms**: Seeing the overall structure and form of the figure, such as the orientation of the ribcage and pelvis, is vital for dynamic gesture drawing.
- 🧍 **Proportions Matter**: While not needing to be perfectly accurate, maintaining intuitive proportions is essential to avoid distracting from the gesture.
- 🚫 **Limiting Marks**: Using a limited set of C-shaped, S-shaped curves, and straight lines (CSI) can help simplify the drawing process and focus on the essential aspects of gesture.
- ⏱️ **Time Constraints**: Implementing a time limit can encourage decisiveness and prevent getting lost in unnecessary details.
- 🔍 **Finding Asymmetry**: Asymmetry in a figure, like the contrast between squashed and stretched sides, adds visual interest and dynamism to gesture drawings.
- 🌊 **Standard and Pose-Specific Curves**: Utilizing both standard curves that are generally expected and pose-specific curves that capture the unique aspects of a pose.
- 🏞️ **Surface Lines**: Employing surface lines, cross contour lines, or wrapping lines can add gesture and clarify forms, especially in foreshortened views.
- ✏️ **Mark Making Strategy**: Having a personalized mark-making strategy, such as the type of grip or pencil used, can greatly influence the effectiveness of capturing gesture.
- 🧗 **Risk Mindset**: Embracing a risk-taking mindset, similar to Indiana Jones stepping out onto an unseen path, encourages boldness and confidence in each mark made.
- 💪 **Quantity of Practice**: Recognizing that gesture drawing is a skill built through consistent practice and muscle memory, not just theoretical knowledge.
- 🌟 **Confidence**: Allowing oneself to be confident in their abilities, which is built through practice and understanding, is a key ingredient in creating compelling gesture drawings.
Q & A
What is the significance of having 11 ingredients for gesture drawing as mentioned in the script?
-The 11 ingredients represent key elements that contribute to successful gesture drawings. Even missing one can significantly affect the outcome, emphasizing the importance of each aspect in capturing the essence of a figure's movement and form.
Why are important landmarks crucial in gesture drawing according to the script?
-Important landmarks, such as the ASIS points and the sternum, are crucial because they help simplify the complex details of a figure into a few key points, allowing the artist to focus on the major forms and relationships, which is central to capturing the gesture.
How does understanding the big forms aid in gesture drawing?
-Understanding the big forms, such as the orientation of the rib cage and pelvis, helps in gesture drawing by providing a clear sense of the figure's major anatomical structures and their spatial relationships, which is essential for conveying movement and posture.
What is the role of intuitive proportions in creating effective gesture drawings?
-Intuitive proportions play a role in gesture drawing by ensuring that the parts of the figure are relatively accurate to each other, avoiding significant distortions that could distract from the overall gesture. It's about being 'wrong in the right direction' rather than being precisely accurate.
Why is limiting the types of marks to CSI (c-shaped curves, s-shaped curves, and straight lines) beneficial?
-Limiting marks to CSI encourages artists to draw through irrelevant details and focus on the essential forms and movements. This simplification helps in capturing the gesture more effectively by emphasizing the dynamic aspects of the pose.
How does a time limit impact the process of creating gesture drawings?
-A time limit forces artists to be decisive and not get lost in details, which is crucial for gesture drawing. It's not about rushing but about slowing down and making fewer, more purposeful marks that capture the essence of the gesture.
What does the script suggest about finding asymmetry in gesture drawings?
-The script suggests that asymmetry, such as the tension between the squash and stretch sides of the torso or the contrast between straight lines and curves, adds visual interest and dynamism to gesture drawings, making them more gestural and less static.
How do pre-prepared and pose-specific curves contribute to gesture drawing?
-Pre-prepared curves provide a foundation that the artist can rely on, while pose-specific curves add unique details that are created by the particular pose, enhancing the gesture drawing by combining the expected with the unexpected.
What is the importance of surface lines, cross contour lines, or wrapping lines in gesture drawing?
-Surface lines, cross contour lines, or wrapping lines are important as they provide a way to maintain long, gestural curves even in foreshortened forms. They help clarify the form's direction and add to the dynamism of the gesture.
What role does mark making strategy play in gesture drawing?
-A mark making strategy, such as the type of grip or tool used, influences the variety and quality of marks an artist can make, which in turn affects the ability to capture the gesture effectively. It's one of the many tools an artist can use to enhance their gesture drawings.
Why is a risk mindset important when doing gesture drawings?
-A risk mindset is important because it encourages artists to make bold, confident marks without fear of failure. This confidence translates into the drawing, allowing for more dynamic and expressive gesture drawings.
What does the script suggest about the importance of practice in developing gesture drawing skills?
-The script emphasizes that understanding the theory is not enough; a sheer quantity of practice is necessary to build muscle memory and integrate the various ingredients of gesture drawing into one's skillset.
How does confidence play a role in creating effective gesture drawings?
-Confidence is crucial as it allows the artist to make bold, assured marks that convey a sense of certainty and mastery. This confidence in one's abilities enhances the gesture drawing and makes it more engaging for the viewer.
Outlines

Этот раздел доступен только подписчикам платных тарифов. Пожалуйста, перейдите на платный тариф для доступа.
Перейти на платный тарифMindmap

Этот раздел доступен только подписчикам платных тарифов. Пожалуйста, перейдите на платный тариф для доступа.
Перейти на платный тарифKeywords

Этот раздел доступен только подписчикам платных тарифов. Пожалуйста, перейдите на платный тариф для доступа.
Перейти на платный тарифHighlights

Этот раздел доступен только подписчикам платных тарифов. Пожалуйста, перейдите на платный тариф для доступа.
Перейти на платный тарифTranscripts

Этот раздел доступен только подписчикам платных тарифов. Пожалуйста, перейдите на платный тариф для доступа.
Перейти на платный тариф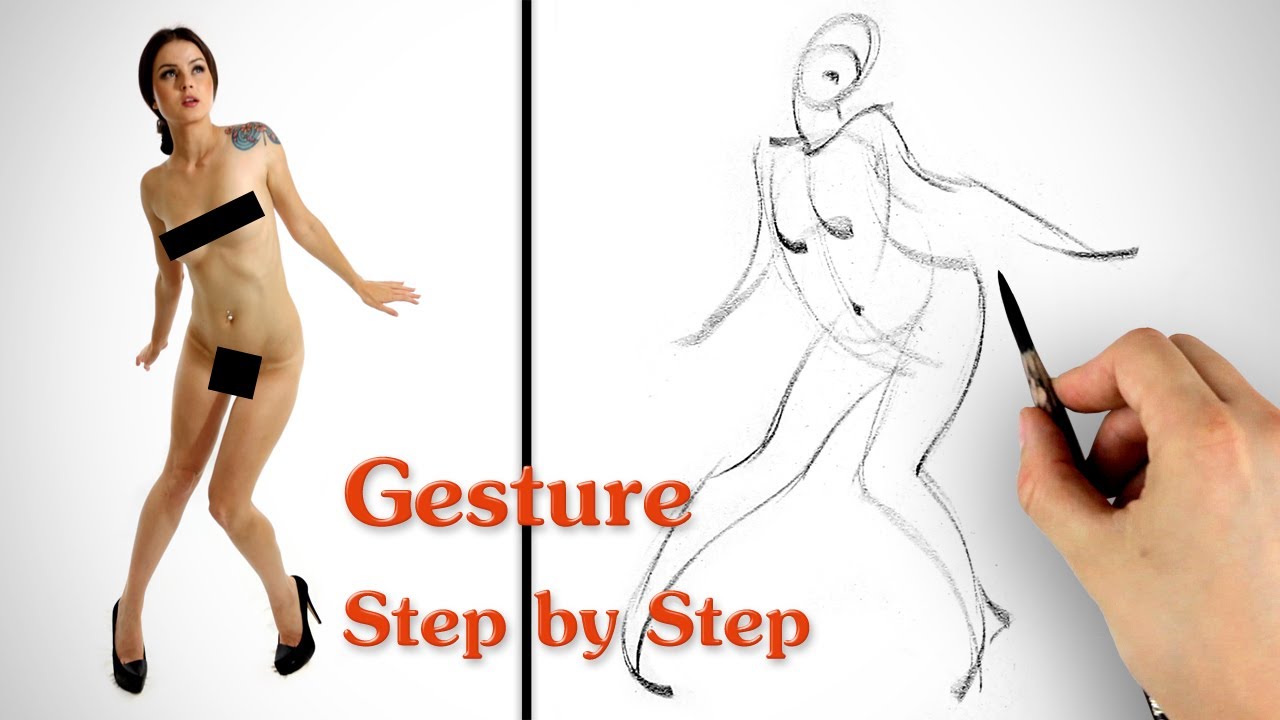


5.0 / 5 (0 votes)
