Amazon FBA: How To Send Your First Shipment To Amazon (Beginner Tutorial)

Jatz Naran
13 Oct 202213:33

Summary

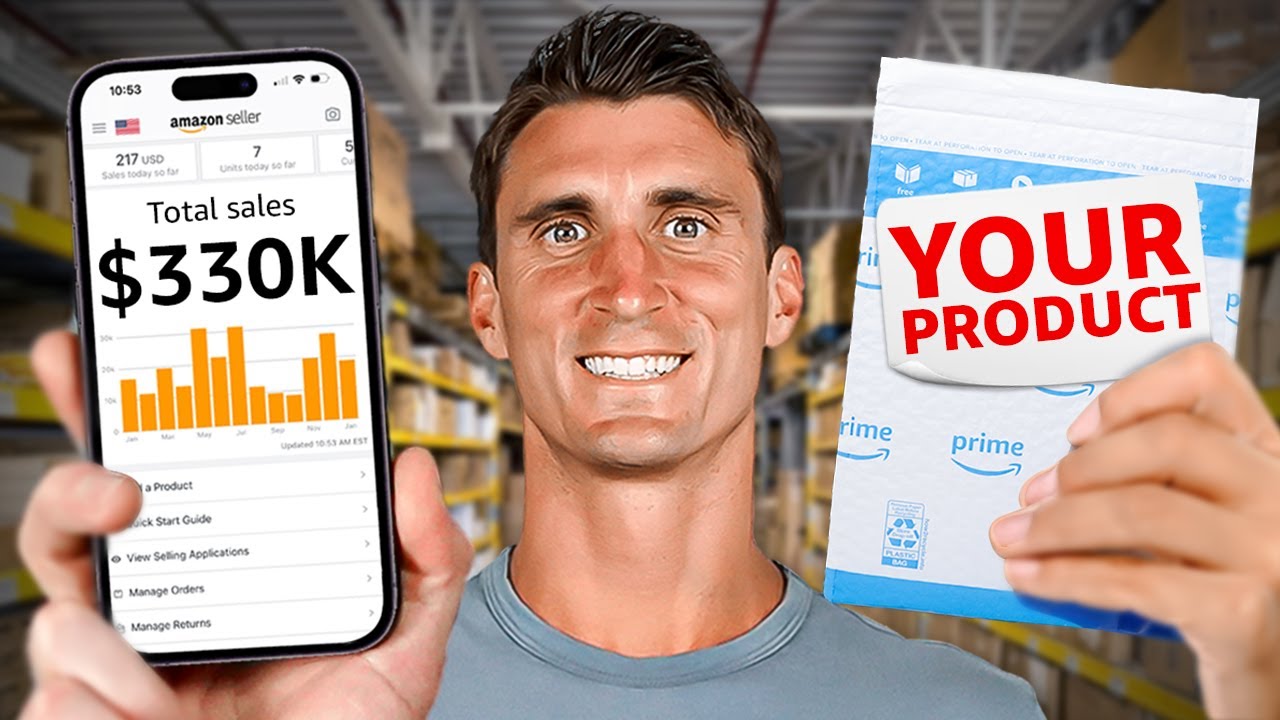
TLDRThis video tutorial guides viewers through the process of shipping their first Amazon FBA (Fulfillment by Amazon) product. It covers three key steps: preparing the shipment, creating a shipping plan, and scheduling a collection. The host demonstrates how to print and apply Amazon barcodes, pack products safely, and use the Amazon and UPS systems to plan and label shipments. The tutorial also promotes a free Amazon FBA Bootcamp for beginners and highlights the importance of accurate labeling to avoid losses.

Takeaways

  • 📦 Preparing the shipment involves labeling each unit with Amazon's barcode to avoid mix-ups and potential losses.
  • 🏷️ For products sold in packs, use a poly bag and label the bag instead of individual items to streamline the process.
  • 🔖 When printing labels, use the appropriate template available on Amazon and a standard printer for convenience.
  • 🛍️ Fragile items like glass or plastic should be bubble wrapped and placed in a poly bag for added protection during shipping.
  • 📏 Ensure boxes are within Amazon's size limits, which is under 63.5 centimeters in length, width, and height.
  • 📐 Measure and record the box's dimensions and weight, which are essential for creating a shipping plan on Amazon.
  • 🚚 Select a shipping carrier that is partnered with Amazon, such as UPS, to benefit from lower shipping costs.
  • 📅 Schedule a shipping plan on Amazon and choose a delivery date that suits your timeline.
  • 🔖 Print box labels, which are different from product labels, using the provided template and adhere them to the side of the box for visibility during transit.
  • ⏰ Schedule a collection with UPS using the tracking ID from Amazon to have your shipment picked up from your specified location.
  • 🔄 Amazon will handle the received shipment, including counting units and distributing them to customers upon orders.

Q & A

  • What is the purpose of the video?

    -The purpose of the video is to guide viewers step by step through the process of sending their first Amazon FBA (Fulfillment by Amazon) shipment using an example product.

  • What are the three main steps involved in sending an Amazon FBA shipment according to the video?

    -The three main steps are: preparing your shipment, creating a shipping plan, and scheduling your shipment for collection.

  • Why is it necessary to print Amazon's barcode labels for each product unit?

    -It is necessary to print Amazon's barcode labels to ensure that Amazon can easily identify and track each unit sent by the seller, which helps in avoiding confusion and potential losses in case of damages.

  • What is the recommended label template size for Amazon FBA shipments?

    -The recommended label template size is 27 labels per A4 sheet, which can be purchased on Amazon.

  • Can you send products in a pack of two without individual labeling?

    -Yes, if you are selling a product in a pack of two, you can place both units in a poly bag and label the bag instead of individually labeling each product.

  • What should be done if the product is made of fragile materials like plastic or glass?

    -For fragile products, they should be bubble wrapped, placed in a poly bag, sealed, and then labeled.

  • What is the maximum size for an Amazon FBA shipment box?

    -The maximum size for an Amazon FBA shipment box is 63.5 centimeters on all dimensions (length, width, and height).

  • Why is it recommended to stick the box label on the side of the box instead of the top?

    -It is recommended to stick the box label on the side to prevent damage to the label when boxes are stacked on top of each other during transportation.

  • What is the significance of the weight of the shipment box in the Amazon FBA process?

    -The weight of the shipment box is important for calculating shipping costs and ensuring that the box does not exceed the maximum weight limit of 23 kg for Amazon FBA.

  • How can one schedule a UPS collection for their Amazon FBA shipment?

    -To schedule a UPS collection, one can go to ups.com, navigate to schedule a collection, enter the tracking ID and package details, and then select the date and time for the collection.

  • What is the role of Osome mentioned in the video?

    -Osome is an e-commerce accounting company that helps with tax and bookkeeping for Amazon FBA businesses, providing an online platform for easy management of financial records.

Outlines

00:00

📦 Preparing Your First Amazon FBA Shipment

This paragraph introduces the process of shipping products to Amazon using the FBA program. It outlines three key steps: preparing the shipment, creating a shipping plan, and scheduling the shipment for collection. The video will guide viewers through these steps using an example product. Additionally, the speaker promotes a free Amazon FBA Bootcamp event and demonstrates how to print item labels for shipment, emphasizing the importance of using Amazon's barcode for easy identification and to avoid losses in case of damaged goods.

05:02

🔖 Labeling Products and Packing for Amazon FBA

The speaker continues by explaining the importance of labeling each product with Amazon's barcode to prevent confusion and potential losses. They also discuss the process of preparing products for shipment, such as using poly bags for products sold in pairs and bubble wrapping fragile items. The paragraph includes instructions for measuring and recording box dimensions and weight, which are necessary for creating a shipping plan. Additionally, the speaker mentions a sponsor, Osome, an e-commerce accounting company, and its benefits for managing Amazon FBA business finances.

10:03

🚚 Creating and Scheduling an Amazon FBA Shipment

This paragraph details the steps for creating a shipping plan on Amazon and scheduling a pickup with UPS. The process involves entering the ship from address, specifying the number of units being sent, and confirming packaging details with the previously measured box dimensions and weight. The speaker advises using UPS due to its partnership with Amazon, which results in lower shipping costs. After accepting the shipping charges, the speaker demonstrates how to print box labels and correctly apply them to the shipment box. The final step is scheduling a pickup with UPS using the provided tracking ID and following the online process to ensure the shipment is collected and delivered to Amazon.

Mindmap

Keywords

💡Amazon FBA

Amazon FBA, which stands for Fulfillment by Amazon, is a service offered by Amazon that allows sellers to store their products in Amazon's fulfillment centers, and Amazon handles the storage, packaging, shipping, and customer service. In the video, the main theme revolves around guiding sellers through the process of sending their first shipment to Amazon using the FBA program, highlighting its importance for those looking to sell on Amazon efficiently.

💡Inventory

In the context of the video, 'inventory' refers to the stock of products that a seller has on hand and is preparing to send to Amazon's fulfillment centers. The script mentions going to one's inventory as the starting point for preparing an FBA shipment, indicating the importance of managing one's stock before shipping to Amazon.

💡Barcode

A 'barcode' is a visual, machine-readable representation of data that is used to identify a product. In the video, it is explained that sellers need to place Amazon's barcode on their products, which is crucial for Amazon to identify and track the products during the shipping and storage process. The script provides an example of how to apply these barcodes to ensure proper identification by Amazon.

💡Poly Bag

A 'poly bag' is a type of packaging made from plastic material, which is used to group and protect products during shipping. The video script describes using a poly bag to package products sold in pairs, emphasizing its role in keeping items together and protected while also facilitating the application of Amazon's shipping labels.

💡Bubble Wrap

'Bubble wrap' is a packaging material used for cushioning and protecting fragile items during transport. The script mentions bubble wrap as a necessary step for products made of plastic or glass, illustrating its importance in preventing damage during the shipping process to Amazon's fulfillment centers.

💡Box Dimensions

The 'box dimensions' refer to the measurements of a shipping box, including its length, width, and height. The video script emphasizes the importance of ensuring the box size is under 63.5 centimeters for all dimensions to comply with Amazon's FBA requirements, showing the relevance of box size in the shipping process.

💡Weighing Scale

A 'weighing scale' is a device used to measure the weight of an object. In the context of the video, it is used to determine the weight of the box containing the products to be shipped to Amazon, which is a critical piece of information needed for creating a shipping plan and ensuring proper handling by the carrier.

💡Shipping Plan

A 'shipping plan' is a set of instructions and information required to prepare and send products to Amazon's fulfillment centers. The video script walks through the steps of creating a shipping plan, including adding the ship from address, specifying the number of units, and confirming packaging information, which is essential for a successful FBA shipment.

💡UPS

In the script, 'UPS' refers to United Parcel Service, a global shipping and logistics company. The video recommends using UPS for shipping to Amazon due to its partnership with Amazon, which can result in lower shipping costs. The script details the process of scheduling a UPS collection for the FBA shipment.

💡Tracking ID

A 'tracking ID' is a unique identifier assigned to a shipment, allowing sellers to track the progress of their package. The video script explains how to obtain a tracking ID for a UPS shipment and use it to schedule a package collection, demonstrating its importance in monitoring the shipment's journey to Amazon.

💡Osome

In the video, 'Osome' is mentioned as an e-commerce accounting company that helps with tax and bookkeeping for Amazon FBA businesses. The script describes Osome as a time-saving service that provides business performance reports and an easy-to-use online platform for handling bookkeeping tasks, illustrating its role in supporting the financial management of an Amazon FBA business.

Highlights

Introduction to the step-by-step process of sending the first Amazon FBA shipment.

Three key steps to sending an Amazon FBA shipment: preparing the shipment, creating a shipping plan, and scheduling the shipment for collection.

Announcement of a free Amazon FBA Bootcamp for potential sellers in the UK, US, and Canada.

Demonstration of how to print Amazon item labels using a standard printer and A4 label template.

Explanation of the importance of using Amazon's barcode for easy identification and to avoid losses.

Instructions for labeling products sold in packs, such as using a poly bag and a single label for multiple items.

Recommendation to bubble wrap fragile items like plastic or glass products before packaging.

Guidance on measuring box dimensions and weight for accurate shipping plans.

Details on creating a shipping plan in Amazon's inventory management system.

Sponsorship mention of Osome, an e-commerce accounting service for Amazon FBA businesses.

Process of confirming packaging information and dealing with warnings for non-standard products.

Explanation of choosing a shipping carrier like UPS due to partnership benefits with Amazon.

Demonstration of printing box labels and proper application on the package.

Instructions for scheduling a UPS collection from home or office for the FBA shipment.

Assurance that Amazon will handle the shipment once it arrives, including counting units and fulfilling customer orders.

Invitation for viewers to comment for further learning on Amazon FBA shipping.

Closing remarks with an invitation to watch additional beginner-friendly Amazon FBA videos.

Transcripts

play00:00

- So you have listed your first product

play00:01

on your Amazon account

play00:02

and now you're ready to ship off the product

play00:03

so you can take advantage of Amazon's FBA program.

play00:06

In this video, I'm gonna take you step by step

play00:08

through the entire process

play00:09

of sending your first Amazon FBA shipment,

play00:11

and I will do this by using this example product,

play00:13

which I've sold on Amazon.

play00:14

There are three steps

play00:15

that go into sending your first Amazon FBA shipment

play00:17

without any issues.

play00:18

Step one is to prepare your shipment.

play00:20

Step two is creating a shipping plan,

play00:22

and step three is to schedule your shipment for collection.

play00:26

Now I'm gonna break each of these one by one

play00:28

as simple as possible, so let's begin.

play00:30

By the way, I'm hosting a free 60 minutes

play00:31

Amazon FBA Bootcamp on the 25th of October

play00:34

at 7:00 p.m. UK time where I'll be sharing my story

play00:37

as well as how you can get started with Amazon FBA

play00:40

and how you can make 10,000 pounds per month on Amazon FBA.

play00:43

It'll be mainly beneficial

play00:44

for people in the UK, US, and Canada.

play00:46

So if you're from that country and you wanna join,

play00:48

you can go to the Luma event in the description box below

play00:50

and register right now, and I'll see you there.

play00:52

So once you're in your inventory,

play00:54

you'll go under the Edit button

play00:55

and then you'll be clicking on Print item labels, okay?

play01:00

Now once you're here, you simply need to put on the amount

play01:03

of labels you wanna print.

play01:03

So if you're sending in 10 units of this specific product,

play01:07

then you just put in 10 and that will provide you 10 labels.

play01:10

Now over here, you'll see the template for this label.

play01:13

So you can choose the 27 label template,

play01:15

which is an A4 sheet, which can be bought on Amazon.

play01:18

As you can see right here,

play01:19

you can get hundred sheets

play01:21

of this specific template for under 10 pounds.

play01:25

You can simply buy from Amazon,

play01:26

and then when you print, right,

play01:28

when you click on Print item labels,

play01:30

it will download the template automatically for 27 labels,

play01:34

which you can simply put in this paper

play01:38

right into your printer.

play01:38

It can be any normal printer.

play01:40

And then simply press the Print button

play01:42

and go ahead and print it,

play01:43

and it'll print exactly on these labels right here.

play01:47

Now as you can see, this is an example template of barcodes

play01:50

which I have printed off using a normal printer

play01:53

and I'm using a 44 label template from Amazon.

play01:57

So you can go ahead and buy this one if you want to as well.

play01:59

The next step here is to peel off each of the labels

play02:02

from the sheet right here,

play02:04

and you're going to stick

play02:05

on top of the existing barcode on the product.

play02:08

So I'm simply going to stick

play02:09

this barcode right here, all right.

play02:11

As you can see, one's done.

play02:13

Then I'm gonna peel off the second one,

play02:15

and I'm gonna stick it on the barcode right here as well.

play02:17

As you can see,

play02:18

this product now has the Amazon's barcode on it.

play02:20

You're gonna go ahead and do this exact same process

play02:22

with all the products you have.

play02:24

Now, some of you might have a question right now,

play02:25

which is that, "Jatz, this product

play02:26

already has a barcode on it,

play02:27

so why am I sticking Amazon's barcode?"

play02:30

Let me quickly explain that.

play02:30

So let's say I decided to send in four units of this product

play02:35

with the product barcode, right,

play02:37

not with Amazon's barcode.

play02:38

And you also decided to send in four units

play02:41

of this exact same product

play02:43

without putting Amazon's barcode on it.

play02:45

Now, once it reaches off to Amazon

play02:46

and when the Amazon employees are putting my product

play02:49

from the box into their shelves, right,

play02:51

if the four units which you sent to Amazon are damaged

play02:53

and the four units which I sent to Amazon are fine,

play02:56

then Amazon won't know whose units are whose

play02:58

because if they have Amazon's barcode,

play03:00

they can identify easily who the product is sent by.

play03:04

But if they don't have Amazon's barcode on it,

play03:06

they could get confused between whose product is it

play03:08

and they'll just write the four damage units

play03:10

under your name and you'll make a loss.

play03:12

And that is the reason why it's important

play03:14

you label every single unit of your product

play03:16

with Amazon's barcode.

play03:18

Another key thing I want you guys to know

play03:19

is that if you are selling a product in a pack of two,

play03:22

then you don't have to individually label each product.

play03:26

You are going to simply put it in a poly bag.

play03:28

As you can see right here,

play03:30

this is a poly bag which you can buy off

play03:32

using the link in the description.

play03:33

It's not sponsored,

play03:34

but I'll just put the link in the description,

play03:36

which you can buy off.

play03:37

You're going to simply put these two units in a poly bag.

play03:41

As you can see, one unit.

play03:42

That is one of the best example of poly bag I have got here

play03:46

because I use it for some other products.

play03:48

But once that's done, you're going to simply peel off

play03:51

and close the poly bag off, and this is done.

play03:55

Now, once you put in a poly bag,

play03:57

then you are going to go ahead

play03:58

and peel off the label from the labels you have

play04:01

and you're gonna stick it onto the poly bag.

play04:04

This is one unit, right?

play04:05

So this is what you're gonna do

play04:06

if you're selling in a pack of two.

play04:08

You don't have to individually label the product.

play04:10

But in this case, I'm gonna remove it from the poly bag.

play04:13

See, I'm wasting all this money just to show you guys,

play04:16

so make sure you leave a like right now

play04:18

and subscribe, okay,

play04:19

as it will help me with the YouTube algorithm.

play04:20

Anyway, let's continue.

play04:22

And if your product is made of plastic or glass,

play04:24

you'll need to bubble wrap the product.

play04:25

Now, the same website, which I have link the description

play04:27

where you can buy these poly bags from,

play04:29

you can also buy the bubble wraps.

play04:30

And once you've got the bubble wrap,

play04:31

you can cut it into small pieces

play04:33

and wrap it around the product

play04:34

and then you can put it in a poly bag

play04:36

and then close the poly bag off

play04:38

and stick the label on top of that.

play04:40

The product has now been labeled

play04:41

and it's time to box the label.

play04:43

So you can get any size box

play04:45

as long as it's less than 63.5 centimeters

play04:49

from all dimensions.

play04:50

So you can get a measurement tape like this one right here

play04:52

and then you can simply measure it to make sure

play04:55

it's less than 63.5 centimeters from all angles

play04:59

and that is length, width, height, okay?

play05:01

If you don't know what that is,

play05:03

I'm gonna put an image right now,

play05:04

which you can see the angles you need to measure from.

play05:06

Now, once I put all the products in the box,

play05:08

I'm gonna close the box and I'm gonna tape the box.

play05:12

Once the box has been sealed, you need to simply go ahead

play05:14

and measure the size of the box.

play05:16

So as you can see this from this angle is 29 centimeter.

play05:19

From this angle, it is 23 centimeter.

play05:22

And from this angle

play05:23

or I can take a measurement from here.

play05:26

From this angle, it is 13 centimeter, okay?

play05:29

That's something I can write down on the actual box,

play05:32

which I can't.

play05:33

I'm gonna make the note on my phone

play05:34

which was 29 by 22 by 13.

play05:38

And the next piece of information I need to collect

play05:40

is the weight of the box.

play05:41

So I've got this weighing scale from Amazon,

play05:43

which I will, again, leave in the description box below.

play05:46

All I have to do is simply put the box on top of it

play05:49

and I can see is 1.1 kg.

play05:51

And I will also put that information on my phone

play05:53

because that's something I will need for the next step,

play05:56

which we're moving onto,

play05:57

which is to creating a shipping plan.

play05:59

Here's a quick word from our sponsor

play06:01

for today's video, Osome.

play06:02

Osome is an e-commerce accounting company

play06:04

that I've been using for almost a year now,

play06:06

which helps me do my taxes

play06:08

for my Amazon FBA business as well as my bookkeeping.

play06:11

When running an Amazon FBA business,

play06:12

time is your biggest constraint,

play06:14

and luckily, Osome gives me back so much time

play06:16

by providing me reports on how my business is doing

play06:18

so I don't have to worry

play06:20

and sit down trying to go through all the transactions

play06:23

to see how my business is performing.

play06:24

They're really easy to use online platform

play06:26

where I simply drag and drop invoices

play06:28

and they will handle the bookkeeping for me.

play06:30

I can also speak to the accountants directly

play06:32

through the platform, which makes my life a lot easier.

play06:34

They currently have an offer where you can register

play06:36

a limited company with one pound

play06:38

and they'll provide you two months of accounting for free.

play06:41

You can get this offer

play06:42

by simply using the link in the description.

play06:44

Anyway, now let's move on with the video.

play06:46

In order to create your shipping plan,

play06:47

you simply need to go to inventory

play06:48

and click on the dropdown button again

play06:50

and click on Send/Replenish inventory.

play06:54

When you click on that,

play06:55

now to create a shipping plan,

play06:56

you need to complete this step one, this step two,

play06:58

and this step three.

play06:59

So in step one,

play07:00

if you're doing the shipping plan for the first time,

play07:02

then you will need to add the ship from address.

play07:04

And once it's added, it'll stay there forever.

play07:06

Then you'll need to go ahead

play07:08

and simply put in the number of units you are sending.

play07:11

So in our case, we are sending 10 units, okay?

play07:13

Now the shipping plan I'm creating for the product

play07:15

is not the same as the product we have bought

play07:17

because, once again, that was an example product

play07:19

and this is a different example product.

play07:21

However, the process for all products is the same.

play07:23

So simply put in the number of units you're sending,

play07:25

then click on Ready to pack, okay?

play07:28

If the product needs any type of preparation,

play07:30

such as bubble wrapping or anything,

play07:32

it will show you right here resolve

play07:33

that the product needs some type of preparation.

play07:36

So you have to ensure you do that

play07:38

or else Amazon will send your products

play07:40

back to you again, all right?

play07:42

Once you added the number of units,

play07:43

you can actually go ahead

play07:45

and print your labels from here as well.

play07:47

But because I already shown you guys

play07:48

and you already prepared your shipment,

play07:50

you don't need to do that.

play07:51

You can then click on Pack individual units.

play07:52

Now on step 1b, you need to put in the box details.

play07:56

So in our case, we are sending everything in one box.

play07:58

Even if you're sending multiple boxes,

play08:00

the process is literally the same, okay?

play08:01

So I'm gonna choose Everything will fit into one box

play08:04

and then Confirm.

play08:04

Now, when we are preparing the shipping plan,

play08:06

we did take in the box dimension and the box weight.

play08:08

So the box dimension was 29 by 22 by 13

play08:13

and the box weight was 1.1 kg.

play08:15

So we're gonna do that

play08:16

and then we are gonna confirm the packaging information.

play08:19

The reason why I'm getting these warnings

play08:20

is because, again, the product is different

play08:22

to the one we have just used as an example one.

play08:25

So don't worry about the warnings.

play08:26

The only warning you need to worry about

play08:28

is if the box you are sending to Amazon

play08:31

weighs more than 15 kg,

play08:34

you'll need to stick a warning label

play08:36

saying heavy package, which you can go on Google

play08:38

and simply find a Google image of it

play08:40

and print it and stick on all four sides of the box.

play08:43

This is exactly what I've done.

play08:44

As you can see, I have just printed this on an A4 sheet,

play08:47

which is obviously a sticker one right here.

play08:49

So I can peel off and stick on all four sides of the box

play08:52

if the box weighs more than 15 kg.

play08:55

Also, the box cannot weigh more than 23 kg

play08:58

so make sure the box is always under,

play09:00

to be on the safe side, always under 22 kg.

play09:02

In step two, I simply need to choose the date

play09:04

I wanna send the product on.

play09:06

So in my case, I'm gonna choose tomorrow.

play09:08

I'm gonna choose small parcel delivery

play09:09

because I'm not sending a pallet,

play09:11

and right here, it will tell me the charge of this shipment.

play09:14

Now, I will always use UPS

play09:16

because UPS is partnered with Amazon,

play09:18

which is the reason why the cost of sending

play09:20

a product to Amazon is a lot cheaper

play09:22

compared to using non-Amazon partnered carrier

play09:25

like DHL, Royal Mail, Yodel, or any others.

play09:28

So that's why I'm always gonna stick to UPS.

play09:30

After checking all the information,

play09:32

I'm simply gonna agree with the charges

play09:34

and I'm gonna press Accept charges and continue.

play09:37

And finally, we're in step three,

play09:39

which is to simply print box labels.

play09:41

Box label is different to product labels,

play09:43

and I will show you an example one in a bit.

play09:45

But the template of the box label

play09:46

you'll be choosing is this one right here,

play09:48

99.1 times by 139 mm

play09:51

and then you're simply going to press Print

play09:53

and it will show you this right here.

play09:56

Now, once again, you can go on Amazon

play09:59

and buy a sticky label, A4 sheet, which two labels.

play10:02

I can show you an example right now.

play10:04

So we'll just go A4, two labels.

play10:08

As you can see, this is an example right here,

play10:10

which you can buy off, is once again 100 sheets

play10:13

which means there are 200 labels.

play10:15

And you can simply go ahead and print this

play10:17

and it will look exactly like this right here,

play10:21

as you can see.

play10:22

As you can see, this has been printed on the sticky label

play10:24

which I'm gonna show you guys how to stick on the box now.

play10:27

So once you've printed off the label,

play10:29

you are gonna simply go ahead and peel off the label

play10:31

from the actual, sorry for that, from the actual sheet

play10:36

and then you're gonna stick it on the side of the box.

play10:40

So as you can see, this is the side of the box

play10:42

and I'm gonna simply print,

play10:44

and, I'm sorry, I'm simply gonna stick it right here.

play10:46

The reason being is because if you stick on top of the box

play10:50

and when UPS are stacking it one on top of each other,

play10:53

the label might get damaged

play10:54

and your shipping might be lost.

play10:55

And that is why Amazon always recommends

play10:57

you stick it on the side of the box.

play10:58

I'm gonna do the same with the second label

play11:01

and I'm gonna go ahead on the other side

play11:03

and I'm gonna stick it right here, as you can see,

play11:07

and I've stuck it.

play11:08

I just want to ensure

play11:09

that the barcode is clear for UPS to scan

play11:11

and that is the only thing I need to worry about.

play11:13

And there you go, guys.

play11:14

My first shipment has been prepared,

play11:16

and I've created a shipping plan for my product.

play11:20

Now my box is completely done.

play11:22

I've got the label on it, I've got the products inside,

play11:24

I've got the products labeled, everything.

play11:26

Now moving on to the final step,

play11:28

which is to scheduling your parcel to be collected

play11:31

from your home or wherever you want it to be collected from.

play11:34

So to get started with step three,

play11:35

we are gonna continue from step two

play11:37

and simply go to View tracking details.

play11:40

And when you click on that,

play11:42

this is the tracking ID for your UPS shipment.

play11:44

You're gonna copy the tracking ID,

play11:46

then you're gonna go on ups.com,

play11:48

which you can go right here from.

play11:50

So once you're in ups.com,

play11:52

go to, well, you can accept the cookies, if you wish to,

play11:56

go to shipping.

play11:58

Then you're gonna do schedule a collection, right?

play12:01

Now, right here,

play12:02

you're gonna put all the information, right?

play12:04

You're gonna first select yes,

play12:05

you have a pre-printed UPS shipping label

play12:07

because that's the one we just stuck on the actual box.

play12:10

Now here you're gonna print,

play12:11

I mean you are gonna paste the tracking ID.

play12:14

Next you're gonna put in your detail,

play12:16

so that could be your home address or your office address.

play12:19

Once you added that, you're gonna move to the third part

play12:21

which is adding your package information.

play12:24

So if you're sending 10 boxes,

play12:26

each box weighs 10 kg, then you're gonna select 10,

play12:29

and you're gonna put 100 kg

play12:30

because your total collection weight is 100.

play12:33

If it's more than 30 kg, just press yes

play12:35

because it will help the UPS drivers know

play12:37

how much load they need to carry out from your place.

play12:40

And then when you scroll down,

play12:41

you simply need to put in the date

play12:43

when you want UPS to collect it from your home.

play12:46

Usually, you can schedule them

play12:47

to collect your shipment the next day.

play12:49

So you can literally put, if today is Tuesday,

play12:52

I can put Wednesday and they will come.

play12:53

And then I simply need to go press Next and then Confirm.

play12:56

And the next page

play12:57

is simply going to be a confirmation page

play12:59

where you confirm all the details are correct

play13:01

and that is done.

play13:02

Then you sit back,

play13:04

wait for UPS to come collect your shipment from your home

play13:08

and they will take care of the rest.

play13:09

Once it's reached Amazon, Amazon will open your box.

play13:13

They will count how many units you have sent,

play13:14

and then they will send it to your customers

play13:16

whenever someone orders the product from you.

play13:18

Now that you know how to send your first shipment to Amazon,

play13:21

there might be few other things

play13:22

you might want to learn in detail.

play13:23

So just leave it down in the comment section below.

play13:25

But if you're a complete newbie to Amazon,

play13:27

then go watch this video on how to get started,

play13:29

and I'll see you in the next video.

play13:30

Take care. Have an amazing day, and peace.

Rate This

5.0 / 5 (0 votes)

関連タグ
Amazon FBAShipping GuideProduct LabelingInventory ManagementUPS CollectionE-commerce TipsOnline SellingFBA BootcampPackaging AdviceSelling on Amazon
英語で要約が必要ですか?