Cara Membuat Vector Kartun Simple yang Aesthetic di Photoshop
Summary
TLDRThis tutorial guides viewers through creating a simple vector illustration similar to those found in the GOR Lex Project. Starting with a 3000x3000 pixel canvas in Photoshop, the video demonstrates adding a photo, using the pen tool to trace the body, and creating a new layer for coloring. It covers applying base skin color with the paint bucket tool and adjusting shadows and highlights for depth. The tutorial also suggests coloring the background and concludes with saving the project in JPG or PSD format. For those needing assistance, the video offers the option of hiring a tutor and encourages following the instructor's Instagram for more tips.
Takeaways
- 🌟 Start by opening Photoshop and creating a new canvas with dimensions 3000 x 3000 pixels and a resolution of 72.
- 🖼️ Drag and drop the photo you want to edit into the project, using it as a reference for creating the vector.
- 🎨 Create a new layer and name it appropriately, such as 'Layer', to work on the vector without affecting the original photo.
- 🖌️ Use the Brush tool (shortcut B) to adjust the brush size and start drawing on the new layer.
- ✏️ Select the Pen tool (shortcut P) to draw a path that follows the outline of the body, which will be used to create the vector shape.
- 🔗 Right-click and choose 'Stroke Path' to apply the brush stroke to the path you've drawn, effectively tracing the outline.
- 🖍️ Copy the layer (Control + J) and name it 'Color' to apply the base color, such as skin color, using the Paint Bucket tool (shortcut B).
- 🌑 Create shadows by copying the photo layer, adjusting the image to enhance the shadows, and using a darker color than the base color with the Pen tool.
- 🌟 Apply highlights by using a lighter color than the base color, following the same process as for creating shadows.
- 🖼️ Optionally, color the background by selecting a color and using the Paint Bucket tool after pressing the black space bar.
- 💾 Save your completed simple vector in formats like JPG or PSD, and consider using professional services for more complex vector creations.
Q & A
What is the main topic of this tutorial?
-The main topic of this tutorial is how to create a simple vector image similar to those found in GOR Lex projects.
Which software is used for this tutorial?
-Photoshop is the software used for this tutorial.
What is the recommended canvas size for starting the project?
-The recommended canvas size is 3000 x 3000 pixels.
What is the resolution set for the canvas in this tutorial?
-The resolution is set to 72.
How do you add a photo to the project in Photoshop?
-You drag and drop the photo into the Photoshop workspace to add it to the project.
What is the first step after adding the photo?
-The first step is to create a new layer for editing.
What tool is used to create the outline of the body in the tutorial?
-The Pen Tool (P) is used to create the outline of the body.
How do you make the brush follow the path created with the Pen Tool?
-You right-click and select 'Stroke Path', then choose the brush tool and click OK.
What is the purpose of creating a new layer named 'color'?
-The new layer named 'color' is used to apply the base color to the image.
How do you adjust the brightness and contrast of the image in this tutorial?
-You copy the photo layer, then go to Image Adjustments and select 'Levels' to adjust the brightness and contrast.
What is the method for creating shadows and highlights in the image?
-You create shadows by choosing a darker color and using the Pen Tool, and create highlights by using a lighter color.
How do you finalize the vector image in the tutorial?
-You finalize the vector image by coloring the background, saving the file in JPG or PSD format, and possibly using additional services if needed.
Where can viewers find more information or services related to this tutorial?
-Viewers can find more information or services by visiting the Instagram account @GOR Lex Project.
Outlines

このセクションは有料ユーザー限定です。 アクセスするには、アップグレードをお願いします。
今すぐアップグレードMindmap

このセクションは有料ユーザー限定です。 アクセスするには、アップグレードをお願いします。
今すぐアップグレードKeywords

このセクションは有料ユーザー限定です。 アクセスするには、アップグレードをお願いします。
今すぐアップグレードHighlights

このセクションは有料ユーザー限定です。 アクセスするには、アップグレードをお願いします。
今すぐアップグレードTranscripts

このセクションは有料ユーザー限定です。 アクセスするには、アップグレードをお願いします。
今すぐアップグレード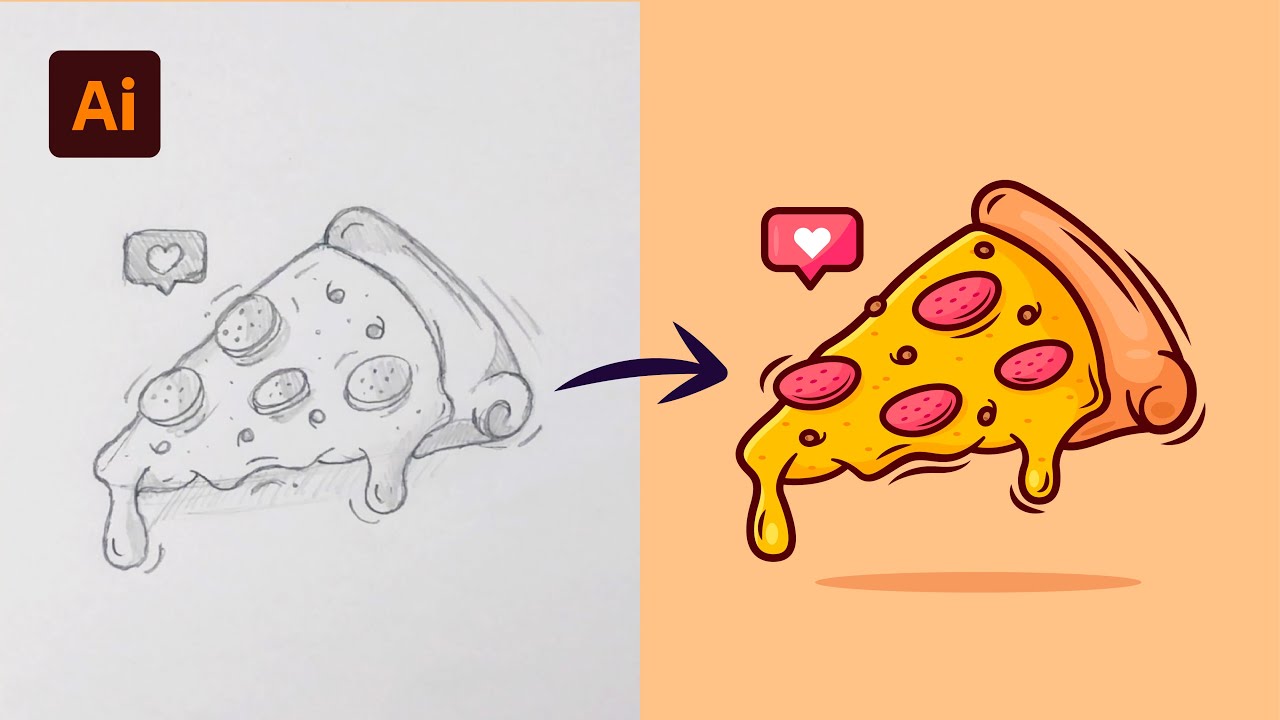


5.0 / 5 (0 votes)
