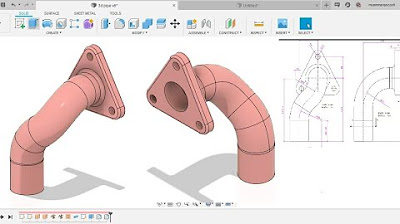
Computer Mouse Surface Modelling in Creo 3.0 | Creo Beginner Tutorial 2021
Summary
TLDRThis tutorial walks users through the process of creating a 3D model of a computer mouse using CAD software. It covers essential steps including sketching the base shape, extruding surfaces, trimming unwanted areas, and applying features such as rounding sharp edges and creating the scroll wheel. The video also details the process of adjusting planes, drawing reference curves, and merging surfaces to create a seamless design. Aesthetic enhancements like coloring the model are also included. The tutorial is ideal for users interested in mastering CAD design tools like Creo, SolidWorks, and CATIA.
Takeaways
- 😀 Start by setting up your units and creating a basic rectangle shape with specified dimensions.
- 😀 Use the 'Extrude' command to create the base surface, making sure to extrude symmetrically using a mid-plane.
- 😀 Adjust the reference planes and sketch curves as needed to shape the model.
- 😀 Draw reference curves using splines for accurate design details, and mirror curves when necessary.
- 😀 Trim and refine surfaces using the cutting element, ensuring the direction and placement are correct.
- 😀 Merge all surfaces into a single, seamless model using the 'Match' command.
- 😀 Apply rounds to smooth sharp edges and refine the model's overall shape with specified radius values.
- 😀 For the scrolling button, create a centerline and draw a circular profile for accurate design.
- 😀 Apply colors and appearances to surfaces for a polished, aesthetic finish.
- 😀 Always hide unnecessary planes to focus on the key parts of the model and clean up the workspace.
- 😀 After completing the model, ensure all features are aligned and ready for final adjustments or rendering.
Q & A
What is the first step in creating a 3D mouse model in the CAD software?
-The first step is to click 'OK' and select the 'Airplane' tool, then draw a rectangle with the required dimensions based on your specifications.
How do you extrude the base shape in this tutorial?
-To extrude the base shape, select the 'Extrude' command, set the extrude type to 'Surface,' and specify the thickness. Ensure the extrude is centered on the 'Mid Plane' before confirming with 'OK.'
What is the purpose of moving the planes in this process?
-The planes are moved to align with the equipment specifications, adjusting the datum to ensure proper alignment for subsequent operations.
How do you create the reference curves needed for the design?
-To create reference curves, select a plane, sketch reference points, then draw a spline based on those points. Afterward, click 'OK' to confirm the curves.
What does the 'Boundary Blend' option do in this tutorial?
-The 'Boundary Blend' option is used to create surfaces by combining the selected curves, helping to generate a smooth transition between them.
How do you trim unwanted surfaces in the model?
-To trim unwanted surfaces, use the 'Trim' command, select the surfaces to be trimmed, choose the cutting element, and adjust the flip direction as needed. Click 'OK' to finalize the operation.
What is the purpose of mirroring the curves in this process?
-Mirroring the curves along the midplane ensures symmetry in the design, which is essential for creating balanced and proportional components.
How do you generate and manage intersections between surfaces?
-You can generate intersections by selecting the 'Intersect' tool, which creates intersection points between surfaces. Unnecessary intersections can be deleted using the design tree options.
What is the role of the 'Round' tool in this tutorial?
-The 'Round' tool is used to smooth sharp edges by applying a rounded corner. You can specify the radius for the round based on your design requirements.
How do you apply color and appearance changes to the 3D model?
-To apply color and appearance, go to the 'Appearance' settings, select the surfaces you want to modify, choose the desired color, and click 'OK' to apply the changes.
Outlines

このセクションは有料ユーザー限定です。 アクセスするには、アップグレードをお願いします。
今すぐアップグレードMindmap

このセクションは有料ユーザー限定です。 アクセスするには、アップグレードをお願いします。
今すぐアップグレードKeywords

このセクションは有料ユーザー限定です。 アクセスするには、アップグレードをお願いします。
今すぐアップグレードHighlights

このセクションは有料ユーザー限定です。 アクセスするには、アップグレードをお願いします。
今すぐアップグレードTranscripts

このセクションは有料ユーザー限定です。 アクセスするには、アップグレードをお願いします。
今すぐアップグレード5.0 / 5 (0 votes)


