3D High Poly - Blender

Intan Permata Sari
27 Sept 202110:30

Summary

TLDRThis tutorial walks viewers through creating a 'Habibie move' with a cylinder object in a 3D modeling software. It covers adding a cylinder, adjusting its properties, and using modifiers to manipulate its shape. The process includes extruding, using X-ray view for better visibility, and mirroring features. The tutorial also shows how to add details like handles and improve the object's appearance for a more natural look by refining edges and vertices.

Takeaways

  • 🔧 The tutorial demonstrates how to create the 'Habibie move' using a cylinder object.
  • 🗑️ The tutorial starts by deleting an existing object and adding a new cylinder using the keyboard shortcut 'Shift'.
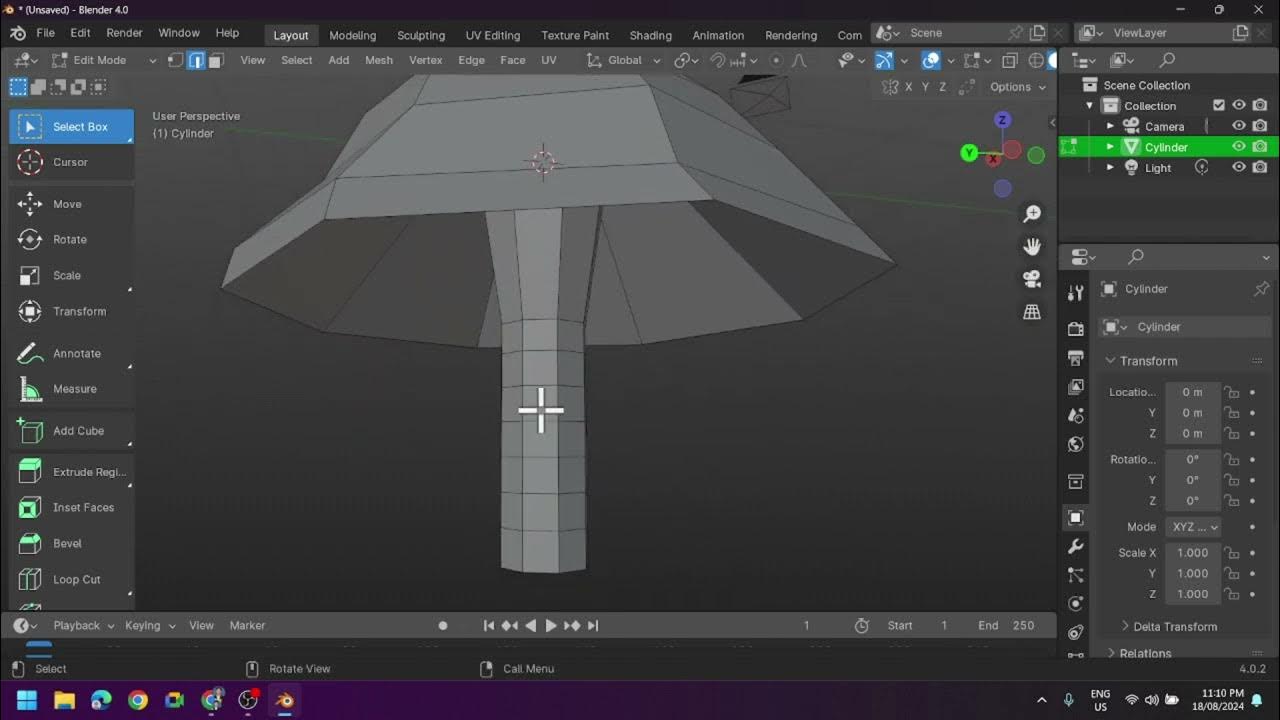
  • 🔺 The speaker uses 15 polygons for the cylinder and edits the top and bottom of the cylinder in edit mode.
  • 🛠️ Extruding the cylinder is done by pressing 'E', and thickness adjustments are made using a manual method instead of modifiers.
  • 🔍 The x-ray view feature is used to better visualize the inner parts of the object during editing.
  • ✂️ The tutorial includes a process of cutting the object and using the mirror feature to create symmetrical parts.
  • 🔄 The handle of the cup is created by selecting the sides and extruding, followed by rotating along the Y-axis.
  • 🖱️ Polygon subdivision is applied to smooth the 3D object, increasing the level of detail.
  • 🎨 The object is edited to look more natural, adjusting its appearance and refining the handle.
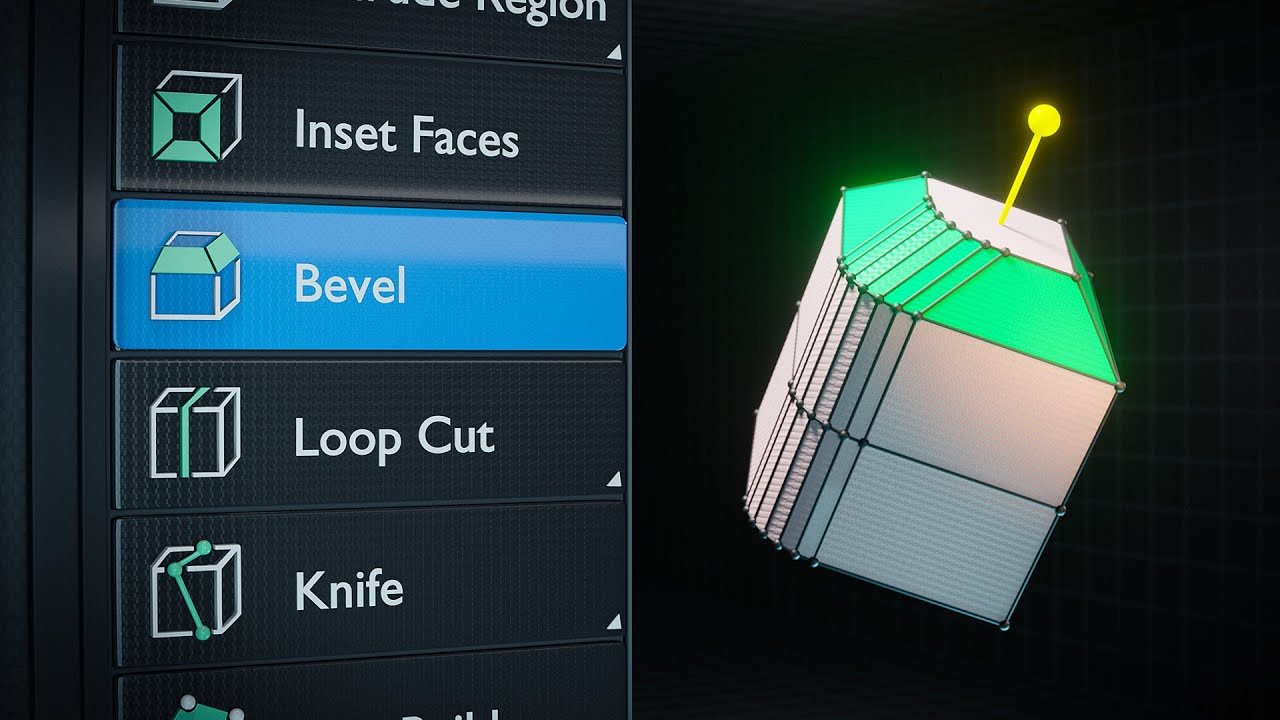
  • 🕳️ The 'knife' tool is introduced to create holes or cuts in the object, with examples shown on a multi-layered surface.

Q & A

  • What is the main purpose of this tutorial?

    -The tutorial aims to teach how to create and modify a 3D object in the shape of a cup using tools such as cylinders, polygons, and mirror functions.

  • What object is used as the base shape for creating the cup?

    -A cylinder object is used as the base shape for creating the cup.

  • How is the top and bottom of the cylinder removed?

    -The top and bottom of the cylinder are removed by selecting and deleting the upper and lower faces while in edit mode.

  • What is the purpose of using the extrude function in this process?

    -The extrude function is used to add thickness to the walls of the cup and to modify the shape of the object.

  • How can the thickness of the cup be manually adjusted?

    -The thickness of the cup can be adjusted by selecting the outer face and scaling it using the extrusion tool and adjusting the size manually.

  • What tool is used to ensure that the cup’s sides are aligned symmetrically?

    -The mirror modifier is used to align the sides of the cup symmetrically.

  • How can polygons be added to the 3D object to smooth the model?

    -Polygons can be increased using the subdivision surface modifier, which makes the object smoother and more detailed.

  • What method is used to make the handle of the cup?

    -The handle is created by selecting a part of the object, extruding it, and then rotating it along the Y-axis to form the handle shape.

  • How can the sharp edges of the object be smoothed out?

    -Sharp edges can be smoothed by selecting the object and applying a 'shade smooth' option from the object menu.

  • What feature allows for cutting or creating holes in the object?

    -The 'knife' tool allows the user to cut or create holes in the 3D object by selecting parts of the surface and using the knife tool to make precise cuts.

Outlines

00:00

🛠️ Creating a Basic Object with Extrusion

In this paragraph, the tutorial begins by explaining how to create a basic 'Habibie move' using a cylindrical object in 3D software. The user is guided through adding a cylinder, modifying it by deleting its top and bottom, and extruding the object using tools like 'extrude oil' and 'ST center'. The paragraph also covers techniques for thickening the object manually without adding extra polygons, and how to use features like x-ray view to visualize the object better.

05:00

🔧 Refining the 3D Object and Adding a Handle

This part focuses on further refining the 3D object by adding a handle. The user is instructed to extrude along the y-axis and rotate the object to shape the handle. Polygon count is increased to smoothen the object using amudi file properties. The process includes enhancing the appearance of the handle and adjusting its natural look. Instructions are also given for eliminating visible polygon lines by selecting the 'smooth' option in the object settings.

10:02

🕳️ Using Mirror and Knife Tools to Modify the Object

This section explains how to apply the mirror tool to modify and align the object’s parts. The tutorial also introduces the knife tool, allowing users to cut holes in the 3D object. However, the result is not entirely visible due to the object’s thickness. Despite this, the process successfully demonstrates how to create layered objects and prepare them for further modifications in the next tutorial.

Mindmap

Keywords

💡Cylinder Object

A cylinder object refers to the 3D shape used as the base model in the tutorial. It is a simple geometric figure that forms the foundation for creating more complex models, such as the cup in this video. The script mentions adding a cylinder object by using a keyboard shortcut and modifying its properties to fit the desired shape.

💡Polygon

A polygon in 3D modeling refers to the flat, multi-sided shapes that make up a 3D object. In the script, the instructor adjusts the polygon count to 15, which impacts the smoothness and complexity of the object. Fewer polygons create a more angular object, while more polygons make it appear smoother.

💡Edit Mode

Edit Mode is a feature in 3D modeling software that allows the user to modify specific aspects of the object, such as vertices, edges, and faces. The script guides the user to switch to Edit Mode to remove certain elements of the cylinder, like the top and bottom faces, to start shaping the object into a cup.

💡Extrude

Extrusion is a common 3D modeling technique that extends a shape along a path, creating new geometry from existing vertices. In the tutorial, the user extrudes parts of the object to build the sides of the cup and to form the handle. It’s a crucial step in shaping the 3D model.

💡X-ray View

X-ray View is a visualization tool that allows the user to see through objects in the 3D workspace. This feature helps the user look at the internal structure of the object to better understand and edit areas that might be obscured by outer surfaces. The script mentions enabling X-ray mode to adjust the thickness of the cup more easily.

💡Modifier

A modifier in 3D modeling software is a non-destructive tool that allows for alterations to an object, such as smoothing or thickening, without permanently changing the original geometry. In this case, the tutorial refers to a 'solidify' modifier, which is used to adjust the thickness of the object. However, the instructor opts for manual adjustments instead of using this feature.

💡Scale

Scaling refers to resizing the 3D object or parts of it in the modeling process. In this tutorial, the user adjusts the size of certain parts, like the handle of the cup, by scaling them to achieve the desired proportions. This technique is frequently used to ensure all elements of the 3D model look cohesive.

💡Mirror

The Mirror function allows the user to create a symmetrical duplicate of an object or part of an object along a chosen axis. The tutorial demonstrates the use of a mirror to duplicate the object’s shape and align it symmetrically, ensuring both sides of the model are identical without manual duplication.

💡Subdivision Surface

Subdivision Surface is a modifier that increases the number of polygons on an object, making it smoother. This tutorial mentions using a 'subdivision surface' to make the cup and its handle appear more polished and realistic by increasing the polygon count without manually altering the geometry.

💡Knife Tool

The Knife Tool is used to cut and add new edges to an object, allowing for more precise control over its geometry. In this tutorial, the Knife Tool is used to create holes or cuts in the object, such as creating a more detailed handle for the cup. It enhances the flexibility and detail of the model.

Highlights

Introduction to creating the 'Habibie move' using a cylinder object.

Deleting the top and bottom faces of the cylinder in edit mode.

Using extrude function (E key) to create additional geometry for shaping the object.

Applying the modifier property 'Solidify' to increase object thickness without adding polygons.

Scaling the object manually to adjust its thickness after extruding.

Enabling X-ray mode to view internal parts of the object.

Cutting parts of the object and using the mirror feature for symmetrical design.

Adding a handle to the cup by extruding and rotating along the Y-axis.

Smoothing the object by increasing the number of polygons using subdivision surface modifier.

Refining the handle design by rotating and scaling to make it more natural.

Applying the 'Shade Smooth' feature to remove visible polygon edges for a smoother surface.

Demonstrating the knife tool for cutting and creating holes in the 3D object.

Dealing with challenges of working with multi-layered objects when using the knife tool.

Previewing the final object after applying all adjustments and modifications.

Concluding the tutorial and moving on to the next steps.

Transcripts

play00:00

Hai

play00:02

[Musik]

play00:16

lanjut ke tutorial selanjutnya disini

play00:19

kita akan membuat Habibie move walau

play00:24

dengan

play00:25

memoqq

play00:27

memulainya pada objek silinder kita coba

play00:31

saja hapus objektif disini lebih kita

play00:34

tambahkan objek silinder atau tekan

play00:38

shift pada keyboard tegak linder disini

play00:42

lalu kita pilih lalu banyak oleh ibunya

play00:45

akan kita gunakan di sini Bu akan

play00:47

menggunakan

play00:48

lalu 15 Polygon saja

play00:52

Lalu kita kembali ke edit mood dan kita

play00:58

hapus atau Hai

play01:00

Azizi atas dan bawah pada

play01:09

wus

play01:11

katkan lele dari salvage tekan

play01:15

txx

play01:18

pesta kemudian kita seleksi bagian bawah

play01:21

Khan teksnya atau menekan

play01:25

maalun 1health eh lalu tekan alt dan

play01:30

klik kiri pada mouse

play01:33

seperti ini semuanya dapat eksresi lalu

play01:37

tekan Eto extruders oil atau

play01:42

ST Tentukan m

play01:45

ners adcenter dan hasilnya akan seperti

play01:49

ini disini juga buka Gimana caranya

play01:53

mengebalkan objek jadinya anak di sini

play01:56

kita ada

play01:57

modifier properti kalau klik

play02:01

Fahrezi fight Nah di sini kita bisa

play02:05

kalau menebalkan publik Regita tanpa

play02:08

harus menambahkan poligonnya

play02:10

Enggak di sini Ibu tidak akan

play02:12

menggunakan ini kita coba aja secara

play02:14

manual ngeklik of pialoof Nah tekan Oge

play02:21

kiri pada mouse

play02:23

kemudian ke

play02:26

tomex terlalu skill

play02:29

seperti ini kurang lebih satu bulan

play02:32

jelasnya seperti nah ini lalu es jeruk

play02:35

lagi kalau kita

play02:38

alaikum bawah disini tidak terlihat

play02:41

bagian Sisi dalamnya atau cat bisa

play02:45

melihatnya dengan menggunakan x-ray yang

play02:47

ada di sini kita coba

play02:52

kurang lebih gede segini ketebalan

play02:56

cangkir ingin aku ceritakan I lagi eh

play03:00

truk

play03:02

SC bocornya lalu tekan

play03:05

m&s center hasilnya akan menjadi seperti

play03:08

ini Ini ada dua lapis dalam cangkirnya

play03:14

kemudian

play03:16

kita akan memotong

play03:20

sebagian

play03:22

obyeknya untuk

play03:25

menggunakan fitur mirror disini Coba

play03:28

kita

play03:29

seleksi objek

play03:32

atau tidak bisa menggunakan while Flying

play03:35

Insects satu untuk tampil counts kita

play03:40

delete

play03:42

vidmate ini

play03:47

oh kemudian kita menggunakan mirror

play03:51

disini lalu kita coba

play03:55

kliping biar dia tidak

play03:58

agar dia lain di

play04:00

antara merah dan obyeknya

play04:03

terseleksi Brazil semuanya

play04:07

lalu kita

play04:09

X

play04:11

trute

play04:14

nah yang lebih obyeknya akan seperti ini

play04:21

lalu kita akan

play04:24

menambahkan tekan 3 Untuk mengeluh

play04:27

tampilan kanannya nulis ini kita akan

play04:31

menambahkan

play04:35

kalau gagang cangkirnya

play04:42

headset

play04:50

lalu

play04:53

seleksi ya

play05:00

Hai kamu

play05:01

ibu hamil dua sisi lalu share

play05:06

y o sumbu-y

play05:08

lalu kita

play05:13

excute

play05:17

wanita extruded lagi

play05:21

Namun kita rotasi sungguh Yi

play05:26

seperti ini

play05:29

lalu kita

play05:32

kan habis batin

play05:37

kemudian setelah ini kita akan

play05:42

eh memperbanyak poligonnya dengan

play05:45

menggunakan amudi File properties sama

play05:48

lagu klik submission surprise untuk

play05:52

memperbanyak mm Polygon pada objek 3D

play05:57

nya secara instan kita bisa menambahkan

play06:01

nagih poligonnya di level 2 dan hasilnya

play06:06

akan semakin halus

play06:09

lalu kita akan memperbaiki

play06:14

obyeknya agar terlihat lebih natural

play06:17

skin ingin

play06:19

agar kita coba edit ini

play06:26

habis ini tercemar juga

play06:34

ini nunggu di dalamnya Juwita nanti

play06:40

sekalian disini

play06:45

rezeki ini

play06:48

memang sudah terlihat seperti cangkir

play06:50

tapi gagangnya masih kurang menarik Kita

play06:54

coba

play06:56

kembali lagi ke

play07:00

Cebong

play07:08

seleksi edner

play07:11

kita perbaiki

play07:25

sesko TNI

play07:26

diseleksi lalu tekan

play07:30

rotasi sumbu-y atau ry pada keyboard +

play07:35

kita putar seperti ini

play07:42

katanya Google ngetik sampai sedikit

play07:45

terkontrol er atau lukat

play07:55

ini

play07:58

tak bisa kelp

play08:04

xexexe

play08:07

kita bisa

play08:15

seleksia

play08:19

hehehe

play08:22

biar dia terlihat lebih

play08:26

ramping

play08:33

nih seperti ini

play08:37

Oke

play08:43

mau juga bisa kita ramping karena lagi

play08:46

fb-an

play09:00

Hai

play09:07

kesini kurang lebih udah cukup

play09:13

nggak bingung kita coba menghilangkan

play09:17

kotak-kotak well Polygon yang ada di

play09:19

sini dengan omzet seleksi objek lalu

play09:22

klik menu objek lalu di sini ada set

play09:25

semut dipilih aja nah hasilnya akan

play09:29

menjadi lebih semut seperti ini

play09:34

kemudian kita coba satu fitur lagi yang

play09:38

namanya Naif Di sini ada Oppo

play09:42

kita bisa melubangi

play09:45

objek

play09:47

3D kita dengan

play09:50

mengklik ha atau pada toolbox itu nice

play09:54

Ayo kita seleksi aja bagian yang akan di

play09:58

piris lalu tekan spasi pada keyboard

play10:02

mereka files kita coba

play10:06

seleksi

play10:08

Contohkan lilit hasilnya akan kurang

play10:12

lebih seperti ini karena ini dua lapis

play10:15

sih jadi tidak terlalu kelihatan

play10:18

jadi hasilnya

play10:20

ada lubangnya ada senyumannya di sini

play10:24

oke kita lanjut ke tutorial selanjutnya

Rate This

5.0 / 5 (0 votes)

関連タグ
3D ModelingPolygon TechniquesExtrusionMirror Tool3D ObjectsBlender TutorialObject CreationModifiersCups DesignX-Ray Mode
英語で要約が必要ですか?