LAB ACTIVITY 4.2 -- PKPJ dengan Cisco packet t
Summary
TLDRIn this tutorial, Avino Putra demonstrates the steps for configuring and testing IPv6 addresses in a network lab. Starting with accessing Cisco software and setting up IP configurations, the video covers the process of dividing MAC addresses, converting them to binary, and combining them using the EUI-64 format. It also details configuring both local and global IPv6 addresses, testing connectivity between devices using ping commands, and troubleshooting common issues like interface configurations. Throughout, practical commands and setup tips are shared to ensure successful connection and configuration.
Takeaways
- 😀 Make sure to disable the internet before starting the Cisco lab activity to avoid any connection issues.
- 😀 The activity involves working with IPv6 addresses, specifically focusing on Link Local and MAC addresses.
- 😀 The process includes copying the IPv6 address from Cisco, adding it to notes, and performing an IP configuration check via the command line.
- 😀 In step 2, the MAC address is split into two parts, and 'FF FE' is inserted to form an EUI-64 address.
- 😀 The EUI-64 format is used to generate a unique IPv6 address, which is further modified by changing the seventh bit to 1.
- 😀 You are required to convert hexadecimal to binary, making necessary adjustments for IPv6 address formation.
- 😀 IPv6 Link Local addresses are configured by appending 'fe80' and removing unnecessary parts.
- 😀 Testing network connectivity is crucial. Ping tests are performed from one laptop to another to ensure successful connections.
- 😀 The process of configuring the router and interface involves enabling IPv6 and assigning global unicast addresses.
- 😀 Ensure that the router interfaces are correctly configured (enabled and assigned proper IP addresses), especially for Ethernet ports.
- 😀 Always verify that the router's Ethernet port is turned on before testing the connectivity to avoid errors such as RTO (Request Timeout).
Q & A
What is the main focus of the lab activity in the script?
-The main focus of the lab activity is on configuring IPv6 or MAC addresses, and testing connectivity between devices using these addresses.
What is the first action taken in the lab activity?
-The first action is opening Cisco software and ensuring the internet connection is disabled before continuing with the lab setup.
Why is the physical address of the device copied and noted down?
-The physical address (MAC address) is copied and noted down as part of the lab instructions to use it later in configuring the network devices.
What is the significance of the 'FF FE' insertion in the MAC address?
-The 'FF FE' is inserted in the middle of the MAC address to follow the EUI-64 format, which is required for IPv6 address generation.
What is the next step after modifying the MAC address format?
-After modifying the MAC address format, the address is converted into binary format, and then the 7th bit is changed from 0 to 1 as per the lab instructions.
What is the purpose of the 'ping' test in this lab?
-The 'ping' test is used to check the connectivity between the devices, confirming that the IPv6 address configuration is correct and that the devices can communicate with each other.
What should be checked if the ping test fails?
-If the ping test fails, it’s important to verify that the interface on the router is turned on, as it might have been off, causing the failure.
What IPv6 address format is used in the final configuration step?
-In the final configuration step, a global unicast IPv6 address in the format '2001:2db8::21' is used, which is configured on the router.
How does the script suggest handling the IPv6 address configuration on the router?
-The IPv6 address is configured on the router through the CLI by entering the appropriate commands to enable IPv6 routing and assign the address to the interfaces.
What issue is addressed with the router's interface in this activity?
-The issue addressed is ensuring that the router's fast Ethernet interface is turned on before testing the connection, as it might be off, causing the failure of connectivity tests.
Outlines

Cette section est réservée aux utilisateurs payants. Améliorez votre compte pour accéder à cette section.
Améliorer maintenantMindmap

Cette section est réservée aux utilisateurs payants. Améliorez votre compte pour accéder à cette section.
Améliorer maintenantKeywords

Cette section est réservée aux utilisateurs payants. Améliorez votre compte pour accéder à cette section.
Améliorer maintenantHighlights

Cette section est réservée aux utilisateurs payants. Améliorez votre compte pour accéder à cette section.
Améliorer maintenantTranscripts

Cette section est réservée aux utilisateurs payants. Améliorez votre compte pour accéder à cette section.
Améliorer maintenantVoir Plus de Vidéos Connexes

Free CCNA | Configuring IPv6 (Part 2) | Day 32 Lab | CCNA 200-301 Complete Course
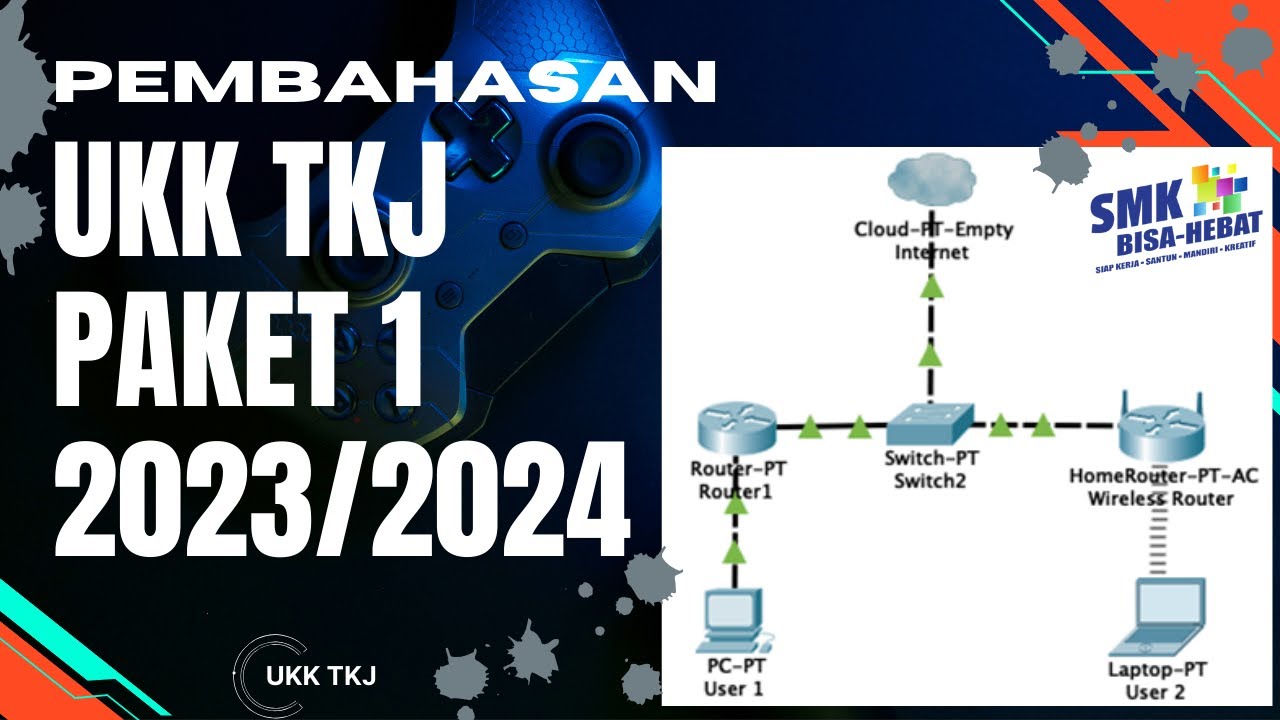
Pembahasan UKK TKJ Paket 1 Tahun 2023/2024 - 2 Router Dynamic Routing ospf dengan RB 951-2HnD
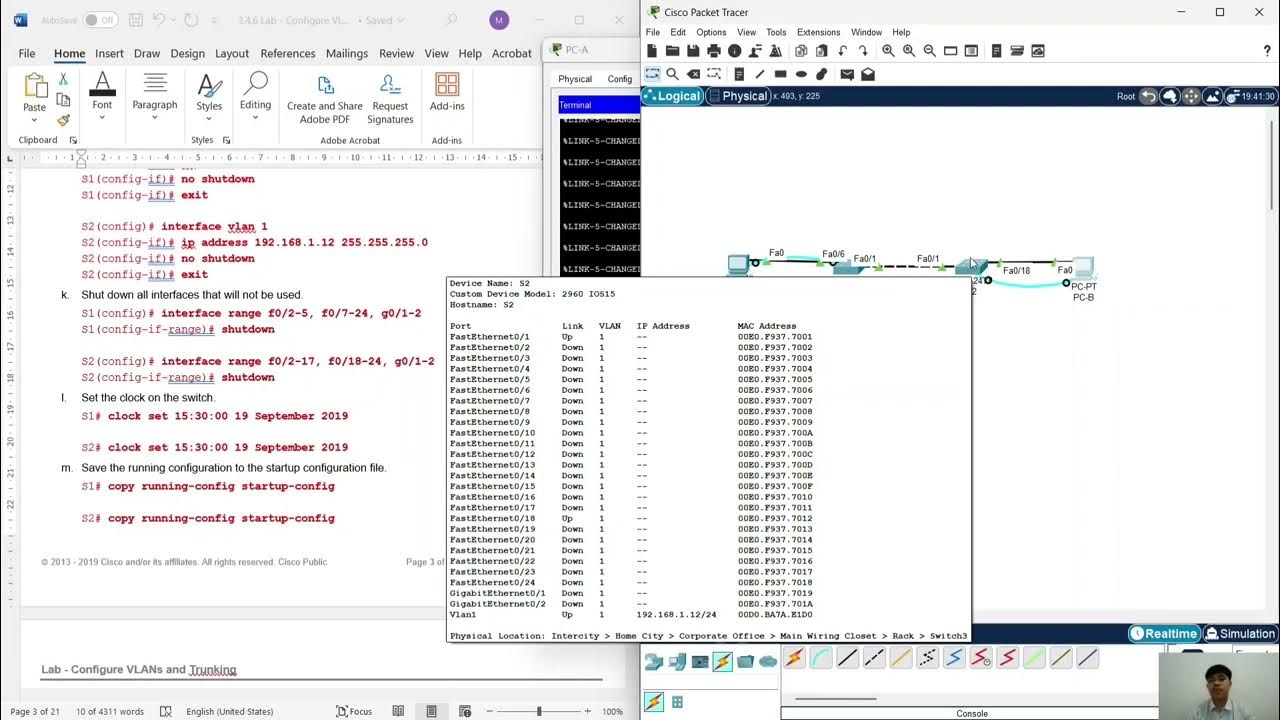
Configure VLANs and Trunking.

Cara Instalasi Server Softswitch Berbasis SIP di Cisco Packet Tracer
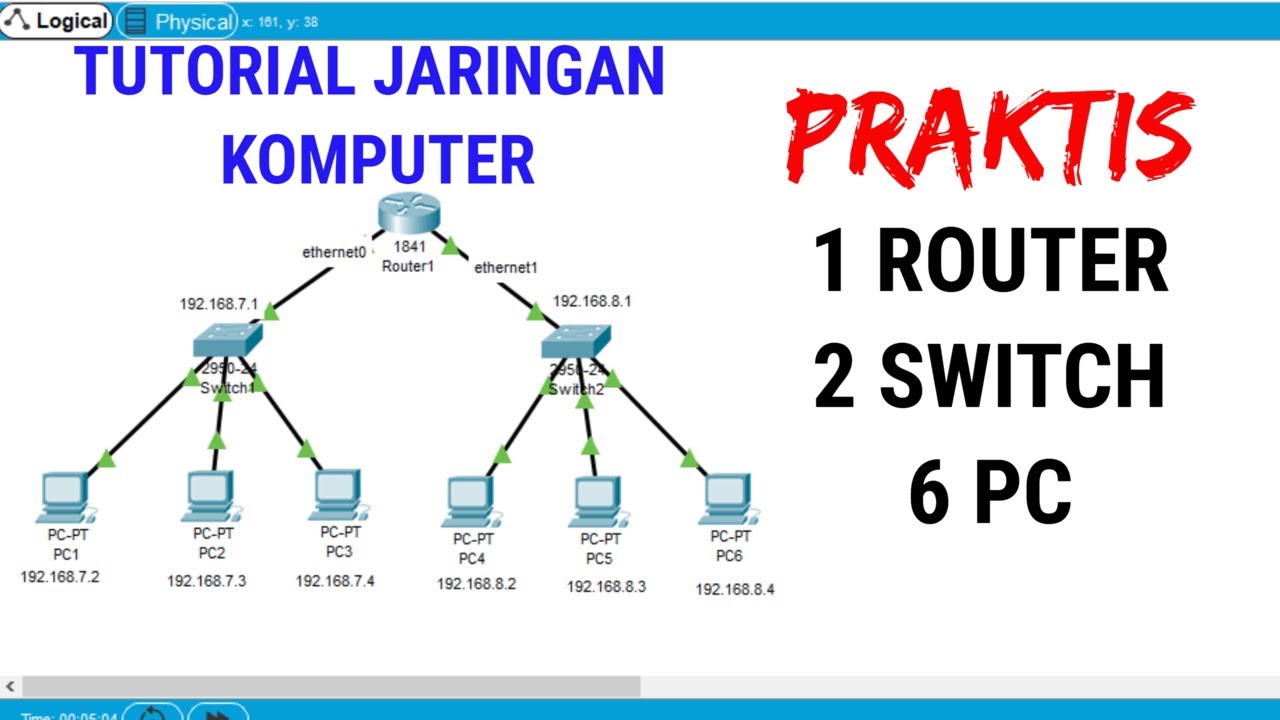
Tutorial Packet Tracer 1 router 2 switch 6 PC #packettracer
Cybersecurity Tip: Build A Basic Home Lab (2/3)
5.0 / 5 (0 votes)
