Cara Splicing Kabel Fiber Optic Untuk Pemula
Summary
TLDRIn this tutorial, Oktavriana demonstrates the step-by-step process of performing a simple fiber optic splice using a fuzzy Gowa splicing machine. She covers the tools and materials needed, including the blazer, optical power meter, and various cables. The video shows the procedure from separating the cables to connecting them with precision, ensuring minimal signal loss. Throughout the demonstration, she emphasizes the importance of care and accuracy in each step, finishing with testing the splice for successful light transmission. A comprehensive guide for anyone looking to understand fiber optic splicing.
Takeaways
- 😀 The video introduces how to perform a simple splicing technique using Fuzzy Gowa.
- 😀 The presenter emphasizes the importance of pressing the subscribe button before continuing with the tutorial.
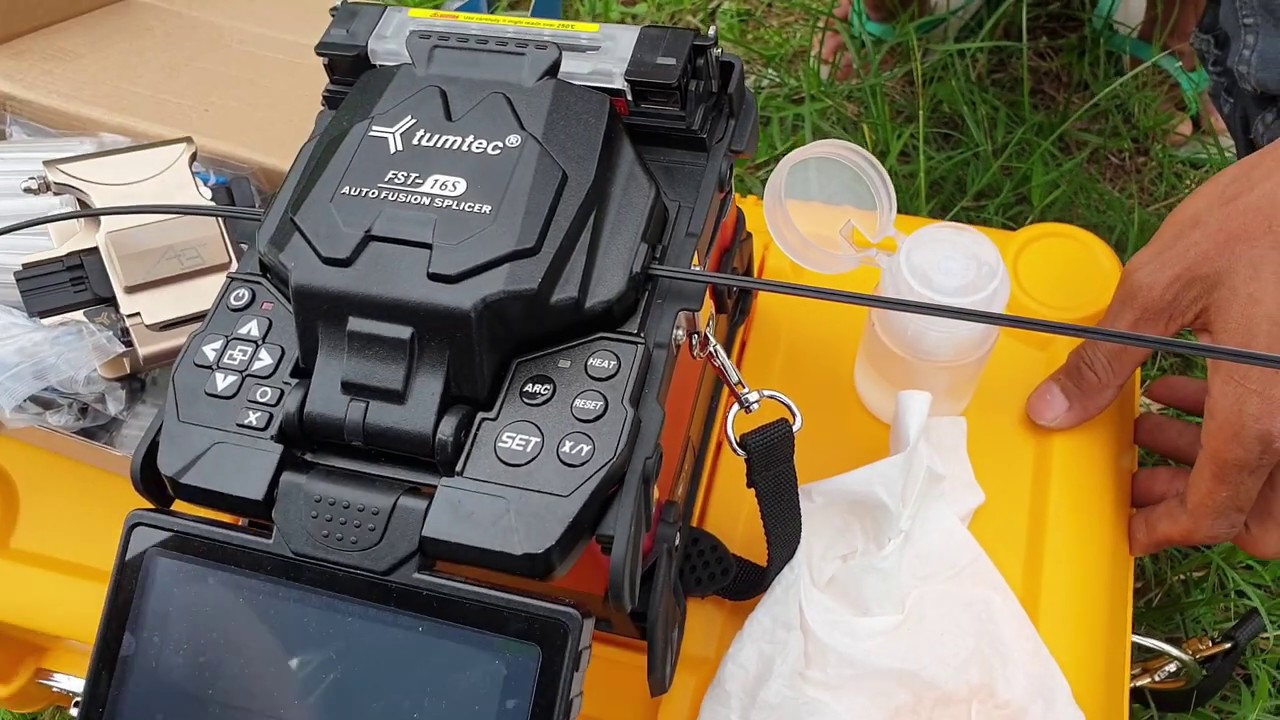
- 😀 The necessary tools for the process include a blazer (Contigo A81S), stable signal equipment, optical power meter (OPM), a visual fault locator (VFL), cutting tools, alcohol wipes, and more.
- 😀 The materials required include specific cables like the Loro fiber optic cable and a 2mm wire, along with a splice tool for the fiber.
- 😀 The simulation in the video focuses on splicing just one side of the fiber cable.
- 😀 The initial step in the process is to separate the cable from the wire in the drop cable.
- 😀 After cutting the wire, the next step is to insert the splicer tool into the cable and peel back the outer coating using a stripper tool.
- 😀 The fiber ends are cleaned using alcohol wipes before splicing to ensure proper connectivity.
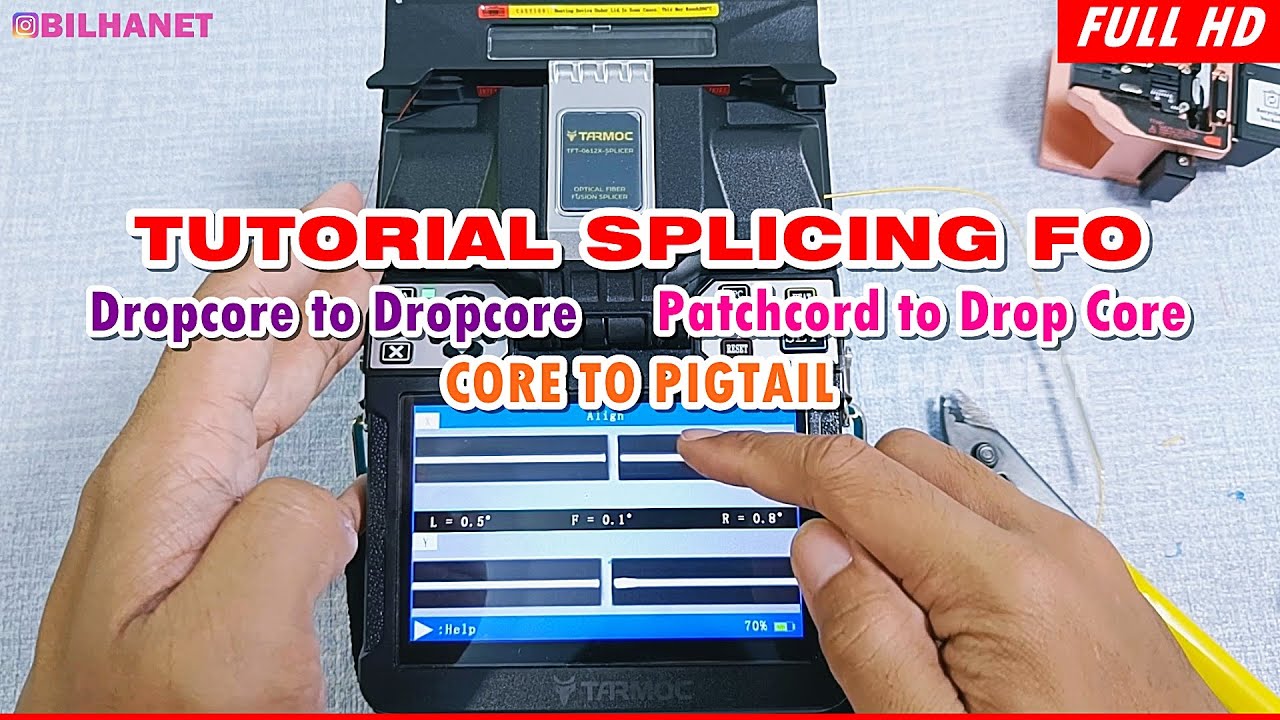
- 😀 The splicing is done using the blazer, making sure the wires are carefully inserted into the appropriate slots without being misaligned.
- 😀 The final part of the process includes heat shrinking the splice area and testing the cable for correct light transmission using a VFL and an optical power meter.
- 😀 The result of the splicing procedure should show a low insertion loss value (0.01 dB), confirming the success of the process.
Q & A
What is the main topic of the video?
-The main topic of the video is explaining how to perform a simple splicing process using fuzzy logic and relevant tools.
What are the tools mentioned in the video for the splicing process?
-The tools mentioned include a blazer (Contigo A81s), optical power meter (OPM), VFL (Visual Fault Locator), cutting tool, alcohol swabs, and a heat shrink tube.
What is the purpose of the optical power meter (OPM)?
-The optical power meter (OPM) is used to test the performance of the spliced fiber and ensure the signal strength is correct.
What type of cable is used in this splicing process?
-The process uses a dropcore cable, specifically with a 2mm outer cable and two internal wires.
Why is the cable stripped during the process?
-The cable is stripped to expose the individual fibers, allowing for proper splicing and connection.
What role does the heat shrink tube play in the process?
-The heat shrink tube is used to protect the spliced fiber by insulating and securing the fibers together once the splice is completed.
How do you ensure the correct alignment of the fiber during splicing?
-The fiber must be carefully placed in between the pins of the splicer, ensuring it does not extend beyond the designated marks on the splicer.
What is the importance of cleaning the cable before splicing?
-Cleaning the cable ensures that no dust or debris interferes with the fiber splicing process, leading to a clearer and more reliable connection.
What does the term 'flashing' refer to in this process?
-Flashing refers to the process where the splicer applies a flashing technique to fuse the fibers together. It requires waiting for a confirmation beep that indicates successful splicing.
What does the final testing with the VFL indicate?
-The final testing with the Visual Fault Locator (VFL) checks if the light passes through the spliced fiber, confirming that the splice is successful and that the connection is intact.
Outlines

Esta sección está disponible solo para usuarios con suscripción. Por favor, mejora tu plan para acceder a esta parte.
Mejorar ahoraMindmap

Esta sección está disponible solo para usuarios con suscripción. Por favor, mejora tu plan para acceder a esta parte.
Mejorar ahoraKeywords

Esta sección está disponible solo para usuarios con suscripción. Por favor, mejora tu plan para acceder a esta parte.
Mejorar ahoraHighlights

Esta sección está disponible solo para usuarios con suscripción. Por favor, mejora tu plan para acceder a esta parte.
Mejorar ahoraTranscripts

Esta sección está disponible solo para usuarios con suscripción. Por favor, mejora tu plan para acceder a esta parte.
Mejorar ahoraVer Más Videos Relacionados
PEMULA WAJIB LIHAT BEGINI CARA SPLICING KABEL FIBER OPTIK DENGAN SPLICER TUMTEC FST-16S

Cara penyambungan kabel fiber optik
Cara Menyambung Kabel Fiber Optik Menggunakan Splicer (Dropcore, Patchcord, Pigtail)

CARA MENYAMBUNG KABEL FIBER OPTIC DENGAN MEKANIKAL SPLICING!

Panduan Lengkap: Splicing Kabel Fiber Optic
Tutorial Konfigurasi Jaringan Fiber Optik dengan Cisco Paket Tracer
5.0 / 5 (0 votes)
