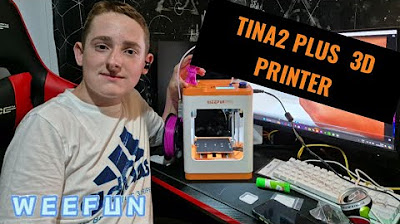
Free Tinkercad Filament Adapter & Generic PLA Entina Tina2 Plus Tips

HL ModTech
3 Sept 202408:21

Summary

TLDR本视频介绍了如何使用Anycubic Photon S(Tina 2+)3D打印机配合自定义线材进行打印。视频中,博主展示了如何设计并打印一个适配器,以适应不同大小的线材卷。接着,详细介绍了更换线材、预热喷头、挤出线材以及开始打印的步骤。博主还分享了如何使用Tinkercad设计并导出3D模型,以及如何将模型切片并传输到SD卡上进行打印。最终,成功打印出了一个可爱的乌龟模型,展示了Tina 2+打印机的性能和自定义线材的兼容性。

Takeaways

  • 😀 主播介绍了使用Anycubic Photon Mono 2+(Tina 2+)3D打印机,并尝试了自定义丝材。
  • ⚙️ 主播遇到了一个问题:Tina 2+打印机的原装适配器不适合250克的丝材卷,因为设计上是为了适配更小的卷轴。
  • 🎨 主播展示了自己设计的适配器,可以在Tinkercad中打印出来,以适配更大的丝材卷。
  • 🔗 主播提供了适配器文件的下载链接,并承诺会将其放在视频描述和个人网站上。
  • 📦 主播演示了如何更换丝材,包括加热喷头和挤出旧丝材,然后加载新丝材。
  • 🐢 主播选择了一个Tinkercad设计的海龟模型进行打印,展示了如何从Tinkercad导出STL文件。
  • 🛠️ 主播在Kira切片软件中调整了打印设置,包括层高、填充率和外框(skirt),以确保打印成功。
  • 💾 主播展示了如何将切片后的文件保存到SD卡,并在Tina 2+上进行打印。
  • 🎉 成功打印出了海龟模型,主播对此表示满意,并鼓励观众尝试使用自定义丝材和适配器。
  • 📢 主播在视频结束时提醒观众访问自己的网站,查看更多关于Tinkercad和3D打印的资源,并邀请观众订阅频道。

Q & A

  • Tina 2+打印机是否支持使用非官方的线材?

    -Tina 2+打印机上确实有贴纸提示不要使用其他品牌的线材,但经过与官方联系确认,使用非官方线材是可以的,只是官方无法保证其兼容性。

  • 如果使用250克的线材,Tina 2+打印机的线材适配器是否适用?

    -不适用。Tina 2+打印机的线材适配器设计上是为了适配较小的线材卷,而不是250克的线材卷。

  • 为了适配250克的线材卷,视频中提出了什么解决方案?

    -视频中提出了一个自行设计的适配器,这个适配器可以套在线材卷上,提供额外的空间,使得线材能够正确地安装并旋转。

  • 视频中提到的适配器设计是用哪个软件完成的?

    -适配器的设计是在Tinker CAD软件中完成的。

  • 适配器的3D打印文件是否可以在视频作者的网站上找到?

    -是的,适配器的3D打印文件会在视频作者的网站上提供,并且视频描述中也会包含链接。

  • 如何更换Tina 2+打印机的线材?

    -更换线材时,需要先按下准备按钮,然后旋转以更换线材,再次按下按钮选择更换线材选项,选择PLA选项,因为这是打印机默认的线材类型。

  • 在更换线材后,打印机需要多长时间来加热喷嘴?

    -打印机的喷嘴大约需要一分钟来加热。

  • 视频中提到的Tinker CAD Turtle项目是如何导出STL文件的?

    -在Tinker CAD中,选择Turtle模型,然后点击导出,选择STL格式,确保只选中了需要的形状,然后保存文件。

  • 在Kira切片软件中,如何设置打印的初始层和填充率?

    -在Kira切片软件中,可以通过调整设置来设定初始层为0.2,顶层和底层为0.28,填充率为10%,以及主层为20%和50%。

  • 视频中提到的'skirt'设置是什么,它在3D打印中起什么作用?

    -在3D打印中,'skirt'是指在打印物体外围额外打印的一圈或多圈,用于确保打印物体的粘附性和稳定性。

  • 如何将切片好的文件传输到Tina 2+打印机并开始打印?

    -首先将文件保存到SD卡中,然后将SD卡插入打印机,选择从TF卡打印,找到文件并开始打印。

Outlines

00:00

😀 探索Tina 2+ 3D打印机与自定义线材

在这段视频中,主持人介绍了使用Tina 2+ 3D打印机和自定义线材的过程。尽管Tina 2+ 打印机上有提示不要使用非官方线材,但经过与制造商的确认,使用第三方线材是可行的,尽管官方不保证其兼容性。主持人展示了从zbot公司购买的250克线材,并设计了一个适配器,以便在Tina 2+打印机上使用这种大卷线材。适配器设计简单,可以在Tinker CAD中打印,并且文件将在主持人的网站上提供。接着,视频展示了如何更换线材,包括准备、加热喷头、更换线材、挤出新线材等步骤。最后,主持人展示了如何使用Tinker CAD软件导出一个3D模型,并准备在Tina 2+上打印一个海龟模型。

05:01

🐢 3D打印海龟模型并分享资源

在视频的第二部分,主持人继续介绍如何使用Tinker CAD软件和Tina 2+ 3D打印机打印一个海龟模型。视频展示了如何设置打印参数,包括层高、填充率和使用skirt来确保打印的稳定性。主持人还分享了如何将模型文件保存到SD卡,并在3D打印机上进行打印。打印完成后,主持人展示了成品,并鼓励观众访问其网站hlod tech.com,那里有更多关于Tinker CAD的资源和3D打印相关内容。视频以主持人的感谢和鼓励观众互动的话语结束。

Mindmap

Keywords

💡Tina 2+

Tina 2+ 是视频中提到的3D打印机型号。它是视频主题的核心,因为整个视频都是围绕如何使用和改进这台3D打印机进行的。在脚本中,提到了使用Tina 2+进行3D打印的过程,包括更换定制的线材(filament)和打印一个Tinker CAD海龟模型。

💡定制线材

定制线材(filament)是3D打印中使用的一种材料,通常以卷轴形式存在。在视频中,提到了使用来自zbot公司的250克标准卷轴,这种线材与Tina 2+打印机兼容,但需要一个适配器才能正确安装。这表明了在3D打印中选择合适的材料对于打印成功至关重要。

💡Tinker CAD

Tinker CAD 是一个在线3D建模工具,视频中提到了使用它来设计一个适配器,以便在Tina 2+打印机上使用不同尺寸的线材卷轴。此外,还提到了使用Tinker CAD来设计并打印一个海龟模型,这展示了Tinker CAD在3D打印准备阶段的应用。

💡适配器

适配器在视频中指的是为了使250克的线材卷轴能够适配Tina 2+打印机而设计的部件。这个适配器是使用Tinker CAD设计的,并且可以3D打印出来。它解决了打印机原始设计中不兼容大卷轴的问题,体现了创新和DIY精神。

💡PLA

PLA(聚乳酸)是视频中提到的3D打印材料类型。在更换线材的过程中,选择了PLA选项,因为这是打印机随附的线材类型。PLA是一种广泛使用的3D打印材料,因为它环保且易于打印。

💡挤出机

挤出机是3D打印机的一个组件,负责将线材加热并挤出形成打印层。在视频中,提到了在更换线材时需要等待挤出机的齿轮开始旋转,以及手动拉出旧线材并插入新线材。这是3D打印过程中的一个关键步骤。

💡打印设置

打印设置是指在开始3D打印之前对打印机进行的一系列参数配置。在视频中,提到了调整打印层厚度、顶部/底部层数、填充百分比等设置。这些设置对打印质量和打印机的性能有直接影响。

💡裙边

裙边是3D打印中的一个术语,指的是在打印对象周围额外打印的一圈或多圈材料。在视频中,提到了在Kira软件中设置裙边,以确保打印对象的粘附性。裙边有助于提高打印的成功率。

💡SD卡

SD卡在3D打印中用于将打印文件从计算机传输到打印机。在视频中,提到了将打印文件保存到SD卡上,然后将卡插入Tina 2+打印机以开始打印。这是将数字模型转换为物理对象的桥梁。

💡打印时间

打印时间是指完成一个3D打印项目所需的时间。在视频中,提到了打印一个Tinker CAD海龟模型大约需要21分钟。这个时间是根据打印设置和模型的复杂性计算出来的,对于计划打印项目和评估打印效率很重要。

Highlights

介绍了使用Anycubic Photon Mono 2+(Tina 2+)3D打印机和自定义丝材的过程。

提到了Tina 2+打印机上关于使用非官方丝材的警告贴纸。

解释了与Anycubic官方联系后,确认可以使用其他品牌的丝材,但官方不保证兼容性。

展示了从zbot公司购买的250克标准卷丝材,并指出Tina 2+的适配器不适合这种大卷丝材。

介绍了作者在Tinkercad上设计的适配器,可以解决大卷丝材的适配问题。

说明了适配器的打印过程,强调其简单性和快速性。

提到了适配器文件将在作者网站和视频描述中提供下载。

展示了如何更换丝材,包括准备、加热喷头和更换丝材的具体步骤。

强调了在更换丝材时,需要耐心等待新颜色的丝材完全排出。

介绍了使用Tinkercad设计并导出3D模型的过程。

展示了如何将3D模型文件保存到SD卡,并在Tina 2+上准备打印。

提供了Kira切片软件的设置调整方法,包括草图设置和偏好设置。

强调了在Kira中启用自动切片的重要性,以便在预览模式下查看打印设置。

展示了如何将SD卡插入Tina 2+并开始打印过程。

展示了打印出的Tinkercad海龟模型,并强调了其打印效果。

提供了作者网站hlod tech.com的链接,以及Tinkercad相关资源和3D打印机相关内容。

鼓励观众点赞、分享视频,并订阅频道以获取更多3D打印相关内容。

Transcripts

play00:00

friends I am back with the antina Tina

play00:02

2+ today we're going to use some custom

play00:05

filaments so let's get cracking all

play00:09

right everybody we are back with the

play00:10

Tina 2 plus and check it out we've got

play00:13

new custom filament now in Tina did have

play00:16

a sticker that said don't use anybody

play00:17

else's filament I contacted them they

play00:19

said it's fine but they can't guarantee

play00:21

it's going to work now I bought a

play00:24

standard 250 mgram roll from a company

play00:27

called zbot it is awesome some fun silk

play00:31

but watch this when I put the 250 g on

play00:35

here it slides in and it won't spin this

play00:39

little adapter is not really built for

play00:41

250 g it appears it is instead built for

play00:44

the smaller reels that come with the

play00:46

antena but of course friends I have got

play00:48

a solution check it out I have designed

play00:52

in Tinker CAD an adapter that just

play00:54

slides over gives us a little bit of

play00:57

room and allows that to sit on there and

play01:00

spin the way you want to it is super

play01:03

simple it'll print on this bed takes

play01:05

less than an hour and you'll be able to

play01:07

use reels that you get from other

play01:09

companies how cool is that quick note of

play01:13

course this file will be available on my

play01:15

website I'll also have a link in the

play01:17

description of the video as you can see

play01:19

this one is completely filled in I've

play01:21

been adjusting the versions this just

play01:23

slips on there may be a new version when

play01:25

you go to download it but as you can

play01:27

tell they will all have been tested

play01:30

right now though let me walk you through

play01:31

filament changing we simply move to

play01:34

prepare press the knob in and then

play01:36

rotate to change filament and press the

play01:39

knob again we want the change filament

play01:42

option and we are going to choose the

play01:44

pla option because that's what the

play01:46

printer shipped with the nozzle takes

play01:48

about a minute to heat up I sped this up

play01:51

with video editing tools and at this

play01:53

point you'll see the little gear on the

play01:55

extruder spinning and the filament will

play01:58

be removed

play02:00

you may have to squeeze and pull yours

play02:02

out at this point simply insert your

play02:05

filament notice you can squeeze and push

play02:07

that up in and wait patiently for

play02:09

filament to purge notice you continue to

play02:13

let it go until you see the new color

play02:15

come out you can always click Purge more

play02:18

if you want more Purge to come out or

play02:20

you can finish up by clicking continue

play02:23

our print today is going to be this

play02:25

fantastic Tinker CAD Turtle as you can

play02:28

see this has the parts to make the

play02:30

project also there are notes that show

play02:32

you how to get to the tutorial right now

play02:35

I simply want to export our adorable

play02:37

Turtle so I'm going to click on him and

play02:40

I'm going to choose export the STL now

play02:43

notice I only have the selected shape I

play02:46

do not want all the other parts and I

play02:48

can simply click the STL button I save

play02:51

everything to a 3D modeling folder and

play02:53

I'm just going to keep the make a turtle

play02:56

tutorial name and hit save it says

play02:59

they're already was one I'm just going

play03:00

to Simply hit save to replace it all

play03:03

right friends this is Kira once again if

play03:06

you haven't set this up yet I do have a

play03:08

tutorial I will put a link up here in

play03:11

the corner so you can follow that to get

play03:12

yours set up the way mine is now the

play03:15

first thing we want to do is grab our

play03:17

file once again we can click this folder

play03:19

find the make a turtle and bingo it

play03:22

comes in notice right now I've got draft

play03:25

settings my layers are 0 2 point8 for

play03:28

the top bottom 10% infill 210 50 and 50

play03:33

for the main numbers and then down here

play03:36

I use skirt this makes a line on the

play03:39

outside of your print when you start I

play03:41

use this so that I can tell that the

play03:43

print is going to be successful if this

play03:46

outside part sticks well then this will

play03:49

stick I do adjust some settings let me

play03:51

show you how to find them if you type

play03:54

skirt up here it will show you all the

play03:56

skirt settings the ones that I change

play03:59

make it five and I make it 10 mm away so

play04:04

that way it'll be outside the shape I

play04:07

have also adjusted a preference in Kira

play04:10

if we click on this I have slice

play04:13

automatically

play04:15

enabled you may have to click slice so

play04:18

that you can see it if we switch to

play04:20

preview mode now you can easily see

play04:22

those five lines of skirt that will be

play04:24

added to this Turtle print real quickly

play04:27

I'm going to insert my SD card

play04:30

there you can see the files that were on

play04:32

it I'm going to minimize that for a

play04:34

second now this says save to removable

play04:37

dis it shows it's going to take about 21

play04:39

minutes in Bingo we can hit eject and

play04:43

take it to the 3D printer of course we

play04:45

can start the print by pressing it in

play04:48

rolling down to print from

play04:52

TF and there is the make a turtle

play04:56

project press it in and press it in

play05:01

again easy peasy

play05:05

[Music]

play05:30

n

play05:32

[Music]

play05:59

a

play06:03

[Music]

play06:13

[Applause]

play06:14

[Music]

play06:39

[Music]

play06:42

and after a little more than 20 minutes

play06:45

check it out we have got an awesome

play06:48

little turtle created in Tinker Cad and

play06:51

printed on the Tina 2 plus how cool is

play06:56

that friends let's wrap this up on my

play06:58

website hlod tech.com of course I've got

play07:02

a page dedicated to Tinker CAD with all

play07:04

sorts of amazing categories below that

play07:06

you'll find my day one favorites the

play07:08

useful starters and the Tinker cat

play07:10

Essentials now today though we're

play07:12

working with 3D printers so let's bounce

play07:14

out to the 3D printer tab right here is

play07:17

the downloads area where you can

play07:19

download that filament arm that I

play07:21

created using Tinker CAD returning

play07:23

quickly to that ot2 plus link it gets

play07:26

you to the t2 plus unboxing and setup

play07:29

video video of course a link to their

play07:31

website and the full playlist that has

play07:33

all of my antina content of course

play07:36

friends if you enjoyed this video please

play07:38

give it a like please also hit that

play07:40

share button so more people can learn

play07:41

about HL Mod Tech don't forget you

play07:44

absolutely make my day if you take time

play07:46

to leave a comment down below and if you

play07:47

haven't subscribed yet what are you

play07:49

waiting for smash that subscribe button

play07:51

and last but not least hit that

play07:52

notification Bell if you want to be the

play07:54

first to know when there's a brand new

play07:56

video from me HL modtech thanks for

play07:59

watching have a great

play08:01

[Music]

play08:09

day

play08:13

o ooh

Rate This

5.0 / 5 (0 votes)

Etiquetas Relacionadas
3D打印Tina 2+自定义丝材Tinker CAD乌龟模型打印教程DIY项目创意制作技术分享3D建模
¿Necesitas un resumen en inglés?