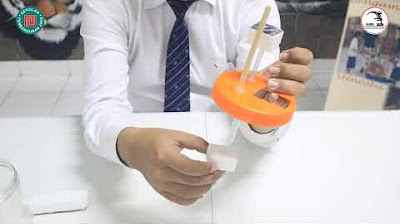
Cara membuat mesin tetas telur dari bahan box sterofoam II How to make egg incubator
Summary
TLDRThis tutorial demonstrates how to create a simple, manual egg incubator using a styrofoam box. The process includes assembling materials like a wooden base, wire mesh, bamboo strips, and plastic trays for water. The system incorporates a digital thermostat to control temperature with two small lamps, and a fan to regulate airflow. The presenter also explains how to set the thermostat's temperature range and provides tips on ensuring proper humidity levels with a thermometer and hygrometer. The result is an easy-to-build, efficient incubator for hatching eggs at home.
Takeaways
- 😀 The tutorial is about making a simple incubator using a styrofoam box and basic materials.
- 😀 You will need a styrofoam box, a wooden base, wire mesh, and bamboo slats for the egg tray.
- 😀 Three plastic food containers are used for the water trays to maintain humidity.
- 😀 A digital thermostat (W3001) is used to control the temperature inside the incubator.
- 😀 Two 25-watt bulbs are used for heating the incubator, with the thermostat regulating the on/off function based on temperature.
- 😀 The thermostat is set by adjusting the upper and lower temperature limits (e.g., 38.3°C and 37.8°C).
- 😀 The incubator's lid is designed with a tape hinge for easy opening and closing.
- 😀 Before placing the eggs inside, fill the water trays to ensure proper humidity levels.
- 😀 A manual thermometer is recommended as a backup to the digital thermometer to check the temperature inside the incubator.
- 😀 A DC 5V cooling fan (e.g., from a laptop) is added to circulate air and ensure uniform temperature throughout the incubator.
Q & A
What is the main purpose of the tutorial in the script?
-The main purpose of the tutorial is to demonstrate how to create a simple egg incubator using basic materials such as a Styrofoam box, a thermostat, light bulbs, and other easily available items.
What type of Styrofoam box is used in this incubator?
-The tutorial uses a 'box teropong,' which is a type of Styrofoam box commonly used for making incubators.
What materials are used for the base of the incubator?
-The base of the incubator is made from wood, which is then covered with wire mesh and bamboo strips to create channels for the eggs.
How does the water tray function in the incubator?
-The water tray is used to maintain the required humidity levels inside the incubator. The tutorial uses plastic containers, such as used food trays, for this purpose.
What is the role of the digital thermostat in the incubator?
-The digital thermostat regulates the temperature inside the incubator by turning the lamps on and off based on the set temperature limits. This helps maintain a consistent temperature for the eggs to hatch.
How are the lamps controlled in the incubator?
-The lamps are controlled by the digital thermostat, which switches them on when the temperature drops below the set lower limit and switches them off when the temperature exceeds the upper limit.
What is the purpose of using a thermometer and a hygrometer in the incubator?
-The thermometer is used to monitor the temperature inside the incubator, while the hygrometer measures the humidity. Both are essential for maintaining optimal conditions for egg incubation.
How is airflow managed inside the incubator?
-Airflow is managed using a DC cooling fan, typically a laptop cooling fan. This fan helps to distribute the heat evenly throughout the incubator.
Why is it important to add water to the incubator before placing the eggs?
-Adding water before placing the eggs is crucial because it ensures that the humidity level inside the incubator is correct, which is important for the proper development of the eggs.
What are some advantages of this homemade egg incubator design?
-This homemade egg incubator is simple, cost-effective, and made from easily accessible materials. It's an ideal solution for those looking to incubate eggs at home without spending much on commercial incubators.
Outlines

Dieser Bereich ist nur für Premium-Benutzer verfügbar. Bitte führen Sie ein Upgrade durch, um auf diesen Abschnitt zuzugreifen.
Upgrade durchführenMindmap

Dieser Bereich ist nur für Premium-Benutzer verfügbar. Bitte führen Sie ein Upgrade durch, um auf diesen Abschnitt zuzugreifen.
Upgrade durchführenKeywords

Dieser Bereich ist nur für Premium-Benutzer verfügbar. Bitte führen Sie ein Upgrade durch, um auf diesen Abschnitt zuzugreifen.
Upgrade durchführenHighlights

Dieser Bereich ist nur für Premium-Benutzer verfügbar. Bitte führen Sie ein Upgrade durch, um auf diesen Abschnitt zuzugreifen.
Upgrade durchführenTranscripts

Dieser Bereich ist nur für Premium-Benutzer verfügbar. Bitte führen Sie ein Upgrade durch, um auf diesen Abschnitt zuzugreifen.
Upgrade durchführenWeitere ähnliche Videos ansehen

Como fazer um PROJETOR DE CELULAR caseiro passo a passo

Membuat Kompor Tenaga Surya

Membuat aplikasi pengubah teks menjadi suara menggunakan app inventor

MEMBUAT ALARM BANJIR SEDERHANA

Create Your First C# Windows Forms Application using Visual Studio

[ Projek Y EE 014 ] Diy Automatic Dustbin || Arduino Nano || Ultrasonic Sensor || Servo Motor
5.0 / 5 (0 votes)
