Como fazer um PROJETOR DE CELULAR caseiro passo a passo
Summary
TLDRThis video teaches viewers how to create a DIY projector using a smartphone. The process involves using a large screen phone, a magnifying glass, a shoe box, and some basic materials like Styrofoam, glue, and pins to build the structure. After setting up the box and placing the phone inside, viewers learn how to project the phone's image onto a wall. Tips for adjusting the focus and preventing upside-down images are included, and the video offers a fun way to turn a simple box into a makeshift home theater. The tutorial is simple, creative, and accessible for anyone interested in DIY projects.
Takeaways
- 😀 You can make a projector using a smartphone and a magnifying glass.
- 😀 A larger smartphone screen and a bigger magnifying glass provide better results for the projector.
- 😀 A shoe box is needed for the projector. One box suffices for a small magnifying glass, but two boxes are required for a large one.
- 😀 To hold the smartphone inside the box, you need a stand. Styrofoam and glue work well for creating the support.
- 😀 You can use other materials, like cardboard or clay, to build the stand for the smartphone.
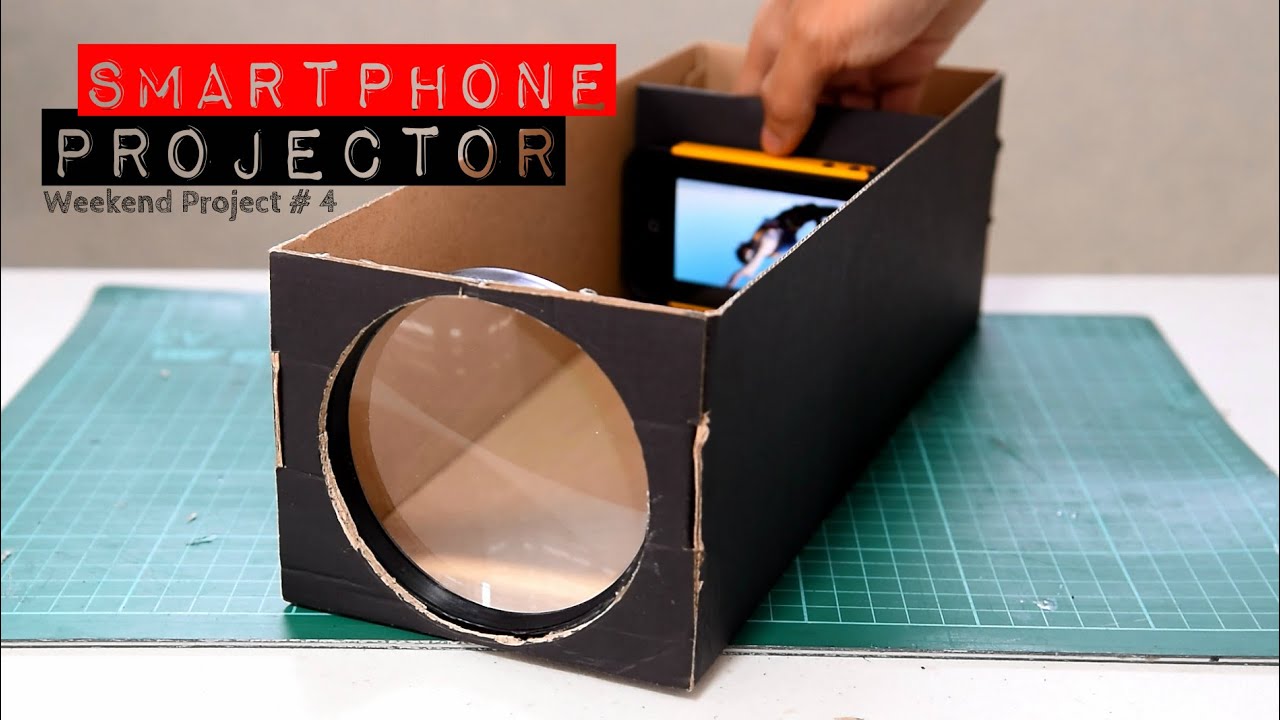
- 😀 The first step is to cut a hole in the front of the box to fit the magnifying glass, securing it with tape.
- 😀 After preparing the box, create a vertical and horizontal base inside it to support the smartphone.
- 😀 Paint the interior of the box black to improve the projected image by preventing light reflection.
- 😀 When testing the projector, ensure the phone's display is upside down, as the image will be projected in reverse.
- 😀 The magnifying glass projects the light from the phone onto the wall, much like how a camera lens works, but in reverse.
- 😀 The human eye also functions similarly, where an image is projected upside down on the retina, and the brain corrects it.
Q & A
What is the main purpose of the project described in the video?
-The project is about creating a simple DIY projector using a mobile phone, a magnifying glass, and a shoebox.
Why is the size of the mobile phone screen important in this project?
-The larger the mobile phone screen, the better the projection quality will be. A bigger screen provides a clearer and more vivid image when projected.
Where can you find the magnifying glass needed for this project?
-You can find a magnifying glass at most stationery stores, and they are usually inexpensive, ranging from three to six reais in price.
What materials are necessary for creating the projector?
-You will need a mobile phone, a magnifying glass, one or two shoeboxes (depending on the size of the magnifying glass), foam (styrofoam), foam glue, and pins. You can also use cardboard or other materials for the support structure.
What is the first step in building the projector?
-The first step is to cut a hole in the front of the shoebox to fit the magnifying glass.
How is the magnifying glass attached to the shoebox?
-The magnifying glass is attached to the shoebox using tape to ensure it stays securely in place.
What role does foam play in the project?
-Foam is used to create a support structure inside the shoebox to hold the mobile phone in place. It helps secure the phone and allows for adjustments to focus the image.
Why should the interior of the shoebox be painted black?
-Painting the interior of the shoebox black helps to improve the image quality by reducing light reflections that could distort the projected image.
What happens if the mobile phone screen is not inverted for the projection?
-If the mobile phone screen is not inverted, the image projected will be upside down. This can be fixed by rotating the phone or using an app that locks the screen orientation.
How can you prevent the phone's screen from automatically rotating during the projection?
-On Android devices, you can use an app called 'Smart Rotator' to lock the screen orientation. For iPhones, you can use the built-in option to disable automatic rotation.
Outlines

This section is available to paid users only. Please upgrade to access this part.
Upgrade NowMindmap

This section is available to paid users only. Please upgrade to access this part.
Upgrade NowKeywords

This section is available to paid users only. Please upgrade to access this part.
Upgrade NowHighlights

This section is available to paid users only. Please upgrade to access this part.
Upgrade NowTranscripts

This section is available to paid users only. Please upgrade to access this part.
Upgrade NowBrowse More Related Video


5.0 / 5 (0 votes)